
Related Manuals for Sartorius 1802


Summary of Contents for Sartorius 1802
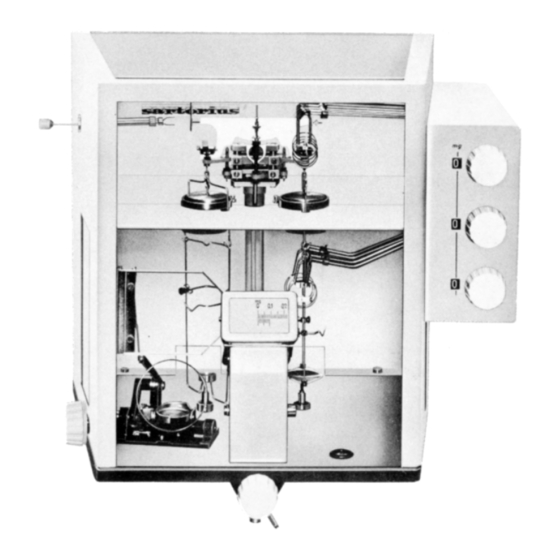
- Page 1 Mikrowaage Micro Balance 1802 Aufstellungs- und Bedienungsanleitung Instructions for Installation and Operation...
- Page 2 Auspacken — Unpacking Aufstellen — Assembling the balance Kontrolle — Checking the balance Bildschärfe einstellen — Focusing the image on the ground glass screen Bildgröße einstellen — Adjustment the magnification of the screen image 18 Prüfen des Reitergewichtssatzes Checking the built-in weights Allgemeines General Remarks - 2 -...
- Page 3 Auspacken Unpacking Waage aus der Verpackung nehmen. Remove balance from carton. Take off plastic Staubschutzhülle und Klebestreifen entfernen. cover and tapes. Zubehör aus dem Karton nehmen und soweit Remove accessories from carton and unpack auspacken, wie es die Abbildung zeigt. as shown.
- Page 4 Aufstellen Assembling the balance Gehäusedeckel nach hinten herausziehen. First pull the top glass panel out towards the Zwischenscheibe nach oben herausnehmen. rear and then take out the vertical dividing panel. Waage bis zur Tischkante vorziehen. Move the balance all the way to the edge of the table (bench).
- Page 5 Schieber an der Rückwand herausziehen. Mit Pull out the slider in the rear panel. Clean the einem kleinen Staubpinsel Staub und inside which is accessible through the opening Verpackungs-Rückstände durch die Öffnungen with a small brush. in der Rückwand entfernen. Return the slider.
- Page 6 Bildhelligkeit einstellen: Waage entarretieren. Adjust intensity of the screen image: release Rändelschraube etwas lösen und beam arrestment. Slightly loosen the knurled Lampenhalter verstellen, bis die Mattscheibe screw and move lamp holder to and fro until the optimal ausgeleuchtet ist. Rändelschraube screen is evenly and brightly illuminated.
- Page 7 Böden der Dämpfungstöpfe herausnehmen, Pull off the bottoms of the damping pots and Schwingungstöpfe einsetzen. introduce the damping bells. • • = links • • = left • = rechts • = right Kennzeichnung nach vorn. Böden der The marks must face forward. Return the Dämpfungstöpfe wieder einsetzen.
- Page 8 Schneiden und Arretierungspunkte auf Check knife edges and cups for cleanliness. Sauberkeit kontrollieren. Waagebalken von oben einführen. Waage Introduce beam from above. Release beam entarretieren, Mittelschneide über den arrestment, move beam so that the center knife Lagerstein bringen. Waage arretieren und edge is above the bearing.
- Page 9 Gehängebügel einhängen. Attach hanger. • • = rechts • • = right-hand side • = links • = left-hand side Anordnung der Gewichte auf dem Reiterlineal Arrangement of weights on the notched weight am Gehänge: bar: 1 mg 50 mg 1 mg 50 mg 1 mg...
- Page 10 5-mg-Gewicht mit Pinzette fassen, vorsichtig Take 5 mg weight with forceps, guide it across über das Reiterlineal führen und in den Haken the upper weight bar and place it into the hängen respective hook. Anzeige auf „0" stellen. 2-mg-Gewicht in die Return knob to position „0".
- Page 11 Anzeige auf „0" stellen. 1-mg-Gewicht in die Return knob to position „0"; place 1 mg weight Mitte zwischen Kerbe 7 + 8 legen. between notches 7 and 8. Move knob to position „2" and drop 1 mg weight into hook. Anzeige auf „2"...
- Page 12 Entsprechend Abb. 17 – 21 die Gewichte 50 Attach 50 mg, 20 mg, and two 10 mg weights mg. 20 mg und 2 x 10 mg einhängen. as per figs. 17 – 21. Zwischenscheibe einstecken. Re-insert dividing panel. Deckel einschieben. Der Deckel muss beim Re-insert top panel which must be pressed Einsetzen in der Nut geführt werden.
- Page 13 Reiterlineal herausnehmen, Gewichte der Remove this bar, attach the weights in Bezeichnungen entsprechend auflegen und accordance with the markings and return it to Reiterlineal wieder im Schalenbügel the hanger. befestigen. Schalenbügel einhängen (Öffnung des Hakens Attach pan hanger (opening of the hook facing nach außen).
- Page 14 Schalen-Abnahme: External loader: ausschwenken swing out einschwenken return Schalenabnahme ausschwenken. Swing out the pan removal arm. Schalenbügel einhängen. Waagschale Attach pan hanger (left). Place pan on loader einlegen. bracket and move it back into the housing. Pull Schalenabnahme einschwenken. out arrestment knob. Arretierungsknopf herausziehen.
- Page 15 Kontrolle Checking the balance Waage entarretieren. Nullpunkt einstellen. Release the beam, adjust „0" setting and arrest Waage arretieren. beam by means of the lever below the base plate which moves the projection screen. Reicht der Einstellungsbereich nicht aus: Nur lf the range of this adjustment is insufficient, bei arretierter Waage Einstellvorrichtung push in the coarse zero adjustment shaft nach innen drücken und Nullpunkt korrigieren.
- Page 16 Linke Waagschale mit einem 1-mg-Gewicht Place a 1 mg weight on the left-hand pan and belasten, Schaltgewichts-Anzeige ebenfalls auf set upper weight knob to 1 mg. Release beam 1 mg stellen. Waage entarretieren und and re-adjust zero setting, if necessary. Nullpunkt einstellen.
- Page 17 Bildschärfe einstellen Focusing the Image on the Ground Glass Screen Rändelschraube lösen. Loosen knurled screw. Objektiv verstellen, bis die Skale auf der Slide objective to and fro until the image on the Mattscheibe scharf erscheint. Rändelschraube screen is as sharp as possible, then tighten wieder anziehen.
- Page 18 Bildgröße einstellen Adjusting the Magnification of the Screen Image Falls der Nonius mehr als 9 Skalenteile lf the magnification of the screen image is überdeckt: Zwischenlinse etwas nach vorn incorrect, the vernier will either cover more or verstellen und Bildschärfe mit Objektiv less than 3 scale divisions.
- Page 19 Prüfen des Reitergewichtssatzes Es ist praktisch nicht möglich, die Reiter so genau zu justieren, dass die Fehler bei allen vorkommenden Kombinationen unberücksichtigt bleiben können. Der Mikroanalytiker muss deshalb den Reitersatz seiner Waage prüfen. Die Prüfung muss von Zeit zu Zeit wiederholt werden, weil die Gewichte sich verändern können.
- Page 20 Checking the Built-in Weights lt is practically impossible to produce weights of such accuracy that errors, which can occur when using certain combinations of these weights, can be disregarded. lt is, therefore, necessary that the user of a micro balance checks his weights from time to time since they may change. Of great importance is the checking of the milligram series of weights.
- Page 21 Die Ermittlung der Luftdichte und ihr Einfluss auf analytische Wägungen Es ist bekannt, dass von analytischen Wägungen, insbesondere von mikroanalytischen Wägungen, oft eine sehr hohe Genauigkeit gefordert wird. Obwohl diese Genauigkeit, mit der das Endergebnis angegeben werden soll, meist nur 1 % beträgt, ist die Forderung einer wesentlich höheren Genauigkeit dadurch bedingt, dass in den meisten Fällen Taramassen mit gewogen werden müssen, deren Größe die des Wägegutes um ein Vielfaches übersteigt.
- Page 22 Berechnung der Luftdichteänderung Bekanntlich ist diese vom Barometerstand, von der Temperatur und der absoluten Luftfeuchtigkeit abhängig, wobei die letztere aus der relativen Feuchtigkeit und der Temperatur berechnet werden kann. Die folgende Formel gibt die Abhängigkeit der Luftdichteänderung D in % von diesen Größen an, wobei b die Änderung des Barometerstandes in mm Quecksilber, At die Änderung der Temperatur, t die Temperatur in Grad Celsius und Af die Änderung der rel.
- Page 23 Berechnung der Auftriebsdifferenz Da der Auftrieb das Gewicht der verdrängten Luft ist, also ρ ∙ ρ ist, erhalten wir für die Auftriebsänderung ∆ ∆ ∙ ρ wobei D in Prozent einzusetzen ist. Wird M in Gramm angegeben, so ergibt sich A in ρ...
- Page 24 Abb.2: Einfluss der Auftriebsänderung bei Wägungen mit Messing-Gewichten. Die Luftdichte-Änderung zu multiplizieren. Der linke Teil der Abb. 2 zeigt, dass z.B. für eine Dichte 1 und eine Luftdichteänderung von 5 % schon für 1 g Wägegut die scheinbare Massenänderung 50 Mg beträgt. Einige häufiger vorkommende Materialien sind im rechten Teil der Abb.
- Page 25 Abb. 3 Auftriebskorrekturen für Glas (p = 2,5) gegen Messing-Gewichte (+ = 8.4) bei verschiedenen Luftdichte-Änderungen D. Die Zahlenwerte links gehören zu der unteren Zahlenreihe unter der Figur, die auf der rechten Seite zu der oberen. - 25 -...
- Page 26 Bestimmung des absoluten Gewichts durch Reduktion auf luftleerem Raum Diese Rechnung wird vor allen Dingen dann nötig sein, wenn man mit einer Vakuumwaage arbeitet und auf ihr die Substanzen einmal in Luft, das andere Mal in Vakuum oder einem anderen Gas wiegt.
- Page 27 Grundsätzlich müsste auch bei der Ausnutzung des Neigungsbereiches, der ja eine Verlagerung des Balkenschwerpunktes nach der Gewichtsseite bedeutet, eine Korrektur entsprechend der Dichte des Balkens angebracht werden, worauf U l b r i c h t ) aufmerksam macht. Eine genauere Betrachtung zeigt jedoch, dass bei Analysenwaagen, bei denen der Neigungsbereich bis zu 100 mg betragen kann, bei Verwendung von Messing-Gewichten erst für Dichten unterhalb von 1 die Anzeigegrenze der Analysenwaagen (0,1 mg) erreicht wird.
- Page 28 Wägetische und Wandkonsolen Erschütterungen beeinträchtigen nicht nur die Genauigkeit der Wägung, sondern schädigen auch die Waage. Vibrationen führen bei der im Gebrauch befindlichen Waage zur schnelleren Abnutzung der Schneiden, besonders wenn die Erschütterungen unglücklicherweise gerade in Resonanz mit einer Eigenfrequenz des Balkens stehen. In diesem Falle sind genaue Wägungen ohnehin ausgeschlossen.
- Page 29 Klimaeinflüsse Das Wägezimmer soll eine möglichst gleichmäßige Temperatur von mindestens 20°C haben. Es empfiehlt sich, den Raum während der kalten Jahreszeit über Nacht durch einen elektrischen Ofen nachzuheizen. Sehr vorteilhaft ist es, wenn die Temperatur durch eine automatische Vorrichtung konstant gehalten wird. Ein Absinken der Temperatur während der Nacht hat größere Nullpunktänderungen durch den Temperaturanstieg am folgenden Vormittag zur Folge.
- Page 30 The determination of atmospheric pressure and its influence on analytical weighings The demands in respect to the accuracy of analytical and especially of micro-analytical weighings are often extreme. Even though the accuracy .required for the end result is usually only 1 %, the requirement of a much higher accuracy is conditioned by the necessity of also having to weigh the mass of the tare which often exceeds to a considerable degree that of the proper sample.
- Page 31 Calculating variations of atmospheric pressure The atmospheric pressure is governed by the barometer reading, which in turn depends on temperature and absolute air humidity. The latter can be determined from the relative humidity and temperature. The following equation indicates the relation between the change of air pressure in % and these factors.
- Page 32 Calculating the buoyancy difference Since the buoyancy is the weight of the replaced air, namely ρ ∙ ρ the change of the buoyancy is ∆ ∆ ∙ ρ wherein D must be entered as % age. lf M is given in grams, A result is in micrograms.
- Page 33 For a graphic presentation of these relations refer to table 2. Fig. 2 Influence of buoyancy changes when weighing with brass weights. Multiply readings by the factor of the variation of air buoyancy. One can see there, that the relative change of mass for glass, which is used quite frequently as tare, at a 1% Variation of air buoyancy is 2,4 x 10 .
- Page 34 ρ Fig. 3 shows the correction factors for glass ( = 2,5) in relation to the mass of the sample and the change in air buoyancy. ρ Fig. 3 Buoyancy corrections for glass ( = 2,5) against brass weights (+ = 8,4) in relation to various changes of air buoyancy The figures on the left hand side apply To the lower row figures, the ones on the right hand side to the upper ones.
- Page 35 Table 4 shows the relation for weighing in vacuum against the specific gravity of the sample. The correction factor would be 3.5 mg if 10 grams of a sample of specific gravity 2.5 were weighed with brass weights. In reference to vacuum weighings one will have to take into special account the use of aluminum fractional weights (usually up to 30 mg), lf in weighings Pt crucible fractional aluminum weights totaling 45 mg are used, then the necessary correction according to table 2 ρ...
- Page 36 Under conditions of this kind the Sartorius balance fable or console can be recommended. d) lt is advisable to use a balance fable or console even if the result of this fest is negative.
- Page 37 Weighing Tables and Consoles Vibrations, in addition to effecting the results, can also cause damage to a balance through accelerated wear of knife edges. This effect will be most noticeable when the frequency of the Vibration is in resonance with the inherent frequency of the beam. Whether a balance table or console is chosen, depends on local conditions.
- Page 38 Fluorescent room lighting should be used, if at all feasible. Otherwise, a Sartorius balance lamp with cold light tube can be obtained. Even the body of the operator can influence the performance of a balance, especially if it is used infrequently and if the doors are not opened repeatedly for the purpose of equalizing the inside and outside temperatures.
Need help?
Do you have a question about the 1802 and is the answer not in the manual?
Questions and answers