Table of Contents

Related Manuals for Xtreme Power Conversion P80g


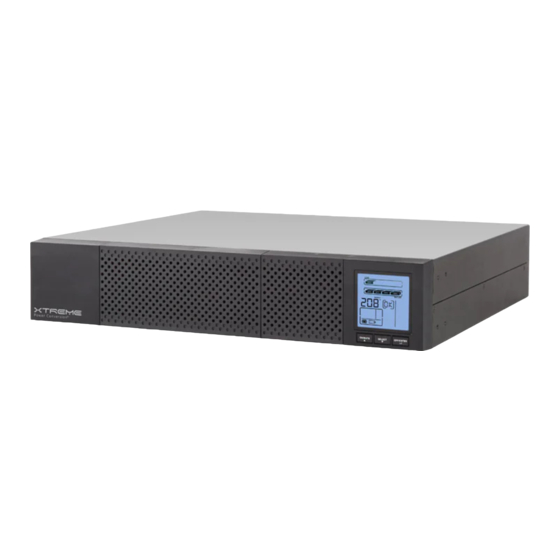
Summary of Contents for Xtreme Power Conversion P80g
- Page 1 All manuals and user guides at all-guides.com P80g Pure Sine Wave Line Interactive UPS 3000VA, 5000VA Models User & Installation Manual www.xpcc.com | © 2016 Xtreme Power Conversion Corporation. All rights reserved. (Rev 6/30/16)
-
Page 2: Table Of Contents
All manuals and user guides at all-guides.com P80g User’s Manual Uninterruptible Power Supply Table of Contents Important Safety Warning................4 Transportation..........................4 Preparation............................4 Installation............................4 Operation............................4 Maintenance, Service, and Faults....................5 Installation and Setup..................5 Rear Panel View..........................6 Operating Principle..........................6 Install the UPS..........................7 Setup the UPS..........................10 Battery Replacement........................12... - Page 3 All manuals and user guides at all-guides.com P80g User’s Manual Uninterruptible Power Supply Xtreme Power Conversion Limited Warranty..........29 Xtreme Power Conversion Load Protection Policy ........30 Appendix A: P90-BP72 User Guide..............33 Important Safety Instructions......................33 Product Overview and Setup......................33 Type of Battery Required.......................35 Battery Replacement........................35...
-
Page 4: Important Safety Warning
All manuals and user guides at all-guides.com P80g User’s Manual Uninterruptible Power Supply Important Safety Warning Please comply with all warnings and operating instructions in this manual strictly. Save this manual properly and read carefully the following instructions before installing the unit. Do not operate this unit before reading through... -
Page 5: Maintenance, Service, And Faults
All manuals and user guides at all-guides.com P80g User’s Manual Uninterruptible Power Supply • The EPO, RS-232 and USB circuits are an IEC 60950 safety extra low voltage (SELV) circuit. This circuit must be separated from any hazardous voltage circuits by reinforced insulation. -
Page 6: Rear Panel View
All manuals and user guides at all-guides.com P80g User’s Manual Uninterruptible Power Supply Rear Panel View P80g-3000 Rear View P80g-5000 Rear View 1. Programmable outlets: connect to non-critical loads. 2. Output receptacles: connect to mission-critical loads. 3. AC input 4. Input circuit breaker 5. -
Page 7: Install The Ups
All manuals and user guides at all-guides.com P80g User’s Manual Uninterruptible Power Supply Install the UPS For safety consideration, the UPS is shipped out from factory without connecting battery wires. Before install the UPS, please follow below steps to re-connect battery wires first. - Page 8 All manuals and user guides at all-guides.com P80g User’s Manual Uninterruptible Power Supply Step 3: Put the front panel back to the unit. Rack-mount Installation CAUTION – Do NOT use the mounting brackets to lift the unit. The mounting brackets are only for securing the unit to the rack.
- Page 9 All manuals and user guides at all-guides.com P80g User’s Manual Uninterruptible Power Supply Tower Installation Step 1 Step 2 Step 3 Xtreme Power Conversion Corporation Page 9...
-
Page 10: Setup The Ups
All manuals and user guides at all-guides.com P80g User’s Manual Uninterruptible Power Supply NOTE: When installing the UPS or battery pack with feet, please keep 70mm distance from the edge of the unit. Setup the UPS UPS input connection Plug the UPS into a two-pole, three-wire, grounded receptacle only. Avoid using extension cords. - Page 11 All manuals and user guides at all-guides.com P80g User’s Manual Uninterruptible Power Supply Step 5: Disable and enable EPO function Keep the pin 1 and pin 2 closed for UPS normal operation. To activate EPO function, cut the wire between pin 1 and pin 2.
-
Page 12: Battery Replacement
All manuals and user guides at all-guides.com P80g User’s Manual Uninterruptible Power Supply 3. Follow the on-screen instructions to install the software. 4. When your computer restarts, the monitoring software will appear as an orange plug icon located in the system tray, near the clock. - Page 13 All manuals and user guides at all-guides.com P80g User’s Manual Uninterruptible Power Supply Step 3: Pull out the battery box by removing two screws on the front panel. Step 4: Remove the top cover of battery box and replace the inside batteries.
-
Page 14: Battery Kit Assembly
All manuals and user guides at all-guides.com P80g User’s Manual Uninterruptible Power Supply Step 6: Re-connect the battery wires. Step 7: Put the front panel back to the unit. Battery Kit Assembly NOTICE: Please assemble battery kit first before installing it inside of UPS. Please select correct battery kit proce- dure below to assemble it. - Page 15 All manuals and user guides at all-guides.com P80g User’s Manual Uninterruptible Power Supply Six Battery Kit Step 1: Remove adhesive tapes. Step 2: Connect all battery terminals by following below diagram. Step 3: Put assembled battery packs on one side of plastic shells.
-
Page 16: Operations
All manuals and user guides at all-guides.com P80g User’s Manual Uninterruptible Power Supply Step 4: Cover the other side of plastic shell as below chart. Then, battery kit is fully assembled. Operations Button Operation Button Function • Turn on the UPS: Press and hold ON/Mute button for at least 2 seconds to turn on the UPS. -
Page 17: Lcd Panel
All manuals and user guides at all-guides.com P80g User’s Manual Uninterruptible Power Supply LCD Panel Rack Display Load info Battery info Input/output Warning & Fault info/ and Battery info Setting operation UPS status Backup time info Tower Display Battery info... -
Page 18: Audible Alarms
All manuals and user guides at all-guides.com P80g User’s Manual Uninterruptible Power Supply Indicates the output/input voltage, output/input frequency or battery volt- age. V: output voltage, Hz: frequency Load Information Indicates the load level by 0-25%, 26-50%, 51-75%, and 76-100%. -
Page 19: Abbreviations In Lcd Display
All manuals and user guides at all-guides.com P80g User’s Manual Uninterruptible Power Supply Abbreviations in LCD Display Abbreviation Display Meaning Enable Disable Escape Temperature Charger Rack display Tower display Site Fault EEPROM error Battery Replacement UPS Setting Parameters 2 There are two parameters to set up the UPS. - Page 20 All manuals and user guides at all-guides.com P80g User’s Manual Uninterruptible Power Supply 01: Output Voltage Settings Interface Setting You may choose the following output voltage: 208: presents output voltage is 208Vac 220: presents output voltage is 220Vac 230: presents output voltage is 230Vac (Default)
- Page 21 All manuals and user guides at all-guides.com P80g User’s Manual Uninterruptible Power Supply 04: Maximum Charger Current Setting Interface Setting Set up the maximum charger current. 1/2/4/6/8: Setting the maximum charger current at 1/2/4/6/8A (Default: 8A). Note: This setting is only effective for super charger.
- Page 22 All manuals and user guides at all-guides.com P80g User’s Manual Uninterruptible Power Supply 07: Battery Total AH Setting Interface Setting Parameter 2: Set up the battery total AH of the UPS. 7-999: setting the battery total capacity from 7-999 in AH.
-
Page 23: Operating Mode Description
All manuals and user guides at all-guides.com P80g User’s Manual Uninterruptible Power Supply Operating Mode Description Operating Mode Description LCD Display When the input voltage is within voltage regulated range, UPS will power the output directly from the ECO mode mains. -
Page 24: Fault Reference Codes
All manuals and user guides at all-guides.com P80g User’s Manual Uninterruptible Power Supply UPS is powered off without output power, but the bat- Standby mode tery is still being charged. Fault Reference Codes Fault event Fault code Icon Fault event... -
Page 25: Troubleshooting
All manuals and user guides at all-guides.com P80g User’s Manual Uninterruptible Power Supply Sounds every 2 seconds (At this time, UPS is off to remind users Battery fault that something is wrong with the bat- tery) EEPROM error Sounds every 2 seconds... -
Page 26: Storage & Maintenance
All manuals and user guides at all-guides.com P80g User’s Manual Uninterruptible Power Supply Charge the batteries for at least 5 hours and then re-check capacity. Batteries are not fully charged. If the problem still exists, contact Battery backup time is shorter than your dealer for support. -
Page 27: Specifications
All manuals and user guides at all-guides.com P80g User’s Manual Uninterruptible Power Supply Specifications P80g-3000 P80g-5000 P80g-5KTB MODEL NUMBER CAPACITY Power rating 3000VA (2700W) 5000VA (4500W) 5000VA (4500W) INPUT Voltage nominal 208/220/230/240VAC 208VAC or 240VAC Voltage range 162–290VAC Frequency 50/60Hz auto sensing... -
Page 28: Obtaining Service
All manuals and user guides at all-guides.com P80g User’s Manual Uninterruptible Power Supply Obtaining Service If the UPS requires Service: 1. Use the TROUBLESHOOTING section in this manual to eliminate obvious causes. 2. Verify there are no circuit breakers tripped. -
Page 29: Xtreme Power Conversion Limited Warranty
P80g-Series products from the date of purchase. XPC Corporation warrants internal batteries for a period of three years from the date of purchase. For equipment sites within the United States and Canada, this warranty covers repair or replacement, at the sole discretion of XPC Corporation. -
Page 30: Xtreme Power Conversion Load Protection Policy
All manuals and user guides at all-guides.com P80g User’s Manual Uninterruptible Power Supply Xtreme Power Conversion Load Protection Policy THIS POLICY IS NOT A WARRANTY. REFER TO THE XPC CORPORATION, INC. LIMITED WARRANTY FOR INFORMATION CONCERNING THE WARRANTY FOR YOUR XPC PRODUCT. THE LIMITATIONS AND CONDITIONS CONTAINED IN THIS POLICY DO NOT AFFECT THE TERMS OF THE XPC LIMITED WARRANTY. - Page 31 All manuals and user guides at all-guides.com P80g User’s Manual Uninterruptible Power Supply registering on the website, Purchaser must list all connected equipment that is directly connected to the product. Only those devices registered in that manner will be covered.
- Page 32 All manuals and user guides at all-guides.com P80g User’s Manual Uninterruptible Power Supply of the Connected Equipment. XPC will forward to the Purchaser a Load Protection Policy claims form, which must be completed and filed with XPC within 30 days.
-
Page 33: Appendix A: P90-Bp72 User Guide
All manuals and user guides at all-guides.com P80g User’s Manual Uninterruptible Power Supply Appendix A: P90-BP72 User Guide Important Safety Instructions Please comply with all warnings and operating instructions in this manual strictly. Save this manual properly and read carefully the following instructions before installing the unit. Do not operate this unit before reading through all safety information and operating instructions carefully. - Page 34 All manuals and user guides at all-guides.com P80g User’s Manual Uninterruptible Power Supply Rear Panel View 1. DC connector : connects to either UPS or 2nd battery box 2. DC breaker: Battery over-current protection breaker Installation and Setup with UPS Unpacking &...
-
Page 35: Type Of Battery Required
All manuals and user guides at all-guides.com P80g User’s Manual Uninterruptible Power Supply Tower Installation Connecting with UPS and Other Battery Box Follow below installation chart to connect with UPS and other battery box with included cable. Type of Battery Required... - Page 36 All manuals and user guides at all-guides.com P80g User’s Manual Uninterruptible Power Supply P90-BP72 Step 1 : Open the package and place the battery box on a horizontal plane. Step 2: Remove the removable front panel part by pulling it from the lower extremity Step 3: Remove the fixed part of the front panel by removing 2 screw present.
- Page 37 All manuals and user guides at all-guides.com P80g User’s Manual Uninterruptible Power Supply Step 5: Once battery box is opened, remove the battery hold down brackets present on the left side of the battery box by unscrewing the 2 screws on each bracket.
-
Page 38: Wiring Diagram
All manuals and user guides at all-guides.com P80g User’s Manual Uninterruptible Power Supply Step 9: Put the metal top cover back on the unit. Close the front fixing plate and the two parts of the front panel and secure it with screws. -
Page 39: Storage & Maintenance
All manuals and user guides at all-guides.com P80g User’s Manual Uninterruptible Power Supply Picture example as below: 240M 280M 380M 380M Note: The cable connection from the external battery connector to PCB is already present inside the battery box. All the other cable connections should be made in accordance with the above wiring diagram.
Need help?
Do you have a question about the P80g and is the answer not in the manual?
Questions and answers