Table of Contents
Advertisement
Quick Links
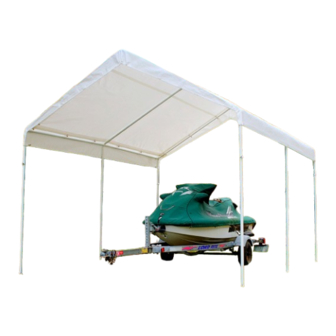
10'X13' UNIVERSAL 6 LEG
ITEM #: C61013PC
Dimensions:
10ft. 8in. Wide x 13ft. Deep x 6ft. 8in. Side Height / 9ft. 9in. Center Height
WARNING:
Keep all flame and heat sources
away from this tent fabric. Meets
the flammability requirements of
CPAI-84 It is not fire proof
Distributed by: PIC America, LTD.
The fabric will burn if left in
1730 Five Points Lane • Fuquay-Varina, NC 27526
continuous contact with any
1-800-800-6296 • www.kingcanopy.com
flame source.
Advertisement
Table of Contents

Subscribe to Our Youtube Channel
Summary of Contents for KING CANOPY C61013PC
- Page 1 10’X13’ UNIVERSAL 6 LEG ITEM #: C61013PC Dimensions: 10ft. 8in. Wide x 13ft. Deep x 6ft. 8in. Side Height / 9ft. 9in. Center Height WARNING: Keep all flame and heat sources away from this tent fabric. Meets the flammability requirements of CPAI-84 It is not fire proof Distributed by: PIC America, LTD.
- Page 2 PARTS 4WPC TDS1013 BALLW 5X8PC 3WPC CCLIP PFOOT 6X6PC 6X6PC 12 pc 78” Powder Coated Pipe 5X8PC 6 pc 68” Powder Coated Pipe 3WPC 6 pc 3-way Connectors 4WPC 3 pc 4-way Connectors BALL50W 50 pc Elastic Ball Straps PFOOT 6 pc Plastic Foot Pads TDS1013...
-
Page 3: Frame Assembly
3WPC 3WPC 1) Start by laying out all of the parts and pieces to your King Canopy. Please refer to the parts list to ensure that your kit is complete. When all the parts have been accounted for, begin to layout the perimeter of your frame according to the photo above (6X6PC &... - Page 4 FRAME & ATTACHING COVER Width 5) Now that the roof frame work is 4) Once one side is complete, move complete you can begin to attach the to opposite sides of the unassembled drawstring style cover. Start by laying out frame lifting the frame and connecting the cover to determine which way it is the remaining 5X8PC pipe.
-
Page 5: Attaching Cover
ATTACHING COVER 8) Wrap the cord around the pole and 9) Be sure all four corners are attached secure around the ball. before attaching the remaining ball straps. 11) Next continue attaching the straps 10) Continue attaching straps from left down each side and end. -
Page 6: Leg Assembly
LEG ASSEMBLY 12) Now that all the ball straps are 13) Slide a c-clip on to each corner leg attached. Insert the pipe into each plastic before inserting them into the 3-way foot pad and begin to attach the legs fittings. -
Page 7: Cover Adjustment
COVER ADJUSTMENT Pull Cord Down & Hook 16) Pull each drawstring cord down 17) Use the remaining ball straps to evenly and hook onto the c-clip at each secure the valances to the legs. corner leg. Repeat step at the other end of the canopy. - Page 8 IMPORTANT NOTICE: PLEASE READ CAREFULLY We are confident that you will be completely satisfied with your King Canopy unit. Please take a moment to read the very important information below, and call us with any questions you may have. King Canopy/PIC America, LTD. has no control over wind, snow, ice, rain or any other weather condition and we are in no way responsible for any damage caused by the canopy or to the canopy.
-
Page 9: Warranty Information
Improper Anchoring, Strong Winds, Rain Snow, or Ice King Canopy/PIC America, LTD. does not guarantee these canopies under strong weather conditions. These canopies are designed to protect against damages caused by sun, rain, tree sap, birds, etc. They are not designed to hold roof loads that accompany snow, ice or heavy rains.


Need help?
Do you have a question about the C61013PC and is the answer not in the manual?
Questions and answers