Advertisement
Quick Links
Directrices de Seguridad e Instrucciones de Construcción
Guide de sécurité et Instructions de montage
Diseño Gold
Option Or
Diseño Silver
Option Argent
PS 7676
PS 7836
PS 8813
PS 7958
PS 7952
We Will Gladly Help! • ¡Le Ayudaremos Con Mucho Gusto! • C'est avec plaisir que nous vous aiderons!
1-888-PLAYSTAR
Monday through Friday, 8:00 A.M. to 5:00 P.M. C.S.T.
(752- 97 82)
De Lunes a Viernes de 8:00 A.M. a 5:00 P.M. C.S.T.
(450) 699-3083
Du lundi au vendredi, de 8 h à 16 h EST
®
Safety Guide & Assembly Instructions
SAFETY ZONE
ZONA DE SEGURIDAD
ZONE DE SÉCURITÉ
TM
PS 7690
PS 7952
PS 7676 (2)
PS 7836
Diseño Bronze
Option Bronze
PS 8813
www.playstarinc.com
PS 7460
SAFETY ZONE
ZONA DE SEGURIDAD
ZONE DE SÉCURITÉ
PS 8850
PS 8824
SAFETY ZONE
ZONA DE SEGURIDAD
ZONE DE SÉCURITÉ
Advertisement

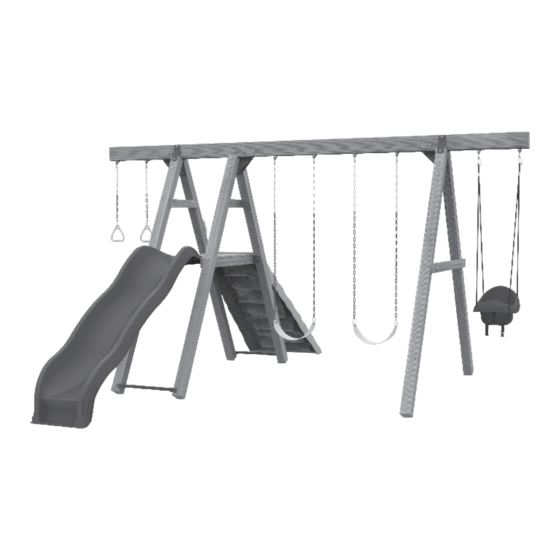
Related Manuals for PLAYSTAR Mesa PS 7460


Summary of Contents for PLAYSTAR Mesa PS 7460
- Page 1 PS 8813 PS 7958 PS 7952 We Will Gladly Help! • ¡Le Ayudaremos Con Mucho Gusto! • C’est avec plaisir que nous vous aiderons! 1-888-PLAYSTAR Monday through Friday, 8:00 A.M. to 5:00 P.M. C.S.T. www.playstarinc.com (752- 97 82) De Lunes a Viernes de 8:00 A.M. a 5:00 P.M. C.S.T.
- Page 2 • Thoroughly read all safety instructions before Testing and Materials (ASTM) Home Playground beginning. Safety Standard. In order for PlayStar to comply with the ASTM Standard, we cannot recommend • Children must remain clear of construction site until anyone above these limits.
-
Page 3: Annual Maintenance Checklist
SAFETY INSTALLATION: seat or single planned activity should The chains or ropes provided are the be allowed on this set at one time, with maximum length designed for the swinging 1. Follow the instructions provided, do not a maximum weight of 105 pounds for element(s). - Page 4 Materiales (ASTM). Para cumplir con las Normas de • Los niños deben permanecer alejados del lugar de construcción la ASTM, PlayStar no recomienda el uso del equipo por hasta que éste producto esté instalado adecuadamente y listo alguien arriba de estos límites.
-
Page 5: Instalación
SEGURIDAD INSTALACIÓN: 2. Únicamente deberá permitirse un solo niño provistas sonde la longitud máxima con un peso máximo de 105 libras (48 Kg.) diseñada para los elementos de columpio. 1. Siga las instrucciones que se proveen, no en cada asiento o en cada actividad 5. - Page 6 Matériaux en vrac manufacturier ou installateur un rapport démontrant que le produit a été testé Les structures de jeu PlayStar de huit pieds et réponds aux standards de sécurité de hauteur ont besoin d'un revêtement de ASTM F1292. Ce rapport devra indiquer protection contre les chutes.
- Page 7 SÉCURITÉ INSTALLATION: ne doivent pas être utilisés par plus d’un suspendues sont fixées aux deux enfant à la fois. Le poids maximum per- extrémités et qu’elles ne peuvent se 1. Suivre les instructions fournies, ne pas mis pour chaque enfant sur la structure nouer d’elles-mêmes.
- Page 8 FC 3125 FC 3109 HW 1600 LT 7000 FP 2054 FC 3217 FC 3107 SA 4494 SA 4496 FC 3111 SA 4492 FC 3175 SA 4493 HW 1212 HW 1223 HW 1411 (4) #8 x B/," (44) C/," (24) #14 x 1Z/v" HW 1474 HW 1216 HW 1213...
- Page 9 Lumber Notes • Notas acerca de la madera • Notes sur le bois • Assembly is easier if boards are stacked by size before beginning. • If 1" thick boards are not pre-drilled it is easier to complete using drill marking template before beginning the assembly process. •...
- Page 10 Icon Glossary • Glosario de iconos • Lexique des icônes Place tower or component in desired location. Coloque la torre o el componente en la ubicación deseada. Placez la tour ou la pièce à l'endroit souhaité. Mark board with template using pattern shown on this step. Note: DO NOT drill through template. Marque la tabla con la plantilla utilizando el patrón que se muestra en este paso.
- Page 11 GABARIT POUR LE PERÇAGE DES TROUS Use las pestañas para escuadrar en la esquina de la tabla. Affichage du logo Playstar : Utilisez les onglets pour ajuster sur les coins de la planche. Arrow showing: Use tabs to slide along edge of board to drill location.
- Page 12 Safety Warning Glossary • Glosario de advertencias de seguridad • Lexique des consignes de sécurité CAUTION: Failure to anchor properly could cause serious injury. Anchors must be placed below the level of the shock-absorbing surfacing material to prevent tripping or injury resulting from a fall. Refer to the Safety Guidelines at the beginning of this plan. Note: If soil conditions permit anchors to be pulled out easily, such as in sandy soil conditions, cementing is required.
- Page 13 CAUTION: These boards should be pre-drilled to avoid cracking. Note: Pre-drill into second board using first board as a template before attaching. PRECAUCIÓN: Estas tablas deberán perforarse previamente para evitar grietas. Nota: Perfore la segunda tabla usando la primera como plantilla antes de unirlas. ATTENTION : Ces planches doivent être pré-percées pour éviter les fissures.
- Page 14 (12) SA 4493 SA 4492 HW 1213 (6) 4" x 4" x 8' SA 4493 SA 4493 SA 4492 (12) (12) HW 1301 HW 1411 (12) C/," x 4" HW 1514 SA 4493 SA 4492...
- Page 15 HW 1515 HW 1411 SA 4492 SA 4493 2" x 4" x 46C/v" (12) #8 x 2Z/x" HW 1204 51Z/x" 93Z/x" 51Z/x"...
- Page 16 SA 4496 #8 x 1Z/v" (24) HW 1213...
- Page 17 (12) C/," x 2" HW 1528 HW 1301 C/," x 4" HW 1514 (12) HW 1411 HW 1514 HW 1514 HW 1528 HW 1528...
- Page 18 (--> Pg. 24) Bronze Design Only • Diseño Bronze únicamente • Option Bronze uniquement #8 x 1Z/v" HW 1213 (1) 2" x 6" x 10' 21Z/x" 2" If you do not have saw horses, rest beam on the ground. Si no cuenta con burros de carpintero, apoye la viga en el suelo.
- Page 20 #8 x 2Z/x" HW 1204 (1) 2" x 6" x 10' 0" 24" 44" 64" 120"...
- Page 21 If you do not have saw horses, flip the beam over. Si no cuenta con burros de carpintero, dele la vuelta a la viga. Si vous n’avez pas de chevalet de sciage, retournez la poutre. C/," x 4" HW 1514 (18) HW 1411 HW 1301...
- Page 22 FP 2054 C/," x 4" HW 1514 HW 1411 HW 1301...
- Page 23 FC 3111 120" 68" 52" 36" 20" 0" HW 1301 C/," x 3" HW 1201...
- Page 24 (--> Pg. 30) Silver & Gold Design Only • Diseños Silver & Gold únicamente • Option Argent et Or uniquement #8 x 1Z/v" HW 1213 2" x 6" x 14' 21Z/x" 28Z/x" If you do not have saw horses, rest beam on the ground. 33"...
- Page 26 (14) #8 x 2Z/x" HW 1204 (1) 2" x 6" x 14' 0" 20" 50Z/x" 70Z/x" 90Z/x" 148" 168"...
- Page 27 If you do not have saw horses, flip the beam over. Si no cuenta con burros de carpintero, dele la vuelta a la viga. Si vous n’avez pas de chevalet de sciage, retournez la poutre. C/," x 4" HW 1514 (18) HW 1411 HW 1301...
- Page 28 FP 2054 C/," x 4" HW 1514 HW 1411 HW 1301...
- Page 29 FC 3111 FC 3111 Brackets & Installation Instructions included with PS 7958 Se incluyen soportes e instrucciones de instalación en el PS 7958 Supports et instructions d'installation inclus avec PS 7958 165" 151" PS 7958 94Z/x" 78Z/x" 62Z/x" 46Z/x" 17" 3"...
- Page 30 All Design Options • Todas las opciones de diseño • Toutes les options HW 1212 (8) #14 x 1Z/v" SA 4494 21Z/x" 21Z/x" 1" Bronze Design Option Shown Se muestra la opción de diseño de Bronze Option Bronze illustrée 21Z/x" 21Z/x"...
- Page 31 Skip this step for the Gold Design Option. Continue to next page. Omita este paso para la opción de diseño Gold. Continúe en la página siguiente. Sautez cette étape pour l'option Or. Passez à la page suivante. HW 1212 (12) #14 x 1Z/v" SA 4494 13"...
- Page 32 (2) 1" x 4" x 21M/zn" HW 1216 #8 x 1Z/x"...
- Page 33 (1) 2" x 4" x 46C/v" HW 1216 (4) #8 x 1Z/x"...
- Page 34 (12) 1" x 4" x 21M/zn" HW 1216 (72) #8 x 1Z/x"...
- Page 35 1" x 4" x 21M/zn" HW 1216 (8) #8 x 1Z/x" 22"...
- Page 36 HW 1219 C/," x 1Z/x" FC 3217 HW 1301...
- Page 37 Swings and Rings • Columpios y Aros • Balançoires et anneaux FC 3107 FC 3106 HW 1600 FC 3109 FC 3110 NOTE: Customize the height of your chain in the Adjustment Zone to fit your child. Adjustment Zone NOTA: Ajuste la altura de la cadena en la zona Zona de ajuste de ajuste de acuerdo con el tamaño de su hijo.
- Page 38 Slide • Tobogán • Toboggan Line up center hole. Alinear agujero central. Alignez le trou central. 1Z/x" 1Z/x" HW 1474 HW 1212 HW 1217 HW 1212 HW 1309 (1) #14 x 1Z/v" Z/v" x 1" Z/v" FC 3217...
- Page 39 HW 1536 HW 1301 HW 1411 (1) C/," (2) C/," (1) C/," x 1Z/v" Fill in around bottom of slide to make surface level to surrounding grade. 1" Rellene alrededor de la parte inferior del tobogán para que la superficie quede a nivel con el terreno circundante.
- Page 40 PlayStar, Incorporated, Janesville, WI 53547 © 2021, 2017 PlayStar, Inc. Reproduction of this document in part or whole is prohibited without the permission of PlayStar, Inc. Protected by one or more of the following United States or Foreign Patents: US D418,189; US D409,708; US D424,154; US D428,637; US 6,402,663; US D422,332; US D410,059;...
Need help?
Do you have a question about the Mesa PS 7460 and is the answer not in the manual?
Questions and answers