
Related Manuals for DAD ARK208SA-SP


Summary of Contents for DAD ARK208SA-SP
- Page 1 DYNAMIC AUDIO DEVICE ARK series ARK105MP ARK106MP ARK205MP ARK206MP ARK208SA - SP ARK1200SA ARK12SA - SP ARK12MP ARK208CX ACTIVE-PASSIVE LOUDSPEAKERS MANUALE UTENTE USER MANUAL IT - EN...
- Page 2 Music & Lights S.r.l. si riserva ogni diritto di elaborazione in All rights reserved by Music & Lights S.r.l. No part of this qualsiasi forma delle presenti istruzioni per l’uso. instruction manual may be La riproduzione - anche parziale - per propri scopi commerciali reproduced in any form or by any means for any commercial è...
-
Page 3: Table Of Contents
ARK series INDICE CONTENTS Sicurezza Safety Avvertenze generali Avvertenze generali General instructions General instructions Attenzioni e precauzioni per l’installazione Attenzioni e precauzioni per l’installazione Warnings and installation precautions Warnings and installation precautions 1 Introduzione 1 Introduction 1. 1 ARK105MP 1. 1 ARK105MP 1. -
Page 4: Sicurezza
ARK series ATTENZIONE! WARNING! Before carrying out any operations with the unit, Prima di effettuare qualsiasi operazione con carefully read this instruction manual, and keep it l’unità, leggere con attenzione questo manuale with cure for future reference. conservarlo accuratamente riferimenti It contains important information about the futuri. -
Page 5: Attenzioni E Precauzioni Per L'installazione
ARK series Warnings and installation precautions Attenzioni e precauzioni per l’installazione • This product in combination with ampli- • Questo prodotto da solo oppure in combina- zione con amplificatore può essere capace di fier, may be capable of producing dangerous produrre livelli sonori che possono causare sound levels that could cause permanent hearing loss. - Page 6 ARK series rottura di uno di essi, l’altro sarà in grado suspension for hanging speakers (for example di sostenere il sistema. one chain); always use at least two of them - Verificare sempre che la struttura cui i and make sure they are sufficiently strong. So, diffusori sono sospesi sia in grado di sop- if one fails the other will sustain the load.
-
Page 7: Introduzione
ARK series - 1 - INTRODUZIONE - 1 - INTRODUCTION 1.1 ARK105MP 1.1 ARK105MP DESCRIZIONE DESCRIPTION Diffusore passivo a 2 vie, 120W AES, 114dB SPL. 2-way passive loudspeaker, 120W AES, 114dB SPL 2-way passive loudspeaker, 120W AES, 114dB SPL. SPECIFICHE TECNICHE TECHNICAL SPECIFICATIONS DIFFUSORI LOUDSPEAKER... - Page 8 ARK series 208 mm 310 mm Fig.1 - Technical drawing...
-
Page 9: Ark106Mp
ARK series 1.2 ARK106MP 1.2 ARK106MP DESCRIZIONE DESCRIPTION Diffusore passivo a 2 vie 120W AES, 116dB SPL. 2-way passive loudspeaker, 120W AES, 116dB SPL. SPECIFICHE TECNICHE TECHNICAL SPECIFICATIONS DIFFUSORI LOUDSPEAKER • Sistema: passivo 2 vie • System type: passive 2 way COMPONENTI COMPONENTS •... - Page 10 ARK series 233 mm 340 mm Fig.2 - Technical drawing...
-
Page 11: Ark205Mp
ARK series 1.3 ARK205MP 1.3 ARK205MP DESCRIZIONE DESCRIPTION Diffusore passivo a 2 vie 240W AES, 119dB SPL. 2-way passive loudspeaker, 240W AES, 119dB SPL. SPECIFICHE TECNICHE TECHNICAL SPECIFICATIONS DIFFUSORI LOUDSPEAKERS • Sistema: passivo 2 vie • System type: passive 2 way COMPONENTI COMPONENTS •... - Page 12 ARK series 208 mm 438 mm Fig.3 - Technical drawing...
-
Page 13: Ark206Mp
ARK series 1.4 ARK206MP 1.4 ARK206MP DESCRIZIONE DESCRIPTION Diffusore passivo a 2 vie 240W AES, 122dB SPL. 2-way passive loudspeaker, 240W AES, 122dB SPL. SPECIFICHE TECNICHE TECHNICAL SPECIFICATIONS DIFFUSORI LOUDSPEAKER • Sistema: passivo 2 vie • System type: passive 2 way COMPONENTI COMPONENTS •... - Page 14 ARK series 233 mm 498 mm Fig.4 - Technical drawing...
-
Page 15: Ark208Sa
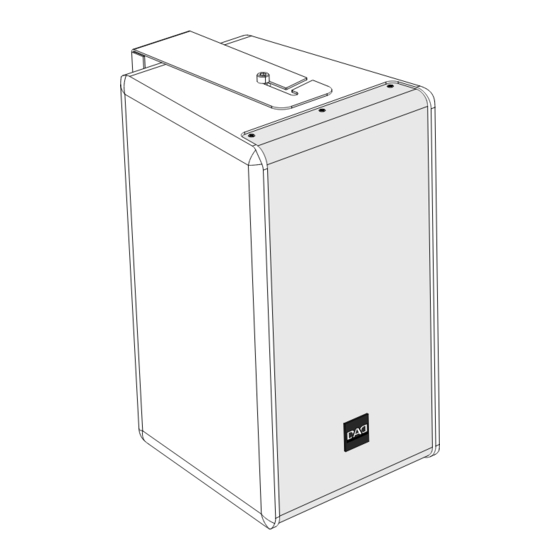
ARK series 1.5 ARK208SA 1.5 ARK208SA DESCRIZIONE DESCRIPTION Diffusore sub woofer attivo in classe D da 2x700W, Bass-reflex active subwoofer, 2x700W D-class am- 121dB SPL. plifier, 121dB SPL. SPECIFICHE TECNICHE TECHNICAL SPECIFICATIONS DIFFUSORI LOUDSPEAKER • Sistema: subwoofer attivo • System type: active subwoofer COMPONENTI COMPONENTS •... -
Page 16: Ark208Sp
ARK series 1.6 ARK208SP 1.6 ARK208SP DESCRIZIONE DESCRIPTION Diffusore sub woofer bass reflex passivo 300W AES, Bass reflex passive subwoofer, 300W AES, 122dB SPL. 122dB SPL. TECHNICAL SPECIFICATIONS SPECIFICHE TECNICHE LOUDSPEAKER • System type: passive subwoofer DIFFUSORI • Sistema: subwoofer passivo COMPONENTS •... - Page 17 ARK series 500 mm 325 mm Fig.5 - Technical drawing...
-
Page 18: Ark1200Sa
ARK series 1.7 ARK1200SA 1.7 ARK1200SA DESCRIZIONE DESCRIPTION Diffusore sub woofer attivo da 600W con uscita ste- Active sub woofer 600W with 2x300W/4 Ohm stereo reo 2x300W/4 Ohm. output. SPECIFICHE TECNICHE TECHNICAL SPECIFICATIONS DIFFUSORE LOUDSPEAKERS • Sistema: subwoofer attivo con uscita stereo am- •... - Page 19 ARK series 325 mm 500 mm Fig.6 - Technical drawing...
-
Page 20: Ark12Sa
ARK series 1.8 ARK12SA 1.8 ARK12SA DESCRIZIONE DESCRIPTION Diffusore sub woofer attivo in classe D da 2x700W, Bass-reflex active subwoofer, 2x700W D-class 122dB SPL. amplifier, 122dB SPL SPECIFICHE TECNICHE TECHNICAL SPECIFICATIONSARK12MP DIFFUSORE LOUDSPEAKER • Sistema: subwoofer attivo • System type: active subwoofer CARATTERISTICHE FEATURES •... -
Page 21: Ark12Sp
ARK series 1.9 ARK12SP 1.9 ARK12SP DESCRIZIONE DESCRIPTION Diffusore sub woofer bass reflex passivo 400W AES, Passive subwoofer loudspeaker, LF 12’’ 400W/8 Ohm, 123dB SPL. 125dB SPL. SPECIFICHE TECNICHE TECHNICAL SPECIFICATION DIFFUSORE LOUDSPEAKER • Sistema: subwoofer passivo • System type: passive subwoofer COMPONENTI COMPONENTS •... - Page 22 ARK series 470 mm 520 mm Fig.7 - Technical drawing...
-
Page 23: Ark12Mp
ARK series 1.10 ARK12MP 1.10 ARK12MP DESCRIZIONE DESCRIPTION Diffusore passivo 2Vie (LF12’’+HF1.7’’) con staffa, Passive 2-way speaker (LF12’’+HF1.7’’) with bracket, 300W/8 Ohm, 128dB SPL. 300W/8 Ohm, 128dB SPL. SPECIFICHE TECNICHE TECHNICAL SPECIFICATION DIFFUSORI LOUDSPEAKERS • Sistema: passivo 2 vie coassiale •... - Page 24 ARK series 325 mm Fig.8 - Technical drawing...
-
Page 25: Ark208Cx
ARK series 1.11 ARK208CX 1.11 ARK208CX SPECIFICHE TECNICHE TECHNICAL SPECIFICATION DIFFUSORE LOUDSPEAKER • Sistema: passivo 2.5 vie • System type: 2.5 way passive COMPONENTI COMPONENTS • Basse frequenze: 8’’ woofer/2’’v.c. • Low frequency: 8’’ woofer/2’’v.c. • Medie frequenze: 8’’ midrange / 2’’ v.c. •... - Page 26 ARK series Fig.9 - Technical drawing...
-
Page 27: Installazione A Muro
ARK series - 2 - INSTALLAZIONE A MURO - 2 - WALL MOUNTING Attenzione! L’installazione deve avvenire sotto Warning! All installation jobs are carried out la responsabilità dell’installatore, nel rispetto di under the solo responsibility of the person the tutte le precauzioni e le norme di sicurezza appli- actual work and must be done in full compliance cabili nel caso specifico. -
Page 28: Installazione Con Staffa Opzionale
ARK series 2.2 INSTALLAZIONE CON STAFFA OPZIONALE 2.2 INSTALLATION WITH OPTIONAL BRACKET (ARK12SA - 12SP) (ARK12SA - 12SP) Step 1 Step 2 Step 3 Step 4 Fig.11 - Installation with optional bracket... -
Page 29: Installazione Con Staffa Di Serie
ARK series 2.3 INSTALLAZIONE CON STAFFA DI SERIE 2.3 INSTALLATION WITH STANDARD BRACKET (ARK 105MP - 106MP - 205MP - 206MP - 208CX) (ARK 105MP - 106MP - 205MP - 206MP - 208CX) Step 1 Step 2 Step 3 Step 4 Fig.12 - Installation with standard bracket... -
Page 30: Connessioni E Controlli
ARK series - 3 - CONNESSIONI E CONTROLLI - 3 - CONNECTIONS AND CONTROLS 3.1 PANNELLO POSTERIORE ARK1200SA 3.1 ARK1200SA REAR PANEL... - Page 31 ARK series LF LEVEL : potenziometro per il controllo del L.F. LEVEL: volume control for internal livello di segnale inviato al subwoofer. HIGH amplifier. HIGH CUT: frequency control to CUT: potenziometro per la regolazione della change the bass crossover frequency from frequenza di taglio del subwoofer, variabile tra 80Hz to 200Hz.
- Page 32 ARK series - 3 - CONNESSIONI E CONTROLLI - 3 - CONNECTIONS AND CONTROLS 3.1 PANNELLO POSTERIORE ARK208SA E ARK12SA 3.1 ARK208SA AND ARK12SA REAR PANEL ARK208SA CH1 700W - MIN. 4 +1-1 High pass out CH2 700W - MIN. 8 +2-2 Sub out 2 0 8 SA ARK208SA, ARK12SA - Rear panel...
-
Page 33: Pannello Posteriore Diffusori Passivi
ARK series 3.2 PANNELLO POSTERIORE DIFFUSORI PASSIVI 3.2 PASSIVE LOUDSPEAKER REAR PANEL (ARK 105MP - 106MP - 205MP - 206MP -208SP - (ARK 105MP - 106MP - 205MP - 206MP -208SP 12SP - 12MP - 208CX) - 12SP - 12MP - 208CX) 206MP INPUT LINK... - Page 34 ARK series 3 - NETWORK IN - Connettore RJ45 per l’ingres- 3 - NETWORK IN - RJ45 connector, for signal in- so del segnale proveniente dal convertitore USB put from the USB - RS485 converter. - RS485. 4 - NETWORK LINK - RJ45 connector, for output 4 - NETWORK LINK - Connettore RJ45 per il col- connection to other amplified sub.
-
Page 35: Esempi Di Configurazione
ARK series - 4 - ESEMPI DI CONFIGURAZIONE - 4 - CONFIGURATION EXAMPLES 4.1 CONFIGURAZIONE 1 4.1 CONFIGURATION 1 2 0 8 SP 2 0 6 MP LINK INPUT SIGNAL SIGNAL 2 0 5 MP 1 0 6 MP ARK208SA 1 0 5 MP CH1 700W - MIN. - Page 36 ARK series 1 2 S P 206MP 205MP LINK INPUT SIGNAL SIGNAL 106MP 105MP NETWORK CLIP LINK LINK OUT LINE INPUT VOLUME ARK12SA Digital amplifier with DSP Out CH1/CH2 Out CH1/CH2 CH1 700W - MIN. 4 +1-1 High pass out LINK 12MP CH2 700W - MIN.
-
Page 37: Configurazione
ARK series 4.2 CONFIGURAZIONE 2 4.2 CONFIGURATION 2 2 0 6 MP 2 0 8 SP 2 0 5 MP LINK INPUT SIGNAL SIGNAL 1 0 6 MP 1 0 5 MP ARK208SA CH1 700W - MIN. 4 +1-1 High pass out OUTPUT SIGNAL CH2 700W - MIN. - Page 38 ARK series 1 2 S P 2 05MP 2 06MP LINK INPUT 1 06MP SIGNAL SIGNAL 1 05MP NETWORK 1 2 MP CLIP LINK LINK OUT LINE INPUT VOLUME ARK12SA Digital amplifier with DSP 208CX Out CH1/CH2 Out CH1/CH2 CH1 700W - MIN. 4 +1-1 High pass out LINK OUTPUT SIGNAL...
-
Page 39: Configurazione
ARK series 4.3 CONFIGURAZIONE 3 4.3 CONFIGURATION 3 IDEA1402 SPK 1 LINK CH1 Sensitivity/Gain INPUT 32dB 2X400W IDEA1402 1.4V 2X700W 1.0V CH1+/- = 1± CH2+/- = 2± RS485 BRG+/- = 1+, 2+ LINK SPK 2 IDEA1402 100V DSP Power Amplifier BRIDGE PARALLEL STEREO... - Page 40 ARK series IDEA1402 SPK 1 LINK CH1 INPUT Sensitivity/Gain 32dB 2X400W IDEA1402 1.4V 2X700W 1.0V CH1+/- = 1± CH2+/- = 2± RS485 BRG+/- = 1+, 2+ LINK SPK 2 IDEA1402 100V DSP Power Amplifier BRIDGE PARALLEL STEREO MODE ~220-240V 50/60Hz LINK CH2 INPUT CH2+/- = 1±...
-
Page 41: Connessione Amplificatori
ARK series - 5 - CONNESSIONI AMPLIFICATORI - 5 - AMPLIFIER CONNECTIONS 5.1 CONNESSIONE HARDWARE (ARK208SA / ARK- 5.1 HARDWARE CONNECTION (ARK208SA / 12SA / IDEA1402 / IDEA 2804) ARK12SA / IDEA1402 / IDEA 2804) 2 0 6 MP 12SP 12SP 2 0 5 MP 1 0 6 MP... - Page 42 ARK series 5.2 CONVERTITORE USB-RS485: 5.2 USB-RS485 CONVERTER BOX: INSTALLAZIONE DRIVER DRIVER INSTALLATION OUTPUT SIGNAL (to ampli er) INPUT SIGNAL (from PC) Fig.21 - Converter box • Fare doppio click per aprire il file d’installazio- • Double-click to open the driver installer file. ne dei driver.
- Page 43 ARK series • Cliccare su “Next” per procedere con l’installa- • Click on “Next” to proceed the installation. zione. • Cliccare su “Finish” per completare l’installa- • Click on “Finish” to complete the installation of zione. the driver. Dopo aver installato i driver, il PC riconoscerà au- After this operation, the PC automatically will tomaticamente il convertitore.
-
Page 44: Installazione Software Di Editing
ARK series 5.3 INSTALLAZIONE DEL SOFTWARE DI EDITING 5.3 EDITING SOFTWARE INSTALLATION • Fare doppio click per aprire il file d’installazio- • Double-click to open the software installer ne del software. file. • Cliccare su “Next” per procedere con l’installa- •... - Page 45 ARK series • Inserire user name e nome dell’organizzazio- • Fill in the user name and company name, then ne, quindi cliccare su “Next” per procedere click on “Next” to proceed the installation. con l’installazione. • Selezionare “Complete”, quindi cliccare su •...
- Page 46 ARK series • Cliccare su “Install” per iniziare l’installazione. • Click on “Install” to start the installation. • Cliccare su “Finish” per completare l’installa- • Click on “Finish” to complete the installation. zione. Dopo aver installato il software di editing sarà After installing the editing software, you can use possibile utilizzare il convertitore.
-
Page 47: Verifica Valore Porta Com
ARK series 5.4 VERIFICA VALORE PORTA COM DEL 5.4 VIEW THE PORT COM VALUE OF THE CONVERTITORE CONVERTER BOX • Collegare il convertitore al PC utilizzando il • Connect the converter box to your PC using cavo USB ed attendere qualche secondo che the USB cable and wait a few seconds so the la periferica venga riconosciuta. - Page 48 ARK series • Nel menu a tendina, cliccare su “Porte (COM e • Click on “Port (COM and LPT)” in the drop- LPT)”; sarà possibile leggere “Prolific USB-to- down menu. You can see “Prolific USB-to-Seri- Serial Comm Port (COMX)”, dove X rappresen- al Comm Port (COMX).
-
Page 49: Panoramica Dell'interfaccia Software
ARK series 5.5 PANORAMICA DELL’INTERFACCIA SOFTWARE Pannello di impostazione parametri (salva/carica) Gra co risposta in frequenza Pannello di controllo equalizzatore Pannello di controllo del Crossover Pannello di controllo del Gain/Delay Impostazioni Limiter Pulsante di connessione Interfaccia di controllo impostazioni del Crossover High pass frequency/type Low pass frequency/type Interfaccia di controllo impostazioni del Gain/Delay... - Page 50 ARK series 5.5 SOFTWARE INTERFACE OVERVIEW Parameter setting panel (save/load) Frequency response graphic Equalizer control panel Crossover control panel Gain/Delay control panel Limit setup Connection button Crossover setting control interface High pass frequency/type Low pass frequency/type Gain/Delay setting control interface Limit range setting Limit level Response time...
-
Page 51: Istruzioni Per L'utilizzo Del Software
ARK series 5.6 ISTRUZIONI PER L’UTILIZZO DEL 5.6 SOFTWARE SYSTEM INSTRUCTIONS SOFTWARE • Collegare tutti i dispositivi come mostrato nel • Connect all devices as shown in the “Hard- paragrafo “Connessione Hardware”, quindi ac- ware connection” paragraph, then turn on the cendere gli amplificatori connessi al converti- amplifiers linked to the USB-RS485 converter tore USB-RS485. - Page 52 ARK series • L’interfaccia del software apparirà come • The software interface will appear as shown mostrato nella figura sottostante. in the figure below.
- Page 53 ARK series • Selezionare l’indirizzo del dispositivo (Device • Select the “Device Address”. Address). Note: The “Device Address” factory setting is Nota: In tutti i dispositivi, per impostazione di “addr = 01” (see the next paragraph to change it). fabbrica, l’indirizzo è impostato su “addr=01” •...
- Page 54 ARK series • Cliccare su “DisConnect” per connettere i diffu- • Click on “DisConnect” to connect the speakers sori. • When the connection is complete the indica- • Una volta avvenuta la connessione si accenderà tor turns green. l’indicatore verde.
-
Page 55: Gestione File Di Setup
ARK series 5.7 GESTIONE FILE DI SETUP 5.7 SETUP FILE MANAGEMENT Create a folder to store the setup files Creare la cartella per la memorizzazione dei • Create a new folder on your PC (we recom- file di setup mended on your desktop). We need it to •... - Page 56 ARK series Salvare un file di setup Save a setup file • Cliccare su “Save” per salvare il setup corrente • Click on “Save” button to save the current set- nella cartella selezionata in precedenza, inse- up in the “Setup ARK Series” folder, insert the rire un nome, quindi cliccare su ENTER.
- Page 57 ARK series Caricare un file di setup sull’amplificatore Load a setup file on the amplifier • Cliccare su “Browse” e selezionare la cartella • Click on the “Browse” button and select the in cui sono memorizzati i file di setup (Setup storing folder (Setup ARK Series), then click ARK Series), quindi premere su OK.
- Page 58 ARK series • 1 ARK12SA + 2 DIFFUSORI PASSIVI (ARK 105MP - • 1 ARK12SA + 2 PASSIVE SPEAKERS (ARK 105MP - 106MP - 205MP - 206MP). 106MP - 205MP - 206MP). • 1 ARK12SA + 1 DIFFUSORE PASSIVO ARK12MP. •...
-
Page 59: Modificare L'indirizzo Dell'amplificatore
ARK series 5.8 MODIFICARE L’INDIRIZZO DELL’AMPLIFI- 5.8 EDIT THE AMPLIFIER ADDRESS CATORE • Collegare l’amplificatore come mostrato nel • Connect the amplifier as shown in the “Hard- paragrafo “Connessione Hardware”, quindi ac- ware connection” paragraph, then turn on it cenderlo una volta connesso al convertitore linked to the USB-RS485 converter box. - Page 60 ARK series Modificare l’indirizzo ID dell’amplificatore Edit the amplifier ID Address • Cliccare sul menu a tendina e selezionare • Click on the dropdown menu and select the il nuovo indirizzo che si vuole assegnare new ID address for the amplifier all’amplificatore.
-
Page 61: Specifiche Tecniche
ARK series SPECIFICHE TECNICHE - TECHNICAL SPECIFICATION ARK105MP ARK106MP ARK205MP ARK206MP System Passive - 2 way Passive - 2 way Passive - 2 way Passive - 2 way type AES / Program Power 120 / 240 W 120 / 240 W 240 / 480 W 240 / 480 W Recommended amp... - Page 62 ARK series SPECIFICHE TECNICHE - TECHNICAL SPECIFICATION ARK208SA ARK208SP ARK1200SA System Active Subwoofer with Active - bass reflex Passive - bass reflex type stereo out LF 600W Built-in amp 700+700 W / 4 Ohm MF+HF 2x300W AES / Program Power 300 / 600 W Recommended amp up to 600 W / 8 Ohm...
- Page 63 ARK series SPECIFICHE TECNICHE - TECHNICAL SPECIFICATION ARK12SA ARK12SP ARK12MP ARK208CX System Active - bass reflex Passive - bass reflex Passive - 2 way Passive - 2.5 way type LF/MF-HF:700+700W Built-in amp /4Ohm AES / Program Power 400/800 W 300/600 W 360/720 W Recommended amp Up to 800 W...
-
Page 64: Cavi Di Collegamento
ARK series - 6 - CAVI DI COLLEGAMENTO - 6 - CONNECTION CABLES 6.1 COLLEGAMENTI DI INGRESSO 6.1 INPUT CONNECTION Per il collegamento tra uscite del mixer ed in- To connect the mixer outputs to the amplifiers gressi degli amplificatori utilizzate di preferenza inputs, make sure to always use balanced signal “cavi segnale bilanciati”. -
Page 65: Connectors
ARK series - 7 - CONNETTORI - 7 - CONNECTORS 7.1 CONNETTORI DI SEGNALE AUDIO 7.1 AUDIO SIGNAL CONNECTORS cold ground INPUT (ingresso) INPUT XLR bilanciato maschio Balanced male XLR ground cold OUTPUT (uscita) OUTPUT XLR bilanciato femmina Balanced female XLR Fig.23... - Page 66 ARK series - 8 - RISOLUZIONE DEI PROBLEMI - 8 - TROUBLESHOOTING Assenza di alimentazione No Power • Accertarsi che ci sia effettivamente tensione • Make sure the mains AC outlet is live (check sulla presa di corrente (controllare con un te- with a tester or a lamp).
- Page 68 MUSIC & LIGHTS S.r.l. - Phone +39 0771 72190 - www.musiclights.it...
Need help?
Do you have a question about the ARK208SA-SP and is the answer not in the manual?
Questions and answers