Table of Contents
Advertisement
Quick Links
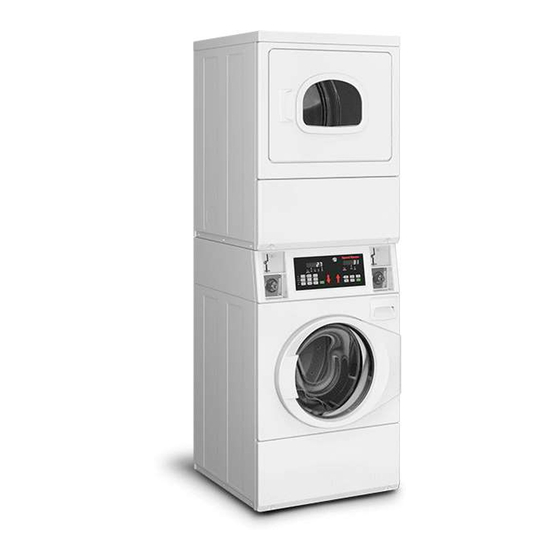
Stacked Washer/Dryers
Electric and Gas Models
Original Instructions
Keep These Instructions for Future Reference.
CAUTION: Read the instructions before using the machine.
(If this machine changes ownership, this manual must accompany machine.)
SWD457C_SVG
Part No. 807872EN
www.alliancelaundry.com
March 2021
Advertisement
Table of Contents

Subscribe to Our Youtube Channel
Related Manuals for Alliance Laundry Systems SV6000WG


Summary of Contents for Alliance Laundry Systems SV6000WG
- Page 1 Stacked Washer/Dryers Electric and Gas Models Original Instructions Keep These Instructions for Future Reference. CAUTION: Read the instructions before using the machine. (If this machine changes ownership, this manual must accompany machine.) SWD457C_SVG Part No. 807872EN www.alliancelaundry.com March 2021...
- Page 3 Installation and service must be performed by a appliance. qualified installer, service agency or the gas sup- plier. W053 W052 This product uses FreeRTOS V7.2.0 (www.freertos.org). © Copyright, Alliance Laundry Systems LLC - Part No. 807872EN DO NOT COPY or TRANSMIT...
- Page 4 Users of this product are cautioned not to make modifications or your body. changes that are not approved by Alliance Laundry Systems, Limited Channels Fixed For Use In USA: IEEE 802.11b or LLC. Doing so may void the compliance of this product with ap- 802.11g or 802.11n(HT20) operation of this product in the U.S.
- Page 5 Alliance Laundry Systems products comply with the requirement The information in this section applies to products bearing the of Article 12 as it can be operated in at least one Member State as Taiwan National Communications Commission mark: examined and the product is compliant with Article 11 as it has This telecom equipment has complied with NCC regulations.
-
Page 6: Safety Information
This is a safety rule for all appliances. © Copyright, Alliance Laundry Systems LLC - Part No. 807872EN DO NOT COPY or TRANSMIT... -
Page 7: Important Safety Instructions
This appliance is not intended for use by persons (including children) with reduced physical, sensory or mental © Copyright, Alliance Laundry Systems LLC - Part No. 807872EN DO NOT COPY or TRANSMIT... - Page 8 • Before the dryer is removed from service or discarded, re- move the door to the drying compartment. © Copyright, Alliance Laundry Systems LLC - Part No. 807872EN DO NOT COPY or TRANSMIT...
-
Page 9: Table Of Contents
Load Laundry................... 35 © Copyright 2021, Alliance Laundry Systems LLC All rights reserved. No part of the contents of this book may be reproduced or transmitted in any form or by any means without the expressed written consent of the publisher. - Page 10 Care of Your Dryer..................42 Reinstallation of Shipping Materials............... 43 Motor Overload Protector................43 For Energy Conservation................43 Troubleshooting..................44 Contact Information................48 Installer Checklist.................49 © Copyright, Alliance Laundry Systems LLC - Part No. 807872EN DO NOT COPY or TRANSMIT...
-
Page 11: Dimensions
NOTE: Exhaust openings are 4 inch [102 mm] metal * With leveling legs turned into base. ducting. ** For ADA compliance turn legs out from base 0.5 inches. © Copyright, Alliance Laundry Systems LLC - Part No. 807872EN DO NOT COPY or TRANSMIT... - Page 12 ** For ADA compliance turn legs out from base 0.5 inches. NOTE: Gas models cannot be vented out left side of cabinet because of burner housing. © Copyright, Alliance Laundry Systems LLC - Part No. 807872EN DO NOT COPY or TRANSMIT...
- Page 13 For maximum drying per- formance, we recommend that more clearance be al- lowed around the dryer than the clearances that are listed throughout this manual. © Copyright, Alliance Laundry Systems LLC - Part No. 807872EN DO NOT COPY or TRANSMIT...
-
Page 14: Installation
NOTE: This appliance is suitable for use in countries stall the washer on carpeting, soft tile or other weakly having a warm, damp climate. supported structures. © Copyright, Alliance Laundry Systems LLC - Part No. 807872EN DO NOT COPY or TRANSMIT... -
Page 15: Connect Fill Hoses
This will release any accumulat- ed hydrogen gas. The gas is flammable. Do not smoke or use an open flame during this time. W029 © Copyright, Alliance Laundry Systems LLC - Part No. 807872EN DO NOT COPY or TRANSMIT... -
Page 16: Water Supply Requirements
5. Turn water on and check for leaks. cets. Refer to Figure 7 . © Copyright, Alliance Laundry Systems LLC - Part No. 807872EN DO NOT COPY or TRANSMIT... -
Page 17: Drain Hose Models - Connect Drain Hose To Drain Receptacle
Refer to Figure 8 . This will prevent the drain hose from dislodging from drain receptacle during use. © Copyright, Alliance Laundry Systems LLC - Part No. 807872EN DO NOT COPY or TRANSMIT... -
Page 18: Gas Dryers - Connect Gas Supply Pipe
Union at gas supply connection (listed to ANSI Z21.24 and CSA inches Part 6.10). feet [m] [mm] Number 2,000 [610] 0.0960 D503776 [2.44] Table 1 continues... © Copyright, Alliance Laundry Systems LLC - Part No. 807872EN DO NOT COPY or TRANSMIT... -
Page 19: Electric Dryer Only - Connect Electrical Plug
© Copyright, Alliance Laundry Systems LLC - Part No. 807872EN DO NOT COPY or TRANSMIT... - Page 20 240 Volts (minimum) 30 Amperes and labeled as suitable for use in a clothes dryer. © Copyright, Alliance Laundry Systems LLC - Part No. 807872EN DO NOT COPY or TRANSMIT...
-
Page 21: Connecting Power Cord With Three-Wire Plug
NOTE: Use COPPER WIRE only. Shorter than 15 ft. (4.5 m) – use 10 AWG Longer than 15 ft. (4.5 m) – use 8 AWG © Copyright, Alliance Laundry Systems LLC - Part No. 807872EN DO NOT COPY or TRANSMIT... - Page 22 15. Direct Connection 16. Power Cord Connection Figure 13 1. Disconnect power to dryer. 2. Remove access cover from rear of dryer. D695I_SVG Figure 14 © Copyright, Alliance Laundry Systems LLC - Part No. 807872EN DO NOT COPY or TRANSMIT...
-
Page 23: Connecting Power Cord With Four-Wire Plug
Connecting Power Cord with Four-Wire Plug NOTE: Four-wire cord is required for new branch-cir- cuit installations, mobile homes or where codes do not permit grounding through neutral. © Copyright, Alliance Laundry Systems LLC - Part No. 807872EN DO NOT COPY or TRANSMIT... - Page 24 10. Reinstall access cover and screw. © Copyright, Alliance Laundry Systems LLC - Part No. 807872EN DO NOT COPY or TRANSMIT...
-
Page 25: Connect Dryer Exhaust System
• Dryer exhaust duct MUST NOT terminate under mobile home. • Exhaust duct must not be connected to any other duct, vent, or chimney. © Copyright, Alliance Laundry Systems LLC - Part No. 807872EN DO NOT COPY or TRANSMIT... -
Page 26: Exhaust Direction
55 feet [16.8 m] 47 feet [14.3 m] 47 feet [14.3 m] 41 feet [12.5 m] 36 feet [11.0 m] 30 feet [9.1 m] Table 4 continues... © Copyright, Alliance Laundry Systems LLC - Part No. 807872EN DO NOT COPY or TRANSMIT... -
Page 27: Multi-Dryer Installation Exhaust Requirements
2. Clean Out Cover (Must be provided). Inspect monthly. 3. Weather Hood or Sweep Elbow (No cap or screen) 4. 24 in. [610 mm] Minimum Clearance to Roof/Ground Figure 23 © Copyright, Alliance Laundry Systems LLC - Part No. 807872EN DO NOT COPY or TRANSMIT... - Page 28 12 inches [305 mm] 13 inches [326 mm] 14 inches [356 mm] 15 inches [381 mm] 15 inches [381 mm] 16 inches [406 mm] Table 5 © Copyright, Alliance Laundry Systems LLC - Part No. 807872EN DO NOT COPY or TRANSMIT...
-
Page 29: Position And Level The Unit
2 in. [51 mm] Clearance to Combustible Ma- terials * Rear clearance is minimum. 6 inches [152 mm] are recommended when venting through rear of unit. © Copyright, Alliance Laundry Systems LLC - Part No. 807872EN DO NOT COPY or TRANSMIT... -
Page 30: Wipe Out Inside Of Washer And Dryer Drums
Connect the dryer to an electrical power source. Refer to Connect 4. Locknut Electrical Plug section for information on connecting power cord. 5. Unit Base Figure 26 © Copyright, Alliance Laundry Systems LLC - Part No. 807872EN DO NOT COPY or TRANSMIT... -
Page 31: Gas Dryer
120 Volts AC (alternating current) 15 Amps. Re- ceptacle rated 110/120 Volts AC (alternating current) 15 Amps. fer to Figure 30 to determine correct polarity of the wall recepta- cle. © Copyright, Alliance Laundry Systems LLC - Part No. 807872EN DO NOT COPY or TRANSMIT... -
Page 32: Washer
3-prong earth/ground plug. Refer to serial plate for specific electrical requirements. NOTE: The wiring diagram is located behind the con- trol panel, inside the control cabinet. © Copyright, Alliance Laundry Systems LLC - Part No. 807872EN DO NOT COPY or TRANSMIT... -
Page 33: Check Installation
Level the Washer to readjust leveling legs. ground conductor and a three-prong earth/ground plug. The plug must be plugged into an appropriate outlet that is properly instal- © Copyright, Alliance Laundry Systems LLC - Part No. 807872EN DO NOT COPY or TRANSMIT... -
Page 34: Check Heat Source
W158 6. After the dryer has operated for approximately three minutes, exhaust air or exhaust pipe should be warm. © Copyright, Alliance Laundry Systems LLC - Part No. 807872EN DO NOT COPY or TRANSMIT... -
Page 35: Operation
NOTE: Different fabrics will have different densities and loads must be adjusted accordingly to meet ma- chine loading specifications shown. © Copyright, Alliance Laundry Systems LLC - Part No. 807872EN DO NOT COPY or TRANSMIT... -
Page 36: Determine Proper Controls
2. Light indicates selection. 2. LED light indicates selection. NOTE: Changes can be made to Fabric Selector setting up until the first fill is complete. © Copyright, Alliance Laundry Systems LLC - Part No. 807872EN DO NOT COPY or TRANSMIT... -
Page 37: Insert Coins Or Card
RINSE RINSE is lit during the RINSE portions of the cycle. SPIN SPIN is lit during the final spin portion of the cycle. Table continues... © Copyright, Alliance Laundry Systems LLC - Part No. 807872EN DO NOT COPY or TRANSMIT... -
Page 38: Operation Instructions For Dryers
Clean Lint Filter Figure 45 Clean lint filter before each use. Determine Proper Controls The direction of the arrow indicates which control is for which unit. © Copyright, Alliance Laundry Systems LLC - Part No. 807872EN DO NOT COPY or TRANSMIT... -
Page 39: Set Fabric Selector
(cool down cycle) to ensure that items in dryer W387I_SVG are left at a temperature that ensures that the items will not be damaged. Figure 48 To Insert Card Insert card into opening. © Copyright, Alliance Laundry Systems LLC - Part No. 807872EN DO NOT COPY or TRANSMIT... -
Page 40: Indicator Lights
COOL DOWN is lit whenever the COOL DOWN portion of a heated cycle is active. It is also lit when the NO HEAT cycle is in operation. © Copyright, Alliance Laundry Systems LLC - Part No. 807872EN DO NOT COPY or TRANSMIT... -
Page 41: Maintenance
• The outside perimeter of the door glass where the seal con- tacts the glass • The front surface of the door seal lip © Copyright, Alliance Laundry Systems LLC - Part No. 807872EN DO NOT COPY or TRANSMIT... -
Page 42: Care Of Your Dryer
Use only a damp or sudsy cloth for cleaning the control panel. Some spray pretreat products may harm the finish on the control panel. DO NOT use products that contain alcohol on the control panel. © Copyright, Alliance Laundry Systems LLC - Part No. 807872EN DO NOT COPY or TRANSMIT... -
Page 43: Reinstallation Of Shipping Materials
Should you plan to dry several loads, do them one after anoth- er, then you do not have to reheat the dryer unit’s interior parts each time. FLW2296N_SVG 1. Shipping Brace Figure 52 © Copyright, Alliance Laundry Systems LLC - Part No. 807872EN DO NOT COPY or TRANSMIT... -
Page 44: Troubleshooting
Refer to the Installation instructions to make sure that the drain hose has been proper- ly installed. • Foreign object trap in pump may be clogged. Clean the trap. Refer to Maintenance section. Table continues... © Copyright, Alliance Laundry Systems LLC - Part No. 807872EN DO NOT COPY or TRANSMIT... - Page 45 “H” on the valve bracket) and cold faucet is connected to cold mixing valve (indicated with “C” on the valve bracket). • Make sure laundry room water heater is adjusted properly. © Copyright, Alliance Laundry Systems LLC - Part No. 807872EN DO NOT COPY or TRANSMIT...
- Page 46 Clothes are too wrinkled • Check heat setting. Overdrying can cause wrinkling. • Check load size. Large loads may not tumble properly and may cause wrinkling. Table continues... © Copyright, Alliance Laundry Systems LLC - Part No. 807872EN DO NOT COPY or TRANSMIT...
- Page 47 • Ventilate room before drying clothes. © Copyright, Alliance Laundry Systems LLC - Part No. 807872EN DO NOT COPY or TRANSMIT...
-
Page 48: Contact Information
+1 (920) 748-3950 for the name Table continues... and address of the nearest authorized parts distributor. DRY2527N_SVG 1. Serial Plate Figure 54 © Copyright, Alliance Laundry Systems LLC - Part No. 807872EN DO NOT COPY or TRANSMIT... -
Page 49: Installer Checklist
Start and Run Dryer in Heat Setting to Verify Dryer is nect Electrical Cord Heating. CHECK CHECK D679I_SVG1 Refer to the manual for more detailed information © Copyright, Alliance Laundry Systems LLC - Part No. 807872EN DO NOT COPY or TRANSMIT...
Need help?
Do you have a question about the SV6000WG and is the answer not in the manual?
Questions and answers