
Related Manuals for Alliance Laundry Systems ATGE9AWP303AW01


Summary of Contents for Alliance Laundry Systems ATGE9AWP303AW01
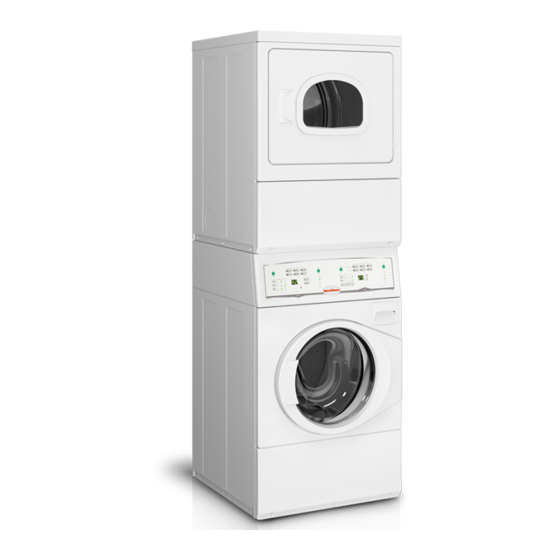
- Page 1 Homestyle Stacked Washer/ Dryers Refer to Page 6 for Model Numbers SWD456C SWD456C...
-
Page 2: Table Of Contents
Table of Section 1 – Safety Information ...............3 Locating an Authorized Servicer............4 Contents Section 2 – Introduction ................5 Customer Service...................5 Nameplate Location................5 Model Identification ................6 Theory of Operation ................7 Section 3 – General Troubleshooting.............8 1. Keypad Combinations..............8 2. Factory Test Procedure ...............10 3. - Page 3 Section 5 – Washer Control Troubleshooting ........44 25. Error Codes .................44 26. No keypad Function ..............51 27. No Visible Display on Control............52 28. Washer Will Not Start – “do” Displayed ........54 29. Washer Will Not Start – “Er”, “dl” on Display ......56 30.
-
Page 4: Section 1 - Safety Information
Section 1 Safety Information Throughout this manual and on machine decals, you will find precautionary statements (“CAUTION,” “WARNING” and “DANGER”) followed by specific instructions. These precautions are intended for the personal safety of the operator, user, servicer, and those maintaining the machine. DANGER Danger indicates an imminently hazardous situation that, if not avoided, will cause severe personal injury or death. -
Page 5: Locating An Authorized Servicer
Locating an Authorized Servicer Alliance Laundry Systems is not responsible for personal injury or property damage resulting from improper service. Review all service information before beginning repairs. Warranty service must be performed by an authorized technician, using authorized factory parts. If service is required after the warranty expires, Alliance Laundry Systems also recommends contacting an authorized technician and using authorized factory parts. -
Page 6: Section 2 - Introduction
Section 2 Introduction Nameplate Location When calling or writing about your product, be sure to mention model and serial numbers. Model and serial numbers are located on nameplate(s) as shown. Nameplate Nameplate SWD1716S SWD1716S 806221... -
Page 7: Model Identification
Introduction Model Identification Information in this manual is applicable to these models. ATEE9AWP433AW01 LTEE5ASP543NW23 ATGE9AWP303AW01 LTGE5ASP113JW01 BTEE6ASP173TW01 LTGE5ASP113TW01 BTEE6ASP283CW01 LTGE5ASP303AW01 BTGE6ASP093CW01 LTGE5ASP303AW12 BTGE6ASP113TW01 LTLE5ASP543NW23 FTEE5ASP303NW10 UTEE5ASP173TW01 FTEE5ASP303ZW01 UTEE5ASP173TW08 FTGE5ASP303NW10 UTEE5ASP283CW01 LTEE5ASP153TW01 UTGE5ASP113TW01 LTEE5ASP173TW01 UTGE5ASP113TW08 LTEE5ASP293CW01 YTEE5ASP173TW01 YTEE5ASP283CW01 LTEE5ASP303ZW01 YTGE5ASP093CW01 LTEE5ASP333NW01... -
Page 8: Theory Of Operation
Introduction Theory of Operation After all the rinse cycles have been completed, the washer goes into a final spin cycle to extract as much General (Dryer) water as possible from the clothing to prepare them for the dryer. The spin speeds and duration of this final The dryer uses heated air to dry loads of laundry. -
Page 9: Section 3 - General Troubleshooting
Section 3 General Troubleshooting WARNING To reduce the risk of electric shock, fire, explosion, serious injury or death: • Disconnect electric power to the washer before servicing. • Never start the washer with any guards/panels removed. • Whenever ground wires are removed during servicing, these ground wires must be reconnected to ensure that the washer is properly grounded. - Page 10 General Troubleshooting WARNING To reduce the risk of electric shock, fire, explosion, serious injury or death: • Disconnect electric power to the washer before servicing. • Never start the washer with any guards/panels removed. • Whenever ground wires are removed during servicing, these ground wires must be reconnected to ensure that the washer is properly grounded.
-
Page 11: Factory Test Procedure
General Troubleshooting WARNING To reduce the risk of electric shock, fire, explosion, serious injury or death: • Disconnect electric power to the washer before servicing. • Never start the washer with any guards/panels removed. • Whenever ground wires are removed during servicing, these ground wires must be reconnected to ensure that the washer is properly grounded. - Page 12 General Troubleshooting WARNING To reduce the risk of electric shock, fire, explosion, serious injury or death: • Disconnect electric power to the washer before servicing. • Never start the washer with any guards/panels removed. • Whenever ground wires are removed during servicing, these ground wires must be reconnected to ensure that the washer is properly grounded.
- Page 13 General Troubleshooting WARNING To reduce the risk of electric shock, fire, explosion, serious injury or death: • Disconnect electric power to the washer before servicing. • Never start the washer with any guards/panels removed. • Whenever ground wires are removed during servicing, these ground wires must be reconnected to ensure that the washer is properly grounded.
- Page 14 General Troubleshooting WARNING To reduce the risk of electric shock, fire, explosion, serious injury or death: • Disconnect electric power to the washer before servicing. • Never start the washer with any guards/panels removed. • Whenever ground wires are removed during servicing, these ground wires must be reconnected to ensure that the washer is properly grounded.
- Page 15 General Troubleshooting WARNING To reduce the risk of electric shock, fire, explosion, serious injury or death: • Disconnect electric power to the washer before servicing. • Never start the washer with any guards/panels removed. • Whenever ground wires are removed during servicing, these ground wires must be reconnected to ensure that the washer is properly grounded.
- Page 16 General Troubleshooting WARNING To reduce the risk of electric shock, fire, explosion, serious injury or death: • Disconnect electric power to the washer before servicing. • Never start the washer with any guards/panels removed. • Whenever ground wires are removed during servicing, these ground wires must be reconnected to ensure that the washer is properly grounded.
-
Page 17: Motor Circuit
General Troubleshooting WARNING To reduce the risk of electric shock, fire, explosion, serious injury or death: • Disconnect electric power to the washer before servicing. • Never start the washer with any guards/panels removed. • Whenever ground wires are removed during servicing, these ground wires must be reconnected to ensure that the washer is properly grounded. -
Page 18: Dipswitch Configuration
General Troubleshooting WARNING To reduce the risk of electric shock, fire, explosion, serious injury or death: • Disconnect electric power to the washer before servicing. • Never start the washer with any guards/panels removed. • Whenever ground wires are removed during servicing, these ground wires must be reconnected to ensure that the washer is properly grounded. -
Page 19: Troubleshooting Knocking Noise
General Troubleshooting WARNING To reduce the risk of electric shock, fire, explosion, serious injury or death: • Disconnect electric power to the washer before servicing. • Never start the washer with any guards/panels removed. • Whenever ground wires are removed during servicing, these ground wires must be reconnected to ensure that the washer is properly grounded. - Page 20 General Troubleshooting WARNING To reduce the risk of electric shock, fire, explosion, serious injury or death: • Disconnect electric power to the washer before servicing. • Never start the washer with any guards/panels removed. • Whenever ground wires are removed during servicing, these ground wires must be reconnected to ensure that the washer is properly grounded.
-
Page 21: Excessive Vibration And/Or Noise During Spin
General Troubleshooting WARNING To reduce the risk of electric shock, fire, explosion, serious injury or death: • Disconnect electric power to the washer before servicing. • Never start the washer with any guards/panels removed. • Whenever ground wires are removed during servicing, these ground wires must be reconnected to ensure that the washer is properly grounded. -
Page 22: Excessive Cycle Time
General Troubleshooting WARNING To reduce the risk of electric shock, fire, explosion, serious injury or death: • Disconnect electric power to the washer before servicing. • Never start the washer with any guards/panels removed. • Whenever ground wires are removed during servicing, these ground wires must be reconnected to ensure that the washer is properly grounded. -
Page 23: Section 4 - Dryer Control Troubleshooting
Section 4 Dryer Control Troubleshooting WARNING To reduce the risk of electric shock, fire, explosion, serious injury or death: • Disconnect all electric power to the machine and accessories before servicing. • Close gas shut-off valve to gas dryer before servicing. •... - Page 24 Dryer Control Troubleshooting (continued) Display Description Cause/Corrective Action Brownout/voltage configuration error: Check the harness connections between the user Unexpected supply voltage. control and the output board. If the user control was replaced, set dipswitch #1 to the same setting as the previous control.
-
Page 25: Dryer Motor Does Not Run
Dryer Control Troubleshooting 8. Dryer Motor Does Not Run Dryer motor does not run. Reset timer/electronic timer/electronic Is power cord control improperly control or try Plug in cord. plugged in? set? another cycle. Test timer/electronic timer/electronic control control and replace inoperative? if inoperative. - Page 26 Dryer Control Troubleshooting 8. Dryer Motor Does Not Run (continued) Continued from previous page. Wait two or three minutes for Has motor overload protector overload to reset. If protector protector cycles Is wiring Refer to wiring cycled? repeatedly, refer broken, loose diagram.
-
Page 27: Dryer Stops In Cycle; Quits After The First Few Loads; Has A Burning Smell; Cycles On Motor Thermal Protector
Dryer Control Troubleshooting 9. Dryer Stops in Cycle; Quits After the First Few Loads; Has a Burning Smell; Cycles On Motor Thermal Protector Dryer stops in cycle, quits after first few loads, has burning smell or cycles on motor thermal protector. Refer to nameplate in Is there door well for correct... -
Page 28: Dryer Motor Runs But Cylinder Does Not Turn
Dryer Control Troubleshooting 10. Dryer Motor Runs But Cylinder Does Not Turn Dryer motor runs but cylinder does not turn. Reinstall belt with ribbed Is belt "inside Is motor drive surface Tighten pulley. out" ? pulley loose? against cylinder. Add grease Is belt between idler installed on... -
Page 29: Dryer Motor Does Not Stop
Dryer Control Troubleshooting 11. Dryer Motor Does Not Stop Dryer motor does not stop. Is wiring to Refer to wiring motor switch diagram. incorrect? Is motor Remove dust or lint centrifugal and spray with a switch sticky cleaner and or plugged lubricant. -
Page 30: Dryer Runs Only When Door Is Open
Dryer Control Troubleshooting 12. Dryer Runs Only When Door is Open Dryer runs only when door is open. Rewire door Is door switch switch. Refer to miswired? wiring diagram. Replace door switch. SWD1693S 806221... -
Page 31: Dryer Heating Assembly Does Not Heat Or Burner Does Not Ignite
Dryer Control Troubleshooting 13. Dryer Heating Assembly Does Not Heat or Burner Does Not Ignite Dryer heating assembly does not heat or burner does not ignite. timer/ Refer to electronic control Reset improperly set Installation timer/electronic Is exhaust (set in a cool-down Instructions control. - Page 32 Dryer Control Troubleshooting 13. Dryer Heating Assembly Does Not Heat or Burner Does Not Ignite (continued) Continued from previous page. Check harness connections Gas Models: Is to gas valve harness properly Check gas coils, sensor connected to gas shut-off valve and main controls? in dryer and...
-
Page 33: Igniter Does Not Glow (Gas Supply Sufficient) - Gas Dryer Models
Dryer Control Troubleshooting 14. Igniter Does Not Glow (Gas Supply Sufficient) – Gas Dryer Models Gas dryer models: Igniter does not glow (gas supply sufficient). Check Is there power to thermostats, power leads on motor switch valve (pink and and wiring. blue wires)? Has flame sensor failed... -
Page 34: Burner Ignites And Goes Out Repeatedly - Gas Dryer Models
Dryer Control Troubleshooting 15. Burner Ignites and Goes Out Repeatedly – Gas Dryer Models Gas dryer models: Burner ignites and goes out repeatedly. Refer to Installation Is exhaust Instructions Replace igniter system Is igniter (supplied with and bracket. improper or cracked? unit) for inadequate? -
Page 35: Igniter Glows But Burner Does Not Ignite - Gas Dryer Models
Dryer Control Troubleshooting 16. Igniter Glows But Burner Does Not Ignite – Gas Dryer Models Gas dryer models: Igniter glows but burner does not ignite. Loosen screw Is sensor and properly Did sensor improperly Replace sensor. position the fail in closed installed on sensor on the position? -
Page 36: Dryer Heater Assembly Or Burner Shuts Off Prematurely
Dryer Control Troubleshooting 17. Dryer Heater Assembly or Burner Shuts Off Prematurely Dryer heater assembly or burner Momentarily shuts off prematurely. connect a jumper wire across Refer to thermostat Cycling off on Installation terminals. If Is exhaust limit Instructions heater element system thermostat? (supplied with... -
Page 37: Dryer Heater Assembly Or Burner Repeatedly Cycles Off On Limit Thermostat
Dryer Control Troubleshooting 18. Dryer Heater Assembly or Burner Repeatedly Cycles Off On Limit Thermostat Dryer heater assembly or burner repeatedly cycles off on limit thermostat. Is there lint Refer to Disassemble or other Installation Is external exhaust and clean obstruction in system longer or Instructions... - Page 38 Dryer Control Troubleshooting 18. Dryer Heater Assembly or Burner Repeatedly Cycles Off On Limit Thermostat (continued) Continued from previous page. Is there an air leak Is there an air Check and around loading door? replace seal if leak at front (Door not sealing due Replace seal necessary.
-
Page 39: Dryer Heater Assembly Or Burner Does Not Shut Off
Dryer Control Troubleshooting 19. Dryer Heater Assembly or Burner Does Not Shut Off Dryer heater assembly or burner does not shut off. Is motor switch Test switch and inoperative? replace if (Must be in a inoperative. heat setting.) Refer to Dryer Motor does Motor Does Not not stop? -
Page 40: Clothes Do Not Dry In Dryer
Dryer Control Troubleshooting 20. Clothes Do Not Dry in Dryer Clothes do not dry in dryer. Test and Timer models: replace switch Is heat selector switch or timer or timer if inoperative? inoperative. Refer to Dryer Heating Does heater Assembly Does assembly not Not Heat or heat or... -
Page 41: Timer Does Not Advance In Automatic Cycle
Dryer Control Troubleshooting 21. Timer Does Not Advance in Automatic Cycle Timer models: Timer does not advance in automatic cycle. Timer will not Is large advance until load Electronic control models: the load is drying? Control does not advance in almost dry. -
Page 42: Clothes Are Too Hot When Removed From Dryer
Dryer Control Troubleshooting 22. Clothes Are Too Hot When Removed From Dryer Clothes are too hot when removed from dryer. Refer to Installation Is exhaust Are seals Instructions system inoperative (supplied with unit) improper or (air leaks)? for exhaust inadequate? requirements. -
Page 43: Excessive Chattering Or Vibrating Noise In Dryer
Dryer Control Troubleshooting 23. Excessive Chattering or Vibrating Noise in Dryer Excessive chattering or vibrating noise in dryer. Remove lower access panel. Set dryer to normal cycle and allow it to heat to operating temperature. Is idler spring If the belt vibrates as it rotates inoperative? around the cylinder, the idler arm is making the noise. -
Page 44: Excessive Humming Or Whistling Noise In Dryer
Dryer Control Troubleshooting 24. Excessive Humming or Whistling Noise in Dryer Excessive humming or whistling noise in dryer. If the abnormal operating noise is blower loudest at the vent exit, the housing problem is originating from the inoperative? blower housing. Replace the current housing and cover. -
Page 45: Section 5 - Washer Control Troubleshooting
Left most Control is in Bootloader Mode. Control is waiting for firmware update. (Firmware decimal updates only done by Alliance Laundry Systems point Lit Service Technicians.) If firmware is not being updated, cycle power to machine. If error still occurs, replace control. - Page 46 Washer Control Troubleshooting Table 8 (continued) Display Description Cause/Corrective Action , Door Unlock Non-Fatal Error If the door fails to unlock 20 seconds after the drum has stopped spinning with a solenoid type door lock and all other outputs have been turned off, the control will display error code.
- Page 47 Washer Control Troubleshooting Table 8 (continued) Display Description Cause/Corrective Action , Drive Board Communication Error Communication failure. Power down, power up and try again. If error persists, check connection between front end control and drive board, or try replacing the front end control or the drive board.
- Page 48 Washer Control Troubleshooting Table 8 (continued) Display Description Cause/Corrective Action , Shorted Temperature/Thermistor Sensor The drive board will flag a Shorted Thermistor any time Error (machines equipped with heater) it senses a temperature greater than 100°C (212°F). The heater output is turned off for the remainder of the cycle.
- Page 49 Washer Control Troubleshooting Table 8 (continued) Display Description Cause/Corrective Action , Overflow Error This error is triggered when an unsafe high water level is detected in the machine and water is unable to drain. The water valve may be stuck open, pump may be stuck, or the drain may be clogged.
- Page 50 Washer Control Troubleshooting Table 8 (continued) Display Description Cause/Corrective Action Drive Board Errors , Voltage Select Error Wrong Input Voltage seen at drive board 120V vs 240V. Dip switch 1 on FEC set wrong, or possibly water on drive board (let drive dry out and determine cause of water).
- Page 51 Washer Control Troubleshooting Table 8 (continued) Display Description Cause/Corrective Action , Overcurrent Shunt Detection Circuit Fail Hardware failure. Unpower to clear error. Replace drive Error board if error persists. , Door Lock Pin HW On/Off Fail Error Hardware failure. Unpower to clear error. Replace drive board if error persists.
-
Page 52: No Keypad Function
Washer Control Troubleshooting 26. No keypad Function No Keypad Function Is the display Refer to “No Display” flowchart. keypad ribbon cable from Plug the keypad ribbon cable from keypad to front end control keypad into the front end control. plugged in? Replace front end control. -
Page 53: No Visible Display On Control
Washer Control Troubleshooting 27. No Visible Display on Control The electronic control has no LED functioning on the control board. Plug unit into an Is the power cord outlet and check plugged in? for proper supply voltage. All display LEDs are turned off in Is control Low Power Mode. - Page 54 Washer Control Troubleshooting No Visible Display on Control FLW1817S 806221...
-
Page 55: Washer Will Not Start - "Do" Displayed
Washer Control Troubleshooting 28. Washer Will Not Start – “do” Displayed Washer will not start. Vend satisfied. Is door Close door. open? Is there Check voltage to 12 Volts DC at drive board or "H3-2" and "H2-5" on the replace board. drive board? Is there Is wiring... - Page 56 Washer Control Troubleshooting Washer Will Not Start – “do” Displayed FLW1817S 806221...
-
Page 57: Washer Will Not Start - "Er", "Dl" On Display
Washer Control Troubleshooting 29. Washer Will Not Start – “Er”, “dl” on Display Washer will not start. Vend satisfied. Is 4 - pin RAST header Plug header plugged in backwards in correctly. at the door lock? Is there voltage* at Replace the terminal "H5-3"... - Page 58 Washer Control Troubleshooting Washer Will Not Start – “Er”, “dl” on Display FLW1817S 806221...
-
Page 59: Washer Will Not Fill (Machine Empty, No "Er", "Ps" On Display)
Washer Control Troubleshooting 30. Washer Will Not Fill (Machine Empty, No “Er”, “PS” on Display) Refer to Is the door Washer Will Not Start - locked? “Er”, “dl” on display section Is there Check that water is water pressure on and fill hoses and to the machine? screens are not clogged. - Page 60 Washer Control Troubleshooting Washer Will Not Fill (Machine empty, No “Er”, “PS” on Display) FLW1817S 806221...
-
Page 61: Washer Overflows
Washer Control Troubleshooting 31. Washer Overflows Run Factory Test procedure and check if water fills and drains properly. Make sure door is closed and locked. Is there Check water level sensor wiring and 5 Volts DC across terminals "H5-3" and "H5-1" replace if necessary. - Page 62 Washer Control Troubleshooting Washer Overflows FLW1817S 806221...
-
Page 63: Pump Or Drain Valve Does Not Operate
Washer Control Troubleshooting 32. Pump or Drain Valve Does Not Operate NOTE: Check at beginning of spin/drain portion of cycle. Is there If the pump or voltage* across the drain valve does not wht/blk and the white wire operate check for going to the pump or blockage. - Page 64 Washer Control Troubleshooting Pump or Drain Valve Does Not Operate FLW1817S 806221...
-
Page 65: Motor Does Not Run ("Ed", "29" On Display)
Washer Control Troubleshooting 33. Motor Does Not Run (“Ed”, “29” on Display) motor harness Connect harness. connected? Does motor harness Replace harness. have continuity? Is there continuity between Check motor Motor Resistance Values: motor terminals? plug or replace Windings: Approx. 3.38 ohms Refer to values motor control. - Page 66 Washer Control Troubleshooting Motor Does Not Run (“Ed”, “29” on Display) FLW1817S 806221...
-
Page 67: Washer Will Not Heat (Models Equipped With Heater) ("Er", "Op" Or "Er", "Sh" Displayed)
Washer Control Troubleshooting 34. Washer Will Not Heat (Models Equipped with Heater) (“Er”, “oP” or “Er”, “SH” Displayed) Measure resistance at terminals "H8-1" and "H8-2" Replace electronic on drive board. Is resistance control. value between 500 and 35,000 ohms? Measure resistance at Replace thermistor/ thermistor. - Page 68 Washer Control Troubleshooting Washer Will Not Heat (Models Equipped with Heater) “Er”, “oP” or “Er”, “SH” Displayed) FLW1817S 806221...
-
Page 69: Washer Will Not Heat (Models Equipped With Heater)
Washer Control Troubleshooting 35. Washer Will Not Heat (Models Equipped with Heater) The heater will not Is the come on until the water level water level satisfied? is satisfied. Are there Verify water temperature "dashes" on is less than selected display indicating cycle temperature the machine... - Page 70 Washer Control Troubleshooting Washer Will Not Heat (Models Equipped with Heater) FLW1817S 806221...
-
Page 71: Section 6 - Adjustments
Section 6 Adjustments WARNING To reduce the risk of electric shock, fire, explosion, serious injury or death: • Disconnect all electric power to the machine and accessories before servicing. • Close gas shut-off valve to gas dryer before servicing. • Never start machine with any guards/panels removed. •... -
Page 72: Washer Loading Door
Adjustments WARNING To reduce the risk of electric shock, fire, explosion, serious injury or death: • Disconnect all electric power to the machine and accessories before servicing. • Close gas shut-off valve to gas dryer before servicing. • Never start machine with any guards/panels removed. •... -
Page 73: Washer Motor Belt Tension
Inner Basket Pulley Pivot Bolt Adjusting Belt Bolt 1/4 Inch Motor Mounting Bracket Motor Pulley Pivot Bolt Metal Wire SWD1717S Harness SWD1717S Adjusting SWD1717S Bolt Figure 5 © Copyright, Alliance Laundry Systems LLC – DO NOT COPY or TRANSMIT 806221... -
Page 74: Washer Door Catch
Adjust door catch so the outside edge is aligned with the edge of the lock. Refer to Figure 7. Outer Bezel Inner Bezel Cut Away FLW1808S Figure 6 806221 © Copyright, Alliance Laundry Systems LLC – DO NOT COPY or TRANSMIT... - Page 75 • Washer motor not grounded! Disconnect electric power before servicing motor. W502 Funnel Door Catch Door Lock Alignment of These Two Edges 802803 Catch H250SE3B SHOWN CLOSED Figure 7 © Copyright, Alliance Laundry Systems LLC – DO NOT COPY or TRANSMIT 806221...
-
Page 76: Shipping Braces
Adjustments WARNING To reduce the risk of electric shock, fire, explosion, serious injury or death: • Disconnect all electric power to the machine and accessories before servicing. • Close gas shut-off valve to gas dryer before servicing. • Never start machine with any guards/panels removed. •... -
Page 77: Burner Flame (Gas Models)
Adjustments WARNING To reduce the risk of electric shock, fire, explosion, serious injury or death: • Disconnect all electric power to the machine and accessories before servicing. • Close gas shut-off valve to gas dryer before servicing. • Never start machine with any guards/panels removed. •... -
Page 78: Section 7 - Dryer Test Procedures
Section 7 Dryer Test Procedures WARNING To reduce the risk of electric shock, fire, explosion, serious injury or death: • Disconnect all electric power to the machine and accessories before servicing. • Close gas shut-off valve to gas dryer before servicing. •... -
Page 79: Fabric Selector Switch
Dryer Test Procedures WARNING To reduce the risk of electric shock, fire, explosion, serious injury or death: • Disconnect all electric power to the machine and accessories before servicing. • Close gas shut-off valve to gas dryer before servicing. • Never start machine with any guards/panels removed. •... -
Page 80: Drive Motor
Dryer Test Procedures WARNING To reduce the risk of electric shock, fire, explosion, serious injury or death: • Disconnect all electric power to the machine and accessories before servicing. • Close gas shut-off valve to gas dryer before servicing. • Never start machine with any guards/panels removed. •... - Page 81 Dryer Test Procedures WARNING To reduce the risk of electric shock, fire, explosion, serious injury or death: • Disconnect all electric power to the machine and accessories before servicing. • Close gas shut-off valve to gas dryer before servicing. • Never start machine with any guards/panels removed. •...
- Page 82 Dryer Test Procedures WARNING To reduce the risk of electric shock, fire, explosion, serious injury or death: • Disconnect all electric power to the machine and accessories before servicing. • Close gas shut-off valve to gas dryer before servicing. • Never start machine with any guards/panels removed. •...
-
Page 83: Motor Switch
Dryer Test Procedures WARNING To reduce the risk of electric shock, fire, explosion, serious injury or death: • Disconnect all electric power to the machine and accessories before servicing. • Close gas shut-off valve to gas dryer before servicing. • Never start machine with any guards/panels removed. •... - Page 84 Dryer Test Procedures WARNING To reduce the risk of electric shock, fire, explosion, serious injury or death: • Disconnect all electric power to the machine and accessories before servicing. • Close gas shut-off valve to gas dryer before servicing. • Never start machine with any guards/panels removed. •...
-
Page 85: Burner System Operation
Dryer Test Procedures WARNING To reduce the risk of electric shock, fire, explosion, serious injury or death: • Disconnect all electric power to the machine and accessories before servicing. • Close gas shut-off valve to gas dryer before servicing. • Never start machine with any guards/panels removed. •... -
Page 86: Electrical Circuit To Ignition System (Gas Models)
Dryer Test Procedures WARNING To reduce the risk of electric shock, fire, explosion, serious injury or death: • Disconnect all electric power to the machine and accessories before servicing. • Close gas shut-off valve to gas dryer before servicing. • Never start machine with any guards/panels removed. •... -
Page 87: Sensor Check (Gas Models)
Dryer Test Procedures WARNING To reduce the risk of electric shock, fire, explosion, serious injury or death: • Disconnect all electric power to the machine and accessories before servicing. • Close gas shut-off valve to gas dryer before servicing. • Never start machine with any guards/panels removed. •... -
Page 88: Thermal Fuse (Electric Models)
Dryer Test Procedures WARNING To reduce the risk of electric shock, fire, explosion, serious injury or death: • Disconnect all electric power to the machine and accessories before servicing. • Close gas shut-off valve to gas dryer before servicing. • Never start machine with any guards/panels removed. •... -
Page 89: Door Switch
Dryer Test Procedures WARNING To reduce the risk of electric shock, fire, explosion, serious injury or death: • Disconnect all electric power to the machine and accessories before servicing. • Close gas shut-off valve to gas dryer before servicing. • Never start machine with any guards/panels removed. •... -
Page 90: Section 8 - Internal Wiring Of Dryer Motor Switch
Section 8 Internal Wiring of Dryer Motor Switch WARNING To reduce the risk of electric shock, fire, explosion, serious injury or death: • Disconnect all electric power to the machine and accessories before servicing. • Close gas shut-off valve to gas dryer before servicing. •... -
Page 91: Section 9 - Cycle Sequence Charts
Section 9 Cycle Sequence Charts WARNING To reduce the risk of electric shock, fire, explosion, serious injury or death: • Disconnect electric power to the washer before servicing. • Never start the washer with any guards/panels removed. • Whenever ground wires are removed during servicing, these ground wires must be reconnected to ensure that the washer is properly grounded. - Page 92 Cycle Sequence Charts WARNING To reduce the risk of electric shock, fire, explosion, serious injury or death: • Disconnect electric power to the washer before servicing. • Never start the washer with any guards/panels removed. • Whenever ground wires are removed during servicing, these ground wires must be reconnected to ensure that the washer is properly grounded.
- Page 93 Cycle Sequence Charts WARNING To reduce the risk of electric shock, fire, explosion, serious injury or death: • Disconnect electric power to the washer before servicing. • Never start the washer with any guards/panels removed. • Whenever ground wires are removed during servicing, these ground wires must be reconnected to ensure that the washer is properly grounded.
- Page 94 Cycle Sequence Charts WARNING To reduce the risk of electric shock, fire, explosion, serious injury or death: • Disconnect electric power to the washer before servicing. • Never start the washer with any guards/panels removed. • Whenever ground wires are removed during servicing, these ground wires must be reconnected to ensure that the washer is properly grounded.
- Page 95 Cycle Sequence Charts WARNING To reduce the risk of electric shock, fire, explosion, serious injury or death: • Disconnect electric power to the washer before servicing. • Never start the washer with any guards/panels removed. • Whenever ground wires are removed during servicing, these ground wires must be reconnected to ensure that the washer is properly grounded.
- Page 96 Cycle Sequence Charts WARNING To reduce the risk of electric shock, fire, explosion, serious injury or death: • Disconnect electric power to the washer before servicing. • Never start the washer with any guards/panels removed. • Whenever ground wires are removed during servicing, these ground wires must be reconnected to ensure that the washer is properly grounded.
- Page 97 Cycle Sequence Charts WARNING To reduce the risk of electric shock, fire, explosion, serious injury or death: • Disconnect electric power to the washer before servicing. • Never start the washer with any guards/panels removed. • Whenever ground wires are removed during servicing, these ground wires must be reconnected to ensure that the washer is properly grounded.
- Page 98 Cycle Sequence Charts WARNING To reduce the risk of electric shock, fire, explosion, serious injury or death: • Disconnect electric power to the washer before servicing. • Never start the washer with any guards/panels removed. • Whenever ground wires are removed during servicing, these ground wires must be reconnected to ensure that the washer is properly grounded.
- Page 99 Cycle Sequence Charts WARNING To reduce the risk of electric shock, fire, explosion, serious injury or death: • Disconnect electric power to the washer before servicing. • Never start the washer with any guards/panels removed. • Whenever ground wires are removed during servicing, these ground wires must be reconnected to ensure that the washer is properly grounded.
- Page 100 Cycle Sequence Charts WARNING To reduce the risk of electric shock, fire, explosion, serious injury or death: • Disconnect electric power to the washer before servicing. • Never start the washer with any guards/panels removed. • Whenever ground wires are removed during servicing, these ground wires must be reconnected to ensure that the washer is properly grounded.
- Page 101 Cycle Sequence Charts WARNING To reduce the risk of electric shock, fire, explosion, serious injury or death: • Disconnect electric power to the washer before servicing. • Never start the washer with any guards/panels removed. • Whenever ground wires are removed during servicing, these ground wires must be reconnected to ensure that the washer is properly grounded.
- Page 102 Cycle Sequence Charts WARNING To reduce the risk of electric shock, fire, explosion, serious injury or death: • Disconnect electric power to the washer before servicing. • Never start the washer with any guards/panels removed. • Whenever ground wires are removed during servicing, these ground wires must be reconnected to ensure that the washer is properly grounded.
- Page 103 Cycle Sequence Charts WARNING To reduce the risk of electric shock, fire, explosion, serious injury or death: • Disconnect electric power to the washer before servicing. • Never start the washer with any guards/panels removed. • Whenever ground wires are removed during servicing, these ground wires must be reconnected to ensure that the washer is properly grounded.
- Page 104 Cycle Sequence Charts WARNING To reduce the risk of electric shock, fire, explosion, serious injury or death: • Disconnect electric power to the washer before servicing. • Never start the washer with any guards/panels removed. • Whenever ground wires are removed during servicing, these ground wires must be reconnected to ensure that the washer is properly grounded.
- Page 105 Cycle Sequence Charts WARNING To reduce the risk of electric shock, fire, explosion, serious injury or death: • Disconnect electric power to the washer before servicing. • Never start the washer with any guards/panels removed. • Whenever ground wires are removed during servicing, these ground wires must be reconnected to ensure that the washer is properly grounded.
- Page 106 Cycle Sequence Charts WARNING To reduce the risk of electric shock, fire, explosion, serious injury or death: • Disconnect electric power to the washer before servicing. • Never start the washer with any guards/panels removed. • Whenever ground wires are removed during servicing, these ground wires must be reconnected to ensure that the washer is properly grounded.
- Page 107 Cycle Sequence Charts WARNING To reduce the risk of electric shock, fire, explosion, serious injury or death: • Disconnect electric power to the washer before servicing. • Never start the washer with any guards/panels removed. • Whenever ground wires are removed during servicing, these ground wires must be reconnected to ensure that the washer is properly grounded.
- Page 108 Cycle Sequence Charts WARNING To reduce the risk of electric shock, fire, explosion, serious injury or death: • Disconnect electric power to the washer before servicing. • Never start the washer with any guards/panels removed. • Whenever ground wires are removed during servicing, these ground wires must be reconnected to ensure that the washer is properly grounded.
- Page 109 Cycle Sequence Charts WARNING To reduce the risk of electric shock, fire, explosion, serious injury or death: • Disconnect electric power to the washer before servicing. • Never start the washer with any guards/panels removed. • Whenever ground wires are removed during servicing, these ground wires must be reconnected to ensure that the washer is properly grounded.
- Page 110 Cycle Sequence Charts WARNING To reduce the risk of electric shock, fire, explosion, serious injury or death: • Disconnect electric power to the washer before servicing. • Never start the washer with any guards/panels removed. • Whenever ground wires are removed during servicing, these ground wires must be reconnected to ensure that the washer is properly grounded.
- Page 111 Cycle Sequence Charts WARNING To reduce the risk of electric shock, fire, explosion, serious injury or death: • Disconnect electric power to the washer before servicing. • Never start the washer with any guards/panels removed. • Whenever ground wires are removed during servicing, these ground wires must be reconnected to ensure that the washer is properly grounded.
- Page 112 Cycle Sequence Charts WARNING To reduce the risk of electric shock, fire, explosion, serious injury or death: • Disconnect electric power to the washer before servicing. • Never start the washer with any guards/panels removed. • Whenever ground wires are removed during servicing, these ground wires must be reconnected to ensure that the washer is properly grounded.
- Page 113 Cycle Sequence Charts WARNING To reduce the risk of electric shock, fire, explosion, serious injury or death: • Disconnect electric power to the washer before servicing. • Never start the washer with any guards/panels removed. • Whenever ground wires are removed during servicing, these ground wires must be reconnected to ensure that the washer is properly grounded.
- Page 114 Cycle Sequence Charts WARNING To reduce the risk of electric shock, fire, explosion, serious injury or death: • Disconnect electric power to the washer before servicing. • Never start the washer with any guards/panels removed. • Whenever ground wires are removed during servicing, these ground wires must be reconnected to ensure that the washer is properly grounded.
- Page 115 Cycle Sequence Charts WARNING To reduce the risk of electric shock, fire, explosion, serious injury or death: • Disconnect electric power to the washer before servicing. • Never start the washer with any guards/panels removed. • Whenever ground wires are removed during servicing, these ground wires must be reconnected to ensure that the washer is properly grounded.
- Page 116 Cycle Sequence Charts WARNING To reduce the risk of electric shock, fire, explosion, serious injury or death: • Disconnect electric power to the washer before servicing. • Never start the washer with any guards/panels removed. • Whenever ground wires are removed during servicing, these ground wires must be reconnected to ensure that the washer is properly grounded.
Need help?
Do you have a question about the ATGE9AWP303AW01 and is the answer not in the manual?
Questions and answers