
Related Manuals for Riello A2WHPR32S/004


Summary of Contents for Riello A2WHPR32S/004
- Page 1 4/6 kW 8/10/12/14/16 kW HP EXTERNAL UNIT R32 MANUALE INSTALLAZIONE E USO INSTALLATION AND OWNER’S MANUAL INSTRUKCJA...
- Page 2 Gamma/Range/Zakres Codice Descrizione Descrizione Riello Code Description Riello description Opis Opis Riello A2WHPR32S/004 20198970 HP EXTERNAL UNIT R32/004 A2WHPR32S/006 20198971 HP EXTERNAL UNIT R32/006 A2WHPR32S/008 20198972 HP EXTERNAL UNIT R32/008 A2WHPR32S/010 20198973 HP EXTERNAL UNIT R32/010 A2WHPR32S/012 20198974 HP EXTERNAL UNIT R32/012...
-
Page 3: Table Of Contents
PRECAUZIONI DI SICUREZZA 2 DESCRIZIONE MATRICOLA 3 ACCESSORI 3.1 Accessori forniti in dotazione con l'unità 4 PRIMA DELL’INSTALLAZIONE 5 INFORMAZIONI IMPORTANTI PER IL REFRIGERANTE 6 SITO DELL’INSTALLAZIONE 6.1 Selezione di una località nei climi freddi 6.2 Selezione di una località nei climi caldi 7 PRECAUZIONI DI INSTALLAZIONE 7.1 Dimensioni 7.2 Requisiti di installazione... - Page 4 4/6 kW 8/10/12/14/16 kW Disposizione interna: per esempio 8/10 kW Impianto di controllo elettrico 4/6 kW Sistema refrigerante Si prega di rimuovere l’elemento di protezione successivamente all’installazione 8/10 kW 12/14/16 kW Eliminare il supporto di trasporto 12/14/16 kW NOTA Le immagini nel presente manuale sono unicamente a scopo di riferimento - riferirsi al prodotto effettivo. NOTA ...
-
Page 5: Precauzioni Di Sicurezza
Hermetically sealed equipment contains HERMETICALLY SEALED APPARECCHIO ERMETICAMEN- fluorinated greenhouse gases Year of construction: EQUIPMENT CONTAINS TE SIGILLATO CHE CONTIENE RIELLO S.p.A. FLUORINATED GREENHOUSE GAS FLUORURATI A EFFETTO GASES SERRA Via Ing. Pilade Riello, 7 anno di costruzione 37045 - Legnago (Vr) - Page 6 Spiegazione delle abbreviazioni utilizzate Abbreviazioni Definizioni Temperatura acqua mandata pompa di calore (a valle di resistenza integrazione elettrica o caldaia a gas) Setpoint temperatura di mandata (installazione a zona singola) T1S1 Setpoint temperatura di mandata zona 1 (installazione a doppia zona) T1S2 Setpoint temperatura di mandata zona 2 (installazione a doppia zona) Temperatura refrigerante liquido Temperatura refrigerante gas Temperatura bollitore sanitario Tw_out Temperatura acqua uscita scambiatore a piastre Tw_in Temperatura acqua ingresso scambiatore a piastre Temperatura di mandata zona 2 Temperatura ambiente esterno PUMP I Circolatore pompa di calore...
- Page 7 Non toccare le parti interne durante e subito dopo il funzionamento. Il contatto con le parti interne può causare ustioni. Per evitare lesioni, dare alle componenti interne il tempo di tornare alla temperatura normale; in alternativa, qualora sia assolutamente neces- sario toccarle, assicurarsi di indossare guanti protettivi.
-
Page 8: Accessori
3 ACCESSORI 8/10/12/14/16 kW (mm) 3.1 Accessori forniti in dotazione con l'unità Materiale fornito Nome Forma Quantità Manuale d’installazione e dell’utente Gruppo tubo di raccordo presa d'acqua Etichetta energetica Modello 4~6kw monofase 8-10kw monofase 4 PRIMA DELL’INSTALLAZIONE 12~16kw monofase Prima dell’installazione 12~16kw trifase Assicurarsi di confermare il nome del modello e il numero di serie dell'unità. -
Page 9: Selezione Di Una Località Nei Climi Freddi
Si prega di istruire il cliente a mantenere pulita l'area intorno Assicurarsi che ci sia spazio a sufficienza per l'installazione. all'unità. Impostare il lato di uscita ad angolo retto rispetto alla direzione Scegliere un luogo di installazione in cui le seguenti condizioni del vento. vengano soddisfatte e che soddisfi l'approvazione del proprio Preparare un canale di scarico dell'acqua intorno cliente. -
Page 10: Precauzioni Di Installazione
7 PRECAUZIONI DI INSTALLAZIONE 7.1 Dimensioni 8/10/12/14/16 kW 4/6 kW Fig: 6-1 Fig: 6-2 dimensioni in mm Modello 4/6kW 1008 8/10/12/14/16kW 1118 7.2 Requisiti di installazione 7.3 Posizione del foro di scarico Controllare la resistenza e il livello del terreno di installazione Foro di scarico in modo che l'unità... -
Page 11: Fabbisogno Di Spazio Per La Manutenzione
NOTA Sarà necessario installare un nastro riscaldante elettrico se l'acqua non riesce a defluire con il freddo, nonostante il foro di scarico più grande sia stato aperto. Si consiglia di dotare l'unità del riscaldatore elettrico base. Fabbisogno di spazio per la manutenzione 7.4.1 In caso di installazione impilata 1) Nel caso in cui vi siano ostacoli davanti al lato di uscita. ≥200mm ≥500mm Fig: 6-6 Unità... - Page 12 7.4.2 In caso di montaggio su più file 1) In caso di installazione di un'unità per fila. <1/2 H Fig: 6-7 Unità A (mm) B1 (mm) B2 (mm) C (mm) 4~16kW ≥ 3000 ≥ 2000 ≥ 150 ≥ 600 2) In caso di installazione di più unità in collegamento laterale per fila. <1/2 H ≥500mm ≥500mm Fig: 6-8 Unità A (mm) B1 (mm) B2 (mm) C (mm) 4~16kW...
-
Page 13: Installazione Del Tubo Di Raccordo
8 INSTALLAZIONE DEL TUBO DI RACCORDO 8.1 Tubo del refrigerante liquido 4~16kW Fig.7-1 ATTENZIONE Fare attenzione ad evitare i componenti mentre si collegano i tubi di raccordo. Per evitare che le tubazioni del refrigerante si ossidino all'interno durante la saldatura, occorre caricare azoto, in caso contrario l'ossido ostruirà... -
Page 14: Metodo Di Collegamento
8.4 Metodo di collegamento Unità esterna Unità interna Unità interna Unità esterna Figure 7-5 Modelli 4~16kW Lunghezza max. tubo (H+L1) Differenza di altezza max. (H) 1) Dimensione tubi lato gas e lato refrigerante. Modello Refrigerante Lato gas/Lato refrigerante 4/6 kW Ø15,9/Ø6,35 8/10 kW Ø15,9/Ø9,52 12/14/16 kW monofase Ø15,9/Ø9,52 12/14/16 kW trifase Ø15,9/Ø9,52 2) Metodo di collegamento. Lato gas Lato refrigerante 4~16kW unità... -
Page 15: Collegamenti Unita' Esterna
9 COLLEGAMENTI UNITA' ESTERNA AVVERTENZA Un interruttore principale o un altro mezzo di scollegamento, con separazione dei contatti in tutti i poli, deve essere incorporato nel cablaggio fisso in conformità con le leggi e le normative locali in materia. Spegnere l'alimentazione prima di effettuare qualsiasi collegamento. Servirsi unicamente di cavi in rame. Non serrare mai i cavi in fasci e assicurarsi che non entrino a contatto con le tubazioni e gli spigoli vivi. Assicu- rarsi che non venga applicata nessuna pressione esterna ai collegamenti dei morsetti. -
Page 16: Rimuovere Il Coperchio Della Scatola Dell'interruttore
Tabella 8-2 Unità esterna Corrente di alimentazione Compressore Sistema Tensione (V) Min. (V) Max . (V) MCA (A) TOCA (A) MFA (A) MSC (A) RLA (A) FLA (A) 220-240 11,50 0,10 0,50 220-240 13,50 0,10 0,50 220-240 14,50 0.17 1,50 10kW 220-240 15,50... -
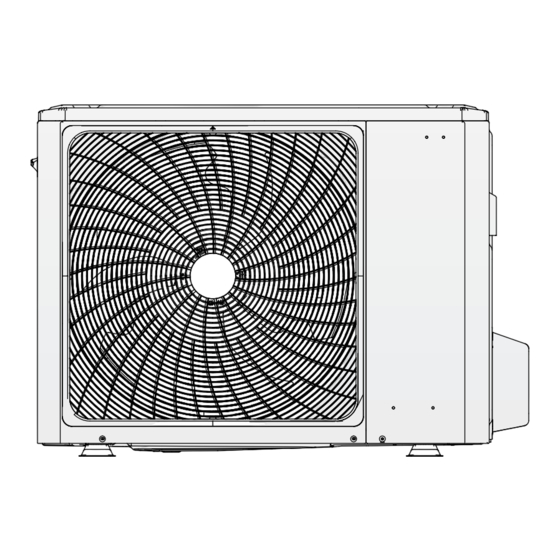
Page 17: Panoramica Dell'unità
10 PANORAMICA DELL’UNITÀ 10.1 Smontaggio dell'unità 4/6kW 8/10/12/14/16kW Porta 1 Per accedere al compressore e Porta 1 Per accedere al compressore e alle parti elettriche alle parti elettriche AVVERTENZA Prima di rimuovere la porta 1, togliere l'alimentazione elettrica, cioè l'alimentazione dell'unità, del riscaldamento di backup e dell'accumulatore dell'acqua calda sanitaria (se applicabile). -
Page 18: Monofase Per Unità 4-16Kw
PCB A PCB B monofase 12/14/16kW (Back) CN30 PCB A PCB B PCB C trifase 12/14/16kW 10.3 Monofase per unità 4-16kW 1) PCB A, 4-10kW, Modulo Inverter Nota: per 4-6kW, due condensatori Codifica Unità di montaggio Porta U di collegamento del compressore Porta V di collegamento del compressore Porta W di collegamento del compressore Porta di uscita per +12V/9V (CN20) - Page 19 2) PCB A, 12-16kW, Modulo Inverter Codifica Unità di montaggio Porta U di collegamento del compressore CN19 Porta V di collegamento del compressore Porta W di collegamento del compressore Porta per ventola (CN19) Porta di uscita per +12V/9V (CN20) Porta per la comunicazione con il PCB B (CN32) Porta per pressostato di alta pressione (CN23) CN20 Riservato (CN6) Porta L di ingresso per ponte raddrizzatore (CN501) CN32 CN502 Porta N di ingresso per ponte raddrizzatore (CN502) CN23 CN501 3) PCB B, 4-16kW, Pannello di controllo principale...
- Page 20 10.4 Trifase per unità 12-16kW 1) PCB A, Modulo Inverter CN16 CN22 CN15 CN23 CN17 CN18 CN20 CN19 Codifica Unità di montaggio Porta di uscita per +15V (CN20) Porta W di collegamento del compressore (CN19) Porta V di collegamento del compressore (CN18) Porta U di collegamento del compressore (CN17) Porta L3 di ingresso alimentazione (CN15) Porta L2 di ingresso alimentazione (CN7) Porta di ingresso P_out per modulo IPM (CN5) Porta L1 di ingresso alimentazione (CN16) Porta di ingresso P_in per modulo IPM (CN1) Porta per la comunicazione con PCB B (CN8) Scheda PED (CN22) Porta per interruttore ad alta pressione (CN23) Porta per la comunicazione con PCB C (CN2)
- Page 21 2) PCB B, Pannello di controllo principale CN41 CN26 CN24 CN36 CN21 CN18 CN31 CN29 CN10 CN35 CN11 CN28 CN20 CN37 CN27 V i n CN22 CN30 CN38 CN53 CN109 Codifica Unità di montaggio Porta per cavo di terra (CN38) Porta per valvola a 2 vie 6 (CN27) Porta per valvola a 2 vie 5 (CN20) Porta 2 per nastro riscaldante elettrico (CN7) Porta 1 per nastro riscaldante elettrico (CN10) Riservato (CN11) Porta per valvola 4 vie (CN18) Riservato (CN21) Porta di alimentazione da PCB C (CN41)
-
Page 22: Funzionamento Di Prova
3) PCB C, scheda filtro CN204 CN205 CN206 CN30 CN213 CN214 CN202 CN211 CN203 CN200 CN201 CN212 PCB C Trifase 12/14/16kW Codifica Unità di montaggio Alimentazione L2 (CN201) Alimentazione L3 (CN200) Alimentazione N (CN203) Porta di alimentazione di 310VDC (CN212) Riservato (CN211) Porta per reattore VENTOLA (CN213) Porta di alimentazione per modulo Inverter (CN214) Cavo di terra (PE3) Porta per la comunicazione con PCB B (CN8) Potenza di filtraggio L3 (L3) Potenza di filtraggio L2 (L2) Potenza di filtraggio L1 (L1) Porta di alimentazione per la scheda di controllo principale (CN30) Porta per cavo di terra (PE2) Porta per cavo di terra (PE1) Alimentazione L1 (L1) 11 FUNZIONAMENTO DI PROVA Procedere in conformità... - Page 23 12 PRECAUZIONI RELATIVE ALLA FUORIUSCITA DI REFRIGERANTE Quando il carico di refrigerante nell'apparecchio è superiore a 1,842kg, occorre soddisfare i seguenti requisiti. Requisti relativi al limite di carico in aree non ventilate: Il carico di refrigerante massimo nell'apparecchio deve essere conforme a quanto segue: =2,5 x (LFL) x 1,8 x (A) o la superficie richiesta minima Amin per installare un apparecchio con carico di refrigerante mc dovrà essere conforme a quanto segue:...
-
Page 24: Consegna Al Cliente
13 CONSEGNA AL CLIENTE Il manuale d'uso per l'unità interna e quello per l'unità esterna devono essere consegnati al cliente. Spiegare nei dettagli al cliente il conte- nuto del manuale d'uso. AVVERTENZA Rivolgersi al proprio rivenditore per l'installazione della pompa di calore. Un'installazione incompleta eseguita dall'utente potrebbe causare fuoriuscita d'acqua, scosse elettriche e incendio. -
Page 25: Funzionamento E Prestazioni
14 FUNZIONAMENTO E PRESTAZIONI 14.1 Dispositivo di protezione Questo dispositivo di protezione consentirà alla pompa di calore di arrestarsi quando questa funziona in modo compulsivo. Il dispositivo di protezione può essere attivato nelle seguenti condizioni. Funzionamento in raffreddamento Ingresso o uscita aria dell'unità esterna bloccati. Vento forte continuo sull'uscita aria dell'unità... -
Page 26: Codici Di Errore
14.8 Codici di errore Quando viene attivato un dispositivo di sicurezza, sull'interfaccia utente viene visualizzato un codice di errore (che non include un guasto esterno). La tabella sottostante presenta un elenco di tutti gli errori e delle azioni correttive. Resettare la sicurezza spegnendo e riaccendendo l'unità. Nel caso in cui questa procedura di ripristino della sicurezza non abbia successo, contattare il proprio rivenditore locale. 1. - Page 27 CODICE ANOMALIA DI FUNZIONAMENTO O CAUSA DEL GUASTO E AZIONE CORRETTIVA ERRORE PROTEZIONE 1. Il sistema presenta la mancanza di volume del refrigerante. Caricare il refri- gerante nel giusto volume. 2. Quando ci si trova in modalità riscaldamento o in modalità ACS, lo scambia- tore di calore esterno è sporco o qualcosa è bloccato in superficie. Pulire lo Interruttore di protezione bassa pressio- scambiatore di calore esterno o togliere l'ostruzione.
-
Page 28: Specifiche Tecniche
CODICE ANOMALIA DI FUNZIONAMENTO O CAUSA DEL GUASTO E AZIONE CORRETTIVA ERRORE PROTEZIONE 1. La tensione di alimentazione dell'unità è bassa, aumentare la tensione di alimentazione fino al range richiesto. 2. Lo spazio tra le unità è troppo stretto per lo scambio termico. Aumentare lo spazio tra le unità. - Page 29 Compressore Inverter CC dual rotary Scambiatore Serpentino alettato Refrigerante Tipo Quantità 1500g 1650g Peso Peso netto 58 kg 75 kg Peso lordo 63,5 kg 89 kg Collegamenti Lato gas Ø6,35 Ø9,52 Lato refrigerante Ø15,9 Ø15,9 Collegamento scarico DN32 Lunghezza massima tubazioni Massimo dislivello Refrigerante da aggiungere 20g/m...
-
Page 30: Dati Tecnici
15.2 Dati tecnici Modello 012T 014T 016T Prestazioni in riscaldamento [A7/W35] (1) Capacità nominale 4,25 6,20 8,30 10,00 12,10 14,50 16,00 12,10 14,50 16,00 kW/kW 5,20 5,00 5,20 5,00 4,95 4,70 4,50 4,95 4,70 4,50 SCOP kW/kW 4,85 4,95 5,22 5,20 4,81 4,72... -
Page 31: Rendimenti In Base Alla Zona Climatica
15.3 Rendimenti in base alla zona climatica Modello 012T 014T 016T Zona temperata - Media temperatura [47/55°C] ηs 129,5 137,9 131,5 136,6 135,1 135,6 133,3 135,1 135,6 133,2 SCOP kW/kW 3,31 3,52 3,37 3,47 3,45 3,47 3,41 3,45 3,47 3,41 Pdesign -7°C 3,89 5,04... -
Page 32: Informazioni Di Manutenzione
15.4 INFORMAZIONI DI MANUTENZIONE 1) Controlli nella zona Prima di iniziare i lavori su impianti contenenti refrigeranti infiammabili sarà necessario eseguire controlli di sicurezza al fine di garantire che il rischio di accensione sia ridotto al minimo. Per eseguire interventi di riparazione dell'impianto di refrigerazione, prima di effettuare lavori sull'impianto devono sarà necessario attenersi alle seguenti precauzioni 2) Procedura di lavoro I lavori vengono effettuati secondo una procedura controllata in modo da ridurre al minimo il rischio di presenza di gas o vapori infiammabili durante l'esecuzione dei lavori. 3) Area di lavoro generale Tutto il personale addetto alla manutenzione e le altre persone che lavorano nella zona interessata devono essere istruiti sulla natura del lavoro svolto. - Page 33 funzionante in modo permanente nel punto più critico per avvertire di una situazione potenzialmente pericolosa. b) S arà necessario prestare particolare attenzione a quanto segue al fine di garantire che, lavorando sulle componenti elettriche, l'involucro non venga alterato in modo tale da modificare il livello di protezione. Ciò include danni ai cavi, numero eccessivo di collegamenti, morsetti non conformi alle specifiche originali, danni alle guarnizioni, montaggio errato dei pressacavi, ecc. Verificare che l'apparecchio sia montato in modo sicuro. Assicurarsi che le guarnizioni o i materiali di tenuta non si siano degradati al punto tale da non servire più a impedire l'ingresso di atmosfere infiammabili. I pezzi di ricambio devono essere conformi alle specifiche del produttore.
- Page 34 effettuata una prova di tenuta a posteriori. 17) Disattivazione Prima di eseguire questa procedura, è essenziale che il tecnico conosca a fondo l'apparecchiatura e tutti i suoi dettagli. È buona prassi che tutti i refrigeranti vengano recuperati in modo sicuro. Prima di eseguire il compito, dovrà essere prelevato un campione di olio e di refrigerante. Nel caso in cui sia necessario eseguire un'analisi prima del riutilizzo del refrigerante recuperato è essenziale che l'energia elettrica sia disponibile prima di iniziare il lavoro.
- Page 35 ALLEGATO A: Ciclo del refrigerante Raffrescamento Riscaldamento Elemento Descrizione Elemento Descrizione Compressore Sensore scambiatore esterno Valvola a 4 vie Valvola di arresto (gas) Separatore gas-liquido Valvola di arresto (liquido) Scambiatore di calore lato aria Interruttore di alta pressione Valvola di espansione elettronica Interruttore di bassa pressione Valvola elettromagnetica mono-via Sensore di pressione Filtro...
- Page 36 ALLEGATO B: Schema elettrico 4/6/8/10kW CN2 0 CN19 VENTILATORE PCB A, scheda Inverter W(C) NERO per monofase V(S) U(R) ROSSO CN50 1 CN50 2 COMP CN27 N-OUT CN28 MARRONE CN17 CN26 12/9V L-OUT DEBUG PCB B, scheda di comando principale per monofase P-SEN P-SEN H-PRO...
- Page 37 ALLEGATO C: Schema elettrico 12/14/16kW CN20 CN32 VENTILATORE PCB A, scheda Inverter per monofase W(C) NERO V(S) U(R) ROSSO CN50 2 CN50 1 COMP CN27 N-OUT CN28 MARRONE L-OUT CN17 CN26 12/9V DEBUG PCB B, scheda di comando principale per monofase P-SEN P-SEN H-PRO...
- Page 38 ALLEGATO D: Schema elettrico trifase 12/14/16kW NERO NERO CN16 NERO H-SEN MARRONE MARRONE MARRONE GRIGIO Scheda CN15 CN41 CN26 CN19 CN24 CN4 CN6 CN32 compressore GRIGIO H-SEN L-SEN ALIM. ROSSO CN17 GRIGIO FERRITE O-COMP CN36 ALIM.-I NERO CN18 CN21 FERRITE CN20 CN19 DSP1...
- Page 39 SAFETY PRECAUTIONS declaration of conformity of the product can be consulted and downloaded from the site. DATA PLATE DESCRIPTION Refer to the instructions on the back cover of the ma- ACCESSORIES nual. Accessories supplied with the unit BEFORE INSTALLATION IMPORTANT INFORMATION FOR THE REFRIGERANT INSTALLATION SITE Selecting a location in cold climates...
- Page 40 4/6 kW 8/10/12/14/16 kW Internal disposal for example 8/10 kW Electric Control System 4/6 kW Refrigerant System Please remove the hollow plate after installation. 8/10 kW 12/14/16 kW Remove the transportation support 12/14/16 kW NOTE Pictures in this manual are for reference only, please refer to the actual product. NOTE Please remove the noise insulation cover of the compressor first.
-
Page 41: Safety Precautions
NET WEIGHT REFRIGERANT EXCESSIVE OPERATING REFRIGERANT PRESSURE Model Serial N° RATED WATER PRESSURE RESISTANCE CLASS Code BACKUP HEATER PARAMETER POWER SUPPLY Year of construction: RATED INPUT year of construction RIELLO S.p.A. Via Ing. Pilade Riello, 7 37045 - Legnago (Vr) - Page 42 Explanation of abbreviations used Abbreviations Definitions Total water outlet temperature of hydraulic module (after electrical heating outlet or gas boiler outlet) Water outlet setting temperature (Single zone installation) Zone 1 outlet water setting temperature (Dual-zone installation) T1S2 Zone 2 outlet water setting temperature (Dual-zone installation) Hydraulic module refrigerant liquid side temperature Hydraulic module refrigerant gas side temperature Tank temperature...
- Page 43 Do not touch the refrigerant pipes during and immediately after operation as the refrigerant pipes may be hot or cold, depending on the condition of the refrigerant flowing through the refrigerant piping, compressor and other refrigerant cycle parts. Burns or frostbite are possible if you touch the refrigerant pipes. To avoid injury, give the pipes time to return to normal temperature or, if you must touch them,be sure to wear protective gloves.
-
Page 44: Accessories Supplied With The Unit
3 ACCESSORIES Model 4~6kw single-phase 3.1 Accessories supplied with the unit 8-10kw single-phase Installation Fittings 12~16kw single-phase Name Shape Quantity 12~16kw three-phase Installation and owner’s manual CAUTION To avoid injury, do not touch the air inlet or aluminum fins of Water outlet connection the unit. pipe assembly Do not use the grips in the fan grills to avoid damage. The unit is top heavy! Prevent the unit from falling due to im- Energy label proper inclination during handling.. -
Page 45: Selecting A Location In Cold Climates
−Places where servicing space can be well ensured. foundation as high as possible. −Places where the units' piping and wiring lengths come within If you install the unit on a building frame, please install a wa- the allowable ranges. terproof plate (field supply) (about 100mm, on the underside of the unit) in order to avoid drain water dripping. -
Page 46: Installations Precautions
7 INSTALLATIONS PRECAUTIONS 7.1 Dimensions 8/10/12/14/16 kW 4/6 kW Fig: 6-1 Fig: 6-2 dimensions in mm Modello 4/6kW 1008 8/10/12/14/16kW 1118 7.2 installation requirements 7.3 Drain hole position Controllare la resistenza e il livello del terreno di installazione Drain hole in modo che l'unità... -
Page 47: Servicing Space Requirements
NOTE It's necessary to install an electrical heating belt if water can't drain out in cold weather, even the bigger drain hole has opened. 7.4 Servicing space requirements 7.4.1 In case of stacked installation 1) In case obstacles exist in front of the outlet side. ≥200mm ≥500mm Fig: 6-6... - Page 48 <1/2 H Fig: 6-7 Unit A (mm) B1 (mm) B2 (mm) C (mm) 4~16kW ≥ 3000 ≥ 2000 ≥ 150 ≥ 600 2) In case of installing multiple units in lateral connection per row. <1/2 H ≥500mm ≥500mm Fig: 6-8 Unit A (mm) B1 (mm) B2 (mm) C (mm) 4~16kW...
-
Page 49: Install The Connecting Pipe
8 INSTALL THE CONNECTING PIPE Refrigerant piping liquido 4~16kW Fig.7-1 CAUTION Please pay attention to avoid the components where it is connecting to the connecting pipes. To prevent the refrigerant piping from oxidizing inside when welding, it is necessary to charge nitrogen, or oxide will chock the circulation system. -
Page 50: Connecting Method
8.3 Connecting method External unit Internal unit Internal unit External unit Figure 7-5 Models 4~16kW Max.piping length (H+L1) Max difference in height (H) 1) Size of pipes of Gas side and Liquid side. Models Refrigerant Refrigerant Gas side/Liquid side 4/6 kW Ø15,9/Ø6,35 8/10 kW Ø15,9/Ø9,52 12/14/16 kW 1-phase Ø15,9/Ø9,52... -
Page 51: Outdoor Unit Wiring
9 OUTDOOR UNIT WIRING WARNING A main switch or other means of disconnection, having a contact separation in all poles, must be incorporated in the fixed wiring in accor- dance with relevant local laws and regulations. Switch off the power supply before making any connections. Use only copper wires. Never squeeze bundled cables and make sure they do not come in contact with the piping and sharp edges. Make sure no external pressure is applied to the terminal connections. All field wiring and components must be installed by a licensed electrician and must comply with relevant local laws and regulations. The field wiring must be carried out in accordance with the wiring diagram supplied with the unit and the instructions given below. Be sure to use a dedicated power supply. Never use a power supply shared by another appliance. Be sure to establish a ground. -
Page 52: Remove The Switch Box Cover
Tabella 8-2 Outdoor Unit Power Current Compressor System Voltage (V) Min. (V) Max . (V) MCA (A) TOCA (A) MFA (A) MSC (A) RLA (A) FLA (A) 220-240 11,50 0,10 0,50 220-240 13,50 0,10 0,50 220-240 14,50 0.17 1,50 10kW 220-240 15,50 0.17... -
Page 53: Overview Of The Unit
10 OVERVIEW OF THE UNIT 4/6kW 8/10/12/14/16kW Door 1 To access to the compressor and Door 1 To access to the compressor and electrical parts. electrical parts. WARNING Cut off all power supply— i.e. unit power supply and backup heater and domestic hot water tank power supply (if applicable) — before removing doors 1. Parts inside the unit may be hot. 10.1 Electronic control box Note:The picture is for reference only, please refer to the actual product. -
Page 54: 16Kw 1-Phase Units
PCB A PCB B 1 phase 12/14/16kW (Back) CN30 PCB A PCB B PCB C 3 phase 12/14/16kW 10.2 4~16kW 1-phase units 1) PCB A, 4-10kw, Inverter module Remarks: for 4-6kw, two capacitors Code Assembly unit Compressor connection port U Compressor connection port V Compressor connection port W Output port for +12V/9V(CN20) - Page 55 PCB A,12-16kW, Inverter module Code Assembly unit Compressor connection port U CN19 Compressor connection port V Compressor connection port W Port for fan (CN19) Output port for +12V/9V (CN20) Port for communication with PCB B (CN32) Port for high pressure switch (CN23) CN20 Reserved (CN6) Input port L for rectifier bridge (CN501)
-
Page 56: 3-Phase For 12/14/16 Kw Units
10.3 3-phase for 12/14/16 kW units 1) PCB A, Inverter module CN16 CN22 CN15 CN23 CN17 CN18 CN20 CN19 Code Assembly unit Code Assembly unit Output port for +15V (CN20) Power Input port L1 (CN16) Compressor connection port W (CN19) Input port P_in for IPM module (CN1) Compressor connection port V (CN18) Port for communication with PCB B (CN8) - Page 57 PCB B, Main control board of heat pump system CN41 CN26 CN24 CN36 CN21 CN18 CN31 CN29 CN10 CN35 CN11 CN28 CN20 CN37 CN27 V i n CN22 CN30 CN38 CN53 CN109 Code Assembly unit Code Assembly unit Port for ground wire (CN38) Port for temp.sensor Tp (CN8) Port for outdoor ambient temp.
- Page 58 PCB C, filter board CN204 CN205 CN206 CN30 CN213 CN214 CN202 CN211 CN203 CN200 CN201 CN212 Code Assembly unit Code Assembly unit Power supply L2 (CN201) Port for communication with PCB B (CN8) Power supply L3 (CN200) Power filtering L3 (L3) Power supply N (CN203) Power filtering L2 (L2) Power supply port of 310VDC (CN212) Power filtering L1 (L1) Reserved (CN211)
-
Page 59: Precautions On Refrigerant Leakage
12 PRECAUTIONS ON REFRIGERANT LEAKAGE When the refrigerant charge in appliance is more than 1.842kg, following requirments should be complied with. Requirments for charge limits in unventilated areas: The maximum refrigerant charge in appliance shall be in accordance with the following: =2,5 x (LFL) x 1,8 x (A) or the required minium floor area Amin to install an appliance with refrigerant charge mc shall be in accordance with following:... -
Page 60: Turn Over To Customer
13 TURN OVER TO CUSTOMER The owner's manual of indoor unit and owner's manual of outdoor unit must be turned over to the customer. Explain the contents in the owner’s manual to the customers in details. WARNING Ask your dealer for installation of the heat pump. Incomplete installation performed by yourself may result in a water leakage, electric shock, and fire. -
Page 61: Operation And Performance
14 OPERATION AND PERFORMANCE 14.1 Protection Equipment This Protection Equipment will enable the Heat Pump to stop when the Heat Pump is to be directed running compulsively. The protection equipment may be activated in following conditions: Cooling Operation ● The air inlet or air outlet of outdoor unit is blocked. ●... -
Page 62: Error Codes
14.8 Error codes When a safety device is activated, an error code(which doesn’t include external failure) will be displayed on the user interface. A list of all errors and corrective actions can be found in the table below. Reset the safety by turning the unit OFF and back ON. In case this procedure for resetting the safety is not successfull, contact your local dealer. - Page 63 1. Heating mode, DHW mode: 1. The water flow is low; water temp is high, whether there is air in the water system. Release the air. 2. Water pressure is lower than 0.1Mpa, charge the water to let the pressure in the range of 0.15~0.2Mpa. 3. Over charge the refrigerant volume. Recharge the refrigerant in right volume. High pressure switch protection 4.
-
Page 64: Technical Specification
1. After 5 minutes of power-o interval, power on again and observe whether it can be recovered; PED PCB failure. 2. If it can't be restored, replace PED safety plate, power on again, and observe whether it can be restored; 3. - Page 65 three-phase three-phase three-phase Model 12kW 14kW 16kW 12kW 14kW 16kW Power supply 220 - 240V~50Hz 380 - 415V 3N~50Hz Rated power input 5400W 5700W 6100W 5400W 5700W 6100W Rated current 24,5A 25,0A 26,0A 9,0A 10,0A 11,0A Norminal capacity Refer to the technical data Dimensions (W×H×D)[mm] 1118×865×523mm 1118×865×523mm...
-
Page 66: Technical Data
15.2 Technical data Unit 012T 014T 016T Performance in heating [A7/W35] (1) Nominal capacity 4,25 6,20 8,30 10,00 12,10 14,50 16,00 12,10 14,50 16,00 kW/kW 5,20 5,00 5,20 5,00 4,95 4,70 4,50 4,95 4,70 4,50 SCOP kW/kW 4,85 4,95 5,22 5,20 4,81 4,72... -
Page 67: Performance Based On The Climatic Zone
15.3 Performance based on the climatic zone Unit 012T 014T 016T Average zone - Average temperature [47/55°C] ηs 129,5 137,9 131,5 136,6 135,1 135,6 133,3 135,1 135,6 133,2 SCOP kW/kW 3,31 3,52 3,37 3,47 3,45 3,47 3,41 3,45 3,47 3,41 Pdesign -7°C 3,89 5,04... -
Page 68: Information Servicing
16.1 INFORMATION SERVICING Checks to the area Prior to beginning work on systems containing flammable refrigerants, safety checks are necessary to ensure that the risk of ignition is minimised. For repair to the refrigerating system, the following precautions shall be complied with prior to conducting work on the system. Work procedure Works shall be undertaken under a controlled procedure so as to minimise the risk of a flammable gas or vapour being present while the work is being performed. General work area All maintenance staff and others working in the local area shall be instructed on the nature of work being carried out. work in confined spaces shall be avoided. The area around the work space shall be sectioned off. Ensure that the conditions within the area have been made safe by control of flammable material. Checking for presence of refrigerant The area shall be checked with an appropriate refrigerant detector prior to and during work, to ensure the technician is aware of potentially flammable atmospheres. Ensure that the leak detection equipment being used is suitable for use with flammable refrigerants, i.e. no sparking, adequately sealed or intrinsically safe. - Page 69 Other parts may result in the ignition of refrigerant in the atmosphere from a leak. 12) Cabling Check that cabling will not be subject to wear, corrosion, excessive pressure, vibration, sharp edges or any other adverse environmental effects. The check shall also take into account the effects of aging or continual vibration from sources such as compressors or fans. 13) Detection of flammable refrigerants Under no circumstances shall potential sources of ignition be used in the searching for or detection of refrigerant leaks. A halide torch (for any other detector using a naked flame) shall not be used.
- Page 70 k) Recovered refrigerant shall not be charged into another refrigeration system unless it has been cleaned and checked. Labelling Equipment shall be labelled stating that it has been de-commissioned and emptied of refrigerant. The label shall be dated and signed. Ensure that there are labels on the equipment stating the equipment contains flammable refrigerant.
- Page 71 ANNEX A: Refrigerant cycle Cooling Heating Item Description Item Description Compressor Outdoor exchanger sensor 4-Way Valve Stop valve (gas) Gas-liquid separator Stop valve (liquid) Air side heat exchanger High Pressure Switch Electronic expansion Valve Low Pressure Switch Single-way electromagnetic valve Pressure sensor Filter Capillary...
- Page 72 ANNEX B: Electrically controlled wiring diagram 1-phase 4/6/8/10kW CN2 0 CN19 PCB A, Inverter W(C) BLACK board for 1phase V(S) U(R) BLUE CN50 1 CN50 2 COMP CN27 BLUE N-OUT CN28 BROWN CN17 CN26 12/9V L-OUT DEBUG PCB B, Main control board for 1phase P-SEN P-SEN...
- Page 73 ANNEX C: Electrically controlled wiring diagram 12/14/16kW CN20 CN32 PCB A, Inverter board for 1phase W(C) BLACK V(S) U(R) BLUE CN50 2 CN50 1 COMP CN27 N-OUT BLUE CN28 MARRONE L-OUT CN17 CN26 12/9V DEBUG PCB B, Main control board for 1phase P-SEN P-SEN...
- Page 74 ANNEX D: Electrically controlled wiring diagram 3-phase 12/14/16kW BLACK BLACK CN16 BLACK H-SEN BROWN BROWN BROWN GREY Compressor CN15 CN41 CN26 CN19 CN24 CN4 CN6 CN32 driver board GREY H-SEN L-SEN ALIM. CN17 GREY FERRITE CORE O-COMP ALIM.-I CN36 BLACK CN18 CN21 FERRITE CORE...
- Page 75 ŚRODKI OSTROŻNOŚCI RUG Riello Urządzenia Grzewcze S.A. IDENTYFIKACJA URZĄDZENIA ul. Kociewska 28/30 87-100 Toruń Infolinia 801 044 804, +48 56 663 79 99 (z tel. kom.) info@beretta.pl AKCESORIA Akcesoria na wyposażeniu PRZED MONTAŻEM WAŻNE INFORMACJE DOTYCZĄCE CZYNNIKA CHŁODNICZEGO MIEJSCE MONTAŻU Deklarację...
- Page 76 4/6 kW 8/10/12/14/16 kW Budowa jednostki: przykład 8/10 kW Elektryczny układ sterowania 4/6 kW Układ chłodniczy Usunąć pustą płytę po montażu 8/10 kW 12/14/16 kW Usunąć podporę transportową 12/14/16 kW INFORMACJA Rysunki zawarte w niniejszej instrukcji mają charakter poglądowy - faktyczny produkt może się różnić. INFORMACJA W pierwszej kolejności należy zdjąć...
-
Page 77: Środki Ostrożności
Hermetically sealed equipment contains CLASS RUNKI ZEWNĘTRZNE fluorinated greenhouse gases Year of construction: HERMETICALLY SEALED HERMETYCZNIE ZAMKNIĘTE RIELLO S.p.A. EQUIPMENT CONTAINS URZĄDZENIA ZAWIERAJĄ FLUO- FLUORINATED GREENHOUSE Via Ing. Pilade Riello, 7 rok produkcji ROWANE GAZY CIEPLARNIANE 37045 - Legnago (Vr) GASES... - Page 78 Wyjaśnienie użytych skrótów Skróty Opisy Całkowita temperatura wody na wyjściu z modułu hydraulicznego (za wyjściem ogrzewania elektrycznego lub z kotła gazowego) Zadana temperatura (instalacja jednostrefowa) T1S1 Temperatura wody na wyjściu strefy 1 (instalacja dwustrefowa) T1S2 Temperatura wody na wyjściu strefy 2 (instalacja dwustrefowa) Temperatura po stronie cieczy czynnika chłodniczego modułu hydraulicznego Temperatura po stronie czynnika chłodniczego modułu hydraulicznego Temperatura w zasobniku c.w.u.
- Page 79 Nigdy nie należy dotykać bezpośrednio czynnika chłodniczego, aby uniknąć poważnego odmrożenia. Nie należy dotykać przewodów z czynnikiem chłodniczym podczas pracy i bezpośrednio po wyłączeniu urządzenia, ponieważ mogą być one gorące lub zimne, zależnie od stanu czynnika, sprężarki oraz innych części obiegu czynnika chłodniczego. Dotykanie przewodów z czynnikiem chłodniczym grozi oparzeniami lub odmrożeniami.
-
Page 80: Akcesoria
2 AKCESORIA 8/10/12/14/16 kW (mm) 2.1 Akcesoria na wyposażeniu Na wyposażeniu Nazwa Rysunek Ilość Instrukcja montażu i obsługi Zespół rury przyłączeniowej wylotu wody Model Etykieta efektywności 4~6kW 1-fazowy energetycznej 8-10kW 1-fazowy 12-16kW 1-fazowy 12-16kW 3-fazowy 3 PRZED MONTAŻEM UWAGA Przed montażem ... -
Page 81: Wybór Miejsca Montażu W Chłodnym Klimacie
Należy wybrać miejsce instalacji spełniające wymienione Należy upewnić się, że wokół jednostki znajduje się wystarczająca przestrzeń umożliwiająca montaż. kryteria oraz zgodne z wymogami klienta. Należy ustawić wylot jednostki pod odpowiednim kątem do - Dobrze wentylowane miejsca. kierunku wiatru. - Miejsca, w których jednostka nie będzie przeszkadzała ... -
Page 82: Środki Ostrożności Dotyczące Montażu
6 ŚRODKI OSTROŻNOŚCI DOTYCZĄCE MONTAŻU 6.1 Wymiary 8/10/12/14/16 kW 4/6 kW Rys: 6-1 Rys: 6-2 jednostka: mm Model 4/6kW 1008 8/10/12/14/16kW 1118 6.2 Wymogi w zakresie montażu 6.3 Pozycja otworu spustowego Należy sprawdzić wytrzymałość podłoża i wypoziomować Otwór spustowy urządzenie aby jednostka nie generowała drgań... -
Page 83: Wymogi W Zakresie Przestrzeni Serwisowej
6.4 Wymogi w zakresie przestrzeni serwisowej 6.4.1 Informacje dotyczące montażu jednostek jedna na drugiej 2) W przypadku gdy przeszkoda występuje przed wlotem powietrza. 1) W przypadku przeszkód z przodu wylotu powietrza. ≥200mm ≥200mm ≥500mm ≥500mm ≥300mm Rys: 6-6 Jednostka A (mm) UWAGA 4~16kW ≥... -
Page 84: Zamontować Rurę Połączeniową
7 ZAMONTOWAĆ RURĘ POŁĄCZENIOWĄ 7.1 Rurociągi czynnika chłodniczego gazowy płyn 4~16kW Rys.7-1 UWAGA Należy zwrócić uwagę, aby unikać elementów, w których łączy się z rurami przyłączeniowymi. Aby zapobiec utlenianiu się przewodów czynnika chłodniczego wewnątrz podczas spawania, konieczne jest napełnienie azotem, w przeciwnym razie tlenek zablokuje układ cyrkulacji. -
Page 85: Metoda Łączenia
7.4 Metoda łączenia Jednostka zewnętrzna Jednostka wewnętrzna Jednostka wewnętrzna Jednostka zewnętrzna Rys 7-5 Modele 4~16kW Maks. długość rur (H+L1) Maksymalna różnica w wysokości (H) 1) Rozmiar rur po stronie gazu i po stronie cieczy. Model Czynnik chłodniczy Strona gazowa/ strona ciekła 4/6 kW Ø15,9/Ø6,35 8/10 kW... -
Page 86: Okablowanie Jednostki Zewnętrznej
8 OKABLOWANIE JEDNOSTKI ZEWNĘTRZNEJ OSTRZEŻENIE Wyłącznik główny lub inny sposób rozłączenia, posiadający separację styków we wszystkich biegunach, musi być włączony do stałego okablowania zgodnie z odpowiednimi lokalnymi przepisami i regulacjami. Przed wykonaniem jakichkolwiek połączeń należy wyłączyć zasilanie. Należy używać wyłącznie przewodów miedzianych. Nigdy nie ściskać wiązek kabli i upewnić się, że nie mają one kontaktu z orurowaniem i ostrymi krawędziami. -
Page 87: Zdejmowanie Pokrywy Skrzynki Przełączników
Tabela 8-2 Jednostka zewnętrzna Moc prądu Sprężarka Instalacja Napięcie (V) Min. (V) Max . (V) MCA (A) TOCA (A) MFA (A) MSC (A) RLA (A) FLA (A) 220-240 11,50 0,10 0,50 220-240 13,50 0,10 0,50 220-240 14,50 0.17 1,50 10kW 220-240 15,50 0.17... -
Page 88: Przegląd Jednostki
9 PRZEGLĄD JEDNOSTKI 9.1 Demontaż jednostki 8/10/12/14/16kW 4/6kW Aby uzyskać dostęp do sprężarki Aby uzyskać dostęp do sprężarki Drzwi Drzwi i części elektrycznych i części elektrycznych OSTRZEŻENIE Przed zdjęciem drzwi odciąć wszystkie źródła zasilania - tzn. zasilanie urządzenia oraz zasilanie grzałki wspomagającej oraz zasobnika ciepłej wody użytkowej (jeśli dotyczy) 1. - Page 89 PCB A PCB B jednofazowe 12/14/16kW (tył) CN30 PCB A PCB B PCB C trójfazowe 12/14/16kW 9.2.1 Jednofazowe do jednostki 4-16 kW 1) PCB A, 4-10kW, moduł falownika Uwagi: dla 4-6 kW, dwa kondensatory Elementy płyty Złącze sprężarki U Złącze sprężarki V Złącze sprężarki W Złącze wyjściowe +12V/9V (CN20) Złącze wentylatora (CN19)
- Page 90 2) PCB A, 12-16kW, moduł falownika Elementy płyty Złącze sprężarki U CN19 Złącze sprężarki V Złącze sprężarki W Złącze wentylatora (CN19) Złącze wyjściowe +12V/9V (CN20) Złącze komunikacji z PCB B (CN32) Złącze przełącznika wysokiego ciśnienia (CN23) CN20 Zarezerwowany (CN6) Złącze wejściowe L mostka prostownikowego (CN501) CN32 CN502 Złącze wejściowe N mostka prostownikowego (CN502)
- Page 91 9.2.2 Trójfazowe do jednostek 12/14/16 kW 1) PCB A, moduł falownika CN16 CN22 CN15 CN23 CN17 CN18 CN20 CN19 Elementy płyty Złącze wyjściowe +15V (CN20) Złącze sprężarki W (CN19) Złącze sprężarki V (CN18) Złącze sprężarki U (CN17) Wejście zasilania L3 (CN15) Wejście zasilania L2 (CN7) Złącze wejściowe P_out modułu IPM (CN5) Wejście zasilania L1 (CN16)
- Page 92 2) PCB B, Główna płyta sterująca CN41 CN26 CN24 CN36 CN21 CN18 CN31 CN29 CN10 CN35 CN11 CN28 CN20 CN37 CN27 V i n CN22 CN30 CN38 CN53 CN109 Elementy płyty Złącze uziemienia (CN38) Złącze zaworu dwudrogowego 6 (CN27) Złącze zaworu dwudrogowego 5 (CN20) Złącze elektrycznej taśmy grzewczej 2 (CN7) Złącze elektrycznej taśmy grzewczej 1 (CN10) Zarezerwowany (CN11)
- Page 93 3) PCB C, płyta filtra CN204 CN205 CN206 CN30 CN213 CN214 CN202 CN211 CN203 CN200 CN201 CN212 Trójfazowa 12/14/16kW PCB C Elementy płyty Zasilanie L2 (CN201) Zasilanie L3 (CN200) Zasilanie N (CN203) Złącze zasilania 310VDC (CN212) Zarezerwowany (CN211) Złącze dławika wentylatora (CN213) Złącze zasilania modułu falownika (CN214) Uziemienie (PE3) Złącze komunikacji z PCB B (CN8)
-
Page 94: Przebieg Testu
10 PRZEBIEG TESTU Uruchomić zgodnie z "punktami kluczowymi dla pracy próbnej" na pokrywie elektrycznej skrzynki sterowniczej. UWAGA Bieg testowy można rozpocząć dopiero po podłączeniu urządzenia zewnętrznego do zasilania na 12 godzin. Uruchomienie próbne nie może się rozpocząć, dopóki wszystkie zawory nie zostaną potwierdzone jako otwarte. ... -
Page 95: Oddanie Do Użytku
12 ODDANIE DO UŻYTKU Instrukcja obsługi urządzenia wewnętrznego i instrukcja obsługi urządzenia zewnętrznego muszą być przekazane klientowi. Należy wyjaśn- ić szczegółowo klientom zawartość instrukcji obsługi. OSTRZEŻENIE O instalację pompy ciepła należy poprosić sprzedawcę. Niekompletna instalacja wykonana samodzielnie może spowodować wyciek wody, porażenie prądem i pożar. -
Page 96: Funkcje I Wydajność
Nie należy instalować pompy ciepła w miejscu, gdzie może wyciekać łatwopalny gaz. Jeśli gaz wycieknie i pozostanie wokół pompy ciepła, może wybuchnąć pożar. Urządzenie nie jest przeznaczone do użytku przez małe dzieci lub osoby z niepełnosprawnością bez nadzoru. ... -
Page 97: Kody Błędów
13.8 Kody błędów Po aktywacji zabezpieczenia na sterowniku użytkownika wyświetlony zostanie kod błędu (nie obejmuje awarii zewnętrznej). Listę błędów i działań naprawczych znajdziesz w tabeli poniżej. Zresetuj kod błędu, ustawiając przełącznik w rozdzielnicy kolejno w pozycji OFF i ON. Jeśli reset zabezpieczeń... - Page 98 AWARIA LUB PRZYCZYNA AWARII I DZIAŁANIE NAPRAWCZE BŁĘDU OCHRONA Tryb grzania, tryb c.w.u.: 1. Zbyt niski przepływ wody. Zbyt wysoka temperatura wody (możliwe, że w instalacji jest powietrze). Należy odpowietrzyć instalację. 2. Ciśnienie wody niższe niż 0,1 MPa. Należy uzupełnić wodę w instalacji, aby uzyskać ciśnienie w zakresie 0,15~0,2 MPa.
-
Page 99: Dane Techniczne
AWARIA LUB PRZYCZYNA AWARII I DZIAŁANIE NAPRAWCZE BŁĘDU OCHRONA 1. Należy sprawdzić zasilanie. 2. Jeśli zasilacz ma stan OK, należy sprawdzić, czy kontrolka OK jest podświetlona, i stan napięcia PN. Jeśli napięcie wynosi 380 V, problem powoduje płyta główna. Jeśli kontrolka nie świeci, należy odłączyć zasilanie, sprawdzić IGBT. Jeśli napięcie jest nieprawidłowe, płyta falownika jest uszkodzona i należy ją... -
Page 100: Dane Techniczne
Przyłącze spustowe DN32 Maks. długość rury Maks. różnica wysokości Dodany czynnik chłodniczy 20g/m 38g/m Zakres temperatury otoczenia podczas pracy Tryb ogrzewania -25~+35°C Tryb chłodzenia -5~+43°C Tryb ciepłej wody użytkowej -25~+43°C trójfazowy trójfazowy trójfazowy Model 12kW 14kW 16kW 12kW 14kW 16kW Zasilanie elektryczne 220 - 240V~50Hz 380 - 415V 3N~50Hz... -
Page 101: Wydajność Oparta Na Strefie Klimatycznej
Klasa efektywności energetycznej Wydajność chłodzenia (A35/W18) (4) Moc nominalna 4,50 6,55 8,40 10,00 12,00 13,50 14,20 12,00 13,50 14,20 Wskaźnik efektywności energetycznej EER 5,55 4,90 5,05 4,80 4,00 3,61 3,61 4,00 3,61 3,61 Sezonowy współczynnik efektywności 7,77 8,21 8,95 8,78 7,10 6,90 6,75... -
Page 102: Informacje Serwisowe
Strefa umiarkowana - Niska temperatura [30/ 35 °C] Sezonowa sprawność ηs 205,6 189,4 189,4 185,7 181,7 189,3 185,6 181,6 Współczynnik SCOP kW/kW 4,85 4,95 5,22 5,20 4,81 4,72 4,62 4,81 4,72 4,62 Deklarowane obciążenie (Pdesign) -7°C 4,88 6,03 7,18 8,10 10,61 12,14 13,45... - Page 103 Obecność gaśnicy Jeśli prace z urządzeniem lub jego komponentami wymagają prac wykonywanych na gorąco, w łatwo dostępnym miejscu musi znajdować się odpowiedni sprzęt gaśniczy (gaśnica proszkowa lub śniegowa). Brak źródła iskry Żadna z osób przeprowadzających prace serwisowe związane z elementami- rurami, w których znajduje się palny czynnik chłodniczy lub w których ten czynnik chłodniczy wcześniej występował, nie może używać...
- Page 104 Nie należy dopuść do tego, aby do poszukiwania lub wykrywania wycieków czynnika chłodniczego stosowane były potencjalne źródła zapłonu. Nie używaj palnika halogenowego (ani innych wykrywaczy wykorzystujący otwarty ogień). 14) Metody wykrywania wycieków Poniższe metody wykrywania wycieków są akceptowalne w przypadku układów zawierających łatwopalny czynnik chłodniczy. Aby wykryć...
- Page 105 18) Oznaczenia Sprzęt należy oznaczyć informacjami o wycofaniu z eksploatacji lub odprowadzeniu czynnika chłodniczego. Etykieta musi być opatrzona datą i podpisana. Należy upewnić się, że na sprzęcie są etykiety ostrzegające o zawartości łatwopalnego czynnika chłodniczego. 19) Usuwanie czynnika chłodniczego Podczas usuwania czynnika chłodniczego z układu na czas serwisu lub przed wycofaniem z eksploatacji zalecaną dobrą praktyką jest bezpieczne usunięcie całego czynnika chłodniczego.
- Page 106 ANEKS A: obieg czynnika chłodniczego Chłodzenie Grzanie Pozycja Opis Pozycja Opis Sprężarka Czujnik wymiennika zewnętrznego Zawór czterodrogowy Zawór odcinający (gaz) Separator gazu i cieczy Zawór odcinający (ciecz) Wymiennik ciepła po stronie powietrza Przełącznik wysokiego ciśnienia Elektroniczny zawór rozprężny Przełącznik niskiego ciśnienia Zawór elektromagnetyczny Czujnik ciśnienia Filtr siatkowy...
- Page 107 ANEKS B: Schemat elektryczny 4/6/8/10kW CN19 WENTYLATOR PCB A, Płyta inwertera W(C) CZARNY dla 1 fazy V(S) U(R) NIEBIESKI CZERWONY CN50 1 CN50 2 SPRĘŻARKA CN27 NIEBIESKI N-OUT CN28 BRĄZOWY CN17 CN26 12/9V L-OUT DEBUG PCB B, Główna płyta sterowania dla 1 fazy P-SEN P-SEN H-PRO...
- Page 108 ANEKS C: Schemat elektryczny 12/14/16kW CN20 CN32 WENTYLATOR PCB A, Płyta inwertera dla 1 fazy W(C) CZARNY V(S) U(R) NIEBIESKI CZERWONY CN50 2 CN50 1 SPRĘŻARKA CN27 N-OUT NIEBIESKI CN28 BRĄZOWY L-OUT CN17 CN26 12/9V DEBUG PCB B, Główna płyta sterowania dla 1 fazy P-SEN P-SEN...
- Page 109 ANEKS D: Schemat elektryczny 3-fazowego 12/14/16kW CZARNY CZARNY CN16 CZARNY H-SEN CZERWONY BRĄZOWY BRĄZOWY BRĄZOWY SZARY Płyta CN15 CN41 CN26 CN19 CN24 CN4 CN6 CN32 sprężarki SZARY H-SEN L-SEN RDZEŃ CZERWONY CN17 FERRYTOWY SZARY O-SPRĘŻARKA CN36 MOC-I CZARNY CN18 CN21 RDZEŃ...
- Page 112 RIELLO S.p.A. Via Ing. Pilade Riello, 7 37045 - Legnago (VR) www.riello.it Poiché l’Azienda è costantemente impegnata nel continuo perfezionamento di tutta la sua produzione, le caratteristiche estetiche e dimensionali, i dati tecnici, gli equipaggiamenti e gli accessori, possono essere soggetti a variazione.
Need help?
Do you have a question about the A2WHPR32S/004 and is the answer not in the manual?
Questions and answers