Table of Contents
Advertisement
Quick Links
Advertisement
Table of Contents

Subscribe to Our Youtube Channel
Related Manuals for National Instruments CP400X


Summary of Contents for National Instruments CP400X
- Page 1 CP400X...
-
Page 2: Table Of Contents
This document explains how to install, configure, and test the PXIe-5163. The PXIe-5163 is a 200 MHz, 1 GS/s oscilloscope. Documentation for the PXIe-5163 is available from the Start menu by navigating to NI-SCOPE Documentation in the National Instruments folder. Contents Verifying the System Requirements..................2 Unpacking the Kit........................ -
Page 3: Verifying The System Requirements
Verifying the System Requirements To use the NI-SCOPE instrument driver, your system must meet certain requirements. Refer to the product readme, which is available on the driver software media or online at ni.com/manuals, for more information about minimum system requirements, recommended system, and supported application development environments (ADEs). -
Page 4: Other Equipment
100x passive probe, 500 MHz SP500X 783629-01 10x passive probe, 500 MHz CC0550X 786846-01 5 A RMS, 50 MHz current probe CC05120X 786847-01 5 A RMS, 120 MHz current probe PXIe-5163 Getting Started Guide | © National Instruments | 3... -
Page 5: Preparing The Environment
Table 1. Probe Options for the PXIe-5163 (Continued) Model NI Part Number Description CC5002X 786848-01 500 A RMS, 2 MHz current probe CC15010X 786849-01 150 A RMS, 10 MHz current probe CC3050X 785561-01 30 A RMS, 50 MHz current probe CC30100X 785562-01 30 A RMS, 100 MHz current probe... -
Page 6: Installing The Pxie-5163
Ensure that the ejector handle is in the downward (unlatched) position. Place the module edges into the module guides at the top and bottom of the chassis. Slide the module into the slot until it is fully inserted. PXIe-5163 Getting Started Guide | © National Instruments | 5... - Page 7 Figure 3. Module Installation 1. Chassis 2. Hardware Module 3. Ejector Handle in Downward (Unlatched) Position Latch the module in place by pulling up on the ejector handle. 10. Secure the module front panel to the chassis using the front-panel mounting screws. Tightening the top and bottom mounting screws increases mechanical Note stability and also electrically connects the front panel to the chassis, which can...
-
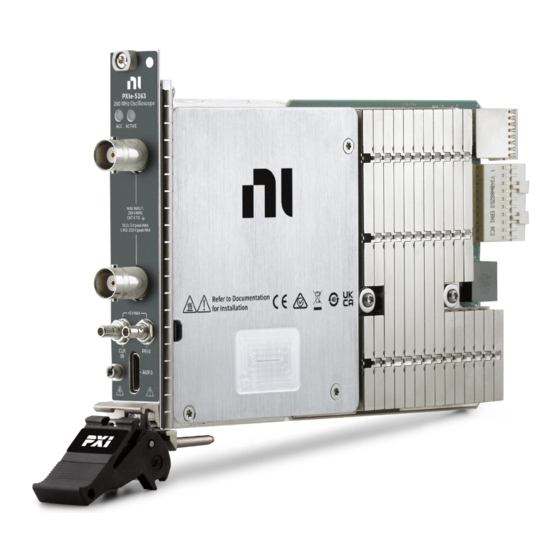
Page 8: Pxie-5163 Front Panel And Pinout
CH 0 MAX INPUT: 250 V RMS CAT II TO 50 Ω: 5 V Peak MAX 1 MΩ: 250 V Peak MAX CH 1 +5 V MAX PFI 0 AUX 0 PXIe-5163 Getting Started Guide | © National Instruments | 7... - Page 9 Table 2. Connectors Signal Connector Type Description CH 0 and CH 1 BNC female Analog input connection; digitizes data and triggers acquisitions. CLK IN Imports an external reference clock or sample clock to the oscilloscope. PFI 0 PFI line for digital trigger input/output, probe compensation.
- Page 10 AUX 0/PFI 0 Bidirectional PFI line AUX 0/PFI 1 Bidirectional PFI line Ground reference for signals AUX 0/PFI 2 Bidirectional PFI line AUX 0/PFI 3 Bidirectional PFI line Ground reference for signals PXIe-5163 Getting Started Guide | © National Instruments | 9...
-
Page 11: Pxie-5163 Scb-19 Pinout
Table 5. AUX 0 Connector Pin Assignments (Continued) Signal Signal Description AUX 0/PFI 4 Bidirectional PFI line AUX 0/PFI 5 Bidirectional PFI line AUX 0/PFI 6 Bidirectional PFI line AUX 0/PFI 7 Bidirectional PFI line +3.3 V +3.3 V power (200 mA maximum) Ground reference for signals PXIe-5163 SCB-19 Pinout You can use the SCB-19 connector block to connect digital signals to the AUX 0 connector on... -
Page 12: Pxie-5163 Mini-Hdmi Breakout Cable To 6 Bnc Pinout
Mini-HDMI Breakout Cable to 6 BNC signals when connected to the AUX 0 front panel connector. PFI 1 PFI 2 PFI 0 PFI 3 CLK OUT CLK IN PXIe-5163 Getting Started Guide | © National Instruments | 11... -
Page 13: Configuring The Pxie-5163 In Max
Table 7. Mini-HDMI Breakout Cable to 6 BNC Signal Descriptions Signal Connector Type Description CLK IN Used to import an external reference clock CLK OUT Used to export the reference clock PFI 0 Bidirectional PFI line BNC female PFI 1 Bidirectional PFI line PFI 2 Bidirectional PFI line... -
Page 14: Running Self-Calibration
In the instrument header menu in the upper-right corner of the panel ( ), add the PXIe-5163 to the large panel with Add/Remove Devices. Click Auto to automatically configure device settings for the detected signal. PXIe-5163 Getting Started Guide | © National Instruments | 13... -
Page 15: Making A Measurement With Labview
If the soft front panel is not already running, click Run/Stop. Add oscilloscope measurements to the channel by selecting Add/Remove in the measurement table of the oscilloscope. For more information on the measurements available for oscilloscopes in InstrumentStudio, refer to the InstrumentStudio Manual at ni.com/manuals. Making a Measurement with LabVIEW Launch LabVIEW. - Page 16 This process ensures you are using the maximum dynamic range of the ADC. Examine the digitized signal and adjust the tunable capacitor on the probe. The probe is correctly compensated when the waveform appears as square as possible: PXIe-5163 Getting Started Guide | © National Instruments | 15...
-
Page 17: Programming The Pxie-5163
Compensated Correctly Undercompensated Overcompensated Probe Adjustment Signal Probe Adjustment Signal Probe Adjustment Signal Proper Amplitude of a Reduced Amplitude of a Increased Amplitude of a 1 MHz Test Signal 1 MHz Test Signal 1 MHz Test Signal Once compensated, the probe conveys signals to the input channel accurately, without artificially attenuating or amplifying frequency components of the signal. - Page 18 • From Measurement & Automation Explorer (MAX), select a device and then click Test Panels..This launches InstrumentStudio and runs a soft front panel for the device you selected. PXIe-5163 Getting Started Guide | © National Instruments | 17...
-
Page 19: Ni-Scope Examples
Table 8. PXIe-5163 Programming Options (Continued) Application Location Description NI-SCOPE LabVIEW—Available on the LabVIEW The NI-SCOPE API Instrument Driver Functions palette at Measurement I/O» configures and operates the NI-SCOPE. device hardware and provides customizable acquisition, C or LabWindows/CVI—Available at control, analysis, and Program Files»IVI Foundation»IVI»... -
Page 20: Troubleshooting
What Should I Do if the PXIe-5163 Doesn't Appear in MAX? In the MAX configuration tree, expand Devices and Interfaces. Expand the Chassis tree to see the list of installed hardware, and press <F5> to refresh the list. PXIe-5163 Getting Started Guide | © National Instruments | 19... -
Page 21: What Should I Do If The Pxie-5163 Fails The Self-Test
If the module is still not listed, power off the system, ensure that all hardware is correctly installed, and restart the system. Navigate to the Device Manager. Operating System Description Windows 10/8.1 Right-click the Start button, and select Device Manager. Windows 7 Select Start»Control Panel»Device Manager. -
Page 22: Where To Go Next
1 866 ASK MYNI (275 6964). For support outside the United States, visit the Worldwide Offices section of ni.com/niglobal access the branch office websites, which provide up-to-date contact information. PXIe-5163 Getting Started Guide | © National Instruments | 21... - Page 23 For patents covering NI products/technology, refer to the appropriate location: Help»Patents in your patents.txt ni.com/patents software, the file on your media, or the National Instruments Patent Notice at . You can find information about end-user license agreements (EULAs) and third-party legal notices in the readme file for your NI product. Refer ni.com/legal/export-compliance...
Need help?
Do you have a question about the CP400X and is the answer not in the manual?
Questions and answers