Advertisement
Quick Links
TYGER RIDER
BEFORE INSTALLATION
READ INSTRUCTIONS CAREFULLY BEFORE STARTING INSTALLATION.
REMOVE CONTENTS FROM BOX AND VERIFY ALL PARTS ARE PRESENT.
FAILURE TO IDENTIFY DAMAGE BEFORE INSTALLATION COULD LEAD TO A
REJECTION OF ANY CLAIM. IF MISSING PARTS OR ANY DAMAGE FOUND,
PLEASE TAKE A PICTURE FOR THE CLAIM PURPOSE. TO FILE YOUR CLAIM,
PLEASE VISIT: WWW.TYGERAUTO.COM/CONTACT
TORQUE VALUES
Fastener Size
Class 8.8 Torque (ft-lbs)
6mm
8mm
10mm
12mm
14mm
(1)Left or Right
Mounting Brackets
®
Class 10.9 Torque (ft-lbs)
6-7
15-16
31-32
54-55
87-88
125-126
Passenger/Right Front
Upper Bracket
Passenger/Right Front
Lower Bracket
Customer Support: www.tygerauto.com/contact
x1
x1
x1
x1
x3
x1
x8
6-7
x9
22-23
x9
44-45
x9
78-79
x1
x8
8mm Bolt Plate
(8)8mm Clip Nuts
1/7
Parts List
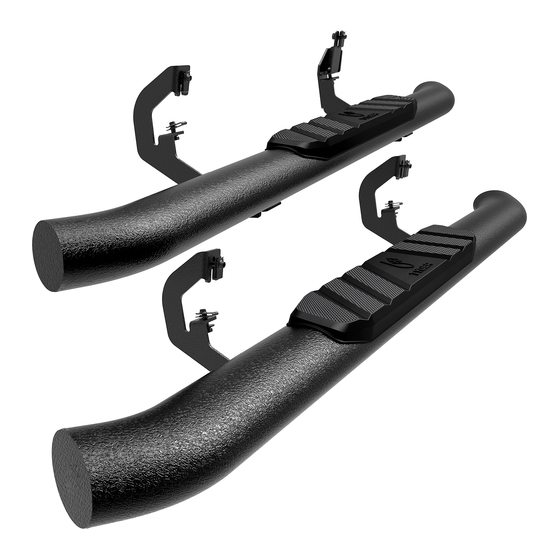
Driver/Left Tyger Sidebar
Passenger/Right Tyger Sidebar
Passenger/Right Front Upper Bracket
Passenger/Right Front Lower Bracket
Mounting Brackets (use for left or right)
8-1.25mm Bolt Plate
8-1.25mm Clip-On Nuts
8-1.25mm x 25mm Hex Bolts
8mm x 24mm x 2mm Flat Washers
8mm Lock Washers
8mm Nylon Lock Nut
8-1.25mm x 25mm Combo Hex Bolts
(2) Left or Right
Mounting Brackets
TG-SS2C35298
V211118
Advertisement

Subscribe to Our Youtube Channel
Related Manuals for Tyger RIDER TG-SS2C35298


Summary of Contents for Tyger RIDER TG-SS2C35298
- Page 1 TYGER RIDER ® TG-SS2C35298 Parts List BEFORE INSTALLATION Driver/Left Tyger Sidebar READ INSTRUCTIONS CAREFULLY BEFORE STARTING INSTALLATION. REMOVE CONTENTS FROM BOX AND VERIFY ALL PARTS ARE PRESENT. Passenger/Right Tyger Sidebar FAILURE TO IDENTIFY DAMAGE BEFORE INSTALLATION COULD LEAD TO A REJECTION OF ANY CLAIM.
- Page 2 PROCEDURE: REMOVE CONTENTS FROM BOX. VERIFY ALL PARTS ARE PRESENT. READ INSTRUCTIONS CAREFULLY BEFORE STARTING INSTALLATION. ON MODELS WITH DEF TANK, SELECT A FLAT, LEVEL AREA FOR INSTALLATION. MAY REQUIRE CUTTING. Factory 8mm threaded insert in body panel STEP 1 Start the installation under the driver/left side of the vehicle.
- Page 3 8mm Clip Nuts (2) 8mm x 25mm Hex Bolts (2) 8mm Lock Washers (2) 8mm Flat Washers (Fig 4) Driver/left rear mounting location. Models without threaded mounting holes, (Fig 5) Driver/Left Front Bracket installed slide 8mm Clip Nuts over mounting holes Locate top mounting location on the back side of the body panel.
- Page 4 STEP 5 STEP 7 Select the Driver/left Sidebar. Carefully position the Sidebar onto Move to the Passenger/Right side of the vehicle. Determine if the the (2) Mounting Brackets. vehicle is equipped with a plastic diesel exhaust fluid (DEF) tank (Figs 8-10). IMPORTANT: DO NOT slide, (front to back or rotate), the Sidebar on the Brackets or damage to the finish may result.
- Page 5 On 2017-on models: a. Remove the (4) hex bolts attaching plastic cover to DEF tank (Fig 10) and remove plastic cover (Fig 17). NOTE: On 2017-on 25-3500 models, only remove the plastic cover from the DEF tank. DO NOT lower or remove the DEF tank and proceed to STEP 8.
- Page 6 b. Models with flat tab and hole: Insert the 8mm Bolt Plate (Fig 14) down through the hole in the Upper Bracket and mounting tab (Figs 15 & 16). Attach the Lower Bracket to the bottom of the body and Bolt Plate with (1) 8mm Flat Washer and (1) 8mm Nylon Lock Nut (Fig 13).
- Page 7 STEP 12 STEP 10 Repeat STEPS 5 & 6 to install the Passenger/Right Sidebar. Attach the Lower Bracket to the side of the Upper Bracket with (1) 8mm x 25mm Hex Bolt, (1) 8mm Lock Washer and (1) 8mm Flat Washer (Figs 13 &...
Need help?
Do you have a question about the RIDER TG-SS2C35298 and is the answer not in the manual?
Questions and answers