Table of Contents
Advertisement
Quick Links
IMPORTANT:
THESE INSTRUCTIONS ARE TO
REMAIN WITH THE HOMEOWNER.
TESTED and LISTED to;
CAN/ULC S610 AND UL127
SAFETY NOTICE
If this Fireplace is not properly installed,
a house fire may result. For your safety,
follow the installation instructions.
Contact local building or fire officials
about restrictions and installation
inspection requirements in your area.
Meets the U.S.Environmental Protection
Agency's 2020 Particulate Emission Standards
for Cord Wood
Visit www.pacificenergy.net for the most recent version of this manual
040523-36
SERIAL #
INSTALLATION
AND OPERATING
INSTRUCTIONS
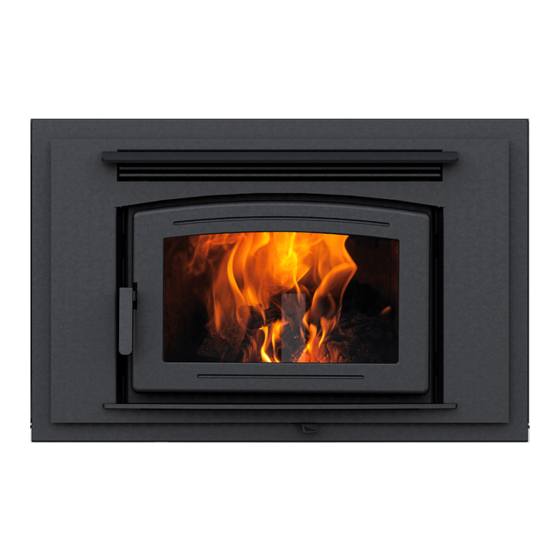
MODEL:
FP25 LE,
FP25AR LE
FP25 LE
100003890
Advertisement
Table of Contents

Subscribe to Our Youtube Channel
Related Manuals for Pacific energy FP25 LE


Summary of Contents for Pacific energy FP25 LE
- Page 1 Contact local building or fire officials about restrictions and installation AND OPERATING inspection requirements in your area. INSTRUCTIONS MODEL: FP25 LE, Meets the U.S.Environmental Protection Agency's 2020 Particulate Emission Standards FP25AR LE for Cord Wood Visit www.pacificenergy.net for the most recent version of this manual...
-
Page 2: Table Of Contents
PLEASE SAVE THESE INSTRUCTIONS This manual describes the installation and operation of the Pacific Energy, FP25LE/FP25 AR LE wood burning Fireplace. SAFETY NOTICE: If this heater is not properly installed, a house fire may result. For your safety, follow the installation instructions. -
Page 3: Rating Label
BLOWER ELECTRICAL RATING 115V, 60HZ, 1.1AMP • REPLACE GLASS ONLY WITH 5mm CERAMIC GLASS. • DO NOT USE OR INSTALL COMPONENTS OR PRODUCTS NOT SPECIFIED IN PACIFIC ENERGY INSTALLATION INSTRUCTIONS. • DO NOT USE A FIREPLACE INSERT OR OTHER PRODUCTS NOT SPECIFIED FOR USE WITH THIS PRODUCT. -
Page 4: Safety
Chimney fires are easy to detect; they usually involve one or more of the following: • Flames and sparks shooting out of the top of the chimney • A roaring sound • Vibration of the chimney FP25 LE 040523-36 100003890... -
Page 5: Curing Of The Paint Finish
The smoke is primarily Carbon Dioxide, and therefore non-toxic but uncomfortable. • DO NOT STORE/PLACE WOOD WITHIN THE STOVES INSTALLATION CLEARANCES, INCLUDING IN FRONT OF THE UNIT. FP25 LE 040523-36 100003890... -
Page 6: Operation
Do not burn anything but wood. Other fuels, eg. charcoal, can produce large amounts of carbon monoxide, a tasteless, odorless gas that can kill. Under no circumstances should you attempt to barbecue in this heater. FP25 LE 040523-36 100003890... -
Page 7: How To Test Your Wood
4. Do not load fuel to a height that exceeds 7 1/2" from the firebox floor or in such a manner that would be hazardous when opening the door. 5. For extended or overnight burns, unsplit logs are preferred. Remember to char the wood completely on "High" setting before adjusting air control to the "Low" setting for overnight burn. FP25 LE 040523-36 100003890... -
Page 8: Restarting After Extended Or Overnight Burns
WARNING: This unit is not designed to be operated during normal operation with the firing door open. In addition to the obvious hazard of sparks landing on combustibles, an open fire door will cause the heater to draw excess air from the living space and possibly cause suffocation. FP25 LE 040523-36 100003890... -
Page 9: Maintenance Checks
Back side of airwash chamber. • Baffle locking pin. • Boost manifold cover. When Cleaning the Chimney System: • Top baffle board/blanket. • Baffle. • Top heat shield and mounting bolt. • Baffle Gasket. • Brick Rails. • Manifold. FP25 LE 040523-36 100003890... -
Page 10: Maintenance
If the ashes are disposed of by burial in soil or otherwise locally dispersed, they should be retained in closed container until all cinders have thoroughly cooled. Other waste should not be placed in this con- tainer. FP25 LE 040523-36 100003890... -
Page 11: Door Glass/Gaskets
• DOOR GASKETS - The gasket used by Pacific Energy (7/8”(22mm) medium density fibreglass rope) requires only light pressure to seal. This will prolong seal life. It is important that the door seal be maintained in good condition. Periodically inspect seals and replace if necessary. -
Page 12: Baffle Removal
3. Replace the access panel. Replace the gasket if needed. MAKE SURE THE GASKET IS IN GOOD SHAPE AND POSITIONED CORRECTLY. IF IT IS DAMAGED THEN IT MUST BE REPLACED. Figure 2: Secondary Air Box clean out cover. FP25 LE 040523-36 100003890... -
Page 13: Blower Replacement
5. Remove the three bolts securing the blower to the mounting bracket and replace the blower (Figure 4). 6. Reverse all previous steps to reinstall the new blower. See "Convection Blower Wiring" on page 22 for wiring diagram. Bolts Bolts Figure 4: Blower mounting bolts. Figure 3: Removing mounting bracket bolts. FP25 LE 040523-36 100003890... -
Page 14: Fireplace Installation
In Canada: the unit must be installed with access openings into the built in enclosure for inspection purposes. The access covers must require a household tool to open. Crate Removal 1. Carefully remove wood top and supports. 2. Remove the screws securing the fireplace to the pallet(4). 3. Remove from pallet bottom. FP25 LE 040523-36 100003890... -
Page 15: Dimensions
Minimum chimney height: minimum total chimney height from fireplace bottom to 15’ (4.6m) below the chimney rain cap. Recommended maximum chimney height (at sea level) from top of fireplace to 35’ (10.7m) rain cap. Maximum unsupported chimney height. 20’ (6.1m) FP25 LE 040523-36 100003890... -
Page 16: Minimum Framing Dimensions
Do not build anything inside this Minimum 24” chase area. [610mm] Do Not insulate the front portion of the 56 1/2” chase above the unit. [1.435m] Figure 7: FP25LE framing enclosure. FP25 LE 040523-36 100003890... -
Page 17: Framing Kit Installation
It is very important to provide a flat surface to attach the outer non-combustible board to. • Attach the Framing kit securely to the chase's framing using appropriate fasteners. Figure 9: FP25LE Chase with unit . FP25 LE 040523-36 100003890... -
Page 18: Chimney Installation
3. Install the pipe manufacturer's fireplace anchor/base plate by inserting it into the flue collar on the fireplace. We recommend sealing the joint with stove cement. Figure 10: FP25LE Basic installation. Secure the anchor plate with stainless steel screws. FP25 LE 040523-36 100003890... -
Page 19: Offset Chimney
4. Use a plumb bob to line up the centre of the hole with the center of the flue collar on the fireplace. Cut a hole for the chimney in the ceiling/floor. Frame the hole as described in Figure 10 on page 18. 5. Install all firestops following the chimney manufacturer's directions. FP25 LE 040523-36 100003890... -
Page 20: Masonry Chimney
NFPA 211 ULC-S635 or UL-1777 16” [405mm] listed liner Mortar Minimum distance system. to the combustible ceiling. Adapter Minimum 12” Mortar chimney section ULC-S629 or UL-103HT listed Chimney Anchor system. Plate Figure 12: FP25LE Masonry Installation. FP25 LE 040523-36 100003890... -
Page 21: Combustion Air
WARNING: THE COMBUSTION AIR INLET MUST BE AT LEAST 5ft (1.5m) BELOW CHIMNEY OUTLET AND MUST NEVER TERMINATE IN ATTIC SPACES. OUTSIDE AIR ADAPTER left or right mounting Air Intake from side or rear Figure 13: FP25LE Air intake - rear view. Figure 14: Typical outside air installation. FP25 LE 040523-36 100003890... -
Page 22: Convection Blower Wiring
USA with the National Electrical Code, ANSI/NFPA 70 (latest edition). Electrical Rating : 115 V, 60 Hz, 1.1A Blowers Temp Switch From Wall Neutral Switch/Fan controller Line Electrical Ground Junction Box Figure 16: FP Wiring Diagraml. Figure 15: Junction box. FP25 LE 040523-36 100003890... -
Page 23: Ember Protection
Minimum Width - 35"(889mm) centered with door opening Minimum Width - 57 1/2"(1461mm) centered with door opening Minimum Overall Depth - 16 1/2"(420mm) Minimum Overall Depth - 18"(460mm) Figure 19: FP25LE Ember protection Canada Figure 18: FP25LE Ember protection US. FP25 LE 040523-36 100003890... -
Page 24: Option: Remote Heat Duct Kit Installation
EACH REMOTE HEAT KIT INSTALLED ON THE FIREPLACE. The inlets can be combined, but it must be 60in² or greater. No chase air inlet is required if not installing a remote heat kit, but a single inlet and outlet is recommended for increased efficiency. FP25 LE 040523-36 100003890... -
Page 25: Heat Duct Replacement Parts
TRANSITION BOOT ..........5096.853 12 RHEOSTAT KIT ............5025.001 BLOWER CASING FACE PLATE ........9144 13 JUNCTION BOX ............5024.408 BLOWER FAN BRACKET ..........9146 14 INLET GRILL ............5096.851 ELECTRICAL CONNECTION COVER ....... 9144.5 REMOTE BLOWER BOX ........WODC.9141 FP25 LE 040523-36 100003890... -
Page 26: Ducting Options
To maximize the performance the length and number of bends should be kept to a minimum. 12" (305mm) from the CEILING or SIDE WALLS 36" (914mm) from the FLOOR FP25 LE 040523-36 100003890... -
Page 27: Duct Installation
4. Attach the Duct Adapter to the top of the fireplace over top of the Backflow Damper (Figure 24). Using 4 screws secure both pieces to the Fireplace's outer casing. Back ow damper installed Figure 23: Backflow damper. Figure 24: Duct collar. FP25 LE 040523-36 100003890... - Page 28 11. Install the Inlet grill(s) over the chase inlet opening(s) after any decorative finish has been applied. Blower Casing Face Plate Egdes Outlet Grill Mounting Blower Casing Holes Egdes Figure 26: Blower details. Figure 27: Grill mounting holes. FP25 LE 040523-36 100003890...
-
Page 29: Remote Heat Kit Wiring
This kit includes a junction box, rheostat and cover plate. The junction box should be mounted in a convenient location away from the fireplace. Use only copper conductors Blower WALL SWITCH/ SPEED CONTROLLER Ground Neutral (white) Hot (black) Terminal Strip Figure 28: T120-WODC remote heat kit wiring diagram. FP25 LE 040523-36 100003890... -
Page 30: Finshing The Chase
49 1/4” MIN. 1.25m 30in (194cm ) CHASE AIR INLET Minimum Minimum 1 1/2”(38mm) 58” (1.47m) VARIOUS LOCATIONS FOR CHASE AIR INLET, CAN ALSO BE ON OTHER SIDE OF CHASE Figure 29: FP25LE Facing and air inlets. FP25 LE 040523-36 100003890... -
Page 31: Mantel And Finishing Clearances
**Raised hearth must be completly constructed of non-combustible materials** Minimum width of floor protection from side of door opening. 8” (200mm) Minimum depth of non-combustible ember protector: from the front of the fireplace. 16 1/2” (420mm) FP25 LE 040523-36 100003890... -
Page 32: Firebrick Installation Instructions
(115 mm x 115 mm x 32 mm) 7847 2 1/4” X 9” X 1 1/4” (57 mm x 230 mm x 32 mm) 7847.3 2 1/4” X 4 1/2” X 1 1/4” (57 mm x 115mm x 32 mm) 7847.1 FP25 LE 040523-36 100003890... -
Page 33: Rating Label Location & Access
3. To access/view the rating label, gently pull the cable attached to the rating label plate and lift the plate free of the slot. Figure 33. Figure 32: Rating label in place. Figure 33: Rating label pulled out. FP25 LE 040523-36 100003890... -
Page 34: Troubleshooting
- Check outside air supply for obstruction blocked - Check that room air cover is removed 2. Draft too low - Chimney plugged or restricted, inspect and clean - Chimney oversized or otherwise unsuitable, consult Dealer FP25 LE 040523-36 100003890... -
Page 35: Parts Diagram
..Door Complete w gasket and glass 80000253 All parts may be ordered from your nearest Pacific ..Arch Door Complete w/ gasket and glass 80000166 Energy dealer. Contact Pacific Energy for the location of the dealer nearest you. NE25.DRBK FP25 LE 040523-36 100003890... - Page 36 ©2023 Copyright Pacific Energy Fireplace Products LTD Reproduction, adaptation, or translation without prior written permission is prohibited, except as allowed under the copyright laws. For technical support, please contact your retailer Web site: www.pacificenergy.net 2975 Allenby Rd., Duncan, BC V9l 6V8...
Need help?
Do you have a question about the FP25 LE and is the answer not in the manual?
Questions and answers