Table of Contents
Advertisement
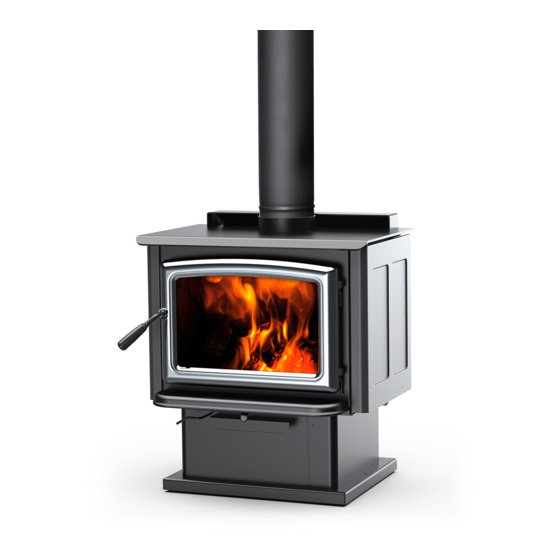
Quick Links
SAFETY NOTICE
If this stove is not properly
installed, a house fire may
result. For your safety, follow
the installation directions.
C o n t a c t l o c a l b u i l d i n g o r
fire officials about restrictions
and installation inspection
requirements in your area.
TESTED and LISTED
to CAN/ULC S627-M93 AND UL 1482-98
Meets the U.S. Environmental Protection
Agency's July 1990 Particulate Emission
Standards
STUDY CAREFULLY BEFORE
PROCEEDING
070509-16
PLEASE SAVE THESE INSTRUCTIONS
VISTA and CLASSIC-C
INSTALLATION
AND OPERATING
INSTRUCTIONS
Models
Pacific VISTA
VISTA CLASSIC
SERIES - C
5055.3
5055.3
Advertisement
Table of Contents

Related Manuals for Pacific energy Pacific VISTA


Summary of Contents for Pacific energy Pacific VISTA
- Page 1 CAN/ULC S627-M93 AND UL 1482-98 Meets the U.S. Environmental Protection INSTALLATION Agency's July 1990 Particulate Emission Standards AND OPERATING INSTRUCTIONS Models Pacific VISTA VISTA CLASSIC STUDY CAREFULLY BEFORE PROCEEDING SERIES - C PLEASE SAVE THESE INSTRUCTIONS 070509-16 VISTA and CLASSIC-C 5055.3...
-
Page 2: Table Of Contents
CREOSOTE FORMATION AND NEED FOR REMOVAL ...............11 REPLACEMENT PARTS - PACIFIC VISTA ..................12 REPLACEMENT PARTS - VISTA CLASSIC ..................13 FIREBRICK INSTALLATION INSTRUCTIONS ................14 SAFETY LABEL - Pacific VISTA and VISTA CLASSIC ..............15 Pacific Vista - Pedestal Model Pacific Vista - Leg Model 24"... -
Page 3: Safety And Maintenance
• PLEASE SAVE THESE INSTRUCTIONS • NOTE: WE STRONGLY RECOMMEND THAT SMOKE DETECTORS BE INSTALLED. If smoke detectors have been previously installed, you may notice that they are operating more frequently. This may be due to curing of stove paint or fumes caused by accidentally leaving the fire door open. Do not disconnect the detectors. If necessary, relocate them to reduce their sensitivity. •... -
Page 4: Assembly
FIG. #1a Minimum Clearances to Combustibles Single Wall Connector - Residential 10" 15" 20 3/4" 22 5/8" 14" 26" 10" Double Wall Connector - Residential 7" 12 3/4" 16 3/4" 11" 15 5/8" 12" 3" 12" 12" 24" 24" 3" Alcove height - 7' min. - Page 5 FIG. #2 Spark arrestor The chimney may incorpo- rain cap rate an offset. To do this safely, all sections of listed connector, offset elbows and chimney section must be screwed together by Chimney at least three sheet metal screws per joint. The chimney must be suitably supported Storm collar by the chimney manufac-...
-
Page 6: Mobile Home Installation
Avoid having joints between ceiling and roof. Install Pacific Vista and Vista Classic: Clearances to combustible radiation shield. Assemble flashing and storm collar and surfaces and materials are shown in Figure #1a, page 4. be sure to maintain the vapour barrier at this point. (Seal securely) Attach rain cap and check flashing for leaks. -
Page 7: Residential Installation
(smoke pipe) or a listed double-wall connector. to the other sides. See Figure #3a below. Pacific Vista and Vista Classic: Clearances to combustible In USA: 16" (406 mm) to the front and 8" (203 mm) to the surfaces and materials are shown in Figure #1a, page 4. -
Page 8: Combustion Air
Consult your local building condition. code. Your PACIFIC ENERGY heater is designed for maximum Note: The living space around the heater must be ventilated overall efficiency at a moderate firing rate. Overfiring is haz- with good air circulation. Anything that may cause a negative ardous and a waste of fuel. -
Page 9: Proper Draft
too low a setting. As every home's heating needs vary while pulling ashes into the hole. Avoid large charcoal pieces (i.e.. insulation, windows, climate, etc.) the proper setting as these still contain heat value. Release handle and push in can only be found by trial and error and should be noted to lock. -
Page 10: Optional Blower
OPTIONAL BLOWER Automatic: To operate the blower automatically, set the The optional blower kit (# WODC.BLOW) is equipped with rocker switch on the side of the fan housing to "Auto" and set a three prong power cord and may be installed at any time. the speed control to desired setting. -
Page 11: Creosote Formation And Need For Removal
CREOSOTE FORMATION AND NEED FOR REMOVAL CHIMNEY FIRES hen wood is burned slowly, it produces tar and other or- ganic vapours, which combine with expelled moisture to form The result of excessive creosote buildup is a chimney fire. creosote. The creosote vapours condense in the relatively Chimney fires are dangerous. Chimney inside temperatures cool chimney flue of a slow burning fire. As a result, creosote can exceed 2000° F. This causes much higher than normal residue accumulates on the flue lining. When ignited, this temperatures in the chimney and on its exterior surfaces. -
Page 12: Replacement Parts - Pacific Vista
REPLACEMENT PARTS - PACIFIC VISTA FIGURE #4a (WHEN ORDERING, INCLUDE PART NUMBER WITH DESCRIPTION) ITEM DESCRIPTION PART NO. ITEM DESCRIPTION PART NO. 1..SIDE SHIELD, LEFT OR RIGHT ..... VIST.2201 .... FIREBRICK, SET ........BRIC.VISTA 2..TOP DEFLECTOR ........VIST.2203 12a..BRICK RAIL, LEFT ...........2122 3..ASH LIP (c/w trim & hardware) ..ALIP.221001MB 12b.. -
Page 13: Replacement Parts - Vista Classic
REPLACEMENT PARTS - VISTA CLASSIC FIGURE #4b (WHEN ORDERING, INCLUDE PART NUMBER WITH DESCRIPTION) ITEM DESCRIPTION PART NO. ITEM DESCRIPTION PART NO. 1..VISTA CLASSIC SIDE SHIELD, L/R ..VISC.2251_ _ 13..RAIL EXTENSIONS (2 pc. required) ....2123 2..VISTA CLASSIC TOP ......VISC.2240_ _ 14..BAFFLE INSULATION KIT (3 pc.) ....5068.74 3.. -
Page 14: Firebrick Installation Instructions
FIREBRICK INSTALLATION INSTRUCTIONS Pacific Vista and Vista Classic This package contains 12 full-size firebricks, as well as 2 various cut-size bricks. If your heater came with an ash cleanout system, or an optional one is being in- stalled, discard one full-size brick. With the heater in the upright position, install firebricks as follows: - First, install 4 full-size firebricks against the rear wall. - Next, install the side firebricks, 2 full-size each side. - Lastly, place 4 full-size on the bottom of the heater. (3 full-size and 2 cut firebricks for heater with an ash cleanout system.) USE THESE WITH ASH CLEANOUT SYSTEM. ITEM SIZE PART NUMBER 1 1/2”... -
Page 15: Safety Label - Pacific Vista And Vista Classic
SAFETY LABEL - Pacific VISTA and VISTA CLASSIC CERTIFIED FOR CANADA AND U.S.A. DO NOT REMOVE THIS LABEL LISTED ROOM HEATER, SOLID FUEL TYPE. ALSO FOR USE IN MOBILE HOMES PACIFIC VISTA TESTED TO CAN/ULC S627-M93 AND UL 1482-98 VISTA CLASSIC REPORT NO. 6680 (AUG. 89) - Page 16 PACIFIC ENERGY FIREPLACE PRODUCTS LTD. 2975 Allenby Rd., Duncan, BC V9L 6V8 Phone: 888-715-2398 Web site: www.pacificenergy.net Printed in Canada VISTA and CLASSIC-C 070509-16 5055.3...