Advertisement
Quick Links
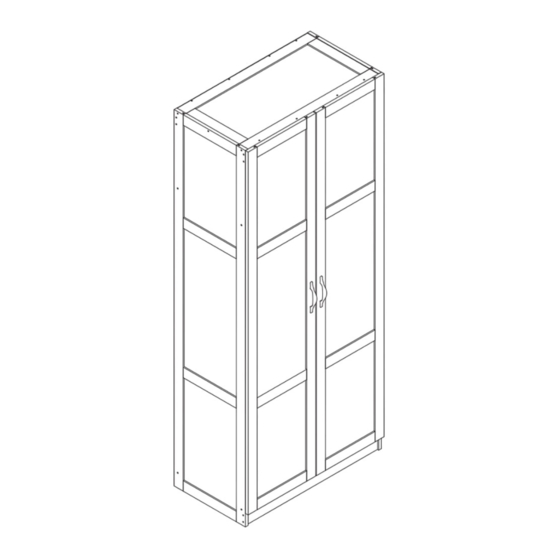
Storage Cabinet
Model 422784
Need help? Visit Sauder.com to view video assembly tips or chat with a live rep.
Prefer the phone? Call 1-800-445-1527.
Share your journey!
DE SI GNE R'S IMA G E
Store behind
closed doors.
NOTE: THIS INSTRUCTION
BOOKLET CONTAINS IMPORTANT
SAFETY INFORMATION.
PLEASE READ AND KEEP FOR
FUTURE REFERENCE.
English pg 1-18
Français pg 19-21
Español pg 22-24
Lot #: 511090
Date Purchased: __________________
12/08/17
Be sure to give us a ring before
making any returns. 1-800-445-1527
®
Advertisement

Related Manuals for designer's image 422784


Summary of Contents for designer's image 422784
- Page 1 DE SI GNE R’S IMA G E ® Store behind closed doors. Storage Cabinet Model 422784 NOTE: THIS INSTRUCTION BOOKLET CONTAINS IMPORTANT SAFETY INFORMATION. PLEASE READ AND KEEP FOR Need help? Visit Sauder.com to view video assembly tips or chat with a live rep.
- Page 2 Use this part identifi cation to help identify similar parts. RIGHT END (1) G2 BACK (1) LEFT END (1) RIGHT DOOR (1) UPRIGHT (1) LEFT DOOR (1) TOP (1) ADJUSTABLE SHELF (4) BOTTOM (1) VALANCE (2) SHELF (1) SKIRT (1) Page 2 www.sauder.com 422784...
- Page 3 Part Identifi cation 422784 www.sauder.com Page 3...
- Page 4 1-1/2" FLAT HEAD SCREW - 40 3/4" MACHINE SCREW - 4 1/2" FLAT HEAD SCREW - 12 1/2" PAN HEAD SCREW - 8 LARGE 1/2" PAN HEAD SCREW - 10 FURNITURE TIPPING RESTRAINT KIT - 1 Page 4 www.sauder.com 422784...
- Page 5 Use two 1/2" PAN HEAD SCREWS (18). LARGE 1/2" PAN HEAD SCREW (5 used for the ANGLE BRACKETS) 1/2" PAN HEAD SCREW (2 used in this step) The molding on the other surface of the BOTTOM should be here. 422784 www.sauder.com Page 5...
- Page 6 å LARGE 1/2" PAN HEAD SCREWS (19) through the ANGLE BRACKETS on the VALANCE and into the BOTTOM. LARGE 1/2" PAN HEAD SCREW (3 used in this step) The molding on the BOTTOM should be here. Page 6 www.sauder.com 422784...
- Page 7 Fasten the VALANCES (K) to the TOP (D). Use eight 1-1/2" å FLAT HEAD SCREWS (13). Some assembly (and snacks) required. This arrow should be pointing up. 1-1/2" FLAT HEAD SCREW (8 used in this step) This arrow should be pointing down. 422784 www.sauder.com Page 7...
- Page 8 Fasten the BOTTOM (E) to the UPRIGHT (C). Use two å 1-1/2" FLAT HEAD SCREWS (13). 1/2" PAN HEAD SCREW (2 used in this step) 1-1/2" FLAT HEAD SCREW (2 used in this step) Top edge Page 8 www.sauder.com 422784...
- Page 9 SCREWS (13). 1/2" PAN HEAD SCREW (2 used in this step) The molding on the SHELF should be here. 1-1/2" FLAT HEAD SCREW (4 used in this step) 422784 www.sauder.com Page 9...
- Page 10 Step 6 Fasten the HINGE BRACKETS (3) to the ENDS (A and B). å Use the SCREWS in the HINGE BRACKETS. NOTE: The arrow on the HINGES should face towards the å edge of the ENDS. Page 10 www.sauder.com 422784...
- Page 11 LARGE 1/2" PAN HEAD SCREW (19) through the ANGLE BRACKET on the SKIRT and into the LEFT END. Edge with HINGE BRACKETS 1-1/2" FLAT HEAD SCREW (13 used in this step) LARGE 1/2" PAN HEAD SCREW (1 used for the ANGLE BRACKET) 422784 www.sauder.com Page 11...
- Page 12 Use a LARGE 1/2" PAN HEAD SCREW (19) through the ANGLE BRACKET on the SKIRT and into the RIGHT END. Edge with HINGE BRACKETS 1-1/2" FLAT HEAD SCREW (13 used in this step) LARGE 1/2" PAN HEAD SCREW (1 used for the ANGLE BRACKET) Page 12 www.sauder.com 422784...
- Page 13 UPRIGHT (C). The large hole should be here. This FELT DISC should set in 1/8" from the front edge of the ENDS. This FELT DISC should set in 1/8" from the front edge of the ENDS. 422784 www.sauder.com Page 13...
- Page 14 Fasten the DOOR BRACKET (10) to the LEFT DOOR (I). å Use two 1/2" PAN HEAD SCREWS (18). 1/2" FLAT HEAD SCREW (12 used for the HINGES) 1/2" PAN HEAD SCREW (2 used for the DOOR BRACKET) Page 14 www.sauder.com 422784...
- Page 15 DOORS with the mounting screw on the HINGE BRACKET. See the enlarged diagrams for adjustments. å Fasten the PULLS (4) to the DOORS (H and I). Use four 3/4" å HINGE BRACKET MACHINE SCREWS (15). 3/4" MACHINE SCREW (4 used for the PULLS) 422784 www.sauder.com Page 15...
- Page 16 If you're doing this to ADJUSTABLE SHELVES (J) onto the SHELF SUPPORTS. help a friend, don't leave without a bite. NOTE: The lips of the ADJUSTABLE SHELVES can face å either up or down in your unit. (16 used) Page 16 www.sauder.com 422784...
- Page 17 Follow the instructions included in the KIT to fasten your unit to the wall. å Use the 5/8" screw through the small hole in a bracket and into the back edge of the TOP (D). Small hole 422784 www.sauder.com Page 17...
- Page 18 And to celebrate, why not share your success story? No load Weight Limits: Top Shelf - 50 lbs. Adjustable Shelf - 25 lbs. each Bottom - 50 lbs. total Peel the APPLIQUES from the applique card. (26 used) Page 18 www.sauder.com 422784...
- Page 19 D E S IG NER’ S IMAG E ® Modèle 422784 Meuble de rangement Utilisez les instructions d’ a ssemblage en français avec les NOUS SOMMES LA POUR VOUS AIDER! schémas étape par étape du manuel d’instruction en anglais. Nous faisons de notre mieux pour nous assurer que votre meuble Chaque étape en français correspond à...
- Page 20 Utiliser treize VIS TÊTE PLATE 38 mm (13). Finir de fi xer l'EXTRÉMITÉ DROITE (A) à la PLINTHE (L). Utiliser une GRAND VIS TÊTE GOUTTE DE SUIF 13 mm (19) à travers la CONSOLE À ÉQUERRE sur la PLINTHE et dans l'EXTRÉMITÉ DROITE. Page 20 www.sauder.com 422784...
- Page 21 CHARNIÈRES des EXTRÉMITÉS. Fixer les PORTES à l'aide de la vis de montage sur la CONSOLE DE CHARNIÈRE. Voir les schémas agrandis pour réglages. Fixer les POIGNÉES (4) aux PORTES (H et I). Utiliser quatre VIS À MÉTAUX 19 mm (15). 422784 www.sauder.com Page 21...
- Page 22 DE S IG NER ’S I MAG E ® Modelo 422784 Gabinete para almacenaje Use estas instrucciones de ensamblaje en español junto con las ESTAMOS AQUI PARA AYUDAR! fi guras paso-a-paso provistas en el folleto inglés. Cada paso Tratamos de asegurar que su mueble llega en condición excelente.
- Page 23 Utilice treinta TORNILLOS DE CABEZA PERDIDA de 38 mm (13). Termine de fi jar el EXTREMO DERECHO (A) al FALDÓN (L). Pase un TORNILLO GRANDE NEGRO DE CABEZA REDONDA de 13 mm (19) a través del SOPORTE ANGULAR y en el EXTREMO DERECHO. 422784 www.sauder.com Page 23...
- Page 24 EXTREMOS. Fije las PUERTAS con el tornillo de montaje de la MÉNSULA DE BISAGRA. Consulte los diagramas ampliados para los ajustes. Fije los TIRADORES (4) a las PUERTAS (H e I). Utilice cuatro TORNILLOS PARA METAL de 19 mm (15). Page 24 www.sauder.com 422784...
- Page 25 TOUJOURS décharger les tablettes et les tiroirs, en commençant par les surface supérieures, avant de déplacer le meuble. NE JAMAIS pousser ou tirer un meuble sur de la moquette. Demander à une autre personne de le soulever correctement pour le déplacer et/ou le repositionner. 422784 www.sauder.com Page 25...
- Page 26 SIEMPRE descargue los estantes y cajones, empezando con las superfi cies superiores, antes de moverlo. NUNCA empuje ni tire de los muebles sobre una alfombra. Obtenga que un amigo le ayude a levantarlo correctamente para moverlo y/o reposicionarlo. Page 26 www.sauder.com 422784...
- Page 27 Algunos estados detallada del defecto del producto. no permiten la exclusión o limitación de daños incidentales o consecuentes, en tales instancias la limitación o exclusión antes mencionada podría no ser aplicable a usted. 422784 www.sauder.com Page 27...
- Page 28 Dear Valued Customer: So, how did it go? Thanks so much for choosing Sauder® furniture. I hope the Set a world record for speed? purchase and assembly process was a positive experience Feeling good about yourself? and you feel good about the furniture you just built. If you Nice.
Need help?
Do you have a question about the 422784 and is the answer not in the manual?
Questions and answers