
Subscribe to Our Youtube Channel
Related Manuals for designer's image 211-4513


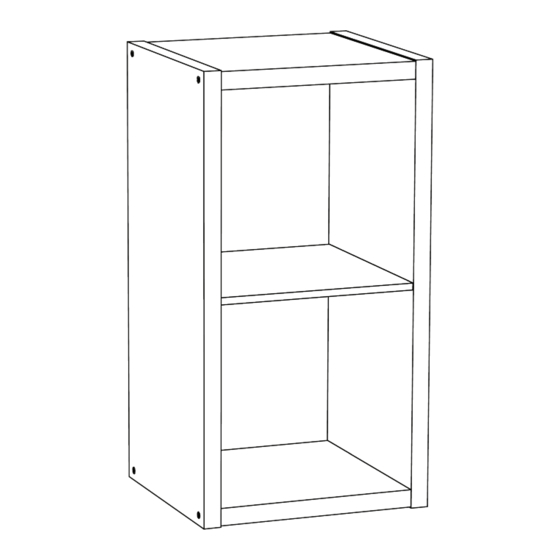
Summary of Contents for designer's image 211-4513
- Page 1 2-Cube Organizer Assembly Instructions Reference # Finish 211-4513 3643 White 211-4512 3644 Java 211-4511 3645 Cottage 211-4612 14585 Charcoal Tools Needed: Tools Provided: screwdriver drill cup of water hex key Optional Assembly 01-13947-00 11/20...
- Page 2 SAFETY PRECAUTIONS WARNING • This unit contains small parts which could be a choking hazard for small children. Children should be STOP under adult supervision at all times or serious injury could occur. • Always unload unit prior to moving the unit. The weight of personal belongings can cause the unit to become unstable and either tip or collapse.
- Page 3 HARDWARE DESCRIPTION QUANTITY (H1) x 4 (H2) x 8 side panel top/bottom panel pre-glued dowel hex screw divider adhesive screw-covers (H3) x 2 (H4) x 2 (H5) x 2 L-bracket screw wall screw L-bracket #10 x 1/2 in. #10 x 1-1/2 in. finished unfinished edge...
- Page 4 STEP 1 (H2) (H2) (H2) (H2) (H2) x 4 hex screw 1. Align top/bottom panels (B) with side panel (A) as shown. 2. Secure each top/bottom panel to the side panel using two hex screws (H2). Use supplied hex wrench to tighten each screw.
- Page 5 STEP 2 (H1) (H1) x 4 pre-glued dowel 1. Arrange divider (C) as shown. 2. Quickly dip pre-glued dowels (H1) into a cup of water, making sure entire dowel gets wet. 3. Immediately push two dowels into holes on both unfinished edges of divider. 4.
- Page 6 STEP 3 (H2) (H2) (H2) (H2) (H2) x 4 hex screw (H2) 1. Align 2 dowels in divider (C) with dowel holes in side panel (A). Push to secure. 2. Secure side panel (A) to both top/ bottom panels (B) and divider panel (C) using four hex screws (H2). Tighten screws using supplied hex wrench. 3.
- Page 7 STEP 4 WARNING (H4) x 2 (H3) x 2 (H5) x 2 wall screw All units MUST be fastened to the wall. L-bracket screw L-bracket #10 x 1/2 in. #10 x 1-1/2 in. Secure to wall using 1-1/2 in. screw (H4) inserted through small hole of L-bracket (H5) into wall stud.
Need help?
Do you have a question about the 211-4513 and is the answer not in the manual?
Questions and answers