Hodedah HI 70DR-A Assembly Instructions Manual
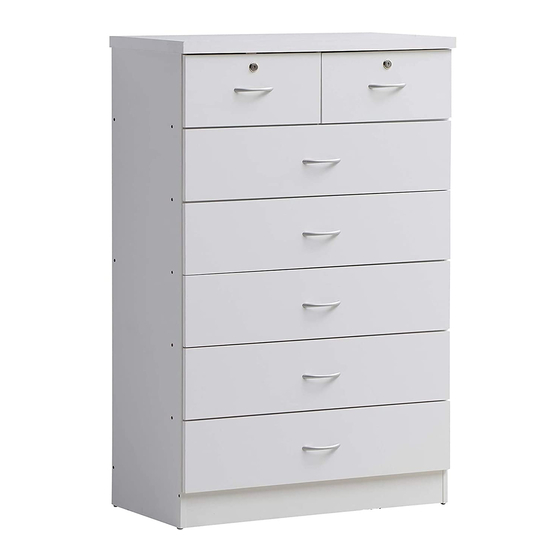
7 drawer chest
Hide thumbs
Also See for HI 70DR-A:
- Assembly instructions manual (20 pages) ,
- Assembly instructions manual (23 pages)
Advertisement
Quick Links
HODEDAH
www.hodedah.com
support@hodedah.com
ASSEMBLY INSTRUCTIONS
HI 70DR -A ( 7 DRAWER CHEST)
~ Before assembly, please read the instructions ~
~ Follow these steps to assembly the Chest Cabinet ~
~ Keep these instructions for future reference ~
BACK VIEW
FRONT VIEW
1
Advertisement

Subscribe to Our Youtube Channel
Related Manuals for Hodedah HI 70DR-A


Summary of Contents for Hodedah HI 70DR-A
- Page 1 HODEDAH www.hodedah.com support@hodedah.com ASSEMBLY INSTRUCTIONS HI 70DR -A ( 7 DRAWER CHEST) ~ Before assembly, please read the instructions ~ ~ Follow these steps to assembly the Chest Cabinet ~ ~ Keep these instructions for future reference ~ BACK VIEW...
- Page 4 HODEDAH www.hodedah.com support@hodedah.com Right Side Panel Left Side Penel 1200x430x15mm 1200x430x15mm 3 Divider Panels 4 Strengthening Panel - l) Main Unit : Back LVL 430x180x15mm 758x70x16mm 5 Strengthening Panel - Back Strengthening Panel Front LVL 758x70x15mm 758x70x16mm 8 Kick Panel (Back & Front)
- Page 5 PVC Dowel Minifix Screw M4x45mm Screw M3.5x16mm Screw M3.5x21mm 48Pcs 47Pcs 54Pcs 25Sets 14Pcs J Lock F Sticker G Handle (96MM) H Drawer Slide - A(350mm) I Nail 6/8 2Pcs 26Pcs 7Pcs 7Sets 40Pcs *Fix On Side Panels K Leg 4Sets...
-
Page 6: Pre-Assembly
HODEDAH www.hodedah.com support@hodedah.com Pre - Assembly Insert PVC dowel (A) to panel 1,2,3,4,5,6,7,8, 12 and 14 's non-thru holes as shown, using hammer to gently tap them in. PVC Dowel 48Pcs... - Page 7 HODEDAH www.hodedah.com support@hodedah.com Pre - Assembly Insert the minifix (B) (nuts) with the cross arrow mark facing up ward and aim to panel 1 and 2 's top thru holes.(AS shown) Place the drawer slide (H) at the predrilled holes on the panel 1 and 2 as shown .
-
Page 8: Right View
HODEDAH www.hodedah.com support@hodedah.com Pre - Assembly Insert the minifix (B) (nuts) with the cross arrow mark facing up ward and aim to panel 3 's top thru holes.(AS shown) Place the drawer slide (H) onto the 3 holes area shown at right view of panel 3. then tighten it with 3 screws (D). - Page 9 HODEDAH www.hodedah.com support@hodedah.com Assembly Intstruction Step 1 *Pleace and fix Panel 4,5,6,7 and 8 onto panel 1 by inserting the (Left) dowels onto the non-thru holes at Panel 1. *Using tighten screws (C) from the 6 thru holes of panel 1, one by one.
- Page 10 HODEDAH www.hodedah.com support@hodedah.com Assembly Intstruction Step 2 *Pleace and fix Panel 3 onto panel 4 and 5 by inserting the dowels onto the non-thru holes at Panel 3. *Using tighten screws (C) from the panel 4 and 5 thru holes of panel 4 and 5.
- Page 11 HODEDAH www.hodedah.com support@hodedah.com Assembly Intstruction Step 3 *Fix Panel 9 onto Panel 1,2 and 3 align properly by inserting the 6 dowels of Panel 1 and 2 onto the non-thru holes of Panel 9 *Pushing and light tapping of Panel 9 to have Panel 1, Panel 2, Panel 3,Panel 9 fix tightly.
- Page 12 HODEDAH www.hodedah.com support@hodedah.com Assembly Intstruction Step 4 *Fix 40 x Nails (I) into Panel 10 using a Hammer *Cover all the screws (C)' head with sticker (F) provided by stick up onto hole of screw (C)' heads one by one for all the screw...
- Page 13 HODEDAH www.hodedah.com support@hodedah.com Assembly Of Big Drawer : 5 Drawers *Insert the mini fix (B) *Insert Panel 16 into the drawer and align properly. (As shown) *Insert the mini fix (B)(nuts) with the cross arrow mark facing upward and aim to...
- Page 14 HODEDAH www.hodedah.com support@hodedah.com *Place panel 13 on each side of panel 12 and 14 as shown. *Then, tighten screw (C) to panel 14 's upper thru holes to fix them onto panel 13. *Next tighten screw (C) to panel 12 's upper thru holes to fix up to the panel 13.
- Page 15 HODEDAH www.hodedah.com support@hodedah.com Assembly Of Small Drawer : 2 Drawers *Insert the mini fix (B) *Insert the mini fix (B)(nuts) with the cross arrow mark facing upward and aim to panel 12 and 14 's top thru holes.(As shown) *Place panel 20 on each side of panel 12 and 14 as shown.
- Page 16 HODEDAH www.hodedah.com support@hodedah.com *Cover all screw (E)'head with sticker (F) provided by stick up onto *Flip the drawer over. the hole of screw (E)' head. *Tighten 2 screw (E) from inner side of panel 17 and 18 into the handle (G) holes.
- Page 17 HODEDAH www.hodedah.com support@hodedah.com Assembly Intstruction Step 5 *Take all drawers, and slide them (the white rollers at drawer slide at both side of drawers are to go into the track of the slide at each side panel.)All the way gently, one drawer by one drawer starting from bottom...
- Page 18 HODEDAH www.hodedah.com support@hodedah.com Completion...
Need help?
Do you have a question about the HI 70DR-A and is the answer not in the manual?
Questions and answers