Advertisement
Quick Links
Advertisement

Related Manuals for Kogan KAM12PDWFSA


Summary of Contents for Kogan KAM12PDWFSA
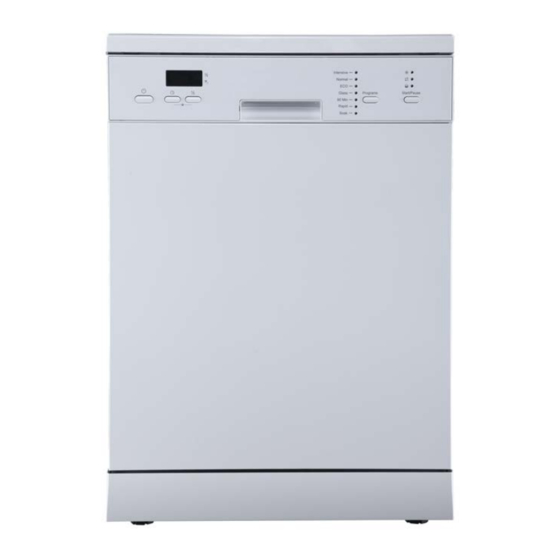
- Page 1 12 PLACE DISHWASHER (WHITE) KAM12PDWFSA...
-
Page 2: Table Of Contents
Safety & Warnings Overview Installation Before First Use Operation Cleaning & Care Troubleshooting Specifications... -
Page 3: Safety & Warnings
SAFETY & WARNINGS Note: To get the best performance from your dishwasher, read all operating instructions and safety notes before using it for the first time. Retain this user guide for future reference. WARNING When using your dishwasher, follow the precautions listed below: •... - Page 4 • Never use soap, laundry detergent or hand washing detergent in your dishwasher. • The door should not be left open since this could increase the risk of tripping. • If the power cord is damaged, cease use immediately and contact help.Kogan.com for support.
- Page 5 • The appliance needs to be connected to the main water valve using new hose sets. Old sets should not be reused. • To save energy, in standby mode. the appliance will switch off automatically while there is an any operation in 30 minutes. Disposal This marking indicates that this appliance should not be disposed with other household wastes.
-
Page 6: Overview
OVERVIEW Top spray arm Inner pipe Lower spray arm Filter assembly Dispenser Cutlery rack... - Page 7 Upper spray arm Cup rack Upper basket Lower basket Control Panel Intensive Normal Glass Programs Start/Pause 90 Min Rapid Soak Buttons 1 Power Press this button to turn on your dishwasher. Press the Delay button to increase the delay start time. Delay 2 Delay a cycle for up to 24 hours in one-hour increments.
- Page 8 Select the appropriate washing program, the selected 5 Program program indicator will be lit. To start the selected washing program or pause it when the 6 Start / Pause dishwasher is working. Display 7 Screen To show the reminding time, delay time, error code etc. Rinse Aid If the “...
-
Page 9: Installation
INSTALLATION WARNING Electrical Shock Hazard Disconnect electrical power before installing dishwasher. Failure to do so could result in death or electrical shock. Attention The installation of the pipes and electrical equipment’s should be done by professionals. About Power Connection WARNING For personal safety: •... - Page 10 Water Supply and Drain Cold Water Connection Connect the cold-water supply hose to a threaded 3/4-inch connector and ensure that it is fastened tightly in place. If the water pipes are new or have not been used for an extended period, let the water run to make sure that the water is clear.
- Page 11 How to Connect the Safety Supply Hose Pull the safety supply hoses completely out from storage compartment located at rear of dishwasher. Tighten the screws of the safety supply hose to the faucet with 3/4-inch thread. Ensure the water is on before starting the dishwasher. How to Disconnect the Safety Supply Hose Turn off the water.
- Page 12 How to Drain Excess Water from Hoses If the sink is 1000mm higher from the floor, the excess water in the hoses cannot be drained directly into the sink. It will be necessary to drain excess water from hoses into a bowl or suitable container that is external and lower than the sink.
- Page 13 Free Standing Installation Fitting between existing cabinets The height of the dishwasher (845 mm) has been designed to allow the machine to be fitted between existing cabinets of the same height. The feet can be adjusted so that correct height is reached. The laminated top of the machine does not require any particular care since it is heatproof, scratchproof and stainproof.
- Page 14 Built-in Installation (for the integrated model) Step 1: Selecting the best location for the dishwasher. The installation position of dishwasher should be near the existing inlet and drain hoses and power cord. Ensure there is a gap of no more than 5mm between the top surface of the dishwasher and the underside of the kitchen cabinet.
- Page 15 Step 2: Aesthetic panel installation. This integration method ensures that the wooden panel aligns with the surrounding cabinets, creating an appealing and seamless appearance while maintaining efficient dishwasher operation. Semi-integrated model: (A) Apply adhesive tape to the wooden panel, and then attach the felted side of the adhesive tape to the outer door of the dishwasher.
- Page 16 Step 3: Tension adjustment of the door spring The door springs are set from the factory to the proper tension for the outer door. If wooden panels are installed, you will have to adjust the door spring tension. Rotate the adjusting screw to drive the adjustor to strain or relax the steel cable. Door spring tension is correct when the door remains horizontal in the fully opened position yet rises to a close with the slight lift of a finger.
- Page 17 Step 5: Levelling the dishwasher. The dishwasher must be level for proper dish rack operation and wash performance. Place a spirit level on the door and rack track inside the dishwasher to ensure the dishwasher is level. If necessary, level the dishwasher by adjusting the 3 levelling legs individually. When levelling the dishwasher, pay attention to avoid letting the dishwasher tip over.
- Page 18 Loading The Baskets Upper basket: Number Items Cups Saucers Glasses Lower basket: Number Items Dinner plates Soup plates Dessert dishes...
- Page 19 Cutlery tray: Number Items Forks Soup spoons Dessert spoons Teaspoons Knives...
- Page 20 Adjusting Cutlery Tray Lift the right rack up. Both racks are flat. Move the right rack from right to left. The two racks are overlapping. Remove the right rack from the cutlery tray, leaving only the left rack.
-
Page 21: Before First Use
BEFORE FIRST USE Adjusting the Upper Basket Type 1: The height of the upper basket can be easily adjusted to accommodate taller dishes in either the upper or lower baskets. To adjust the height of the upper rack, follow the steps below: 1. - Page 22 Folding the Cup Shelves To make room for taller items in the upper basket, raise the cup rack upwards. You can then lean the tall glasses against it. You can also remove the cup shelves when they are not required for use. Folding the Rack Shelves The racks on the lower basket are used for holding plates and platters.
-
Page 23: Operation
OPERATION Select a program with the lowest possible temperature, depending on your load. The following items are not suitable: • Cutlery with wooden, china or mother-of-pearl handles • Plastic items that are not heat resistant • Older cutlery with glued parts that are not temperature resistant •... - Page 24 • Long bladed knives stored in an upright position are a potential hazard! • Long and / or sharp items of cutlery such as carving knives must be positioned horizontally in the upper basket. • Do not overload your dishwasher. This is important for good results and for reasonable consumption of energy.
- Page 25 Loading the Cutlery Rack Cutlery should be placed in the cutlery rack separately from each other in the appropriate positions and to make sure the utensils do not nest together, this may cause bad performance. WARNING Do not let any items extend through the bottom of the baskets/racks. Always load sharp utensils with the point facing downwards.
- Page 26 As the rinse aid diminishes, the size of the black dot on the rinse aid level indicator changes, as illustrated below. 1/4 full Empty 3/4 full 1/2 full Full Detergent The chemical ingredients that compose the detergent are necessary to remove, crush and dispense all dirt out of the dishwasher.
- Page 27 3. Replace the cap by inserting it aligned with "open" arrow and turning it to the closed (right) arrow. Note: Clean up any spilled rinse aid with a cloth to avoid excessive foaming during the next wash. Adjusting the Rinse Aid Reservoir The rinse aid reservoir has six settings.
- Page 28 Filling The Detergent Dispenser 2. Add detergent into the larger cavity (A) for the main wash cycle. For more heavily 1. Press the release catch on the soiled wash loads, also add some detergent dispenser to open the cover. detergent into the smaller cavity (B) for the pre-wash cycle.
- Page 29 Programming the Dishwasher Wash Cycle Table The table below shows which programs are best for the levels of food residue on them and how much detergent is needed. It also shows various information about the programs. ( ) Means: need to fill rinse into the Rinse-Aid Dispenser. Running Description Detergent...
- Page 30 Starting A Cycle Wash Load the dishes and push the baskets back in place. It is recommended to load the lower basket first, then the upper one. Pour in the detergent. Ensure the dishwasher is plugged into an electrical outlet and turned on. Make sure that the water supply is turned on to full pressure.
- Page 31 Adding a Dish Mid-cycle A forgotten dish can be added any time before the detergent dispenser opens. If this is the case, follow the instructions below: Press the Start/Pause button to pause the cycle. Wait 5 seconds then open the door. Add the forgotten dishes.
-
Page 32: Cleaning & Care
CLEANING & CARE Before cleaning or performing maintenance, always remove the plug from the socket. External Care Door and door seal: Clean the door seals regularly with a soft damp cloth to remove food deposits. When the dishwasher is being loaded, food and drink residues may drip onto the sides of the dishwasher door. - Page 33 Note: The images below are for illustrative purposely only. Actual components may differ. Coarse Main Fine Open Hold the coarse filter and rotate it The fine filter can be pulled off the anticlockwise to unlock the filter. Lift bottom of the filter assembly. The the filter upwards and out of the coarse filter can be detached from the dishwasher.
- Page 34 Spray Arms Note: The images below are for illustrative purposely only. Actual components may differ. To remove the upper spray arm, hold To remove the lower spray arm, pull the nut in the centre still and rotate out the spray arm upward. the spray arm counter-clockwise to remove it.
- Page 35 Frost Precaution Take frost protection measures on the dishwasher during winter. After every wash cycles, please operate as follows: Cut off electrical power to the dishwasher at the supply source. Turn off the water supply and disconnect the water inlet pipe from the water valve. Drain the water from the inlet pipe and water valve.
-
Page 36: Troubleshooting
TROUBLESHOOTING Before calling for service, refer to the troubleshooting steps on the following pages. If you are still unable to resolve the issue, contact help.Kogan.com for support. Problem Possible Causes What To Do Replace fuse or reset circuit breaker. Fuse blown or the circuit... - Page 37 Detergent with Stained tub Make sure that the detergent has no colourant may have interior colourant. been used To clean the interior, use a damp sponge with dishwasher detergent and White film on the wear rubber gloves. Never use any other Hard water minerals inside surface cleaner than dishwasher detergent...
- Page 38 • If there is water in the base pan because of an overfill or small leak, the water should be removed before restarting the dishwasher. • If there is an error code that cannot be solved, contact help.Kogan.com for support.
-
Page 39: Specifications
SPECIFICATIONS Standard place settings Energy efficiency class Water consumption class Standard cleaning cycle Energy consumption of the standard 0.71 kWh cleaning cycle Water consumption of the standard 10.5 litre cleaning cycle Program duration of the standard 170 min cleaning cycle Noise level 49 dB(A) re 1 Pw Mounting... - Page 40 Need more information? We hope that this user guide has given you the assistance needed for a simple set-up. For the most up-to-date guide for your product, as well as any additional assistance you may require, head online to help.kogan.com...
Need help?
Do you have a question about the KAM12PDWFSA and is the answer not in the manual?
Questions and answers