Kogan 9 Series User Manual
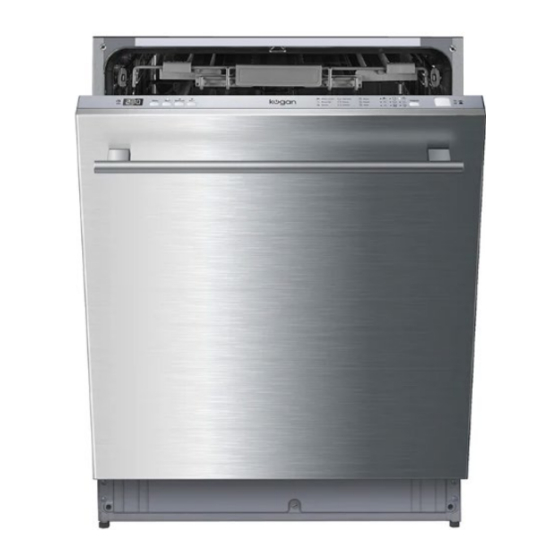
Fully integrated dishwasher
Hide thumbs
Also See for 9 Series:
- User manual (28 pages) ,
- Quick start manual (20 pages) ,
- Manual (16 pages)
Table of Contents
Advertisement
Quick Links
Advertisement
Table of Contents

Related Manuals for Kogan 9 Series


Summary of Contents for Kogan 9 Series
- Page 1 SERIES 9 FULLY INTEGRATED DISHWASHER KAGDWS15CTD...
- Page 3 SAFETY & WARNINGS WARNING: Under certain conditions, hydrogen gas may be produced in a hot-water system that has not been used for two weeks or more. Hydrogen gas is explosive. If the hot-water system has not been used for such a period, before using the dishwasher, turn on all hot-water taps and let the water flow from each for several minutes.
- Page 4 The door should not be left in the open position as this may present a tripping hazard. • If the supply cord is damaged, it must be replaced by Kogan.com or its service agent to avoid a hazard. • Always dispose of packing materials properly.
- Page 5 OVERVIEW Control Panel Program indicator light: When a washing program is selected, the corresponding light will display. Program select button: Press the button to select the washing program. Rinse aid indicator light: Illuminates when the dispenser needs to be refilled. Drying light: Illuminates when a drying cycle is in progress.
- Page 6 Dishwasher features Front view Upper basket Spray arms Lower basket Water softener Detergent dispenser Rinse Aid dispenser Cutlery tray Cup holder...
- Page 7 Positioning and levelling Remove the appliance from all packaging and check that it has not been damaged during transportation. If it has been damaged, contact Kogan.com and do not proceed and further with the installation process. Check the dishwasher by placing it so that its sides or back panel are in contact with the adjacent cabinets, or even with the wall.
- Page 8 • Fit the drainage hose of the machine to the drainage pipe without bending. • If the length of the hose is not sufficient, contact Kogan.com for an extension made from the same material as the original. • The length of the hose should not exceed 4 meters, even with an extension. If the drainage hose is longer than 4 meters, the dishes will not be cleaned properly.
- Page 9 • The cable should not be bent or compressed. If the power supply cable is damaged; it must be replaced by Kogan.com or its service agent to prevent all potential hazards. • Kogan.com shall not be held responsible for any incidents that occur if these regulations are not observed.
- Page 10 Draining excess water from hoses • If the sink is 1000mm or higher from the floor, the excess water in the hoses cannot be drained directly into the sink. It will be necessary to drain excess water from hoses into a bowl or a suitable container that is held outside and lower than the sink.
- Page 11 OPERATION Prior to first use Before using the dishwasher for the first time: Fill the rinse aid dispenser Familiarise yourself with the function of dishwasher detergents A. Fill the rinse aid dispenser Note: Only use branded rinse aid for the dishwasher. Never fill the rinse aid dispenser with any other substances (e.g.
- Page 12 Pour the rinse aid into the dispenser, being careful not to overfill. Replace the cap by inserting it aligned with “open” arrow and turning it to the “closed” (right) arrow. The rinse aid is released during the final rinse to prevent water from forming droplets on your dishes that can leave spots and streaks.
- Page 13 When to refill the rinse aid dispenser The remaining amount of rinse-aid can be estimated by the colour of the optical level indicator “D” located next to the cap. When the rinse-aid container is full, the whole indicator will be dark. As the rinse aid diminishes, the size of the dark dot decreases. Avoid letting the rinse aid get below 1/4 full.
- Page 14 B. Function of dishwasher detergents Detergents with chemical ingredients are necessary to remove dirt, crush dirt and transport it out of the dishwasher. Most commercial quality detergents are suitable for this purpose. Concentrated detergent Based on their chemical composition, detergents can be split into two basic types: •...
- Page 15 Amount of detergent to use Note • If the lid is closed: press release button. The lid springs open. • Always add the detergent just before starting each wash cycle. Only use branded detergent aid for dishwashers. WARNING: Dishwasher detergent is corrosive. Take care to keep it out of reach of children.
- Page 16 Fill the detergent dispenser The markings indicate the detergent dosage levels, as illustrated below: The placement of main wash cycle detergent; “MIN” signifies approximately 20g of detergent. The placement of pre-wash cycle detergent, approximately 5g of detergent. • Observe the manufacturer's dosing and storage recommendations as stated on the detergent packaging.
- Page 17 Use of “3-in-1” detergent tablets • Before using these products, first check that the water hardness in the supply is compatible with the use of these products as the detergent manufacturer’s instructions on the product packaging. • These products should be strictly used according to the detergent manufacturer’s instructions.
- Page 18 Loading the dishwasher baskets Scrape off any large amounts of leftover food. It is not necessary to rinse the dishes under running water. Place objects in the dishwasher in the following manner: Items such as cups, glasses, pots/pans, etc. are stood upside down. Curved items or those with recesses, should be at a slant so that water can runoff.
- Page 19 Upper basket height adjustment • Basket height adjustment mechanism on the upper basket of the machine is designed to allow the adjustment of the height of the upper basket upwards or downwards, without removing it from the machine when it is full and creating large spaces at the top or bottom area of your machine as needed.
- Page 20 Loading the lower basket • Place large items which are most difficult to clean into the lower basket: pots, pans, lids, serving dishes and bowls, as shown in the figure below. • It is preferable to place serving dishes and lids on the side of the baskets to avoid blocking the rotation of the top spray arm.
- Page 21 Cutlery tray Arrange the cutlery in the tray as shown. Cutlery should be placed to ensure that water runs off freely. Teaspoons Dessert spoons Soup spoons Forks Knives...
- Page 22 Items not suitable for dishwashing • Cutlery with wooden, horn china or mother-of-pearl handles. • Plastic items that are not heat resistant, older cutlery with glued parts that are not temperature resistant. • Bonded cutlery items or dishes, pewter or copper items, lead crystal glass. •...
- Page 23 WARNING: Long and/or sharp items of cutlery such as carving knives stored in an upright position are a potential hazard. These items must be positioned horizontally in the upper basket. Damage to glassware and other dishes Possible causes • The type of glass or manufacturing process and the chemical composition of detergents.
- Page 24 Starting a washing program Wash Cycle Table: Cycle selection Description Detergent Runtime Energy Water Program information of cycle Pre/main (min) (kWh) For the heaviest soiled loads, Pre-wash (40°C) such as pots, Main wash pans, casserole (55°C) dishes and Rinse 1 dishes that have Rinse 2 5/29g...
- Page 25 One of the program lights illuminated: cycle running One of the program lights blinking: cycle paused Note: If all the lights begin to flash, this indicates the machine is out of order. Turn off the main power and water supply before contacting Kogan.com.
- Page 26 Adding dishes during a cycle A forgotten dish can be added any time before the detergent cup opens. Open the door slightly to stop the wash cycle. After the spray arms stop moving, the door can be opened completely. Add forgotten dishes. Close the door;...
- Page 27 CLEANING & CARE Filtering system The filter is used to avoid remnants and debris getting inside the pump. The residue can obstruct the filter after building up over time. The filter system consists of a coarse filter, a flat filter (main filter) and a micro-filter (fine filter). Flat filter Food and debris will be trapped by a special jet on the lower spray arm.
- Page 28 Removing the filter assembly Step 1: Rotate the coarse filter counter-clockwise and then lift it up and out of the flat filter. Step 2: Lift the flat filter up and out of the base. To reinsert the filter, simply follow the above steps in reverse order. Inspect the filters for obstructions every time the dishwasher has been used.
- Page 29 WARNING: Never run the dishwasher without the filters in place. When cleaning the filters, try to avoid impacts or excessive pressure as the filters could be contorted and the performance of the dishwasher could be affected. Cleaning the Spray Arms It is necessary to clean the spray arms regularly, as hard water chemicals will clog the spray arm jets and bearings.
- Page 30 Protection against freezing If the dishwasher is left in an unheated place during the winter, contact an authorised service technician to: Cut off electrical power to the dishwasher. Turn off the water supply and disconnect the water inlet pipe from the water valve. Drain water from the inlet pipe and water valve (use a pan to catch the water).
- Page 31 SPECIFICATIONS Dimension 600 x 845 x 600mm Voltage connected load See rating label Water pressure 0.04--1.0MPa Power supply see rating label Capacity: 15 Place settings Hot water connection Max 60°C Disposal This marking indicates that this appliance should not be disposed with other house-hold wastes.
- Page 32 TROUBLESHOOTING Error codes Codes Meanings Possible Causes The door is opened when the dishwasher is Door open operating Water inlet Water inlet malfunction Water drainage Water drainage malfunction Temperature sensor Temperature sensor malfunction Overflow/leakage Overflow occurs/Water leakage occurs Water leakage Water leakage occurs Heating element Abnormal heating...
- Page 33 Some audible sounds Sound from detergent cup opening. are normal Utensils are not secure in the baskets To ensure everything is secured in the or something small dishwasher. Noise has dropped into the basket Dishwasher has not been used regularly. If you do not use it often, remember to set it to fill and Motor hums pump out every week, which will help keep the...
- Page 34 Using a solution of 1/2 cup of bleach and 3 cups of warm water to remove the stains by hand. Tea or coffee stains Wait for 20 minutes after a cycle to let the Yellow or brown heating elements cool down before cleaning film on inside interior, or burns may occur.
- Page 35 NOTES...
- Page 36 Need more information? We hope that this user guide has given you the assistance needed for a simple set-up. For the most up-to-date guide for your product, as well as any additional assistance you may require, head online to help.kogan.com...
Need help?
Do you have a question about the 9 Series and is the answer not in the manual?
Questions and answers