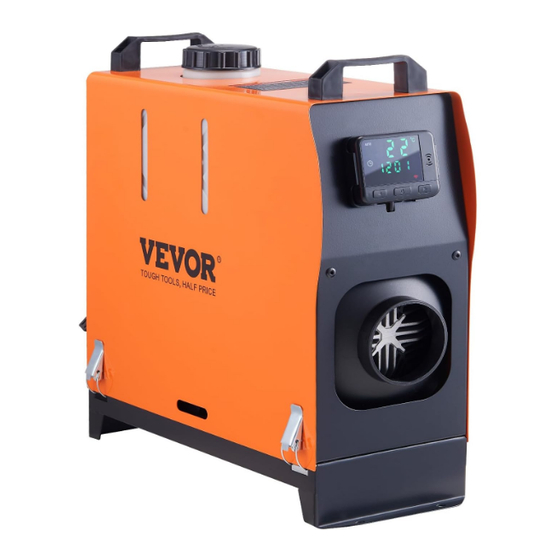
VEVOR XMZ-D1 Manual
VEVOR XMZ-D1 Manual

VEVOR XMZ-D1 Manual

Diesel heater

Advertisement

Technical Support and E-Warranty Certificate www.vevor.com/support
DIESEL HEATER
We continue to be committed to provide you tools with competitive price.
"Save Half", "Half Price" or any other similar expressions used by us only
represents an estimate of savings you might benefit from buying certain
tools with us compared to the major top brands and doses not necessarily
mean to cover all categories of tools offered by us. You are kindly
reminded to verify carefully when you are placing an order with us if you
are actually saving half in comparison with the top major brands.
- 1 -

Advertisement

Table of Contents
loading

Summary of Contents for VEVOR XMZ-D1

  • Page 1 Technical Support and E-Warranty Certificate www.vevor.com/support DIESEL HEATER We continue to be committed to provide you tools with competitive price. "Save Half", "Half Price" or any other similar expressions used by us only represents an estimate of savings you might benefit from buying certain tools with us compared to the major top brands and doses not necessarily mean to cover all categories of tools offered by us.
  • Page 2 CustomerService@vevor.com This is the original instruction, please read all manual instructions carefully before operating. VEVOR reserves a clear interpretation of our user manual. The appearance of the product shall be subject to the product you received. Please forgive us that we won't inform you again if there are any technology or software updates on our product.
  • Page 3: Safety Instruction

    Warning-To reduce the risk of injury, the user must read the instructions manual carefully. This device complies with Part 15 of the FCC Rules. Operation is subject to the following two conditions:(1)This device may not cause harmful interference, and (2)this device must accept any interference received, including interference that may cause undesired operation.
  • Page 4: Product Function

    7. Do not cut off the electric power in operation. 8. If the fuel leak or discharge from the fuel system of heaters, please contact with VEVOR to repair. 9. Place the exhaust outlet outside to prevent any penetration of exhaust fumes.
  • Page 5: Internal Structure

    installation. The heater get rid of damage to car caused by the sudden drop of temperature, improve the temperature inside the car, and preheat the engine coolant to avoid the engine wear at low temperature. Conducive to car interior thawing, car start, and car glass defrost fog.
  • Page 6: Installation Position

    INSTALLATION POSITION On the co-driver's legroom. 2.On the back wall of the cab. 3.Driver's seat backrest. 4.Within the tool box. 1. In front of the passenger seat. 2. Between the driver seat and passenger seat. 3. 3&4 under the container. 4.
  • Page 7: Packing List

    MODEL Model XMZ-D2 XMZ-D1 Appearance Power ZWH 2/5/8KW 5/8KW 5/8KW Heating medium Fuel Diesel Diesel Diesel Ratings 12V/40W 12V/40W 12V/40W PACKING LIST Model XMZ-D2 XMZ-D1 Main engine Intake pipe Exhaust pipe Blowpipe Remote control Silencer with 1 fixing piece and 2...
  • Page 8 Air filter element The screw for the lock catch Machine fixing screws Oil pipe Liquid crystal switch Rotary tuyere Power cord Oil filter Fuel pump sheath with a screw Ribbon Oil pipe clip Fuel tank Oil tank accessories Machine fixing piece Fuel pump User Manual...
  • Page 9: Installation Diagram

    INSTALLATION DIAGRAM XMZ-D2(Split type) During installation, the oil tank should be properly placed above the main engine to facilitate the operation of the fuel pump. - 9 -...
  • Page 10 XMZ-D1(Horizontal type) - 10 -...
  • Page 11 XMZ-D1(Vertical type) Warning: The air inlet shall not be blocked, and keep the inlet open and clear. Keep the exhaust pipe clear.The exhaust pipe outlet shall be kept away from anything flammable, and avoid heating and igniting the flammable goods and loading cargo on the ground.
  • Page 12 downward. REMOTE CONTROL OPERATION INSTRUCTIONS After starting the machine for 3-5 minutes, it will work normally and heat up. Please wait patiently. Key Description 【 】On/Off key; 【▲】【▼】:Gear/Temperature/Item adjustment key; 【M】:Mode switching/Setup key; - 12 -...
  • Page 13 working mode ① In gear mode, the setting gear can be adjusted within the range of 1 to 10 gears. ② In the temperature control mode, the set temperature can be adjusted within the range of 8~36℃. The gear position of the control switch varies with the temperature in the cab.
  • Page 14 【 】 and after all time settings are completed, press and hold for 3s to set successfully and return to the operation interface; 【▲】【▼】 • Engineering mode: Press and hold for 3s in the startup state to enter 【▲】 【▼】 engineering mode, press item+1, and press item - 1.
  • Page 15 to switch, and cycle through the sequence of "English", "German", "Russian", and "voice off "; • Oil pumping mode: Under the first power-on and power-off state, press and hold 【▼】 for 7s, and the display area starts to count down for 300s to start pumping oil. 【...
  • Page 16: Bluetooth Operation

    jammed. Check whether the fan plug is loose and falsely connected. The fan is faulty; replace the fan. Check whether the wind wheel induction magnet is missing or has the wrong polarity. Check whether the main board wind speed sensor is normal. The main board is faulty;...
  • Page 17 IOS App Android APP APP Store search “airHeaterBle” 【 】【 】 Query the Bluetooth name:After turning on the machine, press 3s at the same time, the screen displays the Bluetooth name in 4-digit characters (0-F). 2. Connect to the mobile phone via Bluetooth:Click on the Bluetooth symbol in the upper right corner, find the corresponding local Bluetooth number: BYD+MAC address of the Bluetooth device+4 digits from the controller(Refer to the picture above), then click on the Bluetooth number to connect.
  • Page 18 Click the button to go to the settings screen, you can set the password and click "Confirm" to save the settings. If the password is modified, the switch needs to modify the password according to the above Bluetooth matching operation method.
  • Page 19 【 】 4. Long press the to turn on/turn off the heater. 5. Click "mode" button to switch the gear mode or temperature control mode, then Click "up +" /"down -” button to increase + or decrease- the level (level 1- 10)/temperature(8°C~36°C).
  • Page 20 6. Fault display: when the heater fails, it will display the fault code E-xx, see the table mentioned earlier for the type of fault. - 20 -...
  • Page 21 Address:Baoshanqu Shuangchenglu 803long 11hao 1602A-1609shi Shanghai Imported to AUS: SIHAO PTY LTD, 1 ROKEVA STREETEASTWOOD NSW 2122 Australia Imported to USA: VEVOR STORE INC, 9448 RINCHMOND PL #E RANCHO CUCAMONGA, California, 91730 United States of America Pooledas Group Ltd UK REP...
  • Page 22 Technical Support and E-Warranty Certificate www.vevor.com/support...

This manual is also suitable for:

Xmz-d2

Table of Contents