Advertisement
Technical Support and E-Warranty Certificate www.vevor.com/support
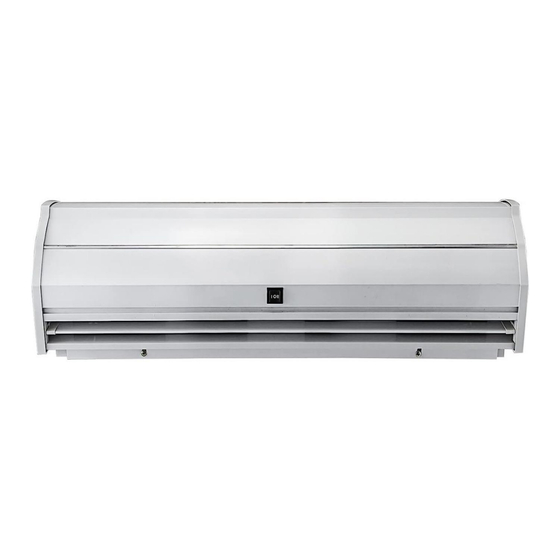
AIR CURTAIN
We continue to be committed to provide you tools with competitive price.
"Save Half", "Half Price" or any other similar expressions used by us only represents an
estimate of savings you might benefit from buying certain tools with us compared to the major
top brands and does not necessarily mean to cover all categories of tools offered by us. You
are kindly reminded to verify carefully when you are placing an order with us if you are
actually saving half in comparison with the top major brands.
Advertisement
Table of Contents

Summary of Contents for VEVOR LFM120-900-U
- Page 1 Technical Support and E-Warranty Certificate www.vevor.com/support AIR CURTAIN We continue to be committed to provide you tools with competitive price. "Save Half", "Half Price" or any other similar expressions used by us only represents an estimate of savings you might benefit from buying certain tools with us compared to the major top brands and does not necessarily mean to cover all categories of tools offered by us.
- Page 3 This is the original instruction, please read all manual instructions carefully before operating. VEVOR reserves a clear interpretation of our user manual. The appearance of the product shall be subject to the product you received. Please forgive us that we won't inform you again if there are any technology or software updates on our product.
- Page 4 Warning-To reduce the risk of injury, user must read instructions manual carefully. This device complies with Part 15 of the FCC Rules. Operation is subject to the following two conditions:(1)This device may not cause harmful interference, and (2)this device must accept any interference received, including interference that may cause undesired operation.
-
Page 5: Mounting Instructions
DO NOT expose to water or rain, Use more than one unit of air which will increase the risk of curtain to fill up the width of the electric shock. doorway, please provide 20-40 mm gaps between the units. Unauthorized modification may DO NOT use the unit where there is impair the function or affect the life a risk of fire or an explosion... - Page 6 Step 2: Unpack the machine and Step 1: Please ensure that the check any damage. machine is at least 10 cm from the roof. TZ-810 TZ-6003 Brackets Step 3: Unscrew the fixing screws Step 4: Determine the installation and take off the mounting plate on position with the mounting plate.
-
Page 7: Limit Switches
B. Other installation methods: Installation on the wooden wall Installation on the steel framework Refer to Step 1 and determine the Refer to Step 1 and determine the installation position with the mounting installation position with the mounting plate. Secure the wood screws in plate. -
Page 8: Connection Diagram
TZ-6003 TZ-8108 Operating force(Max.) 250~350g 750g Release force(Min.) 114g 100g Pre-travel(Max.) 0.5mm 20° Over travel(Max.) 0.05mm 50° Movement differential(Min.) 3.6mm 12° CONNECTION DIAGRAM TZ-6003 TZ-8108 Note: We have connected TZ-6003 to each air curtain for customers. Customers choose the type of switch according to the actual situation of the door. - Page 9 Door Switch Installation Installation Diagram Type Models Method Mount the limit Wide TZ-6003 switch on the side door TZ-8108 of the door frame. frame Step 1: Mount the limit switch on the wall beside the Narrow door frame. TZ-6003 door Step 2: Use the frame brackets...
-
Page 10: Maintenance And Cleaning
Two-speed model Three-speed model MAINTENANCE AND CLEANING 1) Disconnect power source before maintenance service, 2) Routine maintenance must be done every year, 3) Use a clean lacquer brush to remove dust on the fans and electric motor, 4) The surfaces should be wiped with a detergent, and xylene, thinners, alcohol or any other such chemicals is not allowed, 5) If any part of the unit is damaged, please don’t use it forcibly. - Page 11 Model# L(mm) W(mm) H(mm) N.W. (kg) 1600 1600 1800 1800 U.S.A LFM120- LFM120- LFM120- Model 900-U 1200-U 1500-U Voltage(V) AC120 AC120 AC120 Frequency(Hz) CFM(m³/h) 1899 2666 3407 High FPM(m/s) 16.5 16.8 speed Input Power CFM(m³/h) 1738 2365 3086 FPM(m/s) 15.1 14.9 15.4 speed...
- Page 12 Input Power(W) CFM(m³/h) 2011 2422 2745 3633 FPM(m/s) 10.5 10.8 10.2 10.6 Input Power Europe/ Australia LFM120-900- LFM120-120 LFM120-1500 Model LFM120-900- LFM120-120 LFM120-1500 Voltage(V) AC220-240 AC220-240 AC220-240 Frequency(Hz) CFM(m³/h) 1634 2618 2946 High FPM(m/s) 14.2 16.5 14.7 spee Input Power CFM(m³/h) 1450 2269...
- Page 13 AC220-24 AC220-24 AC220-24 AC220-24 Voltage(V) Frequency(Hz) CFM(m³/h) 2375 2825 3337 4147 High FPM(m/s) 12.4 12.6 12.4 12.1 spee Input Power CFM(m³/) 2241 2579 3068 3873 FPM(m/s) 11.7 11.5 11.4 11.3 spee Input Power Australia Model FM125-900 FM125-1200 FM125-1500 Voltage(V) AC220-240 AC220-240 AC220-240 Frequency(Hz)
-
Page 14: Part List
PART LIST Components Picture Q’ty Made In China - 12 -... - Page 16 Technical Support and E-Warranty Certificate www.vevor.com/support...


Need help?
Do you have a question about the LFM120-900-U and is the answer not in the manual?
Questions and answers