Table of Contents
Advertisement
Quick Links
Advertisement
Table of Contents

Related Manuals for ETAS BR XETK-S3.0


Summary of Contents for ETAS BR XETK-S3.0
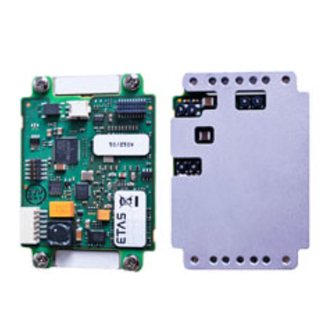
- Page 1 ETAS BR_XETK-S3.0 Emulator Probe for Infineon AURIX MCU Family User Guide...
-
Page 2: Br_Xetk-S3.0
Copyright The data in this document may not be altered or amended without special notification from ETAS GmbH. ETAS GmbH undertakes no further obligation in relation to this document. The software described in it can only be used if the customer is in possession of a general license agreement or single license. -
Page 3: Table Of Contents
Pull CalWakeUp until Startup Handshake ......... . . 28 ETAS BR_XETK-S3.0 | User Guide... - Page 4 Top View ..............58 ETAS BR_XETK-S3.0 | User Guide...
- Page 5 Temperature Range ............71 ETAS BR_XETK-S3.0 | User Guide...
- Page 6 Waterproof Case ..............86 ETAS BR_XETK-S3.0 | User Guide...
- Page 7 Index ................90 ETAS BR_XETK-S3.0 | User Guide...
-
Page 8: Safety Information
Program codes or program control sequences that are created or changed via ETAS products, as well as all types of data obtained through the use of ETAS prod- ucts, must be checked for their reliability and suitability prior to use or distribution. -
Page 9: Intended Use
Shut down a damaged product immediately. The product cannot be repaired. Dispose of the product properly. Do not open or alter the product. Only ETAS may make changes to the product. -
Page 10: Safety Information
If the firmware update is not completed successfully, try it again. If a new firmware update is not possible and the product is not functional, send the product to ETAS. 1.3.3 Electrical Connection... -
Page 11: Cables And Accessories
2. Remove all cables from the product. 1.3.4 Cables and Accessories Cables - Only use ETAS cables, cables recommended by ETAS or other cables certi- fied for the application. - Route the cables such that they are protected against abrasion, damage, deformation and kinking. -
Page 12: Maintenance
Order number of the product (example) SN: yyxxxxx Serial number (7-digit) XXXX/YY Product version ZZZZ Year of manufacture ETAS GmbH,... Manufacturer's address NOTE For symbols and product information one or several adhesive labels can be used. ETAS BR_XETK-S3.0 | User Guide... -
Page 13: Taking The Product Back And Recycling
1.6.1 CE Declaration of Conformity (European Union) With the CE mark attached to the product or its packaging, ETAS confirms that the product corresponds to the applicable product-specific European Directives. The CE Declaration of Conformity for the product is available upon request. -
Page 14: People's Republic Of China
Some products from ETAS GmbH (e.g. modules, boards, cables) use components with substances that are subject to declaration in accordance with the REACH regulation (EU) no.1907/2006. Detailed information is located in the ETAS download center in the customer infor- mation "REACH Declaration" (www.etas.com/Reach). This information is continu- ously being updated. -
Page 15: Introduction
20 pin FCI Power supply connector 6 pin MOLEX Power supply for ED devices 1.3 V or 0.95 V (VDDSTBY) see “Microcontroller Interface” on page 51 SBRAM sense Yes, on board Pinless triggering Timer triggering ETAS BR_XETK-S3.0 | User Guide... -
Page 16: Features
• Open XCP on Ethernet Protocol • Supports a variety of standard applications - “ETK Tools” update to support ETAS software tools (INCA, XCT) - Firmware update (programming of the logic device) through HSP software service packs; removal of XETK or ECU is not necessary - Temperature range suitable for automotive application For more technical data on the BR_XETK-S3.0 consult the chapter “Technical... -
Page 17: Hardware Description
ECU microcontroller can provide data to the calibration and develop- ment system by buffering the data (DISTAB17) and triggering the BR_XETK-S3.0 to read the data via DAP. The BR_XETK-S3.0 then reads, buffers, processes and sends this measured data to the PC. ETAS BR_XETK-S3.0 | User Guide... -
Page 18: Ecu Interface Con2
- 5 Debug lines for the communication between the BR_XETK-S3.0 and the microcontroller - 5 ground lines for proper shielding of the ECU interface lines. CON3 CON1 CON2 Fig. 3-2 Location of the ECU Interfaces ETAS BR_XETK-S3.0 | User Guide... -
Page 19: Automotive Ethernet Interface Con1
The media converter has to be connected to CON1 (refer to Fig. 3-4). The combination of the BR_XETK-S3.0 and the Automotive Ethernet media con- verter CBEB100.1, ES160.1, ES162.1, and ES165.1 is integrated in the ETAS IP world with automatic IP management and supports the open automotive "Universal Measurement and Calibration"... -
Page 20: Power Supply Interface Con3
BR_XETK-S3.0 is reduced to a minimum, when the BR_XETK-S3.0 enters its standby (sleep) mode. The BR_XETK-S3.0 is supplied with power through the connector CON3. CON3 Fig. 3-5 Location of the BR_XETK-S3.0 Power Supply Connector (CON3) ETAS BR_XETK-S3.0 | User Guide... -
Page 21: Status Leds
Status LEDs State Definition BR_XETK-S3.0 is supplied with power and active (i.e., the ECU is switched on or the ETAS calibration and develop- ment system is connected and ready to communicate with the BR_XETK-S3.0) Green Working Page contains data and is accessible from INCA Flashing BR_XETK-S3.0 is in boot configuration mode:... -
Page 22: Dap Interface
DAP0, DAP1, DAP2 and /TRST. Similar termination should be considered on the ECU board - depending both on the layout and on the DAP interface clock rate. NOTE Power Supply of the ED RAM: Use only with supported controllers ETAS BR_XETK-S3.0 | User Guide... -
Page 23: Data Emulation And Data Measurement
XETK until the microcontroller is powered up and the startup handshake is performed. Serial XETKs use the ETAS two-page concept, consisting of both a Reference and a Working page. The Reference Page is located in the ECU flash and cannot be modified by a simple write access. - Page 24 XETK startup handshake has taken place. NOTE The BR_XETK-S3.0 can use the Direct Register Access page switch method only with the TC39x-ED (B-Step) variant of the AURIX microcontrollers. Additional AURIX microcontrollers can be supported on request. ETAS BR_XETK-S3.0 | User Guide...
-
Page 25: Trace Based Measurement
Trigger Semaphore (DTS) for triggering. 3.9.2.1 Startup Handshake The COMDATA trigger register is used to generate an ETK startup handshake. The ECU must ensure that all memory ECC initializations have been completed prior to the startup handshake. ETAS BR_XETK-S3.0 | User Guide... -
Page 26: Timer Triggering
XETK’s trace mirror, not directly via DAP. The BR_XETK-S3.0 supports value based data trace trigger up to 255 value (up to 64 used in a single setup). Requirements for trace triggering by the BR_XETK-S3.0: ETAS BR_XETK-S3.0 | User Guide... - Page 27 - the write must be 32 bit width (the upper 24 bits must be ‘0’) - the value 0x0 is not a valid trigger number NOTE It is not possible to use the BR_XETK-S3.0 configured with trace triggers and a debugger with program / data trace simultaneously. ETAS BR_XETK-S3.0 | User Guide...
-
Page 28: Reset
ECU and XETK is com- plete. NOTE The CalWakeUp function is optional and not essential for the operation of BR_X- ETK-S3.0. Use of this function requires support of ECU hardware. ETAS BR_XETK-S3.0 | User Guide... -
Page 29: Installation
- Fixing the BR_XETK-S3.0 with mounting bracket - Fixing the BR_XETK-S3.0 without mounting bracket NOTE ETAS recommends to attach the BR_XETK-S3.0 on the ECU housing with mount- ing bracket. The mounting bracket is an BR_XETK-S3.0 accessories and can be ordered sepa- rately (refer to chapter “Mounting Material”... -
Page 30: Fixing The Br_Xetk-S3.0 With Mounting Bracket
1. Apply the recommended adhesive on the mounting bracket. NOTE We recommend an adhesive layer thickness of max. 0.3 mm. 2. Fit the mounting bracket at the intended location of the ECU housing. ETAS BR_XETK-S3.0 | User Guide... - Page 31 4. Fit the gap pad on the mounting bracket. Bring the cutout of the gap pad into line with the ETK connectors. The gap pad is self-adhesive. 5. Screw the BR_XETK-S3.0 with the ECU housing. BR_XETK-S3.0 and mounting bracket ETAS BR_XETK-S3.0 | User Guide...
-
Page 32: Fixing The Br_Xetk-S3.0 Without Mounting Bracket
5. Seal the housing with the holes. To mount the BR_XETK-S3.0 on the ECU Housing 1. Place the gap pad correctly between the spacers. 2. Set the BR_XETK-S3.0 on the screws. 3. Attach the BR_XETK-S3.0 with nuts M2. ETAS BR_XETK-S3.0 | User Guide... -
Page 33: Connection To The Ecu
ECU PCB for adapters ETAM8 and ETAM2/ ETAM5/ ETAM9/ ETAM10/ETAM12 (see Fig. 4-2 for additional connector details). ETAM2 or ETAM5 or ETAM9 or ETAM10 BR_XETK-S3.0 ETAM8A or ETAM8B Fig. 4-1 BR_XETK-S3.0 Connection to the ECU ETAS BR_XETK-S3.0 | User Guide... -
Page 34: Wiring To The Computer
Compatible Hardware NOTE The Automotive Ethernet interface is not compatible with the standard Ethernet interfaces of ETAS modules. A CBEB10x.1 Media Converter or an ES88x ECU Inter- face Module is needed to connect the BR_XETK-S3.0 to the PC. 4.3.2 Requirements for failsafe Automotive Ethernet Operation... -
Page 35: Example Connection Overview With Media Converter
3) For use with FE ports together with ES5xx, ES8xx devices Fig. 4-3 BR_XETK-S3.0 Connection examples with media converter The Automotive Ethernet can be connected directly into a ES8xx with AE input(not on the picture). ETAS BR_XETK-S3.0 | User Guide... -
Page 36: Cbeb100.1 Automotive Ethernet Media Converter
CBAM290.1 CBEB100 BR_XETK CBEB121.1 XCP on Fast Ethernet Fig. 4-4 BR_XETK-S3.0 connected with CBEB100.1 Automotive Ethernet Media Converter and ETAS Cable to PC CBAM290.1 ETABR1 ETABR2 ETABR3 Fig. 4-5 BR_XETK-S3.0 connected with CBEB100.1 Automotive Ethernet Media Converter and Customer specific Cable to PC 4.3.5... -
Page 37: Es162.1 Automotive Ethernet Media Converter
(9 m) CBEB312.1 CBEB313.1 ES891.1 Automotive Ethernet Bus ES892.1 Fig. 4-7 BR_XETK-S3.0 connected with ES162.1 Automotive Ethernet Media Converter via Gigabit Ethernet Interface to ETAS Modules 4.3.7 ES165.1 Automotive Ethernet Media Converter Lemo 1B CBAM290.1 Lemo Lemo Lemo 2 (f) 2 (m) CBAM295.1... -
Page 38: Es88X Ecu And Bus Interface Module
1 of 4 Lemo Yamaichi DSUB9 (f) DSUB 9 (m) 2 (m) 8 (m) ES886.x CBEB120.1 CBEB242.1 Fig. 4-9 BR_XETK-S3.0 connected via Gigabit Ethernet Interface to ES88x ECU and Bus Interface Modules with ETAS Cables ETAS BR_XETK-S3.0 | User Guide... -
Page 39: Power Supply
Permanent Power Supply inside ECU available Permanent Power Supply inside ECU not available Cable Gland Serial ETK Interface Connector Cable CBAM295.1 Cable e.g. CBEB120 Cable K70.1 Permanent Supply 12V Power Supply Connector Ignition Key Vehicle Wiring ECU GND Vehicle Connector Battery Fig. 4-11 Permanent Power Supply inside ECU not available ETAS BR_XETK-S3.0 | User Guide... -
Page 40: Xetk Configuration
XETK is checked for the appropriate configuration. If necessary, the XETK will be config- ured appropriately to the corresponding project. Configuration Parameter The XCT Tool provides support concerning hardware configuration parameters and their possible values. ETAS BR_XETK-S3.0 | User Guide... - Page 41 The XCT Tool help window opens. 3. Choose Reference to User Interface > (X)ETK Hardware Configuration Parameters. 4. Choose the topic BR_XETK-S3.0. The topic BR_XETK-S3.0 contains information about the BR_XETK-S3.0 hardware configuration parameters and their possible values. ETAS BR_XETK-S3.0 | User Guide...
-
Page 42: Technical Data
Requirement to ensure successful Initialization of the Module NOTE It is imperative you disable the function which automatically switches to power- saving mode on your PC network adapter when there is no data traffic on the Ethernet interface! ETAS BR_XETK-S3.0 | User Guide... - Page 43 "Power Management" register. Confirm your configuration. The manufacturers of network adapter have different names for this function. Example: - "Link down Power saving" - "Allow the computer to turn off this device to save power" ETAS BR_XETK-S3.0 | User Guide...
-
Page 44: Software Requirements For Br_Xetk-S3.0A
V11.5.0 V7.2.5 V7.2.5 V4.1.6 DISTAB17 (A-Step) V11.5.0 V7.2.5 V7.2.5 V4.1.6 Trace2Ram TC39x-ED V11.8.0 V7.2.8 V7.2.8 V4.1.9 DISTAB17 (B-Step) V11.8.0 V7.2.8 V7.2.8 V4.1.9 Trace2Ram TC37x-XX V12.3.0 V7.3.3 V7.3.3 V4.2.3 DISTAB17 TC39x-XX V12.3.0 V7.3.3 V7.3.3 V4.2.3 DISTAB17 ETAS BR_XETK-S3.0 | User Guide... -
Page 45: Software Requirements For Br_Xetk-S3.0C
"Hooked Service Points" (with the help of a SBB Service Point and DISTAB17). 6.1.4 Software Requirements for BR_XETK-S3.0C 6.1.4.1 Use Case: Measurement & Calibration, ECU Flash Programming Micro- INCA INCA-MCE ETK Tools Method control- TC49x 13.2.0 7.4.2 7.4.2 4.3.0 DISTAB 17 A-Step ETAS BR_XETK-S3.0 | User Guide... -
Page 46: Data Emulation And Measurement Memory
ED RAM available for data emulation. E.g., the page switch mail box and OMD requires typically one tile of ED RAM (64 KB for TC2xx-ED, 256 KB for TC3xx- ED). Trace2Ram requires two tiles of ED RAM (128 KB for TC2xx-ED, 512 KB for TC3xx-ED). ETAS BR_XETK-S3.0 | User Guide... -
Page 47: Measurement Data Memory
Chassis): 60V DC / 30V AC. Inside the ECU housing the maximum. temperature is specified with 110°C, still air. Outside of the ECU housing the maximum ambient temperature is assumed to be 105°C at 1m/s airflow. ETAS BR_XETK-S3.0 | User Guide... -
Page 48: Automotive Ethernet Interface
NOTE The Automotive Ethernet interface is not compatible with the standard Ethernet interfaces of ETAS modules. An Automotive Ethernet Media Converter or an ES88x ECU Interface Module is needed to connect the BR_XETK-S3.0 to the PC. ETAS BR_XETK-S3.0 | User Guide... - Page 49 To ensure successful initialization of the network card of your PC, refer to chap- ter 6.1.2 on page 42 NOTE Maximum Voltage to Earth or to any accessible parts (e.g. ECU Housing, Vehicle Chassis): 60V DC / 30V AC. ETAS BR_XETK-S3.0 | User Guide...
-
Page 50: Power Supply
The BR_XETK-S3.0 will accept permanent power supply voltage dips (for addi- tional details of 3 V low voltage operation, see ISO standard 16750). NOTE Maximum Voltage to Earth or to any accessible parts (e.g. ECU Housing, Vehicle Chassis): 60V DC / 30V AC. ETAS BR_XETK-S3.0 | User Guide... -
Page 51: Microcontroller Interface
2.54 2.66 V (3.3 V selected) IDDP VDDP 3.3 V A ECU Standby RAM VDDSTBY VDDSTBY 0.84 0.87 0.90 V Supervision Voltage /VDDST- VDDSTBY 0.82 0.85 0.88 V BY_- SENSE IDDSTBY VDDSTBY 0.95V A ETAS BR_XETK-S3.0 | User Guide... -
Page 52: Power-On Delay Of Ecu Reset
(ETK --> Target) quency 50 MHz DAP Clock Fre- quency DAP1 Set-Up Time (ETK --> Target) DAP1 Hold Time (ETK --> Target) DAP1 Clock-to-Out Time Undetermined, ETK auto- (Target --> ETK) matically determines opti- mum sampling point ETAS BR_XETK-S3.0 | User Guide... -
Page 53: 3-Pin Dap Mode
100 MHz DAP Clock Fre- quency 50 MHz DAP Clock Fre- quency DAP1/DAP2 Set-Up Time ETK --> Target) DAP1/DAP2 Hold Time (ETK --> Target) DAP1/DAP2 Clock-to-Out Undetermined, ETK auto- Time (Target --> ETK) matically determines opti- mum sampling point ETAS BR_XETK-S3.0 | User Guide... -
Page 54: Electrical Characteristics (Ecu Interface Connector)
6.10 Electrical Characteristics (ECU Interface Connector) Signal Pin Type V (max) (min) (max) (max) (min) (max) Leakage current Addit. load (max)/ (min) by ETK (typ) [A] [pF] DAP0 +631 DAP1 +5000 / +3340 DAP2 +5000 / +3340 Reserved +20 / -20 /TRST +20 / -20 /ESR0... -
Page 55: Pin Assignment
55 | Technical Data 6.11 Pin Assignment 6.11.1 Automotive Ethernet Interface Connector CON1 CON1 Fig. 6-4 Automotive Ethernet Interface Connector (CON1) Location and Pin Assignment Signal Comment Automotive Ethernet signal AE- Automotive Ethernet signal AE+ Connector: MOLEX_87438-0243 ETAS BR_XETK-S3.0 | User Guide... -
Page 56: Ecu Interface Connector Con2
Output DNU Mfr test signal DAPE1 Bidir Extended DAP signal GATE_PORST Input Overwrite /PORST status at Power On, 0V = /PORST inactive, 3.3V = active DAPE0 Output Extended DAP signal Power Signal Ground Connector: FCI_10106813-021112LF ETAS BR_XETK-S3.0 | User Guide... -
Page 57: Power Supply Connector Con3
(0.95 V supply) 0.95 V Note: Do not connect for TC49x A-Step microcontroller Input Power Ground CalWakeUp Output Switch to Ubatt. ECU wake-up signal (for measurement preparation) Ubatt2 Input Vehicle battery Ubatt1 Input Vehicle battery Connector: MOLEX_87438-0643 ETAS BR_XETK-S3.0 | User Guide... -
Page 58: Mechanical Dimensions
Side View Fig. 6-8 BR_XETK-S3.0 Dimensions - Side View Item Dimension Tolerance Dimension Tolerance [mm] [mm] [in] [in] 2.00 +0.0/ -0.2 0.079 +0.000/ -0.008 1.60 +0.16/ -0.16 0.063 +0.006/ -0.006 5.10 +0.0/ -0.2 0.201 +0.000/ -0.008 ETAS BR_XETK-S3.0 | User Guide... -
Page 59: Cables And Accessories
See chapter 4.2 on page 33 for details on wiring the ECU interface adapters. Requirements for failsafe Operation NOTE We recommend using ETAS cables or any other cables certified by the standards for the application. Adhere to the maximum permissible cable lengths! NOTE Application-specific cables are available from ETAS. -
Page 60: Con1: Etabr1 Cable
Signal Color White Automotive Ethernet signal AE- Violet Automotive Ethernet signal AE+ Order Information Product Length Order Number ETABR1 Automotive Ethernet Interface Cable, 0.3 m F 00K 109 771 MOLEX – open wire (2fc-2c), 0m3 ETAS BR_XETK-S3.0 | User Guide... -
Page 61: Con1: Etabr2 Cable
Operating temperature -40 °C to +105 °C -40 °F to + 221 °F 7.3.5 Order Information Product Length Order Number ETABR2 Automotive Ethernet Interface Cable, 0.17 m F 00K 111 118 MOLEX – MOLEX (2fc-2fc), 0m2 ETAS BR_XETK-S3.0 | User Guide... -
Page 62: Con1: Etabr3 Cable
Operating temperature -40 °C to +105 °C -40 °F to + 221 °F 7.4.5 Order Information Product Length Order Number ETABR3 Automotive Ethernet Interface Cable, 0.33 m F 00K 111 964 MOLEX – open wire (2fc-2c), 0m33 ETAS BR_XETK-S3.0 | User Guide... -
Page 63: Con1: Cbam290 Cable
The minimum bending radius for the cable is 16 mm. 7.5.5 Pin Assignment Fig. 7-11 CBAM290.1 Connectors Connector in Fig. 7-11 Target Color CON1 Black Cable to Media Converter, e.g. CBEB120.1 CON2 White BR_XETK interface connector CON3 ECU housing shield ETAS BR_XETK-S3.0 | User Guide... -
Page 64: Temperature Range
-40 °F to + 221 °F 7.5.7 Order Information Product Length Order Number CBAM290.1 BR_XETK ECU Adapter Cable, pre- 0.60 m F 00K 111 117 assembled into M10 screwing, shield on ECU-Hous- ing, Lemo 1B PHA - MOLEX (2fc-2fc), 0m60 ETAS BR_XETK-S3.0 | User Guide... -
Page 65: Con1: Cbam295 Cable
The nut must be ordered separately by AGRO (AGRO order number 8000.12). For wall thickness more than 2.5 mm cut a thread into the hous- ing. The minimum bending radius for the cable is 20 mm. ETAS BR_XETK-S3.0 | User Guide... -
Page 66: Pin Assignment
CBAM295.1-1m8 BR_XETK ECU Adapter and Power 1.80 m F 00K 111 657 Supply Cable, pre-assembled into M12 screwing, shield on ECU housing, Lemo 1B PHA - MOLEX (2fc- 2fc) / Lemo 1B PHG - open wire (2fc-1c), 1m8 ETAS BR_XETK-S3.0 | User Guide... -
Page 67: Cbeb120 Cable
CBEB120.1-3 100 Mbit/s Automotive Ethernet Inter- F 00K 111 111 face Cable Lemo 1B FGA - DSUB (2mc-9fc), 3 m CBEB120.1-5 100 Mbit/s Automotive Ethernet Inter- F 00K 111 112 face Cable Lemo 1B FGA - DSUB (2mc-9fc), 5 m ETAS BR_XETK-S3.0 | User Guide... -
Page 68: Cbeb121 Cable
Cable plus Power for CBEB100, Lemo 1B FGA - DSUB plus banana connector (2mc-9fc), 3 m CBEB121.1-5 100 Mbit/s Automotive Ethernet Inter- F 00K 111 114 face Cable plus Power for CBEB100, Lemo 1B FGA - DSUB plus banana connector (2mc-9fc), 5 m ETAS BR_XETK-S3.0 | User Guide... -
Page 69: Cbeb125 Cable
Cable for ES88x, Lemo 1B FGA - Lemo 1B FGA (2mc- 2mc), 3 m CBEB125.1 100 Mbit/s Automotive Ethernet Interface F 00K 111 116 Cable for ES88x, Lemo 1B FGA - Lemo 1B FGA (2mc- 2mc), 5 m ETAS BR_XETK-S3.0 | User Guide... -
Page 70: Cbeb240 Cable
AE 4 When using the CBEB240.1 cable at the AE interface of the module ES882.1 (three Automotive Ethernet channels), three of the four cable sections are used in accor- dance with the assignment in the table. ETAS BR_XETK-S3.0 | User Guide... -
Page 71: Assignment Of The Automotive Ethernet Signal To The Lemo Connectors
-40 °F to +185 °F 7.10.6 Order Information Product Length Order Number CBEB240.1-0m4 Automotive Ethernet splitter cable 0.4m F 00K 111 122 100 Mbit/s, Yamaichi YCP - 4x Lemo PHA 1B (8mc -4x 2fc), 0m4 ETAS BR_XETK-S3.0 | User Guide... -
Page 72: Cbeb242 Cable
BR_XETKs. NOTE The CBEB242.1 cable is designed for directly connecting BR_XETKs. For other areas of application, ETAS recommends the CBEB240.1 Automotive Ethernet cable (see chapter 7.10 on page 70). 7.11.2 Assignment of the Automotive Ethernet Channels to the Cable Sections The CBEB242.1 cable consists of four identical cable sections [n], each mapped to... -
Page 73: Assignment Of The Automotive Ethernet Signal To The Dsub9 Connectors
Operating temperature -40 °C to +85 °C -40 °F to +185 °F 7.11.6 Order Information Product Length Order Number Automotive Ethernet Splitter Cable 100 Mbit/s, 0.4m F 00K 111 123 Yamaichi YCP - 4x DSUB (8mc - 4x 9mc), 0m4 ETAS BR_XETK-S3.0 | User Guide... -
Page 74: Con2: Etam8 Ecu Adapter
ETAM8 Adapter (bottom view) Fig. 7-24 ETAM8 Adapter (side view) Depending on ECU connector lead style mated height is between 6.35 mm and 11.81 mm (distance between the PCBs). 7.12.4 Pin Assignment Fig. 7-25 ETAM8 Adapter (pin numbering) ETAS BR_XETK-S3.0 | User Guide... -
Page 75: Ecu Signals
ETAM8A BR_XETK-S3 ECU Adapter, FCI - SAMTEC 0.11 m F 00K 110 754 SFM (20c - 10fc), 0m11 ETAM8B BR_XETK-S3 ECU Adapter, FCI - SAMTEC 0.11 m F 00K 110 881 SFM (20c - 10fc), 0m11 ETAS BR_XETK-S3.0 | User Guide... -
Page 76: Con3: Etam2 Ecu Adapter
Switch to Ubatt. ECU wake-up signal (for mea- surement preparation) SGUBATT2 Car battery SGUBATT1 Car battery 7.13.3 Order Information Product Length Order Number ETAM2 XETK/FETK ECU Adapter, MOLEX - open wires 0.25 m F 00K 109 306 (6fc - 6c), 0m25 ETAS BR_XETK-S3.0 | User Guide... -
Page 77: Con3: Etam5 Ecu Adapter
CON3: ETAM5 ECU Adapter Fig. 7-28 FETK/ XETK - ECU Adapter ETAM5 7.14.1 Order Information Product Length Order Number ETAM5 FETK ECU Adapter, MOLEX - MOLEX (6fc - 0.136 m F 00K 110 101 5fc+1c), 0m136 ETAS BR_XETK-S3.0 | User Guide... -
Page 78: Con3: Etam9 Ecu Adapter
Operating temperature -40 °C to +110 °C -40 °F to + 230 °F 7.15.4 Order Information Product Length Order Number ETAM9 F/XETK-S ECU Adapter, MOLEX - MOLEX (6fc 0.136 m F 00K 111 043 - 5fc), 0m136 ETAS BR_XETK-S3.0 | User Guide... -
Page 79: Con3: Etam10/Etam12 Ecu Adapter
Permanent power supply of ECU interface (Supply) Yellow VDDSTBY Permanent power supply of ECU ED RAM (Supply) Brown Ground Power ground Green Cal_WakeUp Switch to Ubatt. ECU wake-up signal (for mea- surement preparation) SGUBATT2 Car battery Not connected ETAS BR_XETK-S3.0 | User Guide... -
Page 80: Temperature Range
NOTE It is recommended for safety reasons to connect the external permanent volt- age and the switched voltage inside the ECU ! 7.17.2 Mechanical Dimensions Fig. 7-33 K70.1 Cable Dimensions Dimension Millimeters Inches 2000 78.74 ETAS BR_XETK-S3.0 | User Guide... -
Page 81: Waterproof Case Etks_C3
For mounting the BR_XETK-S3.0 on top of ECUs, an external case is available. It is small, robust and waterproof (IP65). Fig. 7-34 ETKS_C3 Top View Fig. 7-35 ETKS_C3 Bottom View Fig. 7-36 ETKS_C3 Side View with PG9 thread ETAS BR_XETK-S3.0 | User Guide... -
Page 82: Mounting Plate
AS_ETKS_C3_A1 adapter plate for AS_ETKS_C3_A1 F 00K 114 333 ETKS_C3 water proofed case NOTE To be able to use the BR_XETK-S3.0 ECU adapter cables, an adapter ring from PG9 to M10/M12 is required. Further information on request. ETAS BR_XETK-S3.0 | User Guide... -
Page 83: Ordering Information
- China-RoHS-leaflet_Compact Cable and Adapter NOTE We recommend using ETAS cables or any other cables certified by the standards for the application. Adhere to the maximum permissible cable lengths! NOTE Application-specific cables are available from ETAS. Please contact your ETAS contact partner. -
Page 84: Xetk - Ecu Adapter
MOLEX (6fc - 5fc), 0m136 ETAM10 F/XETK-S ECU Adapter, MOLEX - ETAM10 F 00K 111 814 MOLEX (6fc - 6fc), 0m07 ETAM12 F/XETK-S ECU Adapter, MOLEX - ETAM12 F 00K 112 457 MOLEX (6fc - 6fc) ETAS BR_XETK-S3.0 | User Guide... -
Page 85: Automotive Ethernet Cable
CBEB240.1-0m4 F 00K 111 122 Yamaichi YCP - 4x Lemo PHA 1B (8mc -4x 2fc), Automotive Ethernet Splitter Cable 100 Mbit/s, CBEB242.1-0m4 F 00K 111 123 Yamaichi YCP - 4x DSUB (8mc - 4x 9mc), 0m4 ETAS BR_XETK-S3.0 | User Guide... -
Page 86: Automotive Ethernet Media Converter
BR_XETK-S3_GP F 00K 110 752 Mounting bracket for BR_XETK-S3.0 BR_XETK- F 00K 110 753 S3_MB Adhesive ETAS recommends adhesive LOCTITE SI 5145 for fixing the mounting bracket on the ECU housing. Waterproof Case Order Name Short Name Order Number Waterproof case, designed for ETK-S4.x,... - Page 87 87 | Contact Information Contact Information Technical Support For details of your local sales office as well as your local technical support team and product hotlines, take a look at the ETAS website: www.etas.com/en/hotlines.php ETAS Headquarters ETAS GmbH Borsigstraße 24...
- Page 88 Gigabit Ethernet Interface to ETAS Modules ........
- Page 89 Mounting plate ..............82 ETAS BR_XETK-S3.0 | User Guide...
- Page 90 Introduction ......15 LED .......21 ETAS BR_XETK-S3.0 | User Guide...
Need help?
Do you have a question about the BR XETK-S3.0 and is the answer not in the manual?
Questions and answers