Table of Contents
Advertisement
Quick Links
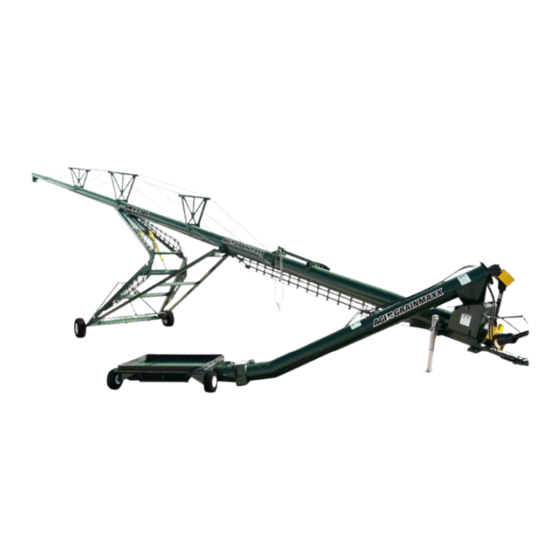
5300 Series
Portable Grain Auger
Operator's Manual
This manual applies to:
AGI GrainMaxx: GMX 5385, GMX 5395
Read this manual before using product. Failure to
follow instructions and safety precautions can
result in serious injury, death, or property
damage. Keep manual for future reference.
LOOKING FOR PARTS?
Check out our online
Parts Catalog!
Part Number: 8210-00022 R0
Revised: July 2021
Original Instructions
Advertisement
Table of Contents

Related Manuals for AGI GrainMaxx 5300 Series


Summary of Contents for AGI GrainMaxx 5300 Series
- Page 1 5300 Series Portable Grain Auger Operator’s Manual This manual applies to: AGI GrainMaxx: GMX 5385, GMX 5395 LOOKING FOR PARTS? Check out our online Parts Catalog! Read this manual before using product. Failure to Part Number: 8210-00022 R0 follow instructions and safety precautions can...
- Page 2 This product has been designed and manufactured to meet general engineering standards. Other local regulations may apply and must be followed by the operator. All personnel must be trained in the correct operational and safety procedures for this product. Use the sign-off sheet below to record initial and periodic reviews of this manual with all personnel.
-
Page 3: Table Of Contents
5300 SERIES – PORTABLE GRAIN AUGER CONTENTS 1. Introduction ............................5 1.1 Serial Number Location......................5 1.2 Intended Use ..........................6 1.2.1 Misuse ........................6 2. Safety............................... 7 2.1 Safety Alert Symbol and Signal Words..................7 2.2 Follow Safety Instructions ......................7 2.3 Rotating Flighting Safety ...................... - Page 4 7.10 Check the Gearbox Oil Level ....................47 7.11 Adjust the Chain Tension ...................... 47 7.12 Replace the Shear Bolt ......................48 7.13 Clean out the Tubes ......................49 8. Troubleshooting............................ 50 9. Specifications ............................53 10. AGI GrainMaxx Limited Warranty ..................... 55 8210-00022 R0...
-
Page 5: Introduction
Keep this manual handy for frequent reference and to review with new personnel. A sign-off form is provided on the inside front cover for your convenience. If any information in this manual is not understood or if you need additional information, please contact AGI or your representative for assistance. -
Page 6: Intended Use
1. INTRODUCTION 5300 SERIES – PORTABLE GRAIN AUGER 1.2. Intended Use The auger is intended for use as listed below and described throughout this manual. Use in any other way is considered contrary to the intended use and is not covered by the warranty. Intended use for the auger: •... -
Page 7: Safety
5300 SERIES – PORTABLE GRAIN AUGER 2. SAFETY 2. Safety 2.1. Safety Alert Symbol and Signal Words This safety alert symbol indicates important safety messages in this manual. When you see this symbol, be alert to the possibility of injury or death, carefully read the message that follows, and inform others. -
Page 8: Rotating Flighting Safety
2. SAFETY 5300 SERIES – PORTABLE GRAIN AUGER 2.3. Rotating Flighting Safety • KEEP AWAY from rotating flighting. • DO NOT remove or modify flighting guards, doors, or covers. Keep in good working order. Have replaced if damaged. • DO NOT operate the auger without all guards, doors, and covers in place. -
Page 9: Work Area Safety
5300 SERIES – PORTABLE GRAIN AUGER 2. SAFETY 2.7. Work Area Safety • Have another trained person nearby who can shut down the auger in case of accident. • The work area should be kept clear of bystanders, including children. •... -
Page 10: Guards Safety
2. SAFETY 5300 SERIES – PORTABLE GRAIN AUGER 2.8. Guards Safety • Keep guards in place. Do not operate with guard removed. • Do not walk on, step on, or damage guards. • Lock out power before removing a guard. •... -
Page 11: Positioning The Auger
5300 SERIES – PORTABLE GRAIN AUGER 2. SAFETY 2.11. Positioning the Auger • Transport and place equipment on reasonably level ground when raising, lowering, positioning, or operating. • Move the auger into position slowly. Do not unhitch and attempt to move by hand. •... -
Page 12: Pto Driveline Safety
2. SAFETY 5300 SERIES – PORTABLE GRAIN AUGER 2.13.1 PTO Driveline Safety Drive • Keep body, hair, and clothing away from rotating PTO driveline. • Make certain the driveline shields telescope and rotate freely on driveline before attaching. • Make certain the driveline is securely attached at both ends. •... -
Page 13: Hydraulic Power Safety
5300 SERIES – PORTABLE GRAIN AUGER 2. SAFETY 2.13.2 Hydraulic Power Safety Power Source • Refer to the rules and regulations applicable to the power source operating your hydraulic drive. • Do not connect or disconnect hydraulic lines while system is under pressure. -
Page 14: Tire Safety
2. SAFETY 5300 SERIES – PORTABLE GRAIN AUGER 2.14. Tire Safety Failure to follow proper procedures when mounting a tire on a wheel or rim can produce an explosion that may result in serious injury or death. • DO NOT attempt to mount a tire unless you have the proper equipment and experience to do the job. -
Page 15: Safety Equipment
5300 SERIES – PORTABLE GRAIN AUGER 2. SAFETY • Hearing Protection • Hard Hat Wear ear protection to prevent hearing Wear a hard hat to help protect your damage. head. • Dust Mask Wear a dust mask to prevent breathing potentially harmful dust. - Page 16 2. SAFETY 5300 SERIES – PORTABLE GRAIN AUGER Figure 2. Decal Locations 8110-00024 P1512044 P1513035 P1513038 P1513052 P1513042 P1513001 P1513035 P1513010 P1513003 P1513008 P1513037 P1513048 8110-00048 P1513016 (both sides) P1513002 4100-50329 8210-00022 R0...
- Page 17 5300 SERIES – PORTABLE GRAIN AUGER 2. SAFETY Figure 3. Decal Locations P1513002 P1513048 P1513016 P1513048 8110-00024 (both sides) 8110-00024 (both sides) P1513008 Table 1. Safety Decals P1513016 P1513002 P1513001 DANGER WARNING WARNING ROTATING FLIGHTING HAZARD ENTANGLEMENT HAZARD To prevent serious injury or death: To prevent death or serious injury: To prevent serious injury or death: •...
- Page 18 2. SAFETY 5300 SERIES – PORTABLE GRAIN AUGER P1513035 8110-00108 8110-00082 WARNING CAUTION WARNING 1. SHUT OFF PTO when retracting or Moving Parts extending swing to or from its fully will cause retracted position. severe injury. 2. Engaging spline shaft with PTO KEEP AWAY running will damage the machine.
- Page 19 5300 SERIES – PORTABLE GRAIN AUGER 2. SAFETY P1513038 P1513044 4100-50319 WARNING WARNING CAUTION ROLLOVER / TRANSPORT HAZARD To prevent death or serious injury: To prevent serious injury or death: MOVING EQUIPMENT • Keep away from rotating cable drum and winch •...
-
Page 20: Features
3. FEATURES 5300 SERIES – PORTABLE GRAIN AUGER 3. Features Read this section to familiarize yourself with the basic component names and functions of the auger. Figure 4. Auger Features Table 2. Auger Features Item Description Item Description Spout Boot Tube Trussing Swing-Away Controls... -
Page 21: Transport
5300 SERIES – PORTABLE GRAIN AUGER 4. TRANSPORT 4. Transport Before continuing, ensure you have completely read and understood this manual’s Safety section, in addition to the safety information in the section(s) below. 4.1. Transport Safety • Check with local authorities regarding transport on public roads. Obey all applicable laws and regulations. -
Page 22: Transport Preparation
4. TRANSPORT 5300 SERIES – PORTABLE GRAIN AUGER 4.2. Transport Preparation 1. It is not recommended that the auger be transported faster than 20 mph (32 km/h). Table 3 references the acceptable transport speed as per the ratio of tractor weight versus auger weight. See Specifications (Section 9. - Page 23 5300 SERIES – PORTABLE GRAIN AUGER 4. TRANSPORT Figure 6. Transport Position and Chain Attach B, C 7. Secure the hopper using the over center toggle clasps. Figure 7. Over Center Toggle Clasps 8210-00022 R0...
-
Page 24: Preparing The Auger For Towing
4. TRANSPORT 5300 SERIES – PORTABLE GRAIN AUGER 4.3. Preparing the Auger for Towing Follow all safety precautions when transporting the auger and use a proper towing vehicle. 1. Fully lower the auger. 2. Disconnect the PTO driveline and hydraulics (as applicable) from the tractor. 3. -
Page 25: Placement
5300 SERIES – PORTABLE GRAIN AUGER 5. PLACEMENT 5. Placement Before continuing, ensure you have completely read and understood this manual’s Safety section, in addition to the safety information in the section(s) below. 5.1. Placement Safety • The auger is not insulated, keep away from overhead power lines. Electrocution can occur without direct contact. - Page 26 5. PLACEMENT 5300 SERIES – PORTABLE GRAIN AUGER 8. Move the jack into storage position. 9. Move the auger into working position slowly. Do not unhitch and attempt to move the auger by hand. 10. Back the auger up to the storage facility while it is in its lowered configuration. 11.
-
Page 27: Raising And Lowering
5300 SERIES – PORTABLE GRAIN AUGER 5. PLACEMENT Figure 10. Auger Placement (Direct PTO Drive) Chock Wheels Chock Wheels Chock Wheels Chock Wheels Tractor Apply Parking Brakes 5.2.1 Raising and Lowering The intake hopper must be off the ground when raising and lowering the auger. Before using the hydraulic lift cylinder: •... -
Page 28: Extendable Axle Positioning
5. PLACEMENT 5300 SERIES – PORTABLE GRAIN AUGER Raising 1. Before connecting the hydraulic hose, wipe the hose coupler clean. Dirt in the hydraulic system can damage the cylinder o-rings and can cause leakage and failure of the system. 2. Connect the hydraulic hoses, ensure the connections are tight. Visually check for leaks, binding, flattening, kinks, or wear. -
Page 29: Auger-To-Tractor Hookup
5300 SERIES – PORTABLE GRAIN AUGER 5. PLACEMENT 2. Using the jack supplied, insert it into one of the jack stubs located on one end of the axle. Jack must be secured to jack stub using pin (attached to jack). 3. -
Page 30: Positioning The Intake Hopper
5. PLACEMENT 5300 SERIES – PORTABLE GRAIN AUGER Measurements Between Drawbar and Driveline Since the auger and tractor become an integral unit during transport, placement, and operation, the configuration and measurements between the tractor drawbar and the tractor PTO driveline are very important. - Page 31 5300 SERIES – PORTABLE GRAIN AUGER 5. PLACEMENT Figure 14. Raised Position Positioning the Hopper 1. Use the handles or the optional hydraulic hopper mover to position the swing auger. Note For optimal performance, position the swing away auger within 25 degrees of a right angle. Figure 15.
-
Page 32: Swing-Away Hydraulic Winch Operation
5. PLACEMENT 5300 SERIES – PORTABLE GRAIN AUGER Figure 16. Swing-Away Working Angle 5.5.1 Swing-Away Hydraulic Winch Operation 1. Before connecting hose, wipe coupler clean. Dirt in the hydraulic system can damage the winch motor and can cause failure of the system. -
Page 33: Operation
5300 SERIES – PORTABLE GRAIN AUGER 6. OPERATION 6. Operation Before continuing, ensure you have completely read and understood this manual’s Safety section, in addition to the safety information in the section(s) below. 6.1. Operation Safety • Keep away from rotating and moving parts, including the auger/mixer flighting, drive components, shafts, and bearings. -
Page 34: Operation - Pto Drive
6. OPERATION 5300 SERIES – PORTABLE GRAIN AUGER 6.3. Operation - PTO Drive 1. Attach the PTO driveline securely to the tractor and confirm the connection to the auger shaft is secure. 2. Confirm the PTO driveline rotating shield and other shields/guards are in place and in good working order. 3. -
Page 35: Restarting With A Full Tube
5300 SERIES – PORTABLE GRAIN AUGER 6. OPERATION 6.5. Restarting with a Full Tube When the auger is shut down inadvertently or due to an emergency, the tube may still be filled with grain. 1. With the power source locked out, remove as much of the grain as possible from the tube and intake using a shop vacuum or other tool. -
Page 36: Operating The Auger With Fertilizer
6. OPERATION 5300 SERIES – PORTABLE GRAIN AUGER Figure 17. Clean Out Clamps Figure 18. Hopper Rotated for Clean Out 6.7. Operating the Auger with Fertilizer If auger has been used to move fertilizer, it should be cleaned out to prevent corrosion. The easiest way to prevent corrosion is to run a load of grain through it after moving fertilizer or clean the machine as noted in the Maintenance section. - Page 37 5300 SERIES – PORTABLE GRAIN AUGER 6. OPERATION To ensure a long, trouble-free life, this procedure should be followed when preparing the unit for storage. 1. Remove all residual material from the hopper and tube. Refer to Section 6.6 – Shutdown and Clean Out on page 2.
- Page 38 6. OPERATION 5300 SERIES – PORTABLE GRAIN AUGER 4. Check tire pressure and inflate according to tire side-wall recommendations. 8210-00022 R0...
-
Page 39: Maintenance
5300 SERIES – PORTABLE GRAIN AUGER 7. MAINTENANCE 7. Maintenance Before continuing, ensure you have completely read and understood this manual’s Safety section, in addition to the safety information in the section(s) below. 7.1. Maintenance Safety • Keep components in good condition. Follow the maintenance procedures. -
Page 40: Visually Inspect The Equipment
7. MAINTENANCE 5300 SERIES – PORTABLE GRAIN AUGER Section 7.10 – Check the Gearbox Oil Level on page 47 Annually: Section 7.4 – Lubricate the Equipment on page 41 Section 7.11 – Adjust the Chain Tension on page 47 Section 7.7 – Clean and Wash the Equipment on page 45 2–3 Years: Section 7.11 –... -
Page 41: Lubricate The Equipment
5300 SERIES – PORTABLE GRAIN AUGER 7. MAINTENANCE 7.4. Lubricate the Equipment Your equipment can operate at top efficiency only if clean fluids and lubricants are used. Use clean containers to handle all fluids and lubricants. Store them in an area protected from dust, moisture, and other contaminants. -
Page 42: Periodic Grease Locations
7. MAINTENANCE 5300 SERIES – PORTABLE GRAIN AUGER 7.4.2 Periodic Grease Locations Top Gearbox Fill Plugs Bottom Gearbox Fill Plugs Lift Frame Pivot Points Pivot Bushings (both sides) Cylinder Bushings (both sides of both bushings) 8210-00022 R0... -
Page 43: Annual Grease Locations
5300 SERIES – PORTABLE GRAIN AUGER 7. MAINTENANCE 7.4.3 Annual Grease Locations Roller Chain Repack Wheel Bearings Top Main Flight Bearing Bottom Main Flight Bearing Hopper Shaft 8210-00022 R0... -
Page 44: Inspect Hydraulic Hoses And Fittings
7. MAINTENANCE 5300 SERIES – PORTABLE GRAIN AUGER 7.5. Inspect Hydraulic Hoses and Fittings When equipped: 1. Pressurize the system. 2. Using a piece of cardboard or wood, run it along the length of the hose and around all fittings. Escaping hydraulic fluid under pressure will cause serious injury if it penetrates the skin surface. -
Page 45: Clean And Wash The Equipment
5300 SERIES – PORTABLE GRAIN AUGER 7. MAINTENANCE 2. Free the cable from the winch and pulleys. 3. Remove the cable clamps that secure the hook in place. 4. Reverse the above steps to install the new cable. 7.7. Clean and Wash the Equipment 1. - Page 46 7. MAINTENANCE 5300 SERIES – PORTABLE GRAIN AUGER 1. Lift the discharge end of the auger with an overhead crane, front end loader, or other proper lifting device so that the tube has a slight upward deflection at the discharge and the cable has some slack. The lifting device must be capable of supporting approximately half of the weight of the auger as provided in the Specifications section.
-
Page 47: Check The Gearbox Oil Level
5300 SERIES – PORTABLE GRAIN AUGER 7. MAINTENANCE Cable must be re-installed exactly as shown or it could come loose. Figure 24. Cable Re-Installation 6. Secure jam nut on cable eyebolt and re-tighten any cable clamps that were loosened. 7.10. Check the Gearbox Oil Level Gearbox Locations There are three gearboxes, one on the front and two inside the swing-away spout. -
Page 48: Replace The Shear Bolt
7. MAINTENANCE 5300 SERIES – PORTABLE GRAIN AUGER 6. Replace and secure the guard covering the chain. Figure 25. Gearbox Mounting Bolts 7.12. Replace the Shear Bolt The PTO is equipped with a shear bolt to protect against overloads. To replace shear bolt: 1. -
Page 49: Clean Out The Tubes
5300 SERIES – PORTABLE GRAIN AUGER 7. MAINTENANCE 7.13. Clean out the Tubes Lock out power before proceeding. 1. Open the access door on the swing auger tube. Figure 27. Location of Swing Auger Tube Access Door 2. Open the access door on the main tube. Figure 28. -
Page 50: Troubleshooting
8. TROUBLESHOOTING 5300 SERIES – PORTABLE GRAIN AUGER 8. Troubleshooting Shut down and lock out all power sources before diagnosing any of the causes or attempting any of the solutions below. In the following section, we have listed some causes and solutions to some of the problems you may encounter. - Page 51 5300 SERIES – PORTABLE GRAIN AUGER 8. TROUBLESHOOTING Tighten or replace bolts. Flighting shaft bolts are loose or damaged. Flighting shaft is bent. Repair or replace flighting shaft. Flighting is damaged. Repair or replace flighting. Worn bearing. Repair or replace bearing. Low gear oil level.
- Page 52 8. TROUBLESHOOTING 5300 SERIES – PORTABLE GRAIN AUGER Clean up oil spill and continue operation Lift cylinder discharges If auger lifts, this is just oil from breather captured oil in the top of the as normal. while lifting. cylinder. If auger will not lift, seal in Lower auger to transport position and hydraulic cylinder is damaged.
-
Page 53: Specifications
5300 SERIES – PORTABLE GRAIN AUGER 9. SPECIFICATIONS 9. Specifications 5385 5395 Capacity 10,800 Bu/Hr Tube Size 13” (33 cm) Transport Length 90’ 100’ (27.4 m) (30.5 m) Width (axles in 12’4” 12’4” transport) (3.76 m) (3.76 m) Width (axles extended) 13’8”... - Page 54 9. SPECIFICATIONS 5300 SERIES – PORTABLE GRAIN AUGER 5385 5395 Hitch Jack 2000 lb Side Winder PTO Drive Power Requirements 100 HP 115 HP PTO Speed 540 RPM (without speed reducer), 1000 RPM (with speed reducer) PTO Shaft Weasler 55 Series HD PTO. 6 spline. 1-3/8” diameter 25°...
-
Page 55: Agi Grainmaxx Limited Warranty
Warranty This warranty relates to AGI GrainMaxx augers (the “Product”) sold by Ag Growth International Inc., (referred to herein as the “Seller”) and applies only to the first user of the Product (meaning a purchaser directly from the Seller or from an authorized dealer or distributor of the Product, referred to herein as the “Buyer”). - Page 56 GrainMaxx is an AGI Brand. AGI is a leading provider of equipment solutions for agriculture bulk commodities including seed, fertilizer, grain, and feed systems with a growing platform in providing equipment and solutions for food processing facilities. AGI has manufacturing facilities in Canada, the United States, the United Kingdom, Brazil, South Africa, India and Italy and distributes its products globally.
Need help?
Do you have a question about the GrainMaxx 5300 Series and is the answer not in the manual?
Questions and answers