Table of Contents
Advertisement
Quick Links
Advertisement
Table of Contents

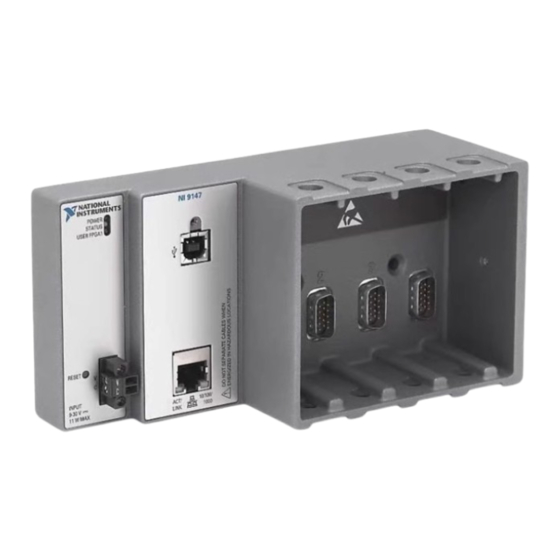
Summary of Contents for National Instruments NI-9147
- Page 1 NI-9147 Getting Started 2022-07-06...
-
Page 2: Table Of Contents
Installing Software on the NI-9147........ -
Page 3: Overview
Safety Guidelines for Hazardous Locations The NI-9147 is suitable for use in Class I, Division 2, Groups A, B, C, D, T4 hazardous locations; Class I, Zone 2, AEx nA IIC T4 Gc and Ex nA IIC T4 Gc hazardous locations;... - Page 4 Special Conditions for Hazardous Locations Use in Europe and Internationally The NI-9147 has been evaluated as Ex nA IIC T4 Gc equipment under DEMKO 07ATEX 0626664X and is IECEx UL 14.0089X certified. Each device is marked II 3G and is suitable for use in Zone 2 hazardous locations, in ambient temperatures of -40 °C ≤...
-
Page 5: Electromagnetic Compatibility Guidelines
Furthermore, any changes or modifications to the product not expressly approved by National Instruments could void your authority to operate it under your local regulatory rules. Special Conditions for Marine Applications Some products are approved for marine (shipboard) applications. -
Page 6: Preparing The Environment
EMC performance is attained. Preparing the Environment Ensure that the environment in which you are using the NI-9147 meets the following specifications. Operating temperature (IEC 60068-2-1, IEC 60068-2-2) -40 °C to 70 °C... -
Page 7: Verifying The Kit Contents
Verify that the following items are included in the NI-9147 kit. Installing Software on the Host Computer Before using the NI-9147, you must install the following application software and device drivers on the host computer in this order: 1. LabVIEW 2014 SP1 or later 2. -
Page 8: Removing C Series Modules
Verify that power is not connected to the I/O connector(s) on the C Series module before you remove a module from the NI-9147. If the system is in a nonhazardous location, the NI-9147 can be powered on when you remove modules. -
Page 9: Connecting The Ni-9147 To Power
Info Code emcground. Connecting the NI-9147 to Power The NI-9147 requires a 9 V to 30 V external power supply. The NI-9147 filters and regulates the supplied power and provides power for the C Series modules. The NI-9147 has one layer of reverse-voltage protection. - Page 10 Wire, 2.1 mm (14 AWG) or larger ■ NI recommends the power supply listed in the following table for the NI-9147. Power Supply Part Number NI PS-15 Industrial Power Supply (24 V DC, 5 A, 100 V AC to 120 V AC/200 V AC to...
-
Page 11: Connecting The Ni-9147 To The Host Computer
7. Power on the power supply. Powering On the NI-9147 When you power on the NI-9147 for the first time, the device boots into safe mode. The POWER LED illuminates, the STATUS LED illuminates briefly, and then the STATUS LED blinks twice every few seconds. -
Page 12: Configuring The System In Measurement & Automation Explorer (Max)
Complete the following steps to set a system password. Note The default username for the NI-9147 is admin. There is no default password for the NI-9147, so you must leave the password field blank when logging in until you set a system password. -
Page 13: Installing Software On The Ni-9147
5. Click Next. 6. Select NI Scan Engine from the software add-ons. Select any additional software to install. If you plan on using the NI-9147 with the LabVIEW FPGA Module, you can click Next. Click NI Scan Engine if you plan on using the NI-9147 without the LabVIEW FPGA Module. -
Page 14: Troubleshooting The Ni-9147
■ steps. 1. Use a USB A-to-B cable to connect the NI-9147 USB device port to a host computer. The USB driver creates a virtual network interface card and assigns an IP address to the NI-9147 in the format of 172.22.11.x. - Page 15 2. Set a new DHCP connection by holding the RESET button down for 5 seconds. The STATUS LED repeats the same behavior from Step If the NI-9147 fails to set a new DHCP address, it assigns itself a link-local IP address. If the DHCP connection is successful and appropriate for your application, skip to Step 3.
-
Page 16: System Reset
LED Pattern Indication Blinks twice and The NI-9147 is in safe mode. Software is not installed, which is the factory pauses default state, or software has been improperly installed on the NI-9147. An error can occur when an attempt to upgrade the software is interrupted. -
Page 17: Where To Go Next
Continuously blinks The NI-9147 has detected an unrecoverable error. Contact NI for support. On momentarily The NI-9147 is booting. No action required. The NI-9147 is in run mode. Software is installed and the operating system is running. Table 3. STATUS LED Indicators... - Page 18 NI product. Product registration facilitates technical support and ensures that you receive important information updates from NI corporate headquarters is located at 11500 N Mopac Expwy, Austin, TX, 78759-3504, USA. ni.com © 2022 National Instruments Corporation.


Need help?
Do you have a question about the NI-9147 and is the answer not in the manual?
Questions and answers