Table of Contents
Advertisement
Quick Links
Advertisement
Table of Contents

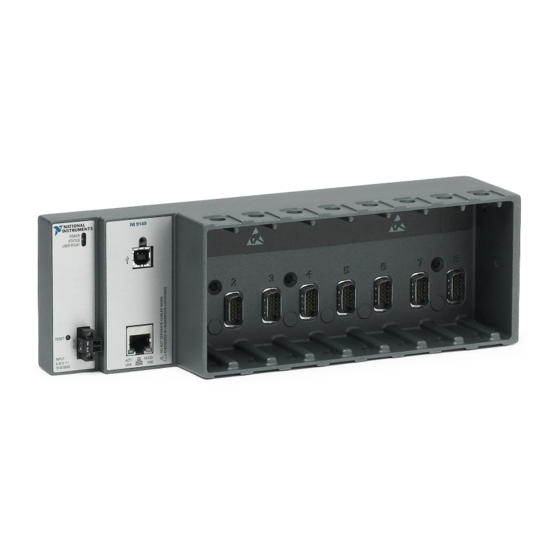
Summary of Contents for National Instruments NI-9149
- Page 1 NI-9149 Getting Started 2022-07-06...
-
Page 2: Table Of Contents
NI-9149 Getting Started Contents Overview..............3 Safety Guidelines. -
Page 3: Overview
NI-9149 Getting Started Overview This document describes how to begin using the NI 9149. Safety Guidelines Caution Observe all instructions and cautions in the user documentation. Using the model in a manner not specified can damage the model and compromise the built-in safety protection. Return damaged models to NI for repair. - Page 4 NI-9149 Getting Started Safety Guidelines for Hazardous Locations The NI 9149 is suitable for use in Class I, Division 2, Groups A, B, C, D, T4 hazardous locations; Class I, Zone 2, AEx nA IIC T4 Gc and Ex nA IIC T4 Gc hazardous locations;...
-
Page 5: Electromagnetic Compatibility Guidelines
Furthermore, any changes or modifications to the product not expressly approved by National Instruments could void your authority to operate it under your local regulatory rules. © National Instruments... -
Page 6: Special Conditions For Marine Applications
NI-9149 Getting Started Special Conditions for Marine Applications Some products are approved for marine (shipboard) applications. To verify marine approval certification for a product, visit ni.com/product-certifications, search by model number, and click the appropriate link. Notice In order to meet the EMC requirements for marine applications, install the product in a shielded enclosure with shielded and/or filtered power and input/output ports. -
Page 7: Verifying The Kit Contents
NI-9149 Getting Started 1. Touch the antistatic package to a metal part of the computer chassis. 2. Remove the device from the package and inspect the device for loose components or any other sign of damage. Notice Never touch the exposed pins of connectors. -
Page 8: Removing C Series Modules
NI-9149 Getting Started 1. Verify that power is not connected to the I/O connector(s) on the C Series module. If the system is in a nonhazardous location, the NI 9149 can be powered on when you install modules. 2. Press the latches on the C Series module. -
Page 9: Connecting The Ni 9149 To Power
NI-9149 Getting Started What to Use Ring lug ■ Wire, 2.1 mm (14 AWG) or larger ■ Screwdriver, Phillips #2 ■ What to Do Complete the following steps to ground the NI 9149. 1. Attach the ring lug to the wire. - Page 10 NI-9149 Getting Started LED Color LED Pattern Indication Green Solid The NI 9149 is powered on and the connected power supply is adequate. — The NI 9149 is powered off. Table 3. POWER LED Indicators What to Use Screwdriver, 2.54 mm (0.10 in.) flathead ■...
-
Page 11: Connecting The Ni 9149 To The Host Computer
NI-9149 Getting Started Note The C terminals are internally connected to each other. 4. Tighten the terminal screws on the power connector to 0.20 N · m to 0.25 N · m (1.8 lb · in. to 2.2 lb · in.) of torque. -
Page 12: Configuring The System In Measurement & Automation Explorer (Max)
NI-9149 Getting Started You can also use the Ethernet port to connect directly to the host computer or network. Refer to the user manual on ni.com/manuals more information about Ethernet connections. Related information Installing Software on the Host Computer ■... -
Page 13: Installing Software On The Ni 9149
NI-9149 Getting Started 3. Click the Security Configuration icon. 4. Click Login. 5. In the Login dialog box, enter the username admin and leave the password field blank. 6. Click OK. 7. Click Change Password. 8. Enter and re-enter a new password. -
Page 14: Troubleshooting The Ni 9149
NI-9149 Getting Started You can use this wizard at anytime to install additional software. 7. Click Next. 8. Verify that the summary of software to install is correct. 9. Click Next to start the installation. 10. Click Finish when the installation is complete. - Page 15 ■ Windows 7, select Start » Control Panel » Device Manager » Network adapters » National Instruments » USBLAN adapter. If the USBLAN adapter is not recognized, you must reinstall NI CompactRIO Device Drivers. Temporarily disable any network firewalls or other security software.
-
Page 16: System Reset
NI-9149 Getting Started 4. Click Add. 5. Click OK. Ensure that UDP port 44525 is open to communication on the host ■ computer. If you are using an intelligent switch on the network, ensure that it is not disabling UDP port 44525. -
Page 17: Where To Go Next
NI-9149 Getting Started LED Pattern Indication by enabling safe mode in MAX. Refer to the Measurement & Automation Explorer (MAX) Help for information about safe mode. Blinks four times The NI 9149 is in safe mode. The software has crashed twice without and pauses rebooting or cycling power between crashes. - Page 18 NI product. Product registration facilitates technical support and ensures that you receive important information updates from NI corporate headquarters is located at 11500 N Mopac Expwy, Austin, TX, 78759-3504, USA. ni.com © 2022 National Instruments Corporation.


Need help?
Do you have a question about the NI-9149 and is the answer not in the manual?
Questions and answers