Table of Contents
Advertisement
Quick Links
Advertisement
Table of Contents

Subscribe to Our Youtube Channel
Related Manuals for Vivo STAND-V002Z


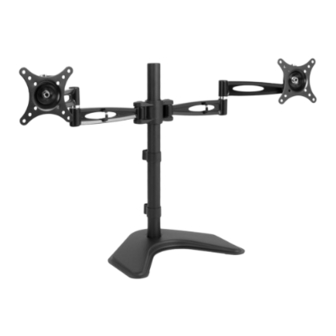
Summary of Contents for Vivo STAND-V002Z
- Page 1 Dual Monitor Desk Stand Instruction Manual SKU: STAND-V002Z Scan the QR code with your mobile device or follow the link for helpful videos and specifications related to this product. https://vivo-us.com/products/stand-v002z help@vivo-us.com www.vivo-us.com 1-800-371-5654...
- Page 2 TOOLS NEEDED WARNING! DO NOT EXCEED WEIGHT CAPACITY. 22lbs Failure to do so may result in serious injury. (9.98kg) If you do not understand these directions, or if you have any doubts about the safety of the PER ARM installation, please call a qualified technician. Check carefully to make sure there are no missing or Phillips defective parts.
- Page 3 STEP 1 (Continued) STEP 3 OPTION C: Self-Drilled Grommet Base Installation OPTION A: Flat Back Monitor Install the grommet base plate (J) to pole (A) using M5x14 bolts (E), and tighten using allen wrench For monitors with flat backs attach VESA plate using M4x12 thumbscrews (N) and M4 washers (Q). (L).
- Page 4 STEP 4 STEP 5 Adjust monitor height by loosening the center bolt with the large Allen Wrench (L), then re-tighten Attach wire clips (K) and cable rings (R) and manage wires as shown in diagram. at desired height. Adjust monitor support joints using the knob on top of each bracket. If additional tightening is needed, remove the monitor, tighten the center nut on the VESA plate with a 13mm wrench (Not Included), and reinstall the monitor.
- Page 5 Love your new VIVO setup and want to share? Tag us in your photo! @vivo_us If any parts are received damaged or defective, please contact us. We are happy to replace parts to ensure you have a fully functioning product.
Need help?
Do you have a question about the STAND-V002Z and is the answer not in the manual?
Questions and answers