Advertisement
Available languages
Available languages
Quick Links
Baby Trend, Inc.
13048 Valley Blvd.
Fontana CA 92335
1-800-328-7363
(8:00 a.m. ~ 4:30 p.m. PST)
www.babytrend.com
TS11xxxS_2L_031423.1
Read all instructions BEFORE assembly and USE of product.
KEEP INSTRUCTIONS FOR FUTURE USE.
Lea todas las instrucciones ANTES de armar y USAR el
producto. CONSERVE LAS INSTRUCCIONES PARA USO FUTURO.
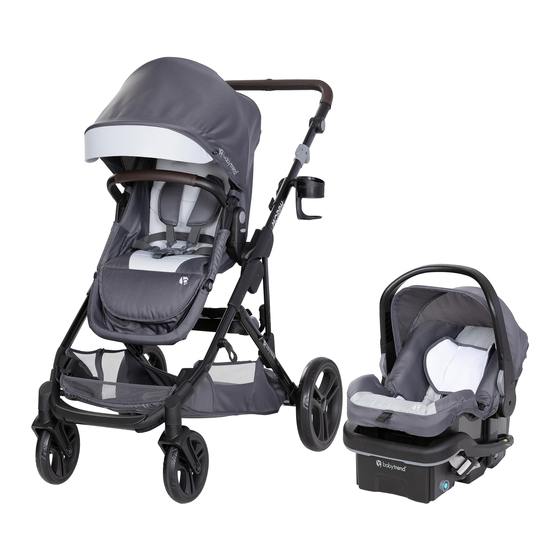
Morph Single to Double Modular
Travel Sytem
Instruction Manual
Manual de Instrucciones
with EZ-Lift
™
35 PLUS
infant car seat
TS11xxxS
Advertisement

Related Manuals for BABYTREND Morph Single to Double Modular Travel Sytem


Summary of Contents for BABYTREND Morph Single to Double Modular Travel Sytem
- Page 1 CONSERVE LAS INSTRUCCIONES PARA USO FUTURO. Morph Single to Double Modular Travel Sytem with EZ-Lift ™ 35 PLUS infant car seat Instruction Manual TS11xxxS Manual de Instrucciones Baby Trend, Inc. 1-800-328-7363 13048 Valley Blvd. (8:00 a.m. ~ 4:30 p.m. PST) Fontana CA 92335 www.babytrend.com TS11xxxS_2L_031423.1...
- Page 2 Customer Service Department can be contacted at 1 (800) 328-7363 Monday through Friday between 8:00 a.m. and 4:30 p.m. (PST). Return Authorizations are required prior to returning product(s) to Baby Trend®. Please visit http://babytrend.com/pages/ limited-warranty for complete warranty details. GARANTIA NO DEVUELVA SU PRODUCTO A LA TIENDA.
- Page 3 WARNING WARNING WARNING: • NEVER use the stroller on stairways or escalators. Please follow all of these instructions to • NEVER use the stroller with roller skates, in-line skates, skateboards or ensure the safety of your child. Keep these instructions for bicycles.
-
Page 4: Front Wheels
SET UP THE STROLLER FRAME Check that you have all the parts for this model before assembling the stroller. Unlock Unlock the fold latch (Fig. 1a) and unfold stroller frame by pulling upward on the stroller handle until the frame locks (Fig. 1b). Stroller Frame *Front Wheels (x2) *Rear Wheels (x2) -
Page 5: Rear Wheels
REAR WHEELS PARENT PHONE HOLDER WARNING: The maximum weight that Press the rear wheel posts into the can be carried in the parent phone holder is 1 pound rear frame hub until it clicks into (0.45kg). place (Fig. 3). NOTE: Pull on the rear wheel assembly to ensure that it is Slide the clip on the phone tab securely attached to the stroller. -
Page 6: Storage Basket
STROLLER HANDLE COVER FEATURE STORAGE BASKET Check all attachments Removal Unzip to remove (Fig. 7a). If received unattached, follow below instructions to attach: To Attach Ensure that all straps and snap Wrap around the handle and zip closed (Fig. 7b). closures are attached correctly. - Page 7 Stroller Modular Towers STROLLER POSITIONS IMPORTANT! For any accessory that is placed at the lowest position, the stroller towers MUST be in an upright position. To Use Front Modular Towers At the front of the stroller frame, Modular Adapter Slot locate the 2 stroller modular (Middle Position) Fig.
- Page 8 STROLLER MODULAR ADAPTERS ASSEMBLING THE TODDLER SEAT IMPORTANT! For any Unfold the toddler seat fully (Fig. 11a). accessory that is placed at the highest or middle position, To assemble the toddler seat, unzip the stroller adapters MUST be the zipper fully, located underneath installed at the same height the seat (Fig.
- Page 9 BUMPER BAR HANDLE COVER Ensure the stroller adapters are positioned on the middle position. See To attach: Before attaching the bumper bar to the stroller, step 10 for installation. wrap the handle cover around the bar (Fig. 12a). Attach the seat by lining up the seat anchors on the side of the seat with the anchors on the stroller frame and pushing them together until they...
- Page 10 TO ADJUST SEAT REMOVABLE CANOPY WARNING: The upright position should be To attach the removable canopy: Slide used only for a child that is at least 6 months old. the canopy clips on the inside of the corresponding slots on the stroller Toddler Seat Mode: The seat can be frame (Fig.
- Page 11 TO SECURE THE CHILD TO RELEASE THE CHILD WARNING: Type 1 Avoid serious injury from falling or sliding out. Always use the safety harness. Type 1 STRANGULATION HAZARD: To release, push the button on center clasp Child and the two harness buckles will pop free Center Clasp can strangle in loose straps.
- Page 12 THE INFANT CARSEAT Removing the car seat: WARNING: Avoid serious injury from falling Set handle to the carry position or sliding out, always use the Infant Car Seat harness. (Fig. 18b). Squeeze the release handle located at the Top-rear CS01 EZ-Lift, CS02 EZ-Lift PLUS and of the car seat and lift away CS03 EZ-Lift PRO Infant Car Seats from the stroller (Fig.
- Page 13 USING THE REAR JUMP SEAT USING THE PLATFORM WARNING: WARNING: The rear platform and jump The rear platform and jump seat seat are designed to accommodate a child who are designed to accommodate a child who is at least 2 is at least 2 1/2 years old, has good balance and 1/2 years old, has good balance and coordination, and coordination, and is not over 40 inches tall.
- Page 14 WARNING! These are the ONLY approved use modes. Failure to follow these instructions could result in serious injury or death. IMPORTANT! When using two car seats or any dual seating combination, make sure to first put the child in the REAR seat, and then the FRONT seat. When removing child, start in the FRONT seat first, then remove the child from the REAR seat.
- Page 15 Carriage & Car Seat – 4 Modes Carriage – Low Position – Rear Facing, Car Seat – High Position – Rear Facing Carriage – Low Position – Rear Facing, Car Seat – High Position – Forward Facing Carriage – High Position – Rear Facing, Car Seat – Low Position – Rear Facing Carriage –...
-
Page 16: To Fold Stroller
TO FOLD STROLLER FRONT AND REAR WHEEL RELEASE WARNING: Care must be taken when folding and unfolding the stroller to prevent finger entrapment. MAINTENANCE WARNING: Care must be taken when folding stroller to prevent damage. Make sure all accessories, mobile phones, diaper bags or purses are removed before If adjustment or replacement folding. - Page 17 ADVERTENCIA ADVERTENCIA ADVERTENCIA: • El peso máximo que se puede llevar en el portavasos es de 1 libra Por favor, siga todas estas (0.45kg). El exceso de peso podría ocasionar una inestabilidad peligrosa. instrucciones para garantizar la seguridad de su hijo. •...
-
Page 18: Rueda Delantera
CONSTRUIR EL BASTIDOR DEL CARRITO Verifique que tenga todas las piezas para este modelo antes de montar el carrito. ABRIR Destrabe el pestillo de plegado (Fig. 1a) y despliegue el armazón del cochecito tirando hacia arriba del manubrio (Fig. 1b). Armazón del cochecito **Rueda delanteras (x2) **Ruedas traseras (x2) -
Page 19: Ruedas Traseras
RUEDAS TRASERAS PORTA TELÉFONO PARA PADRES ADVERTENCIA: El peso máximo que se Presione los postes de la rueda puede llevar en el porta teléfono para padres es de 1 trasera en el cubo del bastidor libra (0.45kg). trasero hasta que encajen en su lugar (Fig. - Page 20 FUNCIÓN DE LA CUBIERTA DEL MANUBRIO CESTA DE ALMACENAMIENTO Remoción Comprobar todo adjunto Abra el cierre para retirar (Fig. 7a). Si se recibe sin adjuntar, Adjuntar siga las instrucciones a Envuelva alrededor del manubrio y cierre la continuación para adjuntar: cremallera (Fig.
- Page 21 MODULARES SOPORTES PARA COCHECITOS Posiciones del cochecito IMPORTANTE! Para colocar cualquier accesorio en la posición más baja, los soportes del cochecito DEBEN estar en posición vertical. Para usar torres modulares frontales Ranura del Adaptadores Modulares En la parte delantera del (posición intermedia) Fig.
- Page 22 ADAPTADORES MODULARES DE COCHECITOS MONTAJE DEL ASIENTO PARA NIÑOS Desdoble completamente el asiento IMPORTANTE! Para cualquier para niños pequeños (Fig. 11a). accesorio que se coloque en la posición más alta o media, Para ensamblar el asiento para niños los adaptadores del cochecito pequeños, abra completamente la DEBEN instalarse al mismo cremallera que se encuentra debajo del...
- Page 23 COUVERCLE DE POIGNÉE DE BARREDE PARE-CHOCS Asegúrese de que los adaptadores del cochecito estén colocados en el nivel Adjuntar: Avant de fixer la barre de pare-chocs à la poussette, medio. Consulte el paso 10 para la enroulez le couvercle de la poignée autour de la barre (Fig. 12a). instalación.
- Page 24 PARA AJUSTAR EL ASIENTO CUBIERTA REMOVIBLE ADVERTENCIA: La posición erguida se Para añadir la cubierta removible: debe usar únicamente para un niño de al menos 6 Deslice los ganchos de la cubierta que meses. se encuentran dentro de las ranuras correspondientes en el armazón del Modo sillita para niños pequeños: El asiento carrito (Fig.
- Page 25 PARA SUJETAR AL NIÑO PARA SOLTARLAS AL NIÑO ADVERTENCIA: Typo 1 Evite lesiones graves por caídas o resbalones. Siempre use el arnés de seguridad. Typo 1 Para soltarlas, presione el Botón en la presilla PELIGRO DE ESTRANGULAMIENTO: El niño se central para destrabar las dos Hebillas del Arnés Presilla puede estrangular con las correas sueltas.
- Page 26 LA SILLITA PARA EL AUTOMÓVIL RETIRADA DE LA SILLA ADVERTENCIA: DE AUTO Evite una lesión grave por caídas o resbalones, siempre use el arnés de la Sillita para el automóvil. Coloque el manubrio en la posición de traslado CS01 EZ-Lift, CS02 EZ-Lift PLUS and (Fig.
- Page 27 USO DEL ASIENTO ADICIONAL USO DE LA PLATAFORMA ADVERTENCIA: ADVERTENCIA: La plataforma trasera y La plataforma trasera y el asiento adicional están diseñados para adaptarse a el asiento adicional están diseñados para adaptarse un niño de al menos 2 años y medio, con buen equilibrio a un niño de al menos 2 años y medio, con buen y coordinación, y una altura que no supere las 40 equilibrio y coordinación, y una altura que no supere...
- Page 28 ¡ADVERTENCIA! Estos son los ÚNICOS modos de uso aprobados. El incumplimiento de estas instrucciones podría ocasionar una lesión grave o la muerte. ¡IMPORTANTE! Cuando use dos asientos de automóvil o cualquier combinación de asiento doble, asegúrese de colocar primero al niño en el asiento TRASERO y luego en el asiento DELANTERO.
- Page 29 Carruaje y sillita para el automóvil – 4 Modos Carruaje – Posición baja – Orientado hacia atrás, Sillita para el automóvil – Posición Alta – Orientado hacia atrás Carruaje – Posición baja – Orientado hacia atrás, Sillita para el automóvil – Posición Alta – Orientado hacia adelante Carruaje –...
- Page 30 PARA PLEGAR EL CARRITO LIBERACIÓN DE TODAS LAS RUEDAS ADVERTENCIA: Se debe ser prudente al plegar y desplegar el carrito para evitar que queden MANTENIMENTO dedos atrapados. ADVERTENCIA: Se debe tener cuidado al plegar el choche de bebé para evitar daños. Asegúrese Si es necesario ajustar o de quitar todos los accesorios, teléfonos móviles, bolsas reemplazar:...
- Page 31 ® BABY TREND CUSTOMER SERVICE The Customer Service Department can be contacted at 1 (800) 328-7363 Monday through Friday between 8:00 a.m. and 4:30 p.m. (PST). Return Authorizations are required prior to returning product(s) to Baby Trend®. ® BABY TREND SERVICIO AL CLIENTE El Departamento de Servicio al Cliente puede ser contactado a 1 (800) 328-7363 Lunes a viernes entre 8:00 a.m.
- Page 32 Copyright © 2023, Baby Trend Inc., All Rights Reserved. Todos los derechos reservados. Copyright © 2023, Baby Trend Inc., All Rights Reserved. Todos los derechos reservados.
Need help?
Do you have a question about the Morph Single to Double Modular Travel Sytem and is the answer not in the manual?
Questions and answers