Advertisement
Quick Links
WARRANTY
DO NOT RETURN YOUR PRODUCT TO THE STORE. PLEASE CONTACT
BABY TREND® FOR REPLACEMENT PARTS, SERVICE AND REPAIR.
The Baby Trend® warranty covers workmanship defects within 1 year of purchase. Any
product which has been subjected to misuse, abuse, abnormal use, excessive wear and
tear, improper assembly, negligence, environmental exposure, alteration or accident, or has
had its serial number altered or removed invalidates all claims against the manufacturer. Any
damage to property during installation is the sole responsibility of the end user.
Customer Service Department can be contacted at 1 (800) 328-7363 Monday through Friday
between 8:00 a.m. and 4:30 p.m. (PST). Return Authorizations are required prior to returning
product(s) to Baby Trend®. Please visit http://babytrend.com/pages/limited-warranty
for complete warranty details.
GARANTIA
NO DEVUELVA SU PRODUCTO A LA TIENDA. POR FAVOR CONTACTE A
BABY TREND® PARA PIEZAS DE REPUESTO, SERVICIO Y REPARACION.
La garantía de Baby Trend® cubre defectos de fábrica por 1 año después de la compra.
Cualquier producto que haya sido sometido a uso inadecuado, abuso, uso anormal,
desgaste excesivo, montaje incorrecto, negligencia, exposición ambiental, alteración o
accidente, o cuyo número de serie haya sido alterado o removido, anula todos los reclamos
contra el fabricante. Cualquier daño a la propiedad durante la instalación es la exclusiva
responsabilidad del usuario final. El Departamento de Servicio al Cliente está disponible
llamando al 1 (800) 328-7363, de lunes a viernes de 8:00 a. m. a 4:30 p. m. (PST). Se
requiere una Autorización de Devolución antes de poder devolver el o los productos a
Baby Trend®. Visite http://babytrend.com/pages/limited-warranty
para conocer todos los detalles de la garantía.
GARANTIE
NE PAS RETOURNER VOTRE PRODUIT AU MAGASIN. VEUILLEZ CONTACTER BABY
TREND® POUR DES PIÈCES DE RECHANGE, ENTRETIEN ET RÉPARATION.
La garantie Baby Trend® couvre les défauts de fabrication dans l'année qui suit l'achat. Tout
produit ayant fait l'objet d'une mauvaise utilisation, d'un abus, d'une utilisation anormale,
d'une usure excessive, d'un assemblage incorrect, d'une négligence, d'une exposition à
l'environnement, d'une modification ou d'un accident, ou dont le numéro de série a été
modifié ou retiré, annule toute réclamation contre le fabricant. Tout dommage matériel
pendant l'installation est de la seule responsabilité de l'utilisateur final. Le service à la
clientèle peut être contacté au 1 (800) 328-7363 du lundi au vendredi entre 8h00 et 16h30
(PST). Une autorisation de retour est requise avant de renvoyer le(s) produit(s) à
Baby Trend®. Veuillez visiter http://babytrend.com/pages/limited-warranty
pour obtenir tous les détails concernant la garantie.
www.babytrend.com
www.babytrend.com
Baby Trend, Inc.
13048 Valley Blvd.
Fontana CA 92335
1-800-328-7363
(8:00am ~ 4:30pm PST)
www.babytrend.com
Read all instructions BEFORE assembly and USE of product.
KEEP INSTRUCTIONS FOR FUTURE USE.
Lea todas las instrucciones ANTES de armar y USAR el producto.
CONSERVE LAS INSTRUCCIONES PARA USO FUTURO.
Lisez toutes les instructions du manuel AVANT l'assemblage ou
L'UTILISATION de ce produit. CONSERVEZ CES INSTRUCTIONS
POUR RÉFÉRENCE ULTÉRIEURE.
JG94XXXB
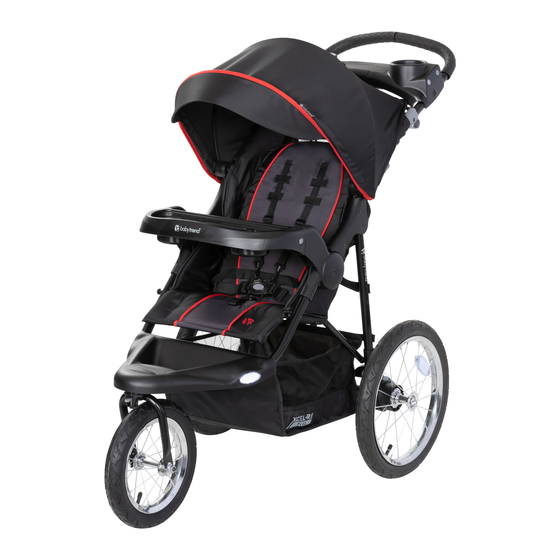
XCEL-R8™ PLUS Jogger
Instruction Manual
Manual de Instrucciones
Manuel d'instruction
Parent Tray
+LED Lights
JG94XXXB_3L_100521
Advertisement

Related Manuals for BABYTREND XCEL-R8 PLUS


Summary of Contents for BABYTREND XCEL-R8 PLUS
- Page 1 POUR RÉFÉRENCE ULTÉRIEURE. Customer Service Department can be contacted at 1 (800) 328-7363 Monday through Friday between 8:00 a.m. and 4:30 p.m. (PST). Return Authorizations are required prior to returning product(s) to Baby Trend®. Please visit http://babytrend.com/pages/limited-warranty for complete warranty details. GARANTIA NO DEVUELVA SU PRODUCTO A LA TIENDA.
- Page 2 PARTS PIEZAS PIÈCES WARNING Check that you have all the parts for this model before assembling the stroller. WARNING: Please follow all of these Verifique que tenga todas las piezas para este modelo antes de montar el carrito. Vérifiez que vous avez bien toutes les pièces pour ce modèle avant de monter la poussette. instructions to ensure the safety of your child.
- Page 3 ADVERTENCIA WARNING • NEVER use the stroller on stairways or escalators. ADVERTENCIA: Por favor, siga todas estas • NEVER use the stroller with roller skates, in-line skates, skateboards or instrucciones para garantizar la seguridad de su hijo. bicycles. Conserve estas instrucciones para referencia futura. •...
- Page 4 ADVERTENCIA AVERTISSEMENT • El uso del carrito con niños que pesan más de 50 libras (22.67 kg) o AVERTISSEMENT : Veuillez suivre miden más de 42 pulgadas (106.7 cm) causará un desgaste y tensión toutes les instructions afin d’assurer la sûreté de votre excesivos en el carrito y podrían provocar una inestabilidad peligrosa.
- Page 5 AVERTISSEMENT ASSEMBLY MONTAJE ASSEMBLEE • Soyez certain que la poussette est entièrement en position redressée et IMPORTANT! To ensure safe operation of your stroller, please verrouillée en position ouverte avant d’autoriser un enfant à proximité. follow these instructions carefully. Please keep these instructions for future •...
- Page 6 ASSEMBLY MONTAJE ASSEMBLEE ASSEMBLY MONTAJE ASSEMBLEE The front wheel, rear wheels, fender, and parent tray need to be installed prior to use. • Remove the fold latch, which is located on the right side. Lean the stroller backwards Antes del uso se deben instalar la rueda delantera, las ruedas traseras, el so that it rests on the handle and rear guardabarros y la bandeja para padres.
- Page 7 ASSEMBLY MONTAJE ASSEMBLEE ASSEMBLY MONTAJE ASSEMBLEE • Faites glisser la plaque d’arrêt sur TESTING FOR PROPER WHEEL INSTALLATION la roue avant. Assurez-vous que la PARA VERIFICAR LA INSTALACION DE LAS RUEDAS languette relevée pointe en direction TEST POUR VÉRIFIER SI LA ROUE EST BIEN FIXÉE de la fourche et insérez-la dans la fente de la fourche.
- Page 8 ASSEMBLY MONTAJE ASSEMBLEE ASSEMBLY MONTAJE ASSEMBLEE • If you experience front wheel wobble that FENDER is beyond what is normal for use while GUARDABARROS walking or jogging you may have to PARE-CHOCS adjust the front wheel housing nut. This nut is located under the footrest located Refer to step 7 as needed for replacement at the -front of the jogger (Fig.
- Page 9 ASSEMBLY MONTAJE ASSEMBLEE ASSEMBLY MONTAJE ASSEMBLEE • Ensure that the wheels are firmly locked into place. • Alinee el guardabarros delantero y NEVER use the stroller if presiónelo en el armazón delantero the wheels are not locked into place, contact our customer service department (Fig.
- Page 10 ASSEMBLY MONTAJE ASSEMBLEE ASSEMBLY MONTAJE ASSEMBLEE PARENT TRAY WITH LED LIGHTS AVERTISSEMENT : BANDEJA PARA PADRES CON LUCES LED Ne placez pas de liquides chauds ou PLATEAU PARENT AVEC LUMIÈRES À DEL plus de 3 livres sur le plateau parents. WARNING: De brûlures graves ou des conditions Do not place hot liquids or...
- Page 11 ASSEMBLY MONTAJE ASSEMBLEE ASSEMBLY MONTAJE ASSEMBLEE • Two AAA batteries required on each side of the parent tray: To open battery slot, unscrew and slide the lid out from the underside. Then, lift the lid to insert two AAA batteries. Repeat for the other side (Fig. 9a) - (Fig. 9b). •...
- Page 12 ASSEMBLY MONTAJE ASSEMBLEE ASSEMBLY MONTAJE ASSEMBLEE • To attach the parent tray, align the CANOPY fittings on the ends of the parent tray CUBIERTA with the fittings on the outsides of the AUVENT Open handle. Hook the hole in the parent tray. Abra Pull outward on the opposite end while Ouvrir...
- Page 13 ASSEMBLY MONTAJE ASSEMBLEE ASSEMBLY MONTAJE ASSEMBLEE CHILD TRAY 12)• To access the child seat: press inward on left side tray release button and BANDEJA PARA NIÑOS “underside” rotate upward on the tray (Fig. 12a). PLATEAU ENFANT “Parte inferior” “Dessous” • To remove the child tray: Press the release button and rotate the tray 180 •...
- Page 14 EZ Lift, EZ-Lift PLUS, EZ-Lift PRO Flex-Loc, EZ Flex-Loc, EZ Loc, INERTIA, SECURE y Canada: EZ Flex-Loc 32. (visite babytrend.com para ver la tabla de compatibilidad) Compatible avec les sièges d’auto Baby Trend®: EZ Lift, EZ-Lift PLUS, EZ-Lift PRO Flex-Loc, EZ Flex-Loc, EZ Loc, INERTIA, SECURE et Canada: EZ Flex-Loc 32.
- Page 15 INFANT SILLITA PARA SIÈGE D’AUTO INFANT SILLITA PARA SIÈGE D’AUTO CAR SEAT EL AUTOMÓVIL POUR BÉBÉ CAR SEAT EL AUTOMÓVIL POUR BÉBÉ • Align the car seat module to the inner frame connectors. Carefully rest the WARNING: Avoid serious injury from falling or car seats lower rear against the angle point of the tray.
- Page 16 INFANT SILLITA PARA SIÈGE D’AUTO INFANT SILLITA PARA SIÈGE D’AUTO CAR SEAT EL AUTOMÓVIL POUR BÉBÉ CAR SEAT EL AUTOMÓVIL POUR BÉBÉ Removing the car seat: OTHER COMPATIBLE CAR SEATS OTROS Retirada de la silla de auto: ASIENTOS DE COCHE COMPATIBLES AUTRES SIÈGES AUTO COMPATIBLES Retrait du siège auto: •...
- Page 17 INFANT SILLITA PARA SIÈGE D’AUTO INFANT SILLITA PARA SIÈGE D’AUTO CAR SEAT EL AUTOMÓVIL POUR BÉBÉ CAR SEAT EL AUTOMÓVIL POUR BÉBÉ • When the infant car seat is locked firmly • Position the infant car seat so that it faces into place, secure the single short clip toward the rear of the stroller.
- Page 18 INFANT SILLITA PARA SIÈGE D’AUTO SAFETY SEGURIDAD LA SÉCURITÉ CAR SEAT EL AUTOMÓVIL POUR BÉBÉ • Avec le siège d’auto installé, garantir le seul agrafe courte par-dessus le BRAKES siège d’auto pour bébé à travers le fente pour la passage de la ceinture le FRENOS siège d’auto pour bébé...
- Page 19 SAFETY SEGURIDAD LA SÉCURITÉ SAFETY SEGURIDAD LA SÉCURITÉ • To engage brakes, apply light FRONT WHEEL LOCK downward pressure to the brake lever BLOQUEO DE LAS RUEDA DELANTERAS located on each rear wheel. The stroller BLOCAGE DES ROUES AVANT may require slight forward or rearward movement in order to line up the teeth on the brake with each wheel brake WARNING:...
- Page 20 SAFETY SEGURIDAD LA SÉCURITÉ SAFETY SEGURIDAD LA SÉCURITÉ • The swivel jogger is equipped with a TO SECURE THE CHILD front wheel locking device. Front wheel PARA SUJETAR AL NIÑO Lock Trabe lock works in a vertical motion from top Destrabe POUR ATTACHER L’ENFANT to bottom, locking and unlocking the...
- Page 21 SAFETY SEGURIDAD LA SÉCURITÉ SAFETY SEGURIDAD LA SÉCURITÉ • Les courroies du harnais à 5 points ont •The shoulder straps of the 5-point 3 positions d’attache. Choisir la position harness have 3 attachment positions. qui place la courroie a niveau avec, ou Select the position that places the au-dessus de l’épaule de l’enfant shoulder strap level with, or below the...
- Page 22 ASSEMBLY MONTAJE ASSEMBLEE SAFETY SEGURIDAD LA SÉCURITÉ TO FOLD STROLLER • Unhook the shoulder straps only if adjusting the harness positions PARA DESPLEGAR EL CARRITO (Fig. 21). PLIER LA POUSSETTE WARNING: • Desenganchar las correas de los Care must be taken when folding hombros solo si ajusta las posiciones the stroller to prevent finger entrapment.
- Page 23 ASSEMBLY MONTAJE ASSEMBLEE SAFETY SEGURIDAD LA SÉCURITÉ • Cierre la cubierta como se describe en la JOGGING WITH YOUR STROLLER sección de la cubierta. Suelte la hebilla para TROTAR CON SU CARRITO reclinar el asiento como se describe en la LE JOGGING AVEC VOTRE POUSSETTE sección sobre las posiciones del respaldo.
- Page 24 SAFETY SEGURIDAD LA SÉCURITÉ SAFETY SEGURIDAD LA SÉCURITÉ Esta posición tiene como fin evitar que When you are jogging with your child, el cochecito se incline hacia atrás en use the following safety features: caso de que usted se caiga al suelo. La correa de seguridad incluye un Al trotar con su hijo, use las siguientes accesorio de Velcro para su almacenaje,...
- Page 25 ASSEMBLY MONTAJE ASSEMBLEE SAFETY SEGURIDAD LA SÉCURITÉ TO UNFOLD STROLLER TIRES PARA DESPLEGAR EL CARRITO NEUMÁTICOS PNEUS DÉPLIER LA POUSSETTE • Check the pressure before using the stroller. WARNING: Care must be taken when Tires are shipped un-inflated. The tires should be inflated on a regular basis to the P.S.I.
- Page 26 ASSEMBLY MONTAJE ASSEMBLEE MAINTENANCE MANTENIMIENTO D’ENTRETIEN • Lift up on the stroller handle with both MAINTENANCE hands until the stroller frame is erected and MANTENIMIENTO locked in the open position (Fig. 25b). The D’ENTRETIEN stroller has spring-loaded latches on both sides of the frame.
- Page 27 OTHER OTRO AUTRE MAINTENANCE MANTENIMIENTO D’ENTRETIEN FLAT TIRE: FCC Statement NEUMÁTICO DESINFLADO: PNEUS A PLAT: This device complies with Part 15 of the FCC rules. Operation is subject to the following two conditions: • The jogging stroller features bicycle tires to allow for extended wear and ease 1 this device may not cause harmful interference, and of pushing.
- Page 28 OTHER OTRO AUTRE OTHER OTRO AUTRE Declaración de la FCC Déclaration FCC Cet appareil est conforme à la Partie 15 des règles de la FCC. L’utilisation est sujette aux Este dispositivo cumple con las normas de la Parte 15 de la Comisión Federal de Comuni- deux conditions suivantes : caciones (FCC).
- Page 29 ® BABY TREND CUSTOMER SERVICE The Customer Service Department can be contacted at 1 (800) 328-7363 Monday through Friday between 8:00 a.m. and 4:30 p.m. (PST). Return Authorizations are required prior to returning product(s) to Baby Trend®. ® BABY TREND SERVICIO AL CLIENTE El Departamento de Servicio al Cliente puede ser contactado a 1 (800) 328-7363 Lunes a...
- Page 30 Copyright © 2021, Baby Trend Inc., All Rights Reserved. Todos los derechos reservados. Tous droits réservés. Copyright © 2021, Baby Trend Inc., All Rights Reserved. Todos los derechos reservados. Tous droits réservés.
Need help?
Do you have a question about the XCEL-R8 PLUS and is the answer not in the manual?
Questions and answers