Advertisement
Available languages
Available languages
Quick Links
Baby Trend, Inc.
13048 Valley Blvd.
Fontana CA 92335
1-800-328-7363
(8:00 a.m. ~ 4:30 p.m. PST)
www.babytrend.com
SS28xxxA_NC28_2L_120722
Read all instructions BEFORE assembly and USE of product.
KEEP INSTRUCTIONS FOR FUTURE USE.
Lea todas las instrucciones ANTES de armar y USAR el
producto. CONSERVE LAS INSTRUCCIONES PARA USO FUTURO.
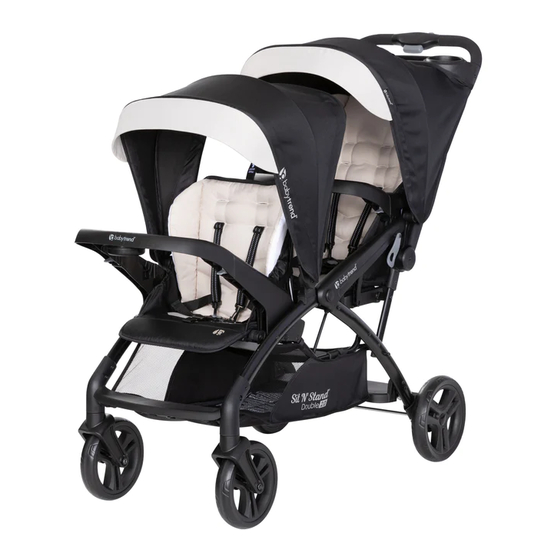
Sit N' Stand
Instruction Manual
Manual de Instrucciones
Double 2.0
®
SS28XXXA/NC28
Advertisement

Related Manuals for BABYTREND Sit N' Stand Double 2.0


Summary of Contents for BABYTREND Sit N' Stand Double 2.0
- Page 1 Lea todas las instrucciones ANTES de armar y USAR el producto. CONSERVE LAS INSTRUCCIONES PARA USO FUTURO. Sit N’ Stand Double 2.0 ® Instruction Manual SS28XXXA/NC28 Manual de Instrucciones Baby Trend, Inc. 1-800-328-7363 13048 Valley Blvd. (8:00 a.m. ~ 4:30 p.m. PST) www.babytrend.com Fontana CA 92335 SS28xxxA_NC28_2L_120722...
- Page 2 Customer Service Department can be contacted at 1 (800) 328-7363 Monday through Friday between 8:00 a.m. and 4:30 p.m. (PST). Return Authorizations are required prior to returning product(s) to Baby Trend®. Please visit http://babytrend.com/pages/ limited-warranty for complete warranty details. GARANTIA NO DEVUELVA SU PRODUCTO A LA TIENDA.
- Page 3 WARNING WARNING WARNING: IMPORTANT! Please follow all of these To ensure safe operation of your stroller, please follow these instructions carefully. Please keep instructions to ensure the safety of your child. Keep these these instructions for future reference. instructions for future reference. IMPORTANT! WARNING: Before assembly and each use,...
- Page 4 Check that you have all the parts for this model before assembling the stroller. Rear Axle parts (2) caps and spare parts Stroller Rear Axle Assembly ** Rear Wheels (x2) **Front Wheels (x2) Child Tray (x2) Rear Axle spare parts (2) caps, (2) pins, (4) washers Mobile Phone Positioning Parent Tray Front Canopy *Infant Car Seat...
-
Page 5: Frame Set Up
Frame Set Up Rear Axel Pull out and rotate the latch Remove the pin and 1 washer from away from the stroller peg both ends of the rear axle (Fig. 3a). (Fig. 1a). (1) Use one hand to hold the handle and tilt stroller forward. - Page 6 8:00 a.m. and 4:30 p.m. PST. www. Fig. 3e Fig. 3d babytrend.com/contact-us Fig. 3f Copyright © 2022, Baby Trend Inc., All Rights Reserved. Todos los derechos reservados. Copyright © 2022, Baby Trend Inc., All Rights Reserved. Todos los derechos reservados.
- Page 7 Child Tray Moblie Phone Positioning Parent Tray WARNING: WARNING: The child’s tray is not a restraint Do not place hot liquids or device: always secure your child with the seat belt. DO more than 3 lbs (1.36 kg) in the parent tray. Serious NOT lift the stroller by the child’s tray.
- Page 8 Front Canopy Mobile phone positioner: Align mobile phone to the clip and To attach the canopy: insert it through the grips. Make Align both sides of the canopy clips sure to push the phone all the way onto the plastic tabs. Slide clips down into the positioner (Fig.
-
Page 9: Rear Canopy
Rear Canopy Ensure all fabric panels are attached to their If received unattached, corresponding tab as Rear Stroller line up the male fittings of the illustrated (Fig. 7d). lower connection with the female fittings on the handle Secure the canopy sides with frame and push inward Fig. - Page 10 Basket Access Check Straps: Ensure that all straps with snap Securing the Basket Straps closures are attached correctly (Fig. 8b). If the straps are not assembled, Underneath the front footrest locate the (4) types of straps as shown (Fig. 8a). Locate the cording on the front edge of the basket and ensure to Fig.
-
Page 11: Rear Brakes
Secure the Child Rear Brakes WARNING: WARNING: Avoid serious injury from falling or Always set brakes when the sliding out. Always use the safety harness. stroller is not being pushed so that the stroller will not STRANGULATION HAZARD: roll away. NEVER leave stroller unattended on a hill or Child can incline as the stroller may slide down the hill. - Page 12 To make adjustments on the front seat: To make adjustments on the rear seat with seat pad: To re-thread: Unhook the shoulder straps. Use the hook and loop Push the button on the center clasp and all the harness straps will release.
-
Page 13: Infant Car Seat
To recline the seat press the clip ends Infant car seat(s) sold separately together to release and pull down (visit babytrend.com for compatibilty chart) (Fig. 11a). ATTENTION: CS01 EZ-Lift, CS02 EZ-Lift PLUS and CS03 EZ-Lift PRO To place seat into an upright position,... - Page 14 IMPORTANT: Car Seat Connections: REAR SEAT: Always use short clips to secure the infant car seat to the stroller. (Fig. 12b). NOTE: Thread between canopy and stroller frame to Recline both seats as shown on step 11. Align the car attach.
- Page 15 Jump Seat Using the Rear Jump Seat WARNING: WARNING: The rear platform and jump The rear platform and jump seat are designed to accommodate a child who is at least seat are designed to accommodate a child who 2 1/2 years old, has good balance and coordination, is at least 2 1/2 years old, has good balance and coordination, and is not over 40 inches tall.
-
Page 16: To Fold Stroller
Using the Platform To Fold Stroller WARNING: WARNING: The rear platform and jump seat Care must be taken when are designed to accommodate a child who is at least 2 folding and unfolding the stroller to prevent finger 1/2 years old, has good balance and coordination, and entrapment. - Page 17 Front Wheel - Maintenance Once the stroller begins to fold, push upward on the handle (Fig. 16c). Continue pushing If replacing the front handle upward and use the fold assist strap wheel, press the pin to close the stroller. located behind the wheel Release Pin hub.
- Page 18 ADVERTENCIA SEAT PAD To clean the seat pad, use only mild household soap or detergent and warm water ADVERTENCIA: on a sponge or clean cloth. Por favor, siga todas estas instrucciones para garantizar OTHER la seguridad de su hijo. Conserve estas Check your stroller for loose screws, worn parts, torn material or stitching on a instrucciones para referencia futura.
- Page 19 ADVERTENCIA ADVERTENCIA ¡IMPORTANTE! El peso máximo que se puede llevar es de 5 libras (2.26 kg) en la canasta de Para asegurar el funcionamiento almacenamiento y de 3 libras (1.36 kg) en la bandeja para niños y en la bandeja seguro de su carrito, siga estas instrucciones para padres.
- Page 20 Verifique que tenga todas las piezas para este modelo antes de montar el carrito. Partes del eje trasero (2) tapas y piezas de repuesto Montaje del Eje trasero Carrito ** Ruedas Traseras (x2) **Rueda Delanteras (x2) Bandeja para Niños (x2) Piezas de repuesto del eje trasero (2) tapas, (2) pernos, (4) arandelas Bandeja Para Teléfonos Moviles Cubierta Delantera...
- Page 21 Configuraci n Del Marco ó Eje Ttrasero Extraiga y gire el pestillo lejos de Retirar el perno y uno arandela de la clavija del cochecito (Fig. 1a). ambos extremos de las piezas del eje (1) Use una mano para sostener trasero (Fig.
- Page 22 1-800-328-7363, de lunes a viernes, en el horario de 8:00 a.m. a 4:30 p.m., Fig. 3e Hora Estándar del Pacífico. www. babytrend.com/contact-us. Fig. 3d Fig. 3f Copyright © 2022, Baby Trend Inc., All Rights Reserved. Todos los derechos reservados. Copyright © 2022, Baby Trend Inc., All Rights Reserved. Todos los derechos reservados.
- Page 23 Bandeja Para Niño Bandeja Para Teléfonos Móviles De Los Padres ADVERTENCIA: ADVERTENCIA: Nocoloque líquidos La bandeja para niños calientes ni más de 3 lbs (1.36 kg) libras sobre no es un dispositivo de restricción: siempre sujete a su la bandeja para padres, ya que podría causar hijo con el cinturón de seguridad.
- Page 24 Dosel Delantero Bandeja para teléfono móvil: Alinee el teléfono móvil con el clip Para fijar el dosel: e insértelo a través de los agarres. Alinee ambos lados de los clips del dosel Asegúrese de empujar el teléfono en las pestañas de plástico. Deslice los hasta el fondo de la bandeja ( Fig.
- Page 25 Dosel Trasero Asegúrese de que todos los paneles de tela estén unidos Si se recibe sin adjuntar, si aún no a su pestaña correspondiente está adjunto, alinee los accesorios Trasero del carrito como se ilustra (Fig. 7d). macho de la conexión inferior con Sujete los laterales de la los accesorios hembra del armazón cubierta con las bandas...
- Page 26 Acceder La Canasta Verificar las correas: Verifique que todas las correas Fijación de las correas de la cesta con cierres a presión estén sujetas correctamente (Fig. 8b). Si las correas no están ensambladas, Debajo del reposapiés ubique los (4) tipos de correas como se muestra (Fig.
- Page 27 Frenos Traseros Para Sujtar Al Niño ADVERTENCIA: ADVERTENCIA: Evite lesiones graves por Siempre aplique los frenos caídas o resbalones. Siempre use el arnés de seguridad. cuando el carrito no esté siendo empujado, para PELIGRO DE ESTRANGULAMIENTO: impedir que ruede fuera de su alcance. Nunca deje el El niño carrito desatendido en una colina o pendiente, ya que se puede estrangular con las correas sueltas del arnés...
- Page 28 Para realizar ajustes en el asiento delantero: Para realizar ajustes en el asiento trasero: Presione el botón en el cierre central y se liberarán todas las correas Desenganche las correas para los hombros. Use el gancho y el lazo en la del arnés.
-
Page 29: Sillita Para El Automóvil
Asiento infantil para automóvil se vende por separado (visite babytrend.com para ver la tabla de compatibilidad) Para reclinar el asiento presione los extremos de la presilla juntos y tire ATENCIÓN: CS01 EZ-Lift, CS02 EZ-Lift PLUS and CS03 EZ-Lift PRO hacia abajo (Fig. - Page 30 IMPORTANTE: CONEXIÓN DE LAS SILLITAS PARA EL AUTOMÓVIL: REAR SEAT: Utilice siempre clips cortos para asegurar la silla de coche Recline los asientos como se muestra en el paso 11. Alinee la conexión del para bebés al carrito (Fig. 12b). NOTA: Rosca entre el dosel y el marco asiento del coche con los conectores del cochecito.
- Page 31 Asiento Adicional Uso Del Asiento Adicional ADVERTENCIA: ADVERTENCIA: La plataforma La plataforma trasera y el asiento adicional están diseñados para adaptarse a un trasera y el asiento adicional están diseñados niño de al menos 2 años y medio, con buen equilibrio\ para adaptarse a un niño de al menos 2 años y y coordinación, y una altura que no supere las 40 pulgadas medio, con buen equilibrio y coordinación, y una...
- Page 32 USO DE LA PLATAFORMA Para Plegar El Carrito ADVERTENCIA: ADVERTENCIA: Se debe ser prudente al La plataforma trasera y el asiento adicional están diseñados para adaptarse a un plegar y desplegar el carrito para evitar que queden niño de al menos 2 años y medio, con buen equilibrio y dedos atrapados.
- Page 33 Rueda Delantera - Mantenimiento Una vez que la carriola comienza a doblarse, empuje hacia arriba la manija (Fig. 16c). Si reemplaza la rueda Continúe empujando la manija hacia arriba delantera, presione el y use la correa de asistencia de doblar para pasador situado detrás del El Pasador cerrar la carriola.
- Page 34 ALMOHADILLA DEL ASIENTO Para limpiar la almohadilla del asiento, use solamente jabón doméstico o detergente suaves y agua tibia en una esponja o trapo limpio. OTROS Verifique con frecuencia que su carrito no tenga tornillos sueltos, piezas gastadas, materiales o costuras rasgados. Reemplace o repare las piezas conforme sea necesario. El Departamento de Servicio al Cliente puede ser contactado a 1 (800) 328-7363 Lunes a viernes entre 8:00 a.m.
Need help?
Do you have a question about the Sit N' Stand Double 2.0 and is the answer not in the manual?
Questions and answers