Advertisement
Quick Links
Baby Trend, Inc.
13048 Valley Blvd.
Fontana CA 92335
1-800-328-7363
(8:00 a.m. ~ 4:30 p.m. PST)
www.babytrend.com
JG94XXXB_2L_050522.1
Read all instructions BEFORE assembly and USE of product.
KEEP INSTRUCTIONS FOR FUTURE USE.
Lea todas las instrucciones ANTES de armar y USAR el
producto. CONSERVE LAS INSTRUCCIONES PARA USO FUTURO.
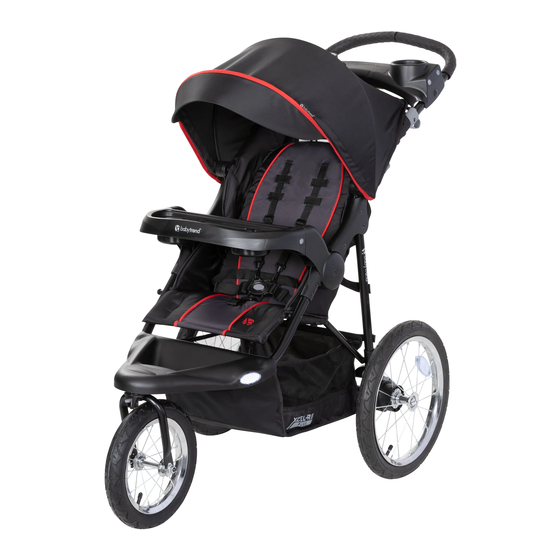
XCEL-R8™ PLUS Jogger
Instruction Manual
Manual de Instrucciones
Parent Tray
+LED Lights
JG94XXXB
Advertisement

Related Manuals for BABYTREND XCEL-R8 PLUS JG94 B Series


Summary of Contents for BABYTREND XCEL-R8 PLUS JG94 B Series
- Page 1 Lea todas las instrucciones ANTES de armar y USAR el producto. CONSERVE LAS INSTRUCCIONES PARA USO FUTURO. XCEL-R8™ PLUS Jogger Parent Tray +LED Lights Instruction Manual JG94XXXB Manual de Instrucciones Baby Trend, Inc. 1-800-328-7363 13048 Valley Blvd. (8:00 a.m. ~ 4:30 p.m. PST) www.babytrend.com Fontana CA 92335 JG94XXXB_2L_050522.1...
-
Page 2: Warranty
Customer Service Department can be contacted at 1 (800) 328-7363 Monday through Friday between 8:00 a.m. and 4:30 p.m. (PST). Return Authorizations are required prior to returning product(s) to Baby Trend®. Please visit http://babytrend.com/pages/ limited-warranty for complete warranty details. GARANTIA NO DEVUELVA SU PRODUCTO A LA TIENDA. - Page 3 PARTS PIEZAS WARNING WARNING: Check that you have all the parts for this model before assembling the stroller. Please follow all of these Verifique que tenga todas las piezas para este modelo antes de montar el carrito. instructions to ensure the safety of your child. Keep these instructions for future reference.
- Page 4 ADVERTENCIA WARNING ADVERTENCIA: • NEVER use the stroller on stairways or escalators. Por favor, siga todas estas • NEVER use the stroller with roller skates, in-line skates, skateboards or instrucciones para garantizar la seguridad de su hijo. bicycles. Conserve estas instrucciones para referencia futura. •...
- Page 5 ASSEMBLY MONTAJE ADVERTENCIA IMPORTANT! • El uso del carrito con niños que pesan más de 50 libras (22.67 kg) o To ensure safe operation of your stroller, please miden más de 42 pulgadas (106.7 cm) causará un desgaste y tensión follow these instructions carefully.
- Page 6 ASSEMBLY MONTAJE ASSEMBLY MONTAJE The front wheel, rear wheels, fender, and parent tray need to be installed prior to use. ATTENTION: To attach the front wheel, remove the nuts and retainer plate from the front wheel Antes del uso se deben instalar la rueda delantera, las ruedas traseras, el prior to the assembly that follows.
- Page 7 ASSEMBLY MONTAJE ASSEMBLY MONTAJE • With the wheel in position, install the axel TESTING FOR PROPER WHEEL INSTALLATION nuts and tighten with standard crescent, PARA VERIFICAR LA INSTALACION DE LAS RUEDAS box, or open end wrench. You should feel significant resistance and the wheel should be held tightly in place (Fig.
- Page 8 ASSEMBLY MONTAJE ASSEMBLY MONTAJE • If you experience front wheel wobble that FENDER is beyond what is normal for use while GUARDABARROS walking or jogging you may have to adjust the front wheel housing nut. This Refer to step 7 as needed for replacement nut is located under the footrest located purposes.
- Page 9 ASSEMBLY MONTAJE ASSEMBLY MONTAJE • Examine la parte inferior del REAR WHEEL guardabarros delantero. Notará RUEDA TRASERA cuatro tubos plásticos de ¼ pulgada de diámetro que sobresalen de la parte inferior (Fig. 7a). • Lean the stroller forward to rest on the front wheel.
- Page 10 ASSEMBLY MONTAJE ASSEMBLY MONTAJE PARENT TRAY WITH LED LIGHTS • Two AAA batteries required on each side of the parent tray: To open battery slot, unscrew and slide the lid out from the underside. Then, lift the lid BANDEJA PARA PADRES CON LUCES LED to insert two AAA batteries (Fig.
- Page 11 ASSEMBLY MONTAJE ASSEMBLY MONTAJE • Repeat for the other side (Fig. 9b). Secure the lid and screw it closed • To attach the parent tray, align the fittings on the ends of the parent tray (Fig. 9c). Test the on and off button to activate the LED Lights on each with the fittings on the outsides of the side (Fig.
- Page 12 ASSEMBLY MONTAJE ASSEMBLY MONTAJE CANOPY • Use the buttons to attach the straps to the rear of the seat fabric (Fig. 10c). CUBIERTA • Use los botones para sujetar las correas a la parte trasera de la tela del asiento (Fig. 10c). •...
- Page 13 ASSEMBLY MONTAJE ASSEMBLY MONTAJE • To open the canopy: pull forward on the front edge of the canopy. To close CHILD TRAY the canopy: push backwards on the front edge towards handle (Fig. 10d). BANDEJA PARA NIÑOS “Underside” “Parte inferior” •...
- Page 14 ASSEMBLY MONTAJE ASSEMBLY MONTAJE 12)• To access the child seat: press inward SEATBACK POSITIONING on left side tray release button and POSICIONED DEL RESPALDO rotate upward on the tray (Fig. 12a). • To recline the seat, press the adjustment • To remove the child tray: Press the tabs and pull down while holding the hoop.
- Page 15 (Fig. 14a). Canada: EZ Flex-Loc 32. (visite babytrend.com para ver la tabla de compatibilidad) Copyright © 2022, Baby Trend Inc., All Rights Reserved. Todos los derechos reservados. Copyright © 2022, Baby Trend Inc., All Rights Reserved. Todos los derechos reservados.
- Page 16 INFANT SILLITA PARA INFANT SILLITA PARA CAR SEAT EL AUTOMÓVIL CAR SEAT EL AUTOMÓVIL • Align the car seat module to the inner frame connectors. Carefully rest the Removing the car seat: car seats lower rear against the angle point of the tray. Latch the module Retirada de la silla de auto: into the stroller frame.
- Page 17 INFANT SILLITA PARA INFANT SILLITA PARA CAR SEAT EL AUTOMÓVIL CAR SEAT EL AUTOMÓVIL OTHER COMPATIBLE CAR SEATS • When the infant car seat is locked firmly into place, secure the single short clip OTROS ASIENTOS DE COCHE COMPATIBLES over the infant car seat through the belt path on the infant car seat (Fig.16a).
- Page 18 SAFETY SEGURIDAD INFANT SILLITA PARA CAR SEAT EL AUTOMÓVIL • Applies to all models: Rotate the BRAKES support tabs up when not using FRENOS the car seat (Fig. 16c). • Se aplica a todos los modelos: WARNING: Gire las lengüetas de apoyo hacia Always arriba cuando no use la sillita para el automóvil (Fig.
- Page 19 SAFETY SEGURIDAD SAFETY SEGURIDAD • To engage brakes, apply light FRONT WHEEL LOCK downward pressure to the brake lever BLOQUEO DE LAS RUEDA DELANTERAS located on each rear wheel. The stroller may require slight forward or rearward WARNING: movement in order to line up the teeth Always lock the front on the brake with each wheel brake cluster (Fig.
- Page 20 SAFETY SEGURIDAD SAFETY SEGURIDAD TO SECURE THE CHILD • Las correas del hombro del arnés de 5 PARA SUJETAR AL NIÑO puntos tienen 3 posiciones de sujeción. Escoja la posición que sitúe a la correa del hombro al mismo nivel o a un nivel WARNING: inferior a la parte superior del hombro Avoid serious injury from falling...
- Page 21 SAFETY SEGURIDAD ASSEMBLY MONTAJE TO RELEASE THE CHILD TO FOLD STROLLER PARA SOLTARLAS AL NIÑO PARA DESPLEGAR EL CARRITO WARNING: Care must be taken when folding • To release, push button on center clasp, Center Clasp the stroller to prevent finger entrapment. Presilla central the two harness buckles will pop free CAUTION:...
- Page 22 SAFETY SEGURIDAD ASSEMBLY MONTAJE • Secure the stroller in the folded position by JOGGING WITH YOUR STROLLER locking the fold latch, located on the right side TROTAR CON SU CARRITO of the stroller, over the rivet that protrudes from the frame (Fig. 22b). WARNING: Never jog or run •...
- Page 23 SAFETY SEGURIDAD SAFETY SEGURIDAD When you are jogging with your child, use TIRES NEUMÁTICOS the following safety features: • Check the pressure before using the Al trotar con su hijo, use las siguientes stroller. Tires are shipped un-inflated. características de seguridad: The tires should be inflated on a regular basis to the P.S.I.
- Page 24 ASSEMBLY MONTAJE ASSEMBLY MONTAJE • Lift up on the stroller handle with both TO UNFOLD STROLLER hands until the stroller frame is erected and PARA DESPLEGAR EL CARRITO locked in the open position (Fig. 25b). The stroller has spring-loaded latches on both WARNING: Care must be taken when sides of the frame.
- Page 25 MAINTENANCE MANTENIMIENTO MAINTENANCE MANTENIMIENTO MAINTENANCE AJUSTE DE RUEDAS: MANTENIMIENTO • Debe tenerse en cuenta que todos los vehículos de tres ruedas pueden influenciarse fácilmente para WHEEL ADJUSTMENT: el desvío de una línea recta. En la mayoría de los casos, los carritos pueden tener una tendencia a •...
- Page 26 OTHER OTRO OTHER OTRO FCC Statement Declaración de la FCC This device complies with Part 15 of the FCC rules. Operation is subject to the following two Este dispositivo cumple con las normas de la Parte 15 de la Comisión Federal de Comuni- conditions: caciones (FCC).
- Page 27 ® BABY TREND CUSTOMER SERVICE The Customer Service Department can be contacted at 1 (800) 328-7363 Monday through Friday between 8:00 a.m. and 4:30 p.m. (PST). Return Authorizations are required prior to returning product(s) to Baby Trend®. ® BABY TREND SERVICIO AL CLIENTE El Departamento de Servicio al Cliente puede ser contactado a 1 (800) 328-7363 Lunes a...
- Page 28 Copyright © 2022, Baby Trend Inc., All Rights Reserved. Todos los derechos reservados. Copyright © 2022, Baby Trend Inc., All Rights Reserved. Todos los derechos reservados.
Need help?
Do you have a question about the XCEL-R8 PLUS JG94 B Series and is the answer not in the manual?
Questions and answers