Advertisement
Quick Links
Baby Trend, Inc.
13048 Valley Blvd.
Fontana CA 92335
1-800-328-7363
(8:00 a.m. ~ 4:30 p.m. PST)
www.babytrend.com
TS12xxxD_2L_011724
Read all instructions BEFORE assembly and USE of product.
KEEP INSTRUCTIONS FOR FUTURE USE.
Lea todas las instrucciones ANTES de armar y USAR el
producto. CONSERVE LAS INSTRUCCIONES PARA USO FUTURO.
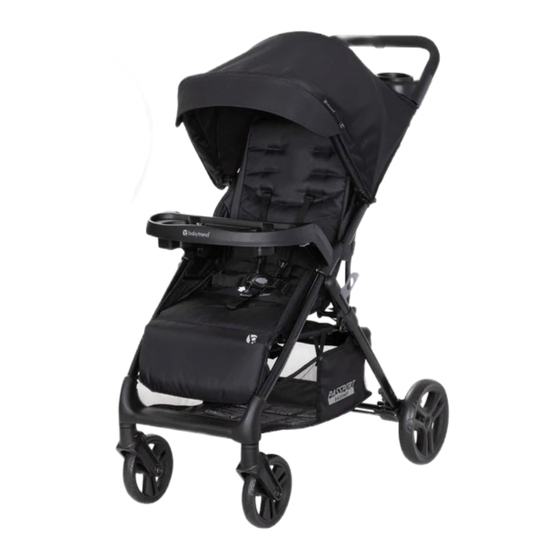
Passport Cargo Travel System
Instruction Manual
Manual de Instrucciones
with EZ-Lift
™
PLUS
infant car seat
TS12XXXD
Advertisement

Subscribe to Our Youtube Channel
Related Manuals for BABYTREND TS12 D Series


Summary of Contents for BABYTREND TS12 D Series
- Page 1 CONSERVE LAS INSTRUCCIONES PARA USO FUTURO. Passport Cargo Travel System with EZ-Lift ™ PLUS infant car seat Instruction Manual TS12XXXD Manual de Instrucciones Baby Trend, Inc. 1-800-328-7363 13048 Valley Blvd. (8:00 a.m. ~ 4:30 p.m. PST) Fontana CA 92335 www.babytrend.com TS12xxxD_2L_011724...
- Page 2 Customer Service Department can be contacted at 1 (800) 328-7363 Monday through Friday between 8:00 a.m. and 4:30 p.m. (PST). Return Authorizations are required prior to returning product(s) to Baby Trend®. Please visit http://babytrend.com/pages/ limited-warranty for complete warranty details. GARANTIA NO DEVUELVA SU PRODUCTO A LA TIENDA.
- Page 3 PARTS PIEZAS PARTS PIEZAS Check that you have all the parts for this model before assembling the stroller. Verifique que tenga todas las piezas para este modelo antes de montar el carrito. Rear Axle parts (2) caps and spare parts Partes del eje trasero (2) tapas y piezas de repuesto Mobile Phone Positioning Parent Tray Bandeja para teléfonos móviles de los padres...
- Page 4 WARNING WARNING WARNING: CAUTION: • This single stroller is designed for one child only. Use with Please follow all of these more than one child may cause the unbalance condition which can instructions to ensure the safety of your child. injure/ harm your child.
- Page 5 ADVERTENCIA ADVERTENCIA ADVERTENCIA: PRECAUCIÓN: • Este carrito está diseñado para un niño solamente. El uso Por favor, siga con más de un niño podría provocar inestabilidad y lesionar o dañar a su todas estas instrucciones para garantizar hijo. la seguridad de su hijo Conserve estas •...
- Page 6 ASSEMBLY ENSAMBLAR ASSEMBLY ENSAMBLAR IMPORTANT ! SET UP THE STROLLER FRAME To ensure safe operation of your CONSTRUIR EL BASTIDOR DEL CARRITO product, please follow these instructions carefully. Please keep these instructions for future reference. IMPORTANT ! • Release the fold latch by pulling it Before assembly and each use, outward (Fig.
- Page 7 ASSEMBLY ENSAMBLAR ASSEMBLY ENSAMBLAR REAR AXLE - ASSEMBLY • Get the cross bar through the EJE TRASERO - MONTAJE rear wheel and insert the second washer (Fig. 2c). • Remove the pin and 1 washer from both ends of the rear axle •...
- Page 8 NEVER use stroller if wheels do not lock into place. If you need Fig. 2e assistance, please contact our customer service department at 1-800-328- 7363, Monday-Friday, between 8:00 a.m. and 4:30 p.m. PST. www.babytrend. com/contact-us NOTA: tire de la rueda delantera y las trasera para cerciorarse de que están insertadas de manera segura al carrito.
- Page 9 ASSEMBLY ENSAMBLAR ASSEMBLY ENSAMBLAR Arch / Arco MOBILE PHONE POSITIONING PARENT TRAY Before attaching the tray BANDEJA PARA TELÉFONOS MÓVILES (PADRES) (1) Face the tray with the • prominent arch side towards the WARNING: canopy. Locate the three canopy straps and seat strap (Fig. 3a). Canopy Straps / not place hot liquids Correas de Cubierta...
- Page 10 ASSEMBLY ENSAMBLAR ASSEMBLY ENSAMBLAR Antes de colocar la bandeja NOTE: Ensure all fabric panels are attached to their corresponding • tab as illustrated (Fig. 3f). • (1) Cara a la bandeja con el lado prominente del arco hacia el dosel. To secure canopy: Hook elastic strap fasteners on each side of the •...
- Page 11 ASSEMBLY ENSAMBLAR ASSEMBLY ENSAMBLAR IF NEEDED: CANOPY SI ES NECESARIO: LA CUBIERTA Parent tray removal: Remove the • Pull the canopy edge forward or • elastic bands by reversing Step 3. backwards to open and close (Fig. 4a). Under the stroller frame locate the •...
- Page 12 ASSEMBLY ENSAMBLAR ASSEMBLY ENSAMBLAR CHILD TRAY To attach the child tray: Push the tray • downward into the connectors (Fig. 5a). BANDEJA PARA NIÑOS Check that the tray is securely latched in WARNING: place. The child’s tray is not a restraint device: always secure your child with the seat To access the child seat: Push •...
- Page 13 ASSEMBLY ENSAMBLAR ASSEMBLY ENSAMBLAR To remove the child tray: Push to Basket Access / Flip-Up Leg Rest: • • release both ends and lift up the tray Lift the leg rest to access the storage simultaneously (Fig. 5c). basket from the front side (Fig. 6b). Access NOTE: Lift leg rest from the Acceso...
- Page 14 SAFETY SEGURIDAD SAFETY SEGURIDAD REAR BRAKES SECURE THE CHILD FRENOS TRASEROS PARA SUJETAR AL NIÑO WARNING: WARNING: Always set brakes when Avoid serious injury from falling or the stroller is not being pushed so that the sliding out. Always use the safety harness. stroller will not roll away.
- Page 15 SAFETY SEGURIDAD SAFETY SEGURIDAD • To secure the child, place the safety • Para ajustar el arnés al siguiente nivel de altura, tire de la correa con forma Adjust for a snug fit Regule para lograr un buen ajuste harness around the child’s waist and de aro por la ranura (Fig.
- Page 16 ASSEMBLY ENSAMBLAR INFANT CAR SEAT / SILLITA PARA EL AUTOMÓVIL SEATBACK POSITIONING THE INFANT CAR SEAT POSICIONES DEL RESPALDO LA SILLITA PARA EL AUTOMÓVIL WARNING: • To recline the seat, open the Avoid serious injury from falling or cover of the adjustment strap sliding out, always use the Infant Car Seat harness.
- Page 17 INFANT CAR SEAT / SILLITA PARA EL AUTOMÓVIL INFANT CAR SEAT / SILLITA PARA EL AUTOMÓVIL CS01 EZ-Lift, CS02 EZ-Lift PLUS and CS03 EZ-Lift PRO Infant Car Seats • Align the car seat module to the inner frame connectors. Carefully rest the car seats lower rear against the angle point of the tray.
-
Page 18: Features Características
FEATURES CARACTERÍSTICAS FEATURES CARACTERÍSTICAS INFANT CAR SEAT / SILLITA PARA EL AUTOMÓVIL REMOVING THE CAR SEAT: STROLLER HANDLE COVER FEATURE FUNCIÓN DE LA CUBIERTA DEL MANUBRIO RETIRADA DE LA SILLA DE AUTO: NOTE: Set handle to the carry position (Fig. •... - Page 19 FEATURES CARACTERÍSTICAS FEATURES CARACTERÍSTICAS STORAGE POUCH • Dépliez la pochette de rangement en serrant la boucle de réglage et en tirant ESTUCHE DE GUARDADO la sangle vers le bas (Fig. 12a). Utilisez la manette pour desserrer et serrer la pochette (Fig. 12b). WARNING: The maximum weight that can be •...
- Page 20 FOLD PLEGAR FOLD PLEGAR TO FOLD STROLLER • Locate the strap in the seat pocket. Using one hand pull the strap firmly PARA PLEGAR EL CARRITO upward to unlock the frame (Fig. 13a). WARNING: • Coloque la correa dentro del bolsillo del asiento. Con una mano, tire de la Care must be taken when correa firmemente hacia arriba para destrabar el armazón folding and unfolding the stroller to prevent finger...
- Page 21 FOLD PLEGAR FOLD PLEGAR • Holding the strap lift the stroller frame until it fully closes (Fig. 13b). Fold stroller to collapsed position (sometimes may require additional assistance by hand) before securing with fold latch (Fig. 13c). • Always tuck the pull strap back into the seat fabric (Fig.
- Page 22 FOLD PLEGAR MAINTENANCE MANTENIMIENTO MAINTENANCE MANTENIMIENTO TO UNFOLD STROLLER SECURING THE SEAT FABRIC PARA DESPLEGAR EL CARRITO SUJECIÓN DE LA TELA DEL CARRITO CAUTION: • If assembly required: Feed the rear recline clip and the seat fabric through the appropriate hook and loop slots on the stroller frame Do not allow children near (Fig.
- Page 23 MAINTENANCE MANTENIMIENTO ENTRETIEN MAINTENANCE MANTENIMIENTO MAINTENANCE MANTENIMIENTO FRONT AND REAR WHEEL RELEASE • If replacing the rear wheel: Press opposite side of rear axle LIBERACIÓN DE LAS RUEDAS the release pin and pull the wheel lado opuesto del eje trasero out (Fig.
- Page 24 MAINTENANCE MANTENIMIENTO CARE AND MAINTENANCE CUIDADO Y MANTENIMIENTO SEAT PAD • To clean the seat pad, use only mild household soap or detergent and warm water on a sponge or clean cloth. OTHER • Check your stroller for loose screws, worn parts, torn material or stitching on a regular basis.
Need help?
Do you have a question about the TS12 D Series and is the answer not in the manual?
Questions and answers