PERMASTEEL PG-40201-RD, PG-40201-CO Use & Care Manual
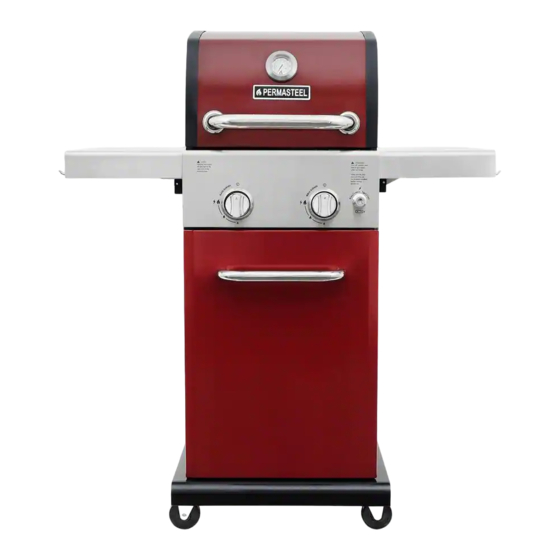
Outdoor 2 burner gas grill
Hide thumbs
Also See for PG-40201-RD, PG-40201-CO:
- Use & care manual (32 pages) ,
- Use & care manual (32 pages) ,
- Use & care manual (86 pages)
Table of Contents
Advertisement
Quick Links
Permasteel Outdoor
2 Burner Gas Grill
Use & Care Guide
Model number: PG-40201-RD, PG-40201-CO, PG-40201-BC
FOR OUTDOOR USE ONLY
Thank you for purchasing your new grill from Permasteel.
We hope you enjoy your product.
If you have any questions, please call us at 1-888-287-0735
or visit www.permasteel.life
1
Advertisement
Table of Contents

Related Manuals for PERMASTEEL PG-40201-RD, PG-40201-CO


Summary of Contents for PERMASTEEL PG-40201-RD, PG-40201-CO
- Page 1 Use & Care Guide Model number: PG-40201-RD, PG-40201-CO, PG-40201-BC FOR OUTDOOR USE ONLY Thank you for purchasing your new grill from Permasteel. We hope you enjoy your product. If you have any questions, please call us at 1-888-287-0735 or visit www.permasteel.life...
-
Page 2: Table Of Contents
Table of content Important Safety Information Leak Testing Safety Symbols Final Installation Check Lists Installation /Safety Precautions Lighting Instruction Propane & Gas Warning Operating Instruction Exploded View Care & Maintain Parts List Food Safety Before Assembly Grill Storage Hardware & Tools Trouble Shooting Assembly Steps Warranty... -
Page 3: Important Safety Information
Important Safety Safety Information Symbols Thank you for your purchase of our BBQ Gas Grill. The symbols listed here are being used We sincerely wish you will enjoy using our fine throughout this User’s Manual. Please pay special products. attention to them. The meaning of each of the symbols is listed here: •... -
Page 4: Installation /Safety Precautions
States and Canada only. Never modify to use in other places. Modification may cause serious bodily injury or property damage. Permasteel is not responsible for any modifications and all warranties will be void. WARNING: This product can expose you to •... -
Page 5: Exploded View
Exploded View... -
Page 6: Parts List
B19-1 Tool Hook (Copper) 30400G34-1 Caster 40900212 Manifold 21800021 Not pictured If you are missing any parts or have damaged parts, please call 1-888-287-0735 M-F 8:00-5:00 Manual 21800043P Pacific Time. For replacement parts, visit us at Hardware Pack 21800044P www.permasteel.life... -
Page 7: Before Assembly
Unpack the grill parts following the steps below: Unpack - Step 1: Carefully open the top of the carton with a box cutter. Take out all the grill parts and packing material above the grill. - Page 8 Unpack - Step 2: With the aid of an assistant, turn the grill on its side as shown below, and remove the top styrofoam endcap. Take out the side shelf carton from it.
- Page 9 Unpack - Step 3: Remove another styrofoam endcap from the grill and place it upright on the floor. Open the lid and take out the small boxes packed inside. Remove all packing materials and take out all parts from the boxes.
-
Page 10: Hardware & Tools
Hardware The following hardware is provided in the blister pack for convenient use. M4X10 Screw: 32 pcs M5X10 Screw: 4 pcs M6X12 Shoulder Bolt: 8 pcs M6X13 Screw: 34 pcs M6 Flat Washer: 2 pcs M6X20 Screw: 2 pcs Cotter Pin: 1 pc Hose Retain Pin: 1 pc Battery (AA): 1 pc Tools... -
Page 11: Assembly Steps
Assembly Instructions Step 1 • Turn the bottom panel upside down. • Use (16) M6x13 screws to attach the four casters to the bottom panel. Note: Mount the casters with brakes on the back of the bottom panel. • Turn the bottom panel right side up. - Page 12 Step 2: Attach the left side panel to the bottom panel with (3) M6x13 screws. Do not fully tighten them. • • Attach the right side panel to the bottom panel with (3) M6x13 screws. Do not fully tighten them. •...
- Page 13 Step 3 • Use (4) M4x10 screws to attach the cart support angle bar to the left side panel and the bottom panel. • Use (4) M4x10 screws to attach the cart support angle bar to the right side panel and the bottom panel.
- Page 14 Step 4 • Use (4) M4x10 screws to attach the left tray bracket to the top of the left side panel. • Use (4) M4x10 screws to attach the right tray bracket to the top of the right side panel.
- Page 15 Step 5 Caution: To avoid possible injury, two people are required to perform this step. Remove any wire ties holding the regulator and gas hose under the grill head. Make sure the hose • hangs freely. • With the aid of an assistant, carefully lower the grill head onto the pedestal. •...
- Page 16 • Open the lid to attach the lid handle. Align the lid handle bezel and the lid handle; attach them to the lid with (2) M6x20 screws and (2) M6 flat washers from the inside of the lid (see figure C).
- Page 17 Step 6 • Remove the 2 pre-installed screws from the two sides of the control panel. Attach the front side shelf supports to each side and reattach the 2 previously removed screws (see figure A & B). • Underneath the firebox, fix the regulator to the right side panel with (1) hose retain pin and (1) cotter pin (see figure C).
- Page 18 • Use (4) M5x10 screws to attach the left & right back side shelf supports to the rear sides of the firebox (see figure D & E). Note: Attach all the brackets so that the flanges are on top.
- Page 19 Step 7 • Attach the 4 side shelf support brackets to the firebox with (8) M6x13 screws. There is a location label on each bracket. Note: Attach the front brackets so that the flanges face the front of the grill. Attach the back brackets so that the flanges face the back of the grill.
- Page 20 Step 8 • Place 3 tool hooks on each side shelf end (6 pieces in total) and tighten the tool hooks with the nuts (see figure A). • Screw (1) M6x12 shoulder screw into the lower hole of each side shelf support bracket (see figure B &...
- Page 21 • For each side shelf, hold the shelf in the folded position on the side of the cart. Screw (1) M6x12 shoulder screw through the shelf attachment slot and into the upper hole of each side shelf support bracket (see figure C & E). Note: To raise the side shelf to an upright position, lift the shelf by holding onto the end of the shelf (front and back of the shelf).
- Page 22 Step 9 • Attach the door handle to the door with (2) pre-assembled M6x15 screws. • Insert the bottom door pin into the hole towards the front-right side of the bottom panel. Push down the top door pin, align it with the hole in the door bracket, and release the pin so that it is inserted into the hole.
- Page 23 Step 10 • Place the heat diffuser over the burners. Diffusers will fit in the firebox in either direction. • Place the cooking grates onto the grate rest. • Insert the two tips on the back of the warming rack into the holes in the warming rack brackets.
- Page 24 Step 11 • Install the drip tray into the cart from the back. • Install the drip cup into the drip tray from the back.
- Page 25 Step 12 • LP tank is sold separately. Use only with an OPD (over-fill protection device) equipped LP tank. • Fill and leak check before attaching the tank to the grill and regulator. Place the LP tank into the hole in bottom shelf with the tank collar opening facing to the left side panel as shown.
-
Page 26: Gas Connection
Gas Connection ONLY USE THE REGULATOR AND HOSE ASSEMBLY PROVIDED WITH THIS GRILL. REPLACEMENT PRESSURE REGULATORS AND HOSE ASSEMBLIES MUST BE THOSE SUPPLIED BY THE MANUFACTURER This is a LP (Liquefied Petroleum Gas) configured grill. Do not attempt to use a natural gas supply unless the grill has been reconfigured for natural gas use. - Page 27 • LP TANK VALVE USED MUST MEET THE FOLLOWING Have a type I outlet compatible with the regulator provided. 2. Have a safety relief valve. 3. UL listed Overfill Protection Device (OPD), This OPD safety feature is identified by a unique triangular hand wheel.
- Page 28 WARNING • Never insert any foreign objects into the valve outlet. It may damage the valve and cause a leak. Leaking propane gas may result in fire, explosion, heavy body injury, or even death. • Do not connect this grill to the self-contained LP gas system of a motor home or camper trailer.
-
Page 29: Leak Testing
Leak Testing • GENERAL Although all gas connections on the grill are leak tested at the factory prior to shipment, a complete gas tightness check must be performed at the installation site due to possible mishandling in the shipment process or excessive pressure unknowingly being applied to the unit. - Page 30 • SAFETY TIPS: Always check for leaks after every LP tank change. 2) Always check for leaks before each use. 3) Use a long BBQ tools to avoid burns. 4) Check all the gas supply fittings for leaks before each use. It is handy to keep a spray bottle of soapy water near the shut-off valve of the gas supply line.
-
Page 31: Final Installation Check Lists
Final Installation Check List At least 36” clearance is maintained from any combustible constructions to the sides and back of this grill. There is no combustible construction material over the grill. All internal packaging is removed. Burners are sitting properly on the orifices. Knobs turn freely. -
Page 32: Lighting Instruction
Lighting Instruction VERY IMPORTANT: ALWAYS INSPECT THE HOSE PRIOR TO EACH USE. BEFORE LIGHTING: • Inspect the gas supply hose before turning the gas “ON”. If there is evidence of cuts, wear, or abrasion, it must be replaced before use. The replacement hose assembly must be supplied by the manufacturer. -
Page 33: Operating Instruction
Operating Instruction CAUTION • Clean the grill often. A grease fire that may damage the grill may occur if the grill has not been cleaned frequently. • NEVER leave the grill unattended while using. • Do not use water to extinguish the grease fire, it may cause bodily injury. Turn the knobs and the LP tank off in case a grease fire occurs. - Page 34 Follow the lighting instructions printed on the control panel. The Permasteel PG-40201 can be converted to Natural Gas using an optional conversion kit # PP-20200-NS. For more information on how to convert to Natural Gas or where to purchase the kit, please visit our website at www.permasteel.life, email us at...
-
Page 35: Care & Maintain
Care & Maintenance MAINTENANCE Keep the grill area clear and free from combustible materials, gasoline and other flammable vapors and liquids. 2. Keep the holes in the three sides of the cart clear and free from debris, which ensures the flow of combustion and ventilation air are unobstructed. 3. -
Page 36: Food Safety
SPIDER AND INSECT WARNING Spiders and insects can nest in the burners after storing. These nests can cause fires inside the tube or beneath the grill. This is a very dangerous condition, so always clean the burners before use. WHEN TO LOOK FOR SPIDERS Inspect the burners at least once a year or immediately if any of the following conditions occur: Yellow flame with a burning smell. -
Page 37: Trouble Shooting
Trouble Shooting Please check the following problems/solutions before contacting our service center. PROBLEMS POSSIBLE CAUSE SOLUTIONS Electrode deposited with cooking Use a clean swab and alcohol to residues clean the electrodes The electrode is damaged Replace the electrode Burner won’t light after turning Electrode wires are loose or Reconnect or replace with a new and pushing the knobs... -
Page 38: Warranty
Related Parts: LIMITATION OF REMEDIES AND LIABILITY Permasteel shall not be liable for any incidental or consequential damages for a breach of any express or implied warranty on this Product. Except to the extent prohibited by applicable law, any implied warranty or merchantability or fitness for a particular purpose on this Product shall be limited to the duration of the above warranty. - Page 39 We hope you enjoy your product and we are always here for you: Visit us at: www.permasteel.life Customer Service: 1-888-287-0735 Email: service@permasteel.life Distributed by Permasteel Inc. 100 Exchange Place Pomona, CA 91768 Designed in California, Made in China...
Need help?
Do you have a question about the PG-40201-RD, PG-40201-CO and is the answer not in the manual?
Questions and answers