Table of Contents
Advertisement
Advertisement
Table of Contents
Troubleshooting

Related Manuals for Technogym Skillrow


Summary of Contents for Technogym Skillrow
- Page 1 killrow Technical Service Guide Rev. 1.1 - (May 2017)
- Page 3 The information in this manual is intended for QUALIFIED TECHNICAL PERSONNEL, who have been specifically trained by TECHNOGYM S.p.A. and are qualified to carry out fine tuning and start-up of the equipment, as well as major maintenance work and repairs, requiring in-depth un- derstanding of the equipment, how it works, its safety devices and maintenance procedures.
- Page 4 SKILLROW: Technical Service Guide - Rev. 1.1 Blank page. Page 4 e-mail: support@technogym.com...
-
Page 5: Table Of Contents
3 . 2 . 6 external power supply ....................... 29 3 . 2 . 7 console ..........................30 3 . 2 . 8 login to the skillrow ......................31 3 . 3 skillrow app ....................32 3 . 3 . 1 resume by app ........................32 ACCESSORIES ......................... - Page 6 SKILLROW: Technical Service Guide - Rev. 1.1 5 . 2 Installation specifications and requirements ........35 5 . 2 . 1 installation procedure ..................... 35 5 . 3 Lifting and moving the equipment ............37 TROUBLESHOOTING & CONFIGURATION ............39 6 . 1 Executable SW for diagnostics with PC ..........39 6 . 2 Structure for entering commands ............
- Page 7 6 . 4 Configuration and setting for classes: TECHNOGYM skillrow APP ........................52 scenario 6 . 5 necessary Steps for configuring the skillrow class - skillrow connected to unity self and cloud ...... 52 6 . 6 TROUBLESHOOTING ................. 56 6 . 6 . 1 braking is not efficient: cleaning the fan ..............56 6 .
- Page 8 SKILLROW: Technical Service Guide - Rev. 1.1 11. TOOLS TO BE USED ......................101 12. LIST OF CHANGES FOR MANUAL VERSION ............. 103 12 . 1 Version 1 . 1 ...................... 103 e-mail: support@technogym.com Page 8...
-
Page 9: General Warnings
Technical Service Guide - Rev. 1.1 GENERAL WARNINGS INTRODUCTION This document has been prepared specifically for Technogym After Sales Service, with the aim of providing authorised personnel with the information for carrying out maintenance and repair operations in the correct manner. -
Page 10: Useful Advice
Technical Service Guide - Rev. 1.1 USEFUL ADVICE Technogym advises you to plan your technical assistance task in the following way: Carefully assess the impressions reported by the Customer regarding the equipment’s operating faults and ask questions suitable to clarify the signs of the defect. -
Page 11: Technical Specifications
SKILLROW: Technical Service Guide - Rev. 1.1 TECHNICAL SPECIFICATIONS TECHNICAL DATA Technical Data Type of battery sealed lead Battery capacity 12V 2Ah Maximum recharge current 200 mA Complete recharge duration 10 hours Noise Less than 70 dB (A) Protection rating... -
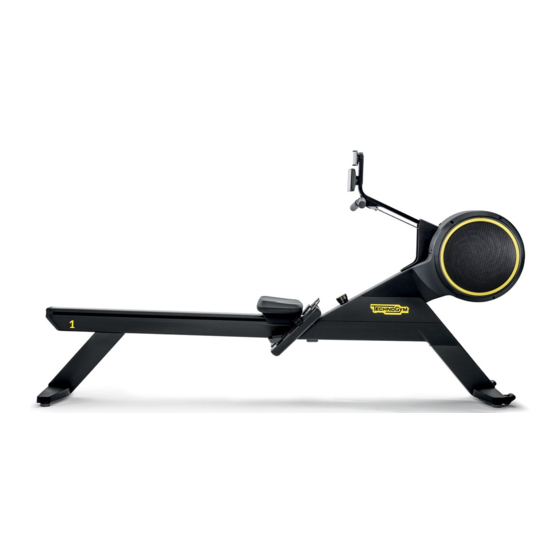
Page 12: Mechanical Characteristics
160 Kg (353 lbs) Table 2 Figure 1 2.2.2 DIMENSIONS AND WEIGHT OF PACKAGING The SKILLROW is shipped partially dismantled, packed in cardboard packaging. The SKILLROW is disassembled into two components for shipping purposes: ▪ A = rear frame group;... - Page 13 SKILLROW: Technical Service Guide - Rev. 1.1 Figure 2 Length Height Width Weight Net_Weight 1470 mm 1150 mm 750 mm 77 Kg 61 Kg 57.9’’ 45.3’’ 29.5’’ 170 lbs 134.5 lbs Table 3 e-mail: support@technogym.com Page 13...
- Page 14 SKILLROW: Technical Service Guide - Rev. 1.1 Figure 3 Page 14 e-mail: support@technogym.com...
-
Page 15: Environmental Characteristics
In storage from -10°C to +70°C In operation between 20% and 90% Dampness In storage between 20% and 90% Table 4 COMPLIANCE WITH REGULATIONS The SKILLROW equipment complies with the following directives: EUROPEAN DIRECTIVES 2014/30/UE 2014/53/UE 2006/42/CE 2011/65/UE 2002/96/CE 2009/125/CE 2006/66/CE... - Page 16 SKILLROW: Technical Service Guide - Rev. 1.1 COMMUNITY REGULATIONS 1275/2008 640/2009 TRADEMARKS CE: Europe UL: America – Canada EAC: Russia – Belarus - Kazakistan GITEKI: Japan ANATEL: Brasil SII homolation: Israel PSE (network cables): Japan The reference Directives and Regulations are subject to legal changes, those indicated in this manual are valid at the moment of product release.
-
Page 17: Equipment Coding
SKILLROW: Technical Service Guide - Rev. 1.1 EQUIPMENT CODING The equipment code for the SKILLROW, is an alphanumerical code composed as follows: Charac- Description Values and meaning ters Line DJ = SKILL LINE Product version R = SKILLROW Model 0 = Standard... -
Page 18: Serial Number Structure
SERIAL NUMBER STRUCTURE The Serial Number is made up of alphanumeric characters as follows: Characters Description Values and meaning DJ = SKILL LINE R = SKILLROW 1,2,3,4,5,6, Type of product, 0 = Standard N = None D = Display 7,8, Year of production;... -
Page 19: Position Of Serial Number And Equipment Code
SKILLROW: Technical Service Guide - Rev. 1.1 POSITION OF SERIAL NUMBER AND EQUIPMENT CODE Figure 4 e-mail: support@technogym.com Page 19... -
Page 20: Wiring Diagram
SKILLROW: Technical Service Guide - Rev. 1.1 WIRING DIAGRAM CONSOLE DISPLAY SENSOR ANGLE NFC BOARD BOARD 0WCU0942xx 0WCU0941xx TOUCH BOARD LOW KIT BOARD (SCWR) J10 J7 J1 J2 CONNECTION BATTERY 0WCU0959xx 0WCU0972xx CONNECTION 0WCU0971xx MAINBOARD 0WCU0973xx CONNECTION 0WCU0943xx GENERATOR JACK... -
Page 21: Cables
SKILLROW: Technical Service Guide - Rev. 1.1 CABLES The colour of the cables may change: in particular, refer to the Pin Out. The following three cables are internal to the Console U.I: 0WCU0971xx = Cable UI/NFC 0WCU0972xx= Cable UI/ knob sensor... - Page 22 SKILLROW: Technical Service Guide - Rev. 1.1 0WCU0943xx: Low Kit Board / UI Cable Low Kit Board Signal Colour Fly connection “C” Power Supply +5Vdc Brown n.c. n.c. RPM SQW Yellow Power Supply GND White n.c. Direct RPM+ Green n.c.
-
Page 23: Equipment Operating Principle
SKILLROW: Technical Service Guide - Rev. 1.1 EQUIPMENT OPERATING PRINCIPLE OPERATING PRINCIPLE The generator is mechanically connected to the flywheel; the flywheel is directly connected to the handlebar (through the chain) and to the fan: when the athlete pulls the handlebar, the flywheel rotates and transmits the movement to the generator;... -
Page 24: Equipment Components
For this reason, even if the same rowing level is set, you may perceive different sensation of effort when using different SKILLROW devices at different moments of the day. In order to compare the results of different workouts by the same person, or compare the workouts of different people, the aspect to take into consideration is the DRAG FAC- TOR, which is a measurement of the agility of the “boat”. -
Page 25: Generator
SKILLROW: Technical Service Guide - Rev. 1.1 3.2.2 GENERATOR Figure 8: left side of the equipment Generator 25W. The generator supplies power to all the electronic components when the voltage exceeds 12V. It directly powers the Low Kit Board. The generator converts mechanical energy into electrical energy; the generator provides a fre- quency signal that is analysed by a U-I microprocessor;... -
Page 26: Nfc Board
SKILLROW: Technical Service Guide - Rev. 1.1 3.2.3 NFC BOARD Figure 9: NFC board under the QR code/NFC label The NFC Board allows the user to login on the equipment through: TGS key, Mywellness Key and Smartphone NFC. The NFC Board is powered 5V. -
Page 27: Angle Sensor Board
SKILLROW: Technical Service Guide - Rev. 1.1 3.2.4 ANGLE SENSOR BOARD Figure 10 The Angle Sensor Board contains a single turn continuous rotation potentiometer. The potentiometer measures the angular displacement of the knob (mode regulator). The Angle Sensor Board directly transmits this information to the CPU mainboard. The knob allows the user to set normal (ROWING) or magnetic (POWER) exercise levels. -
Page 28: Low Kit Board
SKILLROW: Technical Service Guide - Rev. 1.1 3.2.5 LOW KIT BOARD Figure 11: left side of the equipment The low kit board works only when the user starts rowing. The low kit board is powered by the generator. The low kit board powers the console U-I. -
Page 29: External Power Supply
Figure 12: low kit board (detail of Fuse in F3) 3.2.6 EXTERNAL POWER SUPPLY The SKILLROW is a self-powered equipment, therefore during the exercise, the equipment re- charges the battery, that allows the U-I to function, not requiring external power supply. -
Page 30: Console
SKILLROW: Technical Service Guide - Rev. 1.1 Figure 13 3.2.7 CONSOLE The console communicates with the angle sensor board, the low kit board and the NFC board. The console is powered 5V. The console is powered by the low kit board. -
Page 31: Login To The Skillrow
- configure the console; - calibrate the equipment. 3.2.8 LOGIN TO THE SKILLROW The login to the SKILLROW can be done in the following ways: - Mywellness and TGS keys; - Mywellness band and third parties (prior checking by After Sales HQ) bracelets;... -
Page 32: Skillrow App
SKILLROW: Technical Service Guide - Rev. 1.1 - SKILLROW APP (the user is logged in into the APP and the APP is connected to the equipment). SKILLROW APP Figure 15 The SKILLROW APP communicates with SKILLROW via BTLE (Bluetooth Low Energy). -
Page 33: Accessories
SKILLROW: Technical Service Guide - Rev. 1.1 ACCESSORIES For details, refer to the Marketing material. e-mail: support@technogym.com Page 33... - Page 34 SKILLROW: Technical Service Guide - Rev. 1.1 Blank page. Page 34 e-mail: support@technogym.com...
-
Page 35: Moving And Installing The Equipment
SKILLROW: Technical Service Guide - Rev. 1.1 MOVING AND INSTALLING THE EQUIPMENT PRE-INSTALLATION REQUIREMENTS WARNING: Refer to the relative specific manual: SKILLROW PRE-INSTALLATION RE- QUIREMENTS, which can be consulted on TG DIRECT. INSTALLATION SPECIFICATIONS AND REQUIREMENTS Place the equipment on a flat and stamble surface, where there are no vibrations and where the loading bearing capacity is sufficient for the weight to be supported, also taking into con- sideration the weight of the user. Check that the area is not dusty or sandy. Check that there’s ample range of free space measuring at least 60cm all around each piece of equipment; Check that the temperature and humidity are comply with the temperature and humidity operating requirements indicated in paragraph: “2.3 Environmental characteristics”. The place of installation must comply with all binding regulations. 5.2.1 INSTALLATION PROCEDURE Follow the assembly instructions described in the distribution logistics course, available on E-Learn- ing. - Page 36 SKILLROW: Technical Service Guide - Rev. 1.1 Figure 16: dismantled components 2. To use the SKILLROW, join the two parts A and B together; the coupling elements will engage automatically. For the coupling, make sure that the two parts are perfectly aligned. Then, remove the protections and lift the display bracket. Figure 17 Page 36 e-mail: support@technogym.com...
-
Page 37: Lifting And Moving The Equipment
SKILLROW: Technical Service Guide - Rev. 1.1 3. Row and verify that the equipment functions correctly. LIFTING AND MOVING THE EQUIPMENT WARNINGS: Move the equipment with great care to prevent it from tipping over. Before moving the product, check that the release lever is not lifted and that the two parts of the product are well connected. The equipment has two fixed front wheels. To move the equipment, lift it up slightly as shown in the illustration, and push it forwards and backwards. If wheels cannot be used on the floor, move the equipment with normal lifting and transport methods. Figure 18. e-mail: support@technogym.com Page 37... - Page 38 SKILLROW: Technical Service Guide - Rev. 1.1 Figure 19 Page 38 e-mail: support@technogym.com...
-
Page 39: Troubleshooting & Configuration
MINI USB connector to the console (OTG Port) and the USB connector to your PC; The first time that the PC is connected with SKILLROW, the PC asks to install a driver for the detected device. Stop the automatic search for the driver on Windows update and select the manual path on your PC where the file was previously saved, which can be downloaded from TG Direct: myrun_usb_driver.inf. -
Page 40: Structure For Entering Commands
SKILLROW: Technical Service Guide - Rev. 1.1 RESCAN SELECT THE COM PORT SET THE BAUD RATE 19200 SELECT DTR COMMANDS SECTION SELECT +CR Figure 20 STRUCTURE FOR ENTERING COMMANDS The structure of the command/message is: @COMANDO [ARG1] [ARG2]# Character Required Description Message start marker. -
Page 41: Reading Firmware Versions
6.2.1.2 (BLE/ANT+) FIRMWARE VERSION Command Notes Prints the firmware version of the BLE/ANT+ Command @NRFFWVER# module. It’s the CA version of the SKILLROW. Table 14 6.2.2 READING AND WRITING THE SERIAL NUMBERS AND IDENTIFICATION PARAMETERS 6.2.2.1 WRITING THE EQUIPMENT SERIAL NUMBER... -
Page 42: Writing The Console Serial Number
SKILLROW: Technical Service Guide - Rev. 1.1 6.2.2.3 WRITING THE CONSOLE SERIAL NUMBER Command Notes Command @SCONSOLESN sn# Sets the console serial number. Table 17 The parameter sn indicates the console serial number. 6.2.2.4 READING THE CONSOLE SERIAL NUMBER Command... -
Page 43: Determining Mac Address
SKILLROW: Technical Service Guide - Rev. 1.1 6.2.2.7 DETERMINING MAC ADDRESS Command Notes Command @RWIFIMAC# Displays the WiFi Mac address. Table 21 6.2.3 WI-FI AND NETWORK CONFIGURATION 6.2.3.1 ENTERING A NAME FOR THE NETWORK Command Notes Sets the SSID of the access point to which the Command @SWIFISSID ssid# console must connect. -
Page 44: Checking Connection Type
SKILLROW: Technical Service Guide - Rev. 1.1 The parameter index indicates the number of the WEP key utilised (the permitted values are 1, 2, 3 and 4). If a WEP key is not used, enter 0. Only WEP open key mode is supported. -
Page 45: Writing The Gateway Address
SKILLROW: Technical Service Guide - Rev. 1.1 The parameter ipaddress indicates the static IP address of the console. 6.2.3.8 WRITING THE GATEWAY ADDRESS Command Notes Command @SDEFGATEWAY gateway# Sets the IP address of the default gateway. Table 29 The parameter gateway indicates the value of the IP address of the default gateway. -
Page 46: Checking Dhcp
SKILLROW: Technical Service Guide - Rev. 1.1 6.2.3.11 CHECKING DHCP Command Notes Shows if the DHCP is active. If the DHCP is not active it shows the configured static IP address Command @RNETCONFIG# of the console, the default gateway and the net- mask. -
Page 47: Configuring The Clock
SKILLROW: Technical Service Guide - Rev. 1.1 6.2.4 CONFIGURING THE CLOCK If the login to the console fails, check the date and time with the following commands. If necessary, configure the correct date and time. 6.2.4.1 WRITING THE DATE AND TIME IN THE REAL TIME CLOCK... -
Page 48: Configuring Unity Self
SKILLROW: Technical Service Guide - Rev. 1.1 Table 36 6.2.5 CONFIGURING UNITY SELF 6.2.5.1 SETTING PARAMETERS Command Notes Sets the IP address and the UDP port where the Command @SRTMSOCKET ip_add port# Unity Self is located. Table 37 The parameter ip_add indicates the IP address where the real-time monitor is located. The param- eter port indicates the UDP port at which the real-time monitor is located. -
Page 49: Enabling Data Sending
SKILLROW: Technical Service Guide - Rev. 1.1 6.2.5.4 ENABLING DATA SENDING Command Notes Command @ENABLERTM# Enables sending data to the Unity Self. Table 39 6.2.5.5 DISABLING DATA SENDING Command Notes Command @DISABLERTM# Disables sending data to the Unity Self. Table 40 6.2.6 EQUIPMENT CALIBRATION... -
Page 50: Reading The Position Of The Knob
SKILLROW: Technical Service Guide - Rev. 1.1 6.2.6.2 READING THE POSITION OF THE KNOB Command Notes Shows the position of the knob. It returns a value Command @RKNOBPOS# between 1 and 13. Table 42 6.2.6.3 READING THE VALUE CALCULATED BY THE LOW KIT... -
Page 51: Combo Keypad
SKILLROW: Technical Service Guide - Rev. 1.1 COMBO KEYPAD Command Response LONG PRESSURE HEART BUTTON + UP Enters Wi-Fi configuration mode via app. ARROW BUTTON LONG PRESSURE SET BUTTON + DOWN AR- Enters the knob calibration mode. ROW BUTTON Table 44 e-mail: support@technogym.com... -
Page 52: Configuration And Setting For Classes: Technogym Skillrow App
• When set to “on”: the SKILLROW app starts automatically when Unity Self is turned on. To exit the SKILLROW app, if set as the main app, press and hold down on the screen in the lower left corner of the display. - Page 53 Download and open the “Equipment set up” APP, available for Android and IOS mobile phones. Once the APP is downloaded, a tutorial guides the configuration of the SKILLROW to the Wi-Fi network and Unity Self. Configure the consoles for the WiFi connection and for the connection with Unity Self (set- ting on the Technogym Equipment Set Up APP plus switching on of the console to store the data).
- Page 54 SKILLROW: Technical Service Guide - Rev. 1.1 Scan with the camera of the smartphone the QR code of each SKILLROW console. Configure each console with the number of the equipment, the name of the room and crew, through the “Equipment Setting”of the Technogym Equipment setup APP.
- Page 55 In this way, the Unity Self downloads the update database. Apply the numbered adhesives on the SKILLROW based on the layout of the class, if de- sired by the customer. The numbered adhesives on the SKILLROW, must correspond with the number of the SKILLROW, set on the Equipment setup APP.
-
Page 56: Troubleshooting
SKILLROW: Technical Service Guide - Rev. 1.1 TROUBLESHOOTING 6.6.1 BRAKING IS NOT EFFICIENT: CLEANING THE FAN If braking is not efficient, clean the fan. Unscrew the screw (A); hold the grille (B) with one hand. Unscrew the screws (C) to remove the grille (B). -
Page 57: The Bar Does Not Return Completely To The End Of Stroke: Adjusting The Elastic
SKILLROW: Technical Service Guide - Rev. 1.1 6.6.2 THE BAR DOES NOT RETURN COMPLETELY TO THE END OF STROKE: ADJUSTING THE ELASTIC If the bar does not return completely to the end of stroke, adjust the length of the elastic. -
Page 58: The Difficulty Levels Change On The Display, But The Perceived By The User Doesn't Change - Rowing Mode
SKILLROW: Technical Service Guide - Rev. 1.1 6.6.3 THE DIFFICULTY LEVELS CHANGE ON THE DISPLAY, BUT THE PERCEIVED BY THE USER DOESN’T CHANGE - ROWING MODE ROWING MODE The difficulty level changes on the display, but the perceived by the user doesn’t change. - Page 59 SKILLROW: Technical Service Guide - Rev. 1.1 [1]: For details see “6.6.1 braking is not efficient: cleaning the fan” [2]: The two cables that regulate the resistance of the “ROWING” levels are the following: Figure 27: cables ROWING mode e-mail: support@technogym.com...
-
Page 60: The Difficulty Levels Change On The Display, But The Perceived By The User Doesn't Change - Power Mode
SKILLROW: Technical Service Guide - Rev. 1.1 6.6.4 THE DIFFICULTY LEVELS CHANGE ON THE DISPLAY, BUT THE PERCEIVED BY THE USER DOESN’T CHANGE - POWER MODE POWER MODE The difficulty level changes on the display, but the perceived by the user doesn’t change. - Page 61 SKILLROW: Technical Service Guide - Rev. 1.1 [1]: Below the spring in detail: Figure 29: right part of the equipment: spring [2]: The cable that regulates the resistance of the “POWER” levels is the following: e-mail: support@technogym.com Page 61...
- Page 62 SKILLROW: Technical Service Guide - Rev. 1.1 Figure 30: cable POWER mode [3]: See the figure below: Page 62 e-mail: support@technogym.com...
- Page 63 SKILLROW: Technical Service Guide - Rev. 1.1 Figure 31: knob in detail e-mail: support@technogym.com Page 63...
-
Page 64: The Difficulty Levels Physically Change, But The Levels On The Display Don't Change
SKILLROW: Technical Service Guide - Rev. 1.1 6.6.5 THE DIFFICULTY LEVELS PHYSICALLY CHANGE, BUT THE LEVELS, ON THE DISPLAY DON’T CHANGE The difficulty levels physically change, but the levels on the display don’t change. Update the sw at the display; then, calibrate the equipment. -
Page 65: The Display Doesn't Remain Switched On At High Resistances Or During Power Workouts
SKILLROW: Technical Service Guide - Rev. 1.1 [1]: The calibration of the equipment is described at the paragraph “6.7.1 equipment calibration”. The reference values of equipment calibration are the following: Level 1: 5299; Level 10: 2695; Level 11: 2322: Level 12: 1921; Level 13: 1446. This is only an indication about the order of ma- gnitude of values. -
Page 66: The Display Doesn't Switch On
SKILLROW: Technical Service Guide - Rev. 1.1 The TG external power supply 0WR01188xx (MYCYCLING power supply) is an example of an applicable power supply, already tested with the SKILLROW. 6.6.7 THE DISPLAY DOESN’T SWITCH ON When rowing, the display doens’t switch on. - Page 67 SKILLROW: Technical Service Guide - Rev. 1.1 When rowing, the display doens’t switch on. TROUBLESHOOTING A Disconnect the battery and row. Does the display switch on? Replace the display [3]. Problem solved? Replace the battery and charge the new battery 10 hours with the external power supply [1].
- Page 68 The TG external power supply 0WR01188xx (MYCYCLING power supply) is an example of an ap- plicable power supply, already tested with the SKILLROW. [2]: the fuse is present in the Low-Kit board (F3). Follow the below procedure to check it: a.
-
Page 69: The Seat Is Not Stable And Has Plays
SKILLROW: Technical Service Guide - Rev. 1.1 6.6.8 THE SEAT IS NOT STABLE AND HAS PLAYS 1. Follow the procedure as described at the paragraph “7.8 disassembling seat” (from point 1 to point 4). 2. Reposition the seat guard on the guide. -
Page 70: Equipment Calibration
6.7.1 EQUIPMENT CALIBRATION 1. Connect the SKILLROW console with a power bank or a PC, through the USB-MINI USB cable; the display switches on. 2. Long pressure SET button + “DOWN ARROW” button. So you enter in calibration mode. - Page 71 SKILLROW: Technical Service Guide - Rev. 1.1 LEVEL 1 POWER LEVEL 13 ROWING MODE MODE LEVEL 12 LEVEL 11 LEVEL 10 ROWING MODE Figure 38 e-mail: support@technogym.com Page 71...
- Page 72 SKILLROW: Technical Service Guide - Rev. 1.1 Blank Page Page 72 e-mail: support@technogym.com...
-
Page 73: Disassembly
SKILLROW: Technical Service Guide - Rev. 1.1 DISASSEMBLY DISASSEMBLING THE LEFT GUARD If you need to arrive to the battery, the elastics or chain, you should remove the left guard. Remove the front guard (A). TOOL: flat screwdriver. Unscrew the 5 screws (B) to remove the left guard (C) (TOOL: 3mm hex wrench; nano medium Phillips screwdriver). -
Page 74: Disassembling The Left Spiral Guard
SKILLROW: Technical Service Guide - Rev. 1.1 to first tighten the screws (C), and only at the end the screw (A). Figure 40 DISASSEMBLING THE LEFT SPIRAL GUARD The disassembly of the following guards provides access to the generator, the low kit board and ca- bles. 1. Follow the procedure described at the paragraph “7.1 disassembling the left guard”. - Page 75 SKILLROW: Technical Service Guide - Rev. 1.1 Figure 41 Figure 42 e-mail: support@technogym.com Page 75...
- Page 76 SKILLROW: Technical Service Guide - Rev. 1.1 3. Unscrew the lateral two screws. (TOOL: Medium Phillips screwdriver). Then, remove the left spiral guard (E). Figure 43 Figure 44 Page 76 e-mail: support@technogym.com...
-
Page 77: Disassembling The Right Lateral Guards, The Collar And The Central Guard
SKILLROW: Technical Service Guide - Rev. 1.1 DISASSEMBLING THE RIGHT LATERAL GUARDS, THE COLLAR AND THE CENTRAL GUARD If you need to have access to cables of the knob, the pulley of the knob and the angle sensor board follow the procedure below. 1. Follow the procedure described at the paragraph “7.1 disassembling the left guard”. 2. Follow the procedure described at the paragraph “7.2 disassembling the grilles”, from point 1 to point 3. - Page 78 SKILLROW: Technical Service Guide - Rev. 1.1 Figure 46 6. Remove the central guard (N). Figure 47 Page 78 e-mail: support@technogym.com...
-
Page 79: Disassembling And Replacing The Chain
SKILLROW: Technical Service Guide - Rev. 1.1 Figure 48 DISASSEMBLING AND REPLACING THE CHAIN 1. Follow the procedure described at the paragraph “7.3 disassembling the left spiral guard”. 2. Remove the anti-derailment screw and frame. (TOOL: 5mm Allen wrench). The anti-derailment frame is in proximity of the generator. - Page 80 SKILLROW: Technical Service Guide - Rev. 1.1 Figure 50 4. Remove the chain. Let out the chain from the equipment, on the side of the handlebar. Figure 51 Page 80 e-mail: support@technogym.com...
- Page 81 SKILLROW: Technical Service Guide - Rev. 1.1 5. Secure the black box with a hex wrench. Figure 52 6. Release the lower elastic cable. Unhook the elastic cable from the fork. e-mail: support@technogym.com Page 81...
- Page 82 SKILLROW: Technical Service Guide - Rev. 1.1 Figure 53 7. Remove the old chain from the handlebar (F). To do this, follow the below procedure: a. Remove the handlebar (F) (“7.7 disassembling handlebar”), and b. Remove the case (G). ATTENTION: when you remove the handlebar, the chain can enter in the equipment. Keep the chain outside the equipment through the grip pliers or shaping a piece of cartboard.
- Page 83 SKILLROW: Technical Service Guide - Rev. 1.1 Figure 55 10. At the end, remove the hex wrench from the black box and connect the chain to the box, fixing the clip to the hook. Position correctly the black box. e-mail: support@technogym.com...
- Page 84 SKILLROW: Technical Service Guide - Rev. 1.1 Figure 56 Figure 57 11. Fasten the lower elastic cable to the fork. 12. Fix the anti-derailment screw and frame. (TOOL: 5mm Allen wrench). Page 84 e-mail: support@technogym.com...
- Page 85 SKILLROW: Technical Service Guide - Rev. 1.1 Figure 58 13. Simulate an exercise to verify the correct installation of the chain. 14. Assemble the guards, previously disassembled. e-mail: support@technogym.com Page 85...
-
Page 86: Disassembling Equipment
SKILLROW: Technical Service Guide - Rev. 1.1 DISASSEMBLING EQUIPMENT 1. Pull the lever (A) and press the element (B) at the same time. This releases the sliding base. 2. Once the two parts are released, they are free to fall: hold them both and pay attention. - Page 87 SKILLROW: Technical Service Guide - Rev. 1.1 Figure 60 To refit the product, join the two parts together; the coupling elements will engage automatically. For the coupling, make sure that the two parts are perfectly aligned. e-mail: support@technogym.com Page 87...
-
Page 88: Disassembling Handlebar
SKILLROW: Technical Service Guide - Rev. 1.1 Figure 61 DISASSEMBLING HANDLEBAR ATTENTION: when you remove the handlebar, the chain can enter in the equipment. Keep the chain outside the equipment through the grip pliers or shaping a piece of cartboard. Figure 62 - example of solution implemented in production to prevent the entering of the chain in the equipment Page 88 e-mail: support@technogym.com... - Page 89 SKILLROW: Technical Service Guide - Rev. 1.1 1-Remove the seeger. TOOL: Flat Phillips screwdriver. Figure 63 2-Remove the pivot and remove the handlebar. Figure 64 e-mail: support@technogym.com Page 89...
-
Page 90: Disassembling Seat
SKILLROW: Technical Service Guide - Rev. 1.1 DISASSEMBLING SEAT 1a - Loosen the lower screw of the rear guard (TOOL: 6mm Hexagonal wrench); 1b - Loosen the two lateral screws of the rear guard (TOOL: 3mm Hexagonal wrench); 1c - Remove the rear guard. - Page 91 SKILLROW: Technical Service Guide - Rev. 1.1 Figure 66 3. Remove the seat from the carriage guide. 4. Loosen the 4 screws of the seat guard (TOOL: 4mm Hexagonal Wrench). Then, remove the seat guard. ATTENTION: be careful not to damage the wheels of the seat, during the reposition of the seat. ATTENTION: every seat MUST BE REPOSITIONED on the equipment from which it was re- moved. Every seat has a regulation, depending of the carriage guide on which is mounted.
- Page 92 SKILLROW: Technical Service Guide - Rev. 1.1 Figure 67 Page 92 e-mail: support@technogym.com...
-
Page 93: Adjustments
SKILLROW: Technical Service Guide - Rev. 1.1 ADJUSTMENTS ADJUSTING THE ELASTIC If the bar does not return completely to the end of stroke, adjust the length of the elastic. Remove the protection (A). Unscrew the 5 screws (B) to remove the protection (C). - Page 94 SKILLROW: Technical Service Guide - Rev. 1.1 Figure 69 Page 94 e-mail: support@technogym.com...
-
Page 95: Sw Update
• Connect the MINI USB cable to the console (OTG Port) and the USB socket to your PC; • While the SKILLROW display is turning on, press and hold the “UP ARROW” key; Figure 70 • An AUTOPLAY pop-up will appear on the PC for a USB thumb drive called “FSL Loader”; open folder to view files;... - Page 96 Connect the upgrade “Artis” USB key to the PC as soon as synchronised with the PC SYNCH program; • Open the “skillrow” folder on the synchronised Artis” USB key; • Copy and paste the fw file (ROWER_BAxx_CAxx.sb) for the console to the equipment folder;...
- Page 97 SKILLROW: Technical Service Guide - Rev. 1.1 Figure 72 • Wait for the file to copy; • Disconnect the MINI USB cable from the console; • When the SW update is complete, put the protective cover back on the console MINI USB connector.
- Page 98 SKILLROW: Technical Service Guide - Rev. 1.1 Blank Page Page 98 e-mail: support@technogym.com...
-
Page 99: Planned Maintenance
Qualified Technician spe- do not require any particular technical exper- cially trained by Technogym on the specific tise; they are simple operations carried out accord- equipment; authorised to carry out fine tuning ing to good hygiene practices. - Page 100 SKILLROW: Technical Service Guide - Rev. 1.1 Blank page. Page 100 e-mail: support@technogym.com...
- Page 101 SKILLROW: Technical Service Guide - Rev. 1.1 11. TOOLS TO BE USED The tools required to carry out all the disassembling, adjustment and maintenance operations on the equipment are given in the TG SERVICE TOOLS BOX LIST, available on TG DIRECT and during the training course on the e-learning platform.
- Page 102 Blank page.
- Page 103 Inserted new Troubleshooting at the paragraph 6.6.8 THE SEAT IS NOT STAMBLE AND HAS PLAYS. Modified paragraph 6.5 STEPS NECESSARY FOR CONFIGURING THE SKILLROW CLASS - SCENARIO SKILLROW CONNECTED TO UNITY SELF AND CLOUD: described the configura- tion of Unity Self.
- Page 104 SKILLROW: Technical Service Guide - Rev. 1.1 Blank page. Page 104 e-mail: support@technogym.com...
- Page 106 TECHNOGYM S.p.A. Via Calcinaro, 2861 - 47521 Cesena (FC) - Operational Headquarters ITALY Tel.: +39-0547-650638 Fax: +39-0547-650150 e-mail: support@technogym.com 0SM01061AA...
Need help?
Do you have a question about the Skillrow and is the answer not in the manual?
Questions and answers