Table of Contents
Advertisement
Available languages
Available languages
Quick Links
Advertisement
Table of Contents

Related Manuals for Abilica Row 2.0


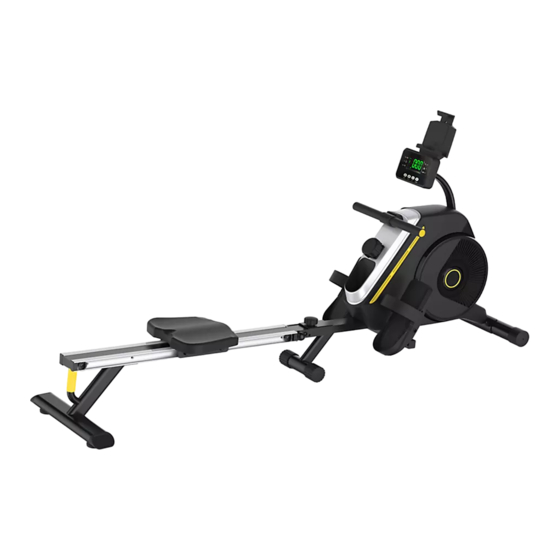
Summary of Contents for Abilica Row 2.0
- Page 1 Abilica Row 2.0 Norsk/ Svensk/ English...
-
Page 2: Table Of Contents
INNHOLD / INNEHÅLL / CONTENTS Deletegning / Sprängskiss / Parts drawing Deleliste / Dellista / Parts List Montering / Assembly DK NO Viktig informasjon Computer Vedlikehold Kontaktinformasjon Viktig Information Konsol Underhåll Kontaktinformation Important information Computer Maintenance Contact information... -
Page 3: Deletegning / Sprängskiss / Parts Drawing
DELETEGNING / SPRÄNGSKISS / PARTS DRAWING... -
Page 4: Deleliste / Dellista / Parts List
DELELISTE / DELLISTA / PARTS LIST Description Qty. Main frame Front stabilizer 3L/R End cap for front stabilizer Rear stabilizer End cap for rear stabilizer Slide rail Slide rail (L) Slide rail (R) Allen screw M8*20 Cushion rubber Self-tapping screw Pedal support tube End cap for pedal support tube Washerφ8*17... - Page 5 Front support End cap for front support Allen screw M6*20 Axle for pulley Pulley Bottle holder Handlebar Bushing for handlebar Carriage bolt M10*75 Curved washerφ10*22 Domed nut M10 Washer Screw M5*10 Chain cover Self-tapping screw ST5*15 Self-tapping screw ST5*15 Allen screw M8*16 Bearing Sensor wire Self-tapping screw ST4*15...
-
Page 6: Montering / Assembly
MONTERING / ASSEMBLY PRE-ASSEMBLY CHECK LIST / SJEKKLISTE PART NO. DESCRIPTION Q’TY Main frame Front support tube with end caps Rear stabilizer with end caps Slide rail tube Pedal support tube Pedal L/R 17 L/R Saddle Training computer Bracket support tube Tablet holder Operating Instructions Small parts set... - Page 7 HARDWARE PARTS LIST / SMÅDELER 1 /2 5 5 M 1 0 * 7 5 m m Ø 1 0 * Ø 2 2 m m 1 6 x 2 M 8 * 4 5 m m 1 5 x 2 2 8x 1 2 9 x 1 5 8 x 1...
- Page 8 STEP 1 Attach the front stabilizer (2) to the main frame (1). Secure this with two carriage bolts (55), two curved washers (56) and two domed nuts (57).
- Page 9 STEP 2 Unscrew the four screws (59) which are pre-installed on the back of the computer (37). Connect the bottom of the three sensor wires (65) to the three sensor wires of the main frame (1). Insert the front support (47) into the main frame (1).
- Page 10 STEP 3 Unscrew the 4 self-tapping screws (18) which are pre-installed on the two pedals (17 L/R). Attach the left pedal (17 L) to the left bracket of the pedal support tube (12). Secure it with 2 self-tapping screws (18). Repeat the same steps for the right pedal (17 R).
- Page 11 STEP 4 Unscrew 1 set of washers (14), nylon nuts (23) and allen screws (31) pre- mounted on the main frame. Pull the ball pin (32) out of the main frame. Push the slide rail (6) onto the U-shaped connecting tube of the main frame. Secure this with 1 washer (14), 1 nylon nut (23), 1 allen screw (31), 1 washer (58) and 1 knob (33).
- Page 12 IMPORTANT INSTRUCTIONS Before inserting or pulling out the ball pin (32): 1. Carefully lift the main frame. 2. Make sure that the fixing holes are in the same position. 3. Insert the ball pin into the fixing holes or pull it out of the fixing holes.
- Page 13 Folding the rowing machine 1. Unscrew the washer (58) and the knob (33). 2. Carefully lift the main frame to easily pull out the ball pin (32). 3. Fold up the side rails (make sure that the saddle does not slip when folding up). 4.
- Page 14 STEP 5 Attach the rear stabilizer (4) to the back of the slide rail. Secure it with 4 allen screws (63) and 4 washers (14). Screw 2 foot mats (77) to the underside of the rear support stabilizer (4). The installation of the device is now complete.
- Page 15 Unfolding the steering gear Unscrew the washer (58) and knob (33) and remove the ball pin (32) from the device. Unfold the slide rail downwards (ensure that the saddle does not slip when unfolding). Lift the main frame slightly and insert the ball pin (32). Secure it with the washer (58) and the knob (33).
-
Page 16: Viktig Informasjon
VIKTIG INFORMASJON Bruksområdet for dette treningsapparatet er kun hjemme trening og privat bruk, eventuelle garantier bortfaller ved bruk av apparatet i kommersielle eller flerbruker miljøer som for eksempel idrettslag, borettslag eller bedrifter. Det eksisterer egne modeller som er egnet for kommersiell og flerbruker miljøer. - Page 17 mindre det er spesielt anbefalt av lege eller fysioterapeut. Pulsfunksjonen på produktet er ikke en medisinsk innretning, den vil også avvike fra målinger med pulsklokke og andre apparater som måler puls. Hensikten er å gi en indikasjon på den faktiske pulsen til brukeren. Ved behov for mer nøyaktig pulsmåling anbefales pulsbelte eller pulsklokke.
- Page 18 KONSOLL Funksjonsknapper MODE Velger modus. Hold inne i to sekunder for å nullstille verdier for TIME, COUNT, DISTANCE og CALORIES. UP/DOWN Stiller inn verdier for TIME, COUNT, DISTANCE og CALORIES. RESET Trykk for å nullstille TIME, COUNT, DISTANCE og CALORIES.
- Page 19 INNSTILLING AV MÅLVERDIER: Konsollet tilbyr fire målverdi-moduser: TIME (tid), COUNT (rotak), DISTANCE (distanse) og CALORIES (kalorier). Dersom beskjeden SCAN vises på skjermen når du velger målverdifunksjonen, må du trykke MODE på nytt for å velge bort SCAN-funksjonen. NEDTELLING AV TID (TIME): Trykk først MODE for å...
- Page 20 MERK: • Dersom batterisymbolet på konsollet aktiveres, må du bytte batterier. • Konsollet vil skru seg av automatisk dersom det ikke mottar signaler på to minutter. • Konsollet vil skru seg på automatisk dersom du trykker på en knapp eller begynner å...
-
Page 21: Computer
Vedlikehold Romaskiner trenger ikke mye vedlikehold, men noe er nødvendig. Regelmessige inspeksjoner bør gjøres ukentlig. Rengjøring og tørking av utsiden av maskinen bør gjøres etter hver treningsøkt. Smøring av kjetting og svingepunkter og rengjøring av svinghjulet er andre vedlikehold punkter som bør utføres når det er nødvendig. 1. - Page 22 Tørk av overflatene på romaskinen din med en fuktig klut og eventuelt noe mildt vaskemiddel eller glassrengjøringsmiddel. Ikke bruk veldig aggressive kjemiske rengjøringsmidler, fordi det kan skade overflatene. 4. Styreskinne / monorail Ett veldig viktig vedlikehold punkt som krever regelmessig oppmerksomhet er skinnen som sete går på.
- Page 23 • Magnetisk motstand • Væske motstand • Luft + magnetisk motstand • Hydraulisk motstand Her er hva vedlikehold som er spesifikt for disse typene. Luftmotstand Mange romaskiner bruker luftmotstand. Det betyr at du i utgangspunktet snurrer en vifte med roingen din. Dette er enkelt og effektivt. Det er ikke for mye som går galt, det eneste problemet er at viften kan bli ganske skitten og støvete.
- Page 24 Anbefalt vedlikehold Hvor ofte? Rens Smøremiddel Rens med en myk, ren og fuktig Ramme Etter bruk Vann klut. Rens med en myk, ren og fuktig Computer Etter bruk klut. Alle bolter, muttre og skruer Bolter, muttre etc. inspiseres og etterstrammes ved Månedlig behov.
- Page 25 VIGTIGT OM SERVICE I tilfælde af problemer af nogen art, skal du kontakte Mylna Service. Vi vil gerne have dig til at kontakte os, før du kontakter butikken, så vi kan tilbyde dig den bedst mulige hjælp. Besøg vores hjemmeside www.mylnasport.com - her vil du finde information om de produkter, brugermanualer, en kontakt formular for at komme i kontakt med os og mulighed...
-
Page 26: Viktig Information
VIKTIG INFORMATION Detta träningsredskap är avsett för träningsrum/företag, eventuella garantier upphör att gälla om produkten används i kommersiella miljöer, till exempel träningsanläggningar. Det finns speciella modeller som är avsedda för kommersiellt bruk. Produkten får endast användas enligt beskrivningen i bruksanvisningen. Produktägaren ansvarar för att alla användare är kunskap om dessa säkerhetsföreskrifter. - Page 27 Produkten bör inte användas i samband med medicinsk eller fysiologisk behandling, utan specifik rekommendation från läkare eller fysioterapeut. Pulsmätningsfunktionen är inte en medicinsk funktion, den avviker även från mätningar med pulsklocka och andra pulsmätare. Avsikten är att ge en indikation på användarens faktiska puls.
- Page 28 CONSOLE INSTRUCTIONS Function keys MODE Press this button to select the mode Hold for 2 seconds to reset time, count, distance and calories for 2 seconds. UP/DOWN Set the values for time, count, distance and calories when not in scan mode. RESET Press button to reset time, count, distance and calories.
- Page 29 INSTÄLLNINGAR FÖR MÅL: Den här datorn har fyra målträningslägen: tid, antal, distans och kalorier (när du växlar till målfunktionen, om teckensnittet "SCAN" blinkar på displayen, du måste trycka på "MODE"-knappen igen för att göra "SCAN"-teckensnittet försvinner innan miljö) TIME target träningsläge: Tryck först på...
- Page 30 NOTERA: • Om batterisymbolen på displayen tänds, byt ut batteriet. • Monitorn stängs av automatiskt om ingen signal tas emot efter 2 minuter. • Monitorn kommer att slås på automatiskt när man börjar träna tryckknappssignalen. • När du slutar träna i 4 sekunder kommer displayen att sluta beräkna och ett ”STOPP” visas på...
-
Page 31: Underhåll
UNDERHÅLL Roddmaskiner behöver inte speciellt mycket underhåll, men det behövs underhåll. Utför regelbundna kontroller, gärna veckovis. Maskinen bör rengöras och torkas av efter varje träningspass. Andra underhållspunkter som bör utföras vid behov är smörjning av kedja och svängleder, samt rengöring av svänghjul. 1. - Page 32 Svett drar till sig smuts, damm och ev. bakterier. Dessutom är svett mer korrosivt än vatten, om svetten lämnas kvar för länge på maskinen kan det orsaka skador. Torka av roddmaskinens ytor med en lätt fuktad trasa och eventuellt lite skonsamt diskmedel eller glasrengöringsmedel.
- Page 33 De olika typerna är: • Luftmotstånd • Mekaniskt motstånd • Vätskemotstånd • Luft + mekaniskt motstånd • Hydrauliskt motstånd Här följer exempel på underhåll för de olika typerna. Luftmotstånd Många roddmaskiner använder luftmotstånd. Detta innebär i grunden att du roterar en fläkt när du ror.
- Page 34 VIKTIGT BETRÄFFANDE SERVICE I händelse av problem av något slag, ber vi dig att kontakta mylne service. Våra konsulter har lång erfarenhet och hjälper dig med frågor om produkter, installation, beställa reservdelar eller eventuella brister. Vi vill att ni kontaktar oss innan du kontaktar butiken så vi kan erbjuda dig bästa möjliga hjälp.
-
Page 35: Important Information
IMPORTANT INFORMATION The application of this fitness device is business/fitness room, any guarantees lapse when using the appliance in commercial environments such as centre. There are a fitness separate models that are suitable for commercial e-environments. The appliance may only be used as described in this manual. The owner of the appliance is responsible for ensuring that all users are familiar with these safety rules. - Page 36 The appliance should not be used if you do not use it. medical or physical treatment, unless specifically recommended by your doctor or physiotherapist. The pulse function of the product is not a medical device, it will also differ from the heart other appliances that measure heart rate.
- Page 37 CONSOLE INSTRUCTIONS Function keys MODE Press this button to select the mode Hold for 2 seconds to reset time, count, distance and calories for 2 seconds. UP/DOWN Set the values for time, count, distance and calories when not in scan mode. RESET Press button to reset time, count, distance and calories.
- Page 38 TARGET TRAINING SETTINGS: This computer has four target training modes: time, count, distance and calories (when switching to the target function, if there is "SCAN" font flashing on the display, you need to press the "MODE" button again to make the "SCAN" font disappear before setting) TIME target training mode: Dirst press the "MODE"...
- Page 39 NOTE: • If the battery symbol on the display lights up, please replace the battery. • The monitor will automatically shut off if there is no signal received after 2 minutes. • The monitor will be auto powered on when starting to exercise push button signal in. •...
-
Page 40: Computer
MAINTENANCE Rowing machines do not need much maintenance, but something is needed. Regular inspections should be done weekly. Cleaning and drying the outside of the machine should be done after each training session. Lubrication of chains and turning points and cleaning the flywheel are other maintenance points that should be carried out when necessary. - Page 41 Sweat attracts dirt, dust and possibly bacteria. In addition, sweat is more correum than water, so leaving it on the machine for too long can cause damage. Wipe the surfaces of your rowing machine with a damp cloth and any mild detergent or glass cleaner.
- Page 42 The different types are: • air resistance • Magnetic resistance • Fluid resistance • Air + magnetic resistance • Hydraulic resistance Here's what maintenance is specific to these types. Air resistance Many rowing machines use air resistance. That means you're basically spinning a fan with your rowing.
- Page 43 IMPORTANT REGARDING SERVICE If there are problems of any kind, we ask you to contact Mylna Service. Our experienced consultants can help you with questions about our products, assembly, spare parts and issues regarding faults or other problems. We urge you to contact us before returning the product to the retailer so that we can offer you the best help possible.
Need help?
Do you have a question about the Row 2.0 and is the answer not in the manual?
Questions and answers