Table of Contents
Advertisement
Quick Links
Your Sewermatic is designed to give
you years of trouble-free, profitable ser-
vice. However, no machine is better than
its operator.
Read, understand and follow all safety
warnings and instructions provided with
the product. Failure to follow the warnings
and instructions may result in electric
shock and/or serious injury. Save all warn-
ings and instructions for future reference.
SAVE THESE INSTRUCTIONS!
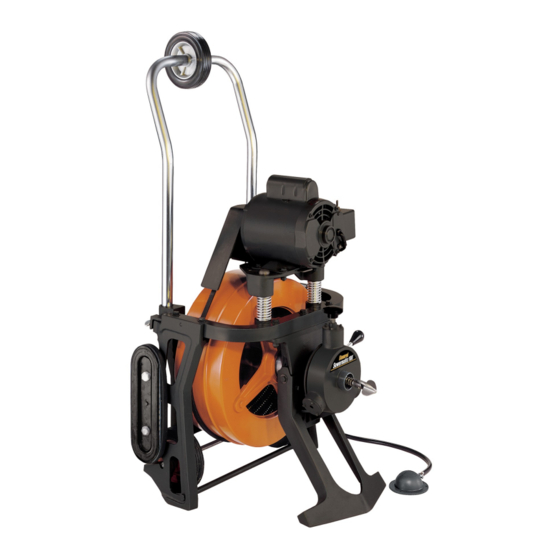
Sewermatic 100
Operating Instructions
For 3" through 10"
(75mm—250mm)
™
Advertisement
Table of Contents

Related Manuals for General Pipe Cleaners Sewermatic 100


Summary of Contents for General Pipe Cleaners Sewermatic 100
- Page 1 ™ Sewermatic 100 Operating Instructions For 3” through 10” (75mm—250mm) Your Sewermatic is designed to give you years of trouble-free, profitable ser- vice. However, no machine is better than its operator. Read, understand and follow all safety warnings and instructions provided with the product.
-
Page 2: General Safety Rules
These items could become wrapped around the cable and procedures for the Sewermatic 100. cause serious injury. This is the safety alert symbol. It is used to alert you to potential personal Always wear safety glasses injury hazards. Obey all safety mes-... -
Page 3: Work Area
Sewermatic 100™ GENERAL SAFETY RULES 10. DO NOT touch plugs or tools with wet hands. Reduces the risk of electric shock. Work Area Personal Safety 1. Keep work area clean and well lit. Cluttered benches 1. Stay alert, watch what you are doing and use and dark areas invite accidents. -
Page 4: Specific Safety Rules
11. Before starting each job, check that the cable in the drum is not broken or kinked, by pulling the cable out and checking for wear or breakage. Al- Sewermatic 100 shown (Right) ways replace worn out (kinked or broken) cables with with Cable Guide Tube genuine GENERAL replacement cables. -
Page 5: Operation
5/8” 3” to 6” Floor Drains, Roots 1. The Sewermatic 100 handle can be raised or lowered quickly by loosening the two knobs at the sides of the rear frame casting. Retighten knobs to secure han- Cutter Application Chart (Table 2) dle. -
Page 6: Special Operations
Sewermatic 100™ OPERATION 12. When the cutter is near the drain opening, take your foot off the pedal to stop drum rotation. Never retract 1. Before stepping on the foot pedal, pull cable from the the cutter from drain while cable is rotating. The drum and slide it into the drain as far as it will go. -
Page 7: Maintenance
Flushing with water followed by liberal oiling can usually 9. Reverse the procedure to install a drum on the restore function. If disassembly is required, proceed as Sewermatic 100. Be sure the drum V-Belt is resting follows: on the motor pulley before starting. After the drum is 1. - Page 8 Sewermatic 100™ TROUBLE SHOOTING GUIDE (Table 3) Problem Probable Cause Solution Cable kinks or breaks. Operator forcing the cable. Do not force the cable. Let the cutter do the work. Too much slack between ma- Allow no more than two feet between machine and chine and drain.
- Page 9 Sewermatic 100™ Sewermatic 100 Parts List CAT. NO. DESCRIPTION CAT. NO. DESCRIPTION STC-100-2 Complete Frame Assembly STC-116-1 Complete Handle Assembly ‡ STC-101 Front Leg Casting STC-116-A-1 Right Handle STC-101-2 Front Leg Casting STC-116-B-1 Left Handle STC-102-1 Right Side Leg Casting ...
- Page 10 Sewermatic 100™ Sewermatic 100 Parts List Continued CAT. NO. DESCRIPTION CAT. NO. DESCRIPTION STC-612 Cord Holder STC-702 Inner Clutch Body STC-616 Cord Clamp STC-702-A Reinforcing Ring STC-617 Cord Clamp Screw (2) STC-702-B Clutch Cover Screws (2) STC-618 Rear Motor Pulley...
- Page 11 Sewermatic 100™...
- Page 12 Sewermatic 100™ General Wire Spring Co, 1101 Thompson Avenue McKees Rocks, PA 15136 412-771-6300 www.drainbrain.com © General Wire Spring Co. 2009 C-ST1OI-0409...
Need help?
Do you have a question about the Sewermatic 100 and is the answer not in the manual?
Questions and answers