Table of Contents
Advertisement
Quick Links
Your Flexi-Rooter 100 is designed to
give you years of trouble-free, profitable
service. However, no machine is better
than its operator.
Read, understand and follow all safe-
ty warnings and instructions provided
with the product. Failure to follow the
warnings and instructions may result in
electric shock and/or serious injury.
Save all warnings and instructions for
future reference.
SAVE THESE INSTRUCTIONS!
Flexi-Rooter 100
Operating Instructions
For 2" through 4"
(50mm—100mm)
®
Advertisement
Table of Contents

Related Manuals for General Pipe Cleaners Flexi-Rooter 100


Summary of Contents for General Pipe Cleaners Flexi-Rooter 100
- Page 1 ® Flexi-Rooter 100 Operating Instructions For 2” through 4” (50mm—100mm) Your Flexi-Rooter 100 is designed to give you years of trouble-free, profitable service. However, no machine is better than its operator. Read, understand and follow all safe- ty warnings and instructions provided with the product.
-
Page 2: Safety Symbols
Use of this safety equip- ment may prevent serious injury. procedures for the Flexi-Rooter 100. Never operate machine with slip clutch removed. Fingers SAFETY SYMBOLS can get caught. This is the safety alert symbol. It is used to alert you to potential personal injury hazards. -
Page 3: General Power Tool Safety Warnings
® Flexi-Rooter 100 GENERAL POWER TOOL SAFETY WARNINGS* 3. Prevent unintentional starting. Ensure the switch is in the off- position before connecting to power source and/or BATTERY WARNING pack, picking up or carrying the tool. Carrying power tools with your finger on the switch or energizing power tools that have the Read all safety warnings, instructions, illustrations and specifica- switch on invites accidents. -
Page 4: Specific Safety Information
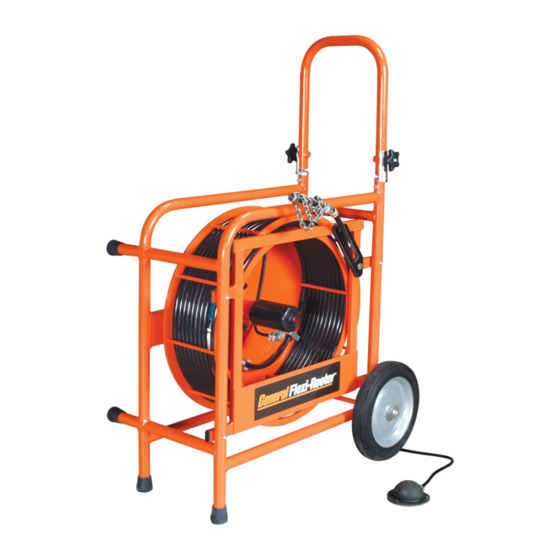
® Flexi-Rooter 100 Specific Safety Information for Flexi-Rooter Service 1. Keep a glove covered hand on the flexible shaft whenever 1. Have your power tool serviced by a qualified repair person the machine is running. This provides better control of the shaft using only identical replacement parts. - Page 5 ® Flexi-Rooter 100 What is Flexible Shaft Technology? FEATURES (FIGURE 1a & 1b) Flexible shaft technology is faster and more thorough than traditional FIGURE 1a drain cleaners. Flexible shaft spins more than 10 times faster than Two-Part Cutter Array drum machines. At speeds of 2000 RPM or more, the cutters quickly...
- Page 6 ® Flexi-Rooter 100 ATTACHING CUTTERS TO A LEADER Flexible Shaft Application Chart - 5/16” (8mm) (Table 1) Note: See the Cutter Application Chart to select the appropriate lead- Shaft er to use with each cutter. Catalog # Length For Pipe Size Typical Applications Caution: Carbide tipped chains can damage plastic.
- Page 7 ® Flexi-Rooter 100 For ClogChoppers (FIGURES 3a & 3b) ATTACHING CUTTER/LEADER ASSEMBLIES (FIGURE 5) 1. Insert the appropriate leader into the ClogChopper until it stops and tighten the set screws. Note: See the Cutter Application chart to select the appropriate cutter 2.
-
Page 8: Operation
® Flexi-Rooter 100 OPERATING THE MACHINE AT EXCESSIVE SPEEDS OPERATION FOR LONG PERIODS OF TIME WILL PREMATURELY WEAR DOWN TOOLING SET-UP AND POSSIBLY DAMAGE THE PIPE MAKE SURE THE MOTOR SWITCH IS IN If you are having trouble getting around a tight bend, push and THE ‘OFF’... -
Page 9: Maintenance
® Flexi-Rooter 100 ATTACHING FLEXIBLE SHAFT EXTENSIONS FIGURE 6 1. Make sure the machine is turned off and unplugged before attach- ing any accessories. 2. Inspect the extension for damage and make any necessary re- pairs. DO NOT use a damaged shaft, leader or extension. - Page 10 ® Flexi-Rooter 100 Lubricating the Flexible Shaft (Figures 8, 9a, 9b, 9c) FIGURE 9b 1. Remove the flexible shaft and sheath from the reel. (See Remov- ing Flexible Shaft from the Reel.) 2. Remove the flexible shaft coupler, split shaft collar, and both thrust washers and set them aside to be reinstalled.
- Page 11 ® Flexi-Rooter 100 Repairing Flexible Shaft (Figures 8, 9a, 9b, 9c) FIGURE 9b 1. If repairing the clutch end of the flexible shaft, first remove the flexible shaft from the reel per the instructions. (See Removing Flexible Shaft from the Reel.) 2.
-
Page 12: Troubleshooting Guide
® Flexi-Rooter 100 TROUBLE SHOOTING GUIDE Problem Probable Cause Solution Flexible Shaft kinks or breaks. Operator forcing the flexible shaft. Do not force the flexible shaft. Let the cutter do the work. Too much slack between machine and drain Allow no more than two feet between the opening.
Need help?
Do you have a question about the Flexi-Rooter 100 and is the answer not in the manual?
Questions and answers