General Pipe Cleaners Mini-Rooter XP Operating Instructions Manual
Hide thumbs
Also See for Mini-Rooter XP:
- Operating instructions manual (13 pages) ,
- Operating instructions manual (9 pages) ,
- Operating instructions manual (31 pages)
Advertisement
Quick Links
Your Mini-Rooter XP is designed to
give you years of trouble-free, profitable
service. However, no machine is better
than its operator.
Read, understand and follow all safe-
ty warnings and instructions provided
with the product. Failure to follow the
warnings and instructions may result in
electric shock and/or serious injury.
Save all warnings and instructions for
future reference.
SAVE THESE INSTRUCTIONS!
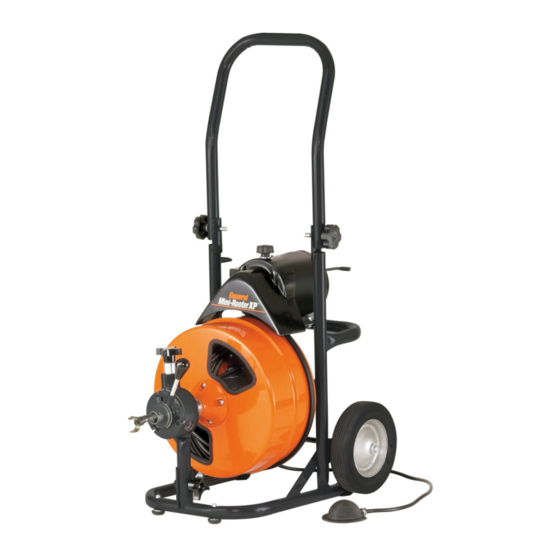
Mini-Rooter XP
Operating Instructions
For 1-1/4" through 4" lines
(30mm—100mm)
®
Advertisement

Related Manuals for General Pipe Cleaners Mini-Rooter XP


Summary of Contents for General Pipe Cleaners Mini-Rooter XP
- Page 1 ® Mini-Rooter XP Operating Instructions For 1-1/4” through 4” lines (30mm—100mm) Your Mini-Rooter XP is designed to give you years of trouble-free, profitable service. However, no machine is better than its operator. Read, understand and follow all safe- ty warnings and instructions provided with the product.
-
Page 2: Safety Symbols
Never grasp a rotat- operation and maintenance ing cable with a rag. These procedures for the Mini-Rooter XP. items could become wrapped around the cable and cause seri- ous injury. Always wear safety glasses... - Page 3 ® Mini-Rooter XP GENERAL POWER TOOL SAFETY WARNINGS* 3. Prevent unintentional starting. Ensure the switch is in the off- position before connecting to power source and/or BATTERY WARNING pack, picking up or carrying the tool. Carrying power tools with your finger on the switch or energizing power tools that have the Read all safety warnings, instructions, illustrations and specifica- switch on invites accidents.
-
Page 4: Specific Safety Information
® Mini-Rooter XP Specific Safety Information for Mini-Rooter XP Service 1. Only wear leather gloves. Never use any other type of glove, 1. Have your power tool serviced by a qualified repair person such as cloth, rubber, or coated gloves. Never grasp a rotating using only identical replacement parts. - Page 5 ® Mini-Rooter XP FEATURES Ground Fault Circuit Interrupter (GFCI) - Open Drum Mini-Rooter XP Your machine is equipped with a ground fault circuit interrupter, which Folding Handle protects you against shock if a short circuit should occur. Check that receptacle is properly grounded. Test the GFCI before each use.
- Page 6 Mini-Rooter XP OPERATING INSTRUCTIONS INSTALLING GUIDE TUBE HOLDER 1. The Guide Tube Holder on the Mini-Rooter XP should already be MAKE SURE THE MOTOR SWITCH installed when you receive the machine. If not, follow the illustra- IS IN THE ‘OFF’ POSITION! tion below for assembly.
-
Page 7: Special Operations
® Mini-Rooter XP 10. Be careful not to let the cutter get caught in the stoppage as you Move the motor switch to the forward position. Then with a work through it. This can cause kinking and breaking of the ca- gloved hand on the guide tube, depress the air foot pedal to start ble. - Page 8 ® Mini-Rooter XP HOW TO REMOVE DRUM FROM MACHINE Slide the back end of the cable (opposite to the end with basin head) through spout and into the drum. The cable will be easier DISCONNECT MACHINE FROM POWER SOURCE BE- to install if you bend the last inch of cable at a 45-degree angle.
-
Page 9: Maintenance
® Mini-Rooter XP DAMAGED ROLLER MAINTENANCE Excessive use may wear a roller to the point of failure. It is recom- mended that all three rollers be replaced at the same time (Cat # PO- DISCONNECT MACHINE FROM POWER SOURCE MR-703). The replacement roller is an assembly consisting of one BEFORE PERFORMING MAINTENANCE! Feed Roller, two Feed Roller Bearings, and two Bearing Spacers. - Page 10 ® Mini-Rooter XP TROUBLE SHOOTING GUIDE (Table 3) Problem Probable Cause Solution Cable kinks or breaks. Operator forcing the cable. Do not force the cable. Let the cutter do the work. Too much slack between machine and Allow no more than two feet between machine and drain.
- Page 11 ® Mini-Rooter XP...
- Page 12 ® Mini-Rooter XP General Wire Spring Co. 1101 Thompson Avenue McKees Rocks, PA 15136 412-771-6300 www.drainbrain.com © General Wire Spring Co. 2022 C-XPOI-0322...
Need help?
Do you have a question about the Mini-Rooter XP and is the answer not in the manual?
Questions and answers