Cuppone Donatello DN 435 Use And Maintenance Manual
Hide thumbs
Also See for Donatello DN 435:
- Pre-installation and installation manual (40 pages) ,
- Manual (28 pages) ,
- Pre-installation and installation manual (54 pages)
Table of Contents
Advertisement
Quick Links
Advertisement
Table of Contents

Related Manuals for Cuppone Donatello DN 435


Summary of Contents for Cuppone Donatello DN 435
- Page 1 Donatello OVEN Use and maintenance manual DN 435 DN 635 DN 635 L DN 935...
-
Page 3: Table Of Contents
Our company was founded in 1963 by the Lorenzo, Luigi and Using CD models ............10 Paolo Cuppone brothers. It immediately specialized in the pro- duction of ovens and equipment to prepare and cook pizza. Knowing the control panel ..............10 The constant research and experimentation of new equipment Use guided procedure ................11... -
Page 4: Safety Instructions
Safety instructions • This appliance can be used by children aged • WARNING: always switch off the main switch when • Read this guide carefully before us- from 8 years and above and persons with re- you finish using the appliance, above all during ing and maintaining the appliance, cleaning or in cases of prolonged downtime. -
Page 5: Safety Instructions
Symbols used in the manual and on • Noise levels lower than 70 dB. • Do not disassemble, modify or disable machine the labels applied to the machine parts (functional parts, control systems and safe- ty devices). Indicates that caution is required when performing an operation described in a paragraph that bears this symbol. -
Page 6: Basic Notions
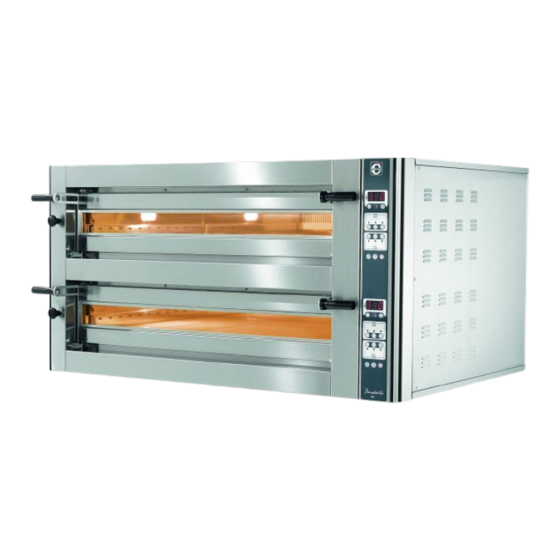
Basic notions Knowing your oven Fig.1. Your oven can be used only to bake pizzas or similar dishes, such as bread or focaccia and to grill vegetables. Its main parts are: 1 Chimney to vent any cooking fumes 2 Cooking chamber in stainless steel 3 Face in stainless steel 4 Chamber steam bleed valve. -
Page 7: Some Piece Of Advice
Some piece of advice... Fig.2. • Before starting cooking, always preheat the oven: this is vital must last at least an to get good food. Preheating the oven In the ovens, products cook thanks to the combined action of: RADIATION hour, it is therefore always preferable to use the programmed •... -
Page 8: Cooking Tables
Basic notions COOKING TABLES The parameters in the tables are just indicative, since they can vary according to the temperature of the room where the oven is installed and the type of dough to bake (e.g. type of flour, hydration, etc.). Manual stretching Stretching with Pizzaform CONTROL PANEL... - Page 9 Basic notions Manual stretching Stretching with Pizzaform CONTROL PANEL Preheating for both types (Manual stretching or stretching with Pizzaform) COOKING COOKING TYPE TIME TEMP. BOTTOM TIME TEMP. BOTTOM time: 1 hour (can vary according to the set %) 320-330 °C CLASSIC 3 min 3 min...
-
Page 10: Use
USING CD MODELS Contents of CD models Knowing the control panel Fig.4. CD MODEL Knowing the control panel ............10 Main display Use guided procedure ..............11 Displays alternatively: A - Turning the oven on ..............11 • the current temperature in the chamber Manual switch-on ................11 •... -
Page 11: Use Guided Procedure
Using CD models Use guided procedure ON/OFF • switch the oven on with the key, • set a cooking cycle with the desired parameters: The oven can be switched on: Fig.7. - Fig.8.) • manually: switching the oven on when it must be used ON/OFF •... - Page 12 Using CD models ACTIVATING AN END-OF-COOKING SIGNAL (BUZZER) Fig.9. If you wish, you can enable a buzzer that will go off when the set time expires. To activate it: with the oven on, press the CLOCK key; after how long the buzzer will 2 the display will show Fig.7.
- Page 13 Using CD models STARTING COOKING Fig.10. Fig.10. Once preheating is complete, you can start cooking and bake the products using personal protection equipment (e.g. gloves) and tools suitable for contact with food and made of material resistant to high temperatures (e.g. steel). For optimal results, always adhere to the oven capacity de- clared by the Manufacturer and position the products to be cooked evenly in the cooking chamber.
-
Page 14: Using D Models
USING D MODELS Knowing the control panel Fig.14. D MODEL Contents of D models Setting the top Allows entering and exiting the top elements percentage setting. Knowing the control panel ............14 Setting the chamber Use guided procedure ..............15 Pressing it once allows entering the chamber temperature set- ting;... -
Page 15: Use Guided Procedure
Using D models Use guided procedure TURNING THE OVEN ON MANUAL SWITCH-ON The oven can be switched on: MANUAL SWITCH-ON • manually: switching the oven on when it must be used Fig.15. is necessary to wait at least an hour for the oven to preheat and get the right temperature. - Page 16 Using D models SETTING THE PREHEATING SETTING THE PARAMETERS Preheating must have the same cooking parameters as the reci- MANUALLY pe to be used (see table on page 8, preheating information). It must be carried out without products in the cooking chamber and takes about an hour for the oven to be ready for cooking.
-
Page 17: Creating - Modifying Cooking Programs Permanently
Using D models Creating - modifying cooking programs USE OF A PREVIOUSLY STORED PROGRAMME permanently Fig.18. Quickly press the key twice: the programme led Fig.20. turns on, the display B shows the programme in use (e.g. Pressing the key changes To set and modify the parameters of the stored programs “per- the display between:... - Page 18 Using D models To exit the settings and save your changes, wait for the displays ACTIVATING AN END-OF-COOKING next to the display B pressed to go off or keep the key SIGNAL (BUZZER) until all displays go off. If you wish, you can enable a buzzer that will go off when the set time expires.
- Page 19 Using D models STARTING COOKING SWITCHING THE OVEN OFF Fig.23. Fig.23. Fig.26. ON/OFF Once preheating is complete, you can start cooking and bake Pressing the key, the oven turns off. the products using personal protection equipment (e.g. gloves) When it is switched on again, the oven will repeat the last pro- and tools suitable for contact with food and made of material gram used before switching off, without the changes made resistant to high temperatures (e.g.
-
Page 20: Maintenance And Cleaning
MAINTENANCE AND CLEANING Warnings Oven cleaning switch off the Before any cleaning, it is necessary to CLEANING THE EXTERNAL STEEL PARTS power to the appliance (acting on the system switch) Use a cloth dampened with hot soapy water and end with rins- and wear suitable personal protection equipment (e.g. - Page 21 Maintenance and cleaning CLEANING THE CHAMBER WITH THE PYROLYSIS FUNCTION Pyrolysis is a thermochemical crystallization process of food residues that have deposited in the cooking chamber, which takes place by bringing the oven up to 400 °C - 752 °F. Before starting the pyrolysis, remove the coarser food residues with a natural fibre brush.
-
Page 22: Replacing Components
Maintenance and cleaning Replacing components The user must replace only the stated compo- nents: in case of a fault or for extraordinary mainte- nance, contact the Dealer, requesting service from an authorised technician. As replacements, always use original spare parts to be requested from the Manufacturer: using non... - Page 23 Maintenance and cleaning REPLACING THE REFRACTORY BRICKS Fig.34. REPLACING THE DOOR HANDLE Fig.35. Fig.34. Fig.35. Ed. 1022 - 70702532 REV02 Donatello Use and maintenance CP...
-
Page 24: Oven Downtime For Prolonged Periods
Maintenance and cleaning Disposing of ashes and food residues Oven downtime for prolonged periods Disposal at end of life Before disposing of the equipment, cut or remove During any downtime, switch the power off. Protect the steel The ash and food residues removed with cleaning the power cord, with the appliance disconnected outside surfaces passing over them with a soft cloth slightly must be disposed of according to the regulations... -
Page 25: Warranty
Seller, ject to its activation to be carried out through the website • c) Alternatively, the Seller may opt for the replacement of www.cuppone.com within 48 hours after the time the Prod- the defective Products; uct is installed. -
Page 26: Something Is Not Working
• Make sure the main switch is ON. The oven turns on but CUPPONE since 1963 • Make sure you set the cooking parameters correctly. cooking does not start CUPPONE S.R.L. Via Sile, 36 •... - Page 28 CUPPONE since 1963 CUPPONE S.R.L. Via Sile, 36 31057 Silea (TV) - ITALY T +39 0422 361143 F +39 0422 360993 info@cuppone.com - www.cuppone.com...
Need help?
Do you have a question about the Donatello DN 435 and is the answer not in the manual?
Questions and answers