Cuppone Donatello DN 435 Pre-Installation And Installation Manual
Hide thumbs
Also See for Donatello DN 435:
- Pre-installation and installation manual (40 pages) ,
- Manual (28 pages) ,
- Use and maintenance manual (28 pages)

Related Manuals for Cuppone Donatello DN 435


Summary of Contents for Cuppone Donatello DN 435
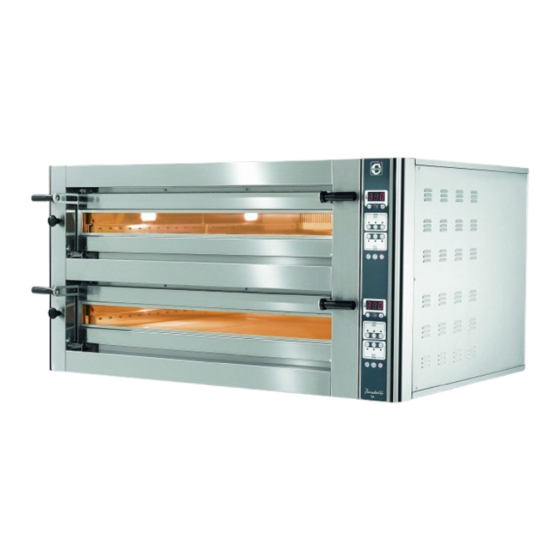
- Page 1 Donatello OVEN Pre-installation and installation manual DN 435 DN 635 DN 635 L DN 935 Ed. 1022 - 70702530 REV04 Donatello - Pre-installation...
-
Page 2: Table Of Contents
Donatello oven technical data | support ..........7 guarantee the best safe operating conditions. Donatello DN 435 oven technical data | single oven....8 Before the installation, read the content of this manual careful- Donatello DN 635 oven technical data | single oven.... -
Page 3: Checks Before Purchasing
CHECKS BEFORE PURCHASING check and agree with the owner Before purchasing the oven and before its installation, that, on installation, all the following conditions are met; they are indispensable for the correct and safe installation, operation and maintenance of the oven. Check with the owner if in the place of installation there are the tools to handle the oven easily Fig. - Page 4 Checks before purchasing Survey the installation room to make sure it is ade- • it is possible to maintain a minimum distance between Inform the owner about the necessary electrical quate. walls, other equipment, objects arrangements (activities to be carried out by a the oven and the combustible materials Fig.
- Page 5 Checks before purchasing Evacuation flue Ø150 mm [Ø5.91 in.] (NOT supplied) Max 35°C Max 95°F Min 5°C Max 70% Min 41°F not supplied not supplied Fig. 2 Fig. 3 min. 50 mm [1.97 in.] min. 500 mm extraction [19,7 in.] system draught switch...
-
Page 6: Oven Technical Data
OVEN TECHNICAL DATA Electrical data * Warning: the values indicated refer to an oven chamber. Double ovens have 2 inlets and therefore 2 different lines ** Warning: for models other than those indicated, contact the company Power supply Power Average consumption Absorption Cable type * Customer panel prot. -
Page 7: Donatello Oven Technical Data | Support
Donatello oven technical data | support ALIGNMENT OF THE OVEN WITH THE SUPPORT If the Donatello oven is to be Supports for Donatello 635 / 635L / 935 placed on a Manufacturer’s ovens are available upon request from support, make the oven rear the Manufacturer, with a shaped lower corners match the rear corners of shelf for inserting accessories. -
Page 8: Donatello Dn 435 Oven Technical Data | Single Oven
Donatello DN 435 oven technical data | single oven unit of measurement: mm [inch] 1134 [44,646] 1150 [45,276] 10 [0,394] 1140 [44,882] 1060 [41,732] [3,150] 860 [33,858] 685 [26,969] 95 [3,740] 965 [37,992] 1140 [44,882] 1150 [45,276] 10 [0,394] 1140 [44,882]... - Page 9 Donatello DN 435 oven + KDN 435 hood technical data | hood + single oven unit of measurement: mm [inch] 1455 [57,283] 573 [22,559] 573 [22,559] 1146 [45,118] 1105 [43,505] [2,638] ø147 [5,787] [15,551] [3,150] 1079 [42,480] 67 [2,638] ø80 [3,150]...
- Page 10 Donatello DN 435 oven technical data | double oven unit of measurement: mm [inch] 1150 [45,276] 1134 [44,645] 10 [0,394] 1060 [41,732] 1140 [44,882] [3,150] 860 [33,858] 685 [26,969] 965 [37,992] 95 [3,740] 1140 [44,882] 1150 [45,276] 1140 [44,882] 10 [0,394]...
- Page 11 Donatello DN 435 oven + KDN 435 hood technical data | hood + double oven unit of measurement: mm [inch] 1455 [57,283] 573 [22,559] 573 [22,559] 1146 [45,118] 1105 [43,505] 67 [2,638] ø147 [5,787] [15,551] [3,150] 67 [2,638] 1079 [42,480] 1146 [45,118] Ø80 [3,15]...
- Page 12 Donatello DN 435 oven technical data | triple oven unit of measurement: mm [inch] 1134 [44,646] 1150 [45,276] 1140 [44,882] 1060 [41,732] 10 [0,394] [3,150] 860 [33,858] 685 [26,969] 1140 [44,882] 965 [37,992] 95 [3,740] 1150 [45,276] 10 [0,394] 1140 [44,882] Ø...
- Page 13 Donatello DN 435 oven + KDN 435 hood technical data | hood + triple oven 1455 [57,283] 573 [22,559] 573 [22,559] unit of measurement: mm [inch] 1146 [45,118] 1105 [43,502] 67 [2,638] Ø 147 [Ø 5,787] 395 [15,551] [3,150] 67 [2,638] 1079 [42,480] Ø80 [3,15]...
- Page 14 Donatello DN 435 oven technical data | capacity 28,35 in 720mm PIZZA PIZZA TRAY Ø 35 cm [Ø 13.78 in.] Ø 50 cm [Ø 19.69 in.] 60x40 cm [23.62x15.75 in.] Ø PIZZAS HOURLY PRODUCTIVITY Ø 35 cm [Ø 13.78 in.] 32 pizzas chamber height: 140 mm [ 5.51 in.
-
Page 15: Donatello Dn 635 Oven Technical Data | Single Oven
Donatello DN 635 oven technical data | single oven unit of measurement: mm [inch] 1150 [45,276] 1494 [58,819] 10 [0,394] 1140 [44,882] 1420 [55,906] [3,150] 860 [33,858] 1045 [41,142] 1140 [44,882] 1325 [52,165] 95 [3,740] 1150 [45,276] 10 [0,394] 1140 [44,882] 64 [2,520] ø... - Page 16 Donatello DN 635 oven + KDN 635 hood technical data | hood + single oven unit of measurement: mm [inch] 573 [22,559] 573 [22,559] 1815 [71,457] ø147 1146 [45,118] 1105 [43,502] [2,638] [5,787] [15,551] [3,150] 67 [2,638] 1079 [42,480] ø80 [3,150] 1146 [45,118] 573 [22,559] 573 [22,559]...
- Page 17 Donatello DN 635 oven technical data | double oven unit of measurement: mm [inch] 1150 [45,276] 1494 [58,819] 1420 [55,906] 1140 [44,882] 10 [0,394] [3,150] 1045 [41,142] 860 [33,858] 1325 [52,165] 95 [3,740] 1140 [44,882] 1150 [45,276] 10 [0,394] 1140 [44,882] 64 [2,520] ø...
- Page 18 Donatello DN 635 oven + KDN 635 hood technical data | hood + double oven 1815 [71,457] unit of measurement: mm [inch] 573 [22,559] 573 [22,559] 1146 [45,118] 1105 [43,505] Ø 147 67 [2,638] [Ø 5,787] [15,551] [3,150] 67 [2,638] 1079 [42,480] Ø80 [3,15] 1146 [45,118]...
- Page 19 Donatello DN 635 oven technical data | triple oven unit of measurement: mm [inch] 1150 [45,276] 1494 [58,819] 10 [0,394] 1140 [44,882] 1420 [55,906] [3,150] 1045 [41,142] 860 [33,858] 1140 [44,882] 1325 [52,165] 95 [3,740] 1150 [45,276] 10 [0,394] 1140 [44,882] 64 [2,520] ø...
- Page 20 Donatello DN 635 oven + KDN 635 hood technical data | hood + triple oven 1815 [71,457] 573 [22,559] 573 [22,559] unit of measurement: mm [inch] 1146 [45,118] 1105 [43,505] 67 [2,638] Ø 147 [Ø 5,787] 395 [15,551] [3,150] 67 [2,638] 1079 [42,480] Ø80 [3,15] 1146 [45,118]...
- Page 21 Donatello DN 635 oven technical data | capacity 720mm 28,35 in PIZZA PIZZA TRAY Ø 35 cm [Ø 13.78 in.] Ø 50 cm [Ø 19.69 in.] 60x40 cm [23.62x15.75 in.] Ø PIZZAS HOURLY PRODUCTIVITY Ø 35 cm [Ø 13.78 in.] 60 pizzas chamber height: 140 mm [ 5.51 in.
-
Page 22: Donatello Dn 635L Oven Technical Data | Single Oven
Donatello DN 635L oven technical data | single oven unit of measurement: mm [inch] 1510 [59,449] 1134 [44,646] 1060 [41,732] 10 [0,394] 1500 [59,055] [3,150] 1220 [48,031] 685 [26,969] 95 [3,740] 965 [37,992] 1500 [59,055] 1510 [59,449] 10 [0,394] 1500 [59,055] 64 [2,520] ø85 [3,346] DN 635L single oven weight... - Page 23 Donatello DN 635L oven + KDN 635L hood technical data | hood + single oven unit of measurement: mm [inch] 1455 [57,283] 753 [29,646] 753 [29,646] 1506 [59,291] 1105 [43,502] 67 [2,638] Ø 147 [Ø 5,787] [15,551] [3,150] 67 [2,638] 1439 [56,654] 1506 [59,291] Ø80 [3,15]...
- Page 24 Donatello DN 635L oven technical data | double oven unit of measurement: mm [inch] 1134 [44,646] 1510 [59,449] 1500 [59,055] 10 [0,394] 1060 [41,732] [3,150] 1220 [48,031] 685 [26,969] 1500 [59,055] 965 [37,992] 95 [3,740] 1510 [59,449] 1500 [59,055] 10 [0,394] 64 [2,520] ø85 [3,346] DN 635L double oven weight...
- Page 25 Donatello DN 635L oven + KDN 635L hood technical data | hood + double oven 1455 [57,283] unit of measurement: mm [inch] 753 [29,644] 753 [29,644] 1506 [59,291] 1105 [43,505] 67 [2,638] Ø 147 [Ø 5,787] [15,551] ø80 [3,150] 67 [2,638] 1439 [56,654] 1506 [59,291] Ø80 [3,15]...
- Page 26 Donatello DN 635L oven technical data | triple oven unit of measurement: mm [inch] 1134 [44,646] 1510 [59,449] 1060 [41,732] 10 [0,394] 1500 [59,055] [3,150] 1220 [48,031] 685 [26,969] 1500 [59,055] 965 [37,992] 95 [3,740] 1510 [59,449] 1500 [59,055] 10 [0,394] 64 [2,520] ø85 [3,346] 70 [2,756]...
- Page 27 Donatello DN 635L oven + KDN 635L hood technical data | hood + triple oven unit of measurement: mm [inch] 1455 [57,283] 753 [29,646] 753 [29,646] 1506 [59,291] 1105 [43,505] 67 [2,638] Ø 147 [Ø 5,787] 395 [15,551] [3,150] 67 [2,638] 1439 [56,654] 1506 [59,291] Ø80 [3,15]...
- Page 28 Donatello DN 635L oven technical data | capacity 1080mm 42,40 in PIZZA Ø 35 cm [Ø 13.78 in.] PIZZA Ø 50 cm [Ø 19.69 in.] TRAY 60x40 cm [23.62x15.75 in.] chamber height: 140 mm [ 5.51 in. ] HOURLY Ø PIZZAS PRODUCTIVITY Ø...
-
Page 29: Donatello Dn 935 Oven Technical Data | Single Oven
Donatello DN 935 oven technical data | single oven unit of measurement: mm [inch] 1510 [59,449] 1494 [58,819] 10 [0,394] 1500 [59,055] 1420 [55,906] [3,150] 1045 [41,142] 1220 [48,031] 95 [3,740] 1325 [52,165] 1500 [59,055] 1510 [59,449] 10 [0,394] 1500 [59,055] 64 [2,520] ø85 [3,346] DN 935 single oven weight... - Page 30 Donatello DN 935 oven + KDN 935 hood technical data | hood + single oven unit of measurement: mm [inch] 1815 [71,457] 753 [29,646] 753 [29,646] 1506 [59,291] 1105 [43,502] Ø 147 67 [2,638] [Ø 5,787] [15,551] [3,150] 67 [2,638] 1439 [56,654] Ø80 [3,15] 1506 [59,291]...
- Page 31 Donatello DN 935 oven technical data | double oven unit of measurement: mm [inch] 1510 [59,449] 1494 [58,819] 10 [0,394] 1500 [59,055] 1420 [55,906] [3,150] 1220 [48,031] 1045 [41,142] 1500 [59,055] 95 [3,740] 1325 [52,165] 1510 [59,449] 1500 [59,055] 10 [0,394] 64 [2,520] ø85 [3,346] DN 935 double oven weight...
- Page 32 Donatello DN 935 oven + KDN 935 hood technical data | hood + double oven unit of measurement: mm [inch] 1815 [71,457] 753 [29,644] 753 [29,644] 1506 [59,291] 1105 [43,505] Ø 147 67 [2,638] [Ø 5,787] [15,551] ø80 [3,150] 67 [2,638] 1439 [56,654] Ø80 [3,15] 1506 [59,291]...
- Page 33 Donatello DN 935 oven technical data | triple oven unit of measurement: mm [inch] 1494 [58,819] 1510 [59,449] 1420 [55,906] 10 [0,394] 1500 [59,055] [3,150] 1220 [48,031] 1045 [41,142] 1325 [52,165] 95 [3,740] 1500 [59,055] 1510 [59,449] 1500 [59,055] 10 [0,394] 64 [2,520] ø85 [3,346] 70 [2,756]...
- Page 34 Donatello DN 935 oven + KDN 935 hood technical data | hood + triple oven unit of measurement: mm [inch] 1815 [71,457] 753 [29,646] 753 [29,646] 1506 [59,291] 1105 [43,505] Ø 147 67 [2,638] [Ø 5,787] 395 [15,551] [3,150] 67 [2,638] 1439 [56,654] Ø80 [3,15] 1506 [59,291]...
- Page 35 Donatello DN 935 oven technical data | capacity 1080mm 42,40 in PIZZA Ø 35 cm [Ø 13.78 in.] PIZZA Ø 50 cm [Ø 19.69 in.] TRAY 60x40 cm [23.62x15.75 in.] chamber height: 140 mm [ 5.51 in. ] Ø PIZZAS HOURLY PRODUCTIVITY Ø...
-
Page 36: Installation
INSTALLATION Symbols used in the manual and on Safety instructions • It is forbidden to install the oven in environments at risk of explosion. the labels applied to the machine • Read this guide carefully before installing the • Installation or maintenance that fails to comply appliance, and keep it with care in an accessible Indicates that caution is required when performing with the instructions in this manual may cause... -
Page 37: Transport
Installation Transport Fig. 5 Fitted with personal protection equipment, transport the appli- ance to the installation location. Use a suitable vehicle capable of withstanding the weight of the same. Model single double Model single double DN435 147 kg - 324 lb 252 kg - 555.5 lb DN635L 190 kg - 418.8 lb 324 kg - 714.2 lb... -
Page 38: Positioning
Installation Positioning Fig. 8 The positioning room must comply with the instructions pro- and 5. Comply with the measure- vided on pages min. 50 mm ments shown in the figure. [1.97 in.] min. 500 mm Fig. 9 [19,7 in.] The oven must be placed on a base, built by the Manufacturer or by yourself that: •... -
Page 39: Serial Number Plate Reading
Installation Serial number plate reading Year of production The serial number is on the right hand side of the appliance. Model It provides important technical information that is vital in case of a request for maintenance or repair of the appliance: please do not remove, damage or modify it. -
Page 40: Electrical Connection
Installation Electrical connection Fig. 12 Fig. 12 The electrical connection must be carried out ex- clusively by qualified personnel after reading the safety warnings at the beginning of the manual. Before connecting the oven, check that the sys- tems comply with the regulations in force in the country where it is going to be used and with the specifications indicated on the appliance rating plate on the RH side of the oven. - Page 41 Installation The Manufacturer accepts no liability for failure to comply with the above. If required, the cable must be replaced by the Dealer or its technical service or by a person with similar qualifications to prevent any risk. Electrical data tables on page Fig.
- Page 42 Installation AC 230 mod. CD T6,3AL250V Abbreviation Description CTRL Oven control board Fuses Top elements half power Top elements full power Bottom elements half power Top elements full power Safety contactor Cooking chamber lights Board cooling fan motor RA1,2,3 Top heating elements RB1,2,3 Bottom heating elements Safety thermostat...
- Page 43 Installation AC 3 230 mod. CD 6,3AL230V 6,3AL250V Abbreviation Description CTRL Oven control board Fuses Top elements half power Top elements full power Bottom elements half power Top elements full power Safety contactor Cooking chamber lights Board cooling fan motor RA1,2,3 Top heating elements RB1,2,3...
- Page 44 Installation AC 3 N400 mod. CD Θ Abbreviation Description A.SF Flue added board Power control input CTRL Oven control board Fuses Top elements half power Top elements full power Bottom elements half power Top elements full power Safety contactor Cooking chamber lights Board cooling fan motor Transformer 50VA, 230/12V AC RA1,2,3...
- Page 45 Installation AC 230 mod. D 230 Vac 50/60 Hz 0,11/0,09 A Θ T6,3AL230V BF26 1 sc. 16 A ON/OFF Abbreviation Description Main contactor F1AL250V F315mAL250V CTRL.B Control board Noise filter Fuses Light relay PW.B Cooking chamber lights CTRL.B. PW.B Power board MICROPROCESSOR RA1,2,3 Top heating elements...
- Page 46 Installation AC 3 N400 mod. D 230 Vac 50/60 Hz 0,11/0,09 A Θ BF09 In=09A I55°C=20A 1 sc. 16 A Abbreviation Description CTRL.B Oven control board Noise filter Fuses ON/OFF Digital input for remote ignition Lights 16A mini relay F1AL250V F315mAL250V Elements supply contactor Cooking chamber lights...
- Page 47 Installation AC 3 230 230 Vac mod. D 50/60 Hz 0,11/0,09 A Θ T6,3AL230V BF26 1 sc. 16 A Abbreviation Description ON/OFF Safety thermostat CTRL.B Control board F1AL250V F315mAL250V Noise filter Fuses Light relay Main contactor Cooking chamber lights PW.B CTRL.B.
- Page 48 Installation AC 3 208 L3 L2 L1 mod. CD L1 L2 L3 L1 L2 L3 Abbreviation Description L1 L2 L3 L1 L2 L3 CTRL.B Oven control board CTRL.SF Flue added board Fuses Safety contactor BF09-MC09 Top res. half power BF09-MC09 Top res.
-
Page 49: Pre-Testing And Final Inspection
Installation Pre-testing and final inspection √ Positioning checks Reference chapter on page... The oven is checked and tested in the Manufacturer’s plant be- Is the installation room adequate and compliant with regulations? (correct ven- fore being delivered to the customer. tilation, maximum/minimum temperature, etc.) The “production process check sheet”... -
Page 50: Maintenance And Cleaning
MAINTENANCE AND CLEANING Warnings Oven cleaning switch off the Before any cleaning, it is necessary to CLEANING THE EXTERNAL STEEL PARTS power to the appliance (acting on the system switch) and Use a cloth dampened with hot soapy water and end with rins- wear suitable personal protection equipment (e.g. - Page 51 Maintenance and cleaning CLEANING THE CHAMBER WITH THE PYROLYSIS FUNCTION Pyrolysis is a thermochemical crystallization process of food residues that have deposited in the cooking chamber, which takes place by bringing the oven up to 400 °C - 752 °F. Before starting the pyrolysis, remove the coarser food residues with a natural fibre brush.
-
Page 52: Replacing Components
Maintenance and cleaning Replacing components The user must replace only the stated compo- nents: in case of a fault or for extraordinary mainte- nance, contact the Dealer, requesting service from an authorised technician. As replacements, always use original spare parts to be requested from the Manufacturer: using non... -
Page 53: Diagnostics
DIAGNOSTICS Diagnostics display A (mod. CD) orB (mod. D) In case of any faults or malfunctioning, the of the boards can show the following error - alarm messages: Error messages - alarms for mod. CD Displayed Oven behaviour Solution code The heater thermocouple is disconnected or faulty Contact The board and cold coupling temperature probe is faulty... - Page 54 CUPPONE since 1963 CUPPONE S.R.L. Via Sile, 36 31057 Silea (TV) - ITALY T +39 0422 361143 F +39 0422 360993 info@cuppone.com - www.cuppone.com...
Need help?
Do you have a question about the Donatello DN 435 and is the answer not in the manual?
Questions and answers