Hotpoint Ariston PKL 741 D2/T/IX/HA Operating Instructions Manual
Hide thumbs
Also See for PKL 741 D2/T/IX/HA:
- Operating instructions manual (64 pages) ,
- Operating instructions manual (64 pages)
Table of Contents
Advertisement
Available languages
Available languages
Quick Links
PKL 741 D2/T/IX/HA
PKLL 751 T/IX/HA
PKL 752 T/EX/HA
PKL 751 T/IX/HA
PKL 752 T/IX/HA
PKL 752 IX/HA
Italiano
Istruzioni per l'uso
PIANO
Sommario
Istruzioni per l'uso,1
Avvertenze,3
Assistenza,7
Descrizione dell'apparecchio,9
Installazione,11
English
Operating Instructions
HOB
Contents
Operating Instructions,1
Warnings,3
Assistance,7
Description of the appliance,9
Installation,18
Mode d'emploi
TABLE DE CUISSON
Sommaire
Mode d'emploi,1
Avertissements,4
Assistance,7
Description de l'appareil,9
Installation,25
Español
Manual de instrucciones
ENCIMERA
Sumario
Manual de instrucciones,1
Advertencias,4
Asistencia,7
Descripción del aparato,9
Portuges
Instruções para a utilização
Índice
Instruções para a utilização,1
Advertências,5
Assistência,8
Descrição do aparelho,10
Français
Advertisement
Table of Contents

Related Manuals for Hotpoint Ariston PKL 741 D2/T/IX/HA


Summary of Contents for Hotpoint Ariston PKL 741 D2/T/IX/HA
-
Page 1: Table Of Contents
PKL 741 D2/T/IX/HA PKLL 751 T/IX/HA PKL 752 T/EX/HA PKL 751 T/IX/HA PKL 752 T/IX/HA PKL 752 IX/HA Français Mode d’emploi TABLE DE CUISSON Sommaire Mode d’emploi,1 Avertissements,4 Assistance,7 Description de l’appareil,9 Installation,25 Mise en marche et utilisation,31 Précautions et conseils,31 Nettoyage et entretien,32 Anomalies et remèdes,33... - Page 2 Deutsch Bedienungsanleitung KOCHMULDE Inhaltsverzeichnis Bedienungsanleitung,2 Hinweise,5 Kundendienst,8 Beschreibung Ihres Gerätes,10 Installation,48 Inbetriebsetzung und Gebrauch,53 Vorsichtsmaßregeln und Hinweise,54 Reinigung und Pflege,54 Störungen und Abhilfe,55 Nederlands Gebruiksaanwijzing KOOKPLAAT Inhoud Gebruiksaanwijzing,2 Belangrijk,6 Service,8 Beschrijving van het apparaat,10 Het installeren,56 Starten en gebruik,61 Voorzorgsmaatregelen en advies,61 Onderhoud en verzorging,62 Storingen en oplossingen,63...
- Page 3 Avvertenze Warnings ATTENZIONE: Questo apparecchio e le sue parti WARNING: The appliance and its accessible parts accessibili diventano molto caldi durante l’uso. become hot during use. Care should be taken to Bisogna fare attenzione ed evitare di toccare gli avoid touching heating elements. Children less than 8 elementi riscaldanti.
- Page 4 ATTENTION : l’utilisation de protections de table inappropriées peut causer des incendies. Avertissements ATTENTION : Cet appareil ainsi que ses parties Advertencias accessibles deviennent très chauds pendant leur fonctionnement. Il faut faire attention à ne pas toucher ATENCIÓN: Este aparato y sus partes accesibles se les éléments chauffants.
- Page 5 Advertências Hinweise ATENÇÃO: Este aparelho e as suas partes ZUR BEACHTUNG: Bei Gebrauch wird dieses acessíveis aquecem muito durante a utilização. Gerät und alle zugänglichen Teile sehr heiß. É preciso ter atenção e evitar tocar os elementos Es ist darauf zu achten, dass die Heizelemente que aquecem.
- Page 6 Belangrijk PAS OP: Dit apparaat en zijn bereikbare onderdelen worden tijdens gebruik zeer heet. Zorg ervoor de verwarmende elementen niet aan te raken. Zorg ervoor dat kinderen die kleiner dan 8 jaar oud zijn niet dichtbij het apparaat kunnen komen, tenzij onder constant toezicht.
- Page 7 Assistenza Assistance Comunicare: Communicating: • il tipo di anomalia • type of trouble • il modello della macchina (Mod.) • appliance model (Mod.) • il numero di serie (S/N) • serial number (S/N) Queste ultime informazioni si trovano sulla targhetta caratteristiche posta This information is found on the data plate located on the appliance and/or sull’apparecchio.
- Page 8 Assistência Comunique: • o tipo de falha • o modelo da máquina (Mod.) • o número de série (S/N) Estas últimas informações encontram-se na placa de identificação situada no aparelho e/ou na embalagem. Kundendienst Geben Sie bitte Folgendes an: • die Fehlerart •...
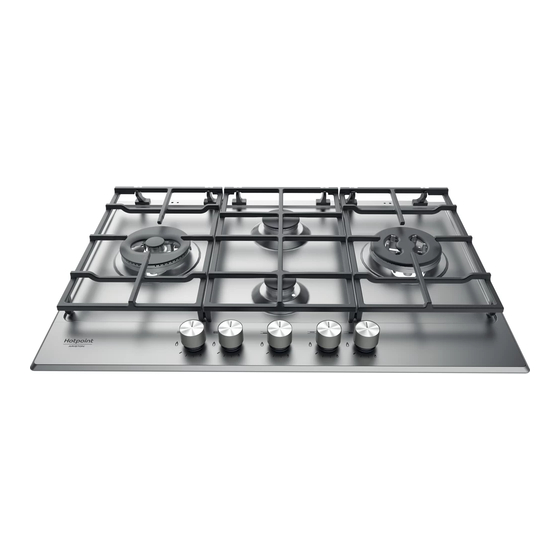
- Page 9 Descrizione dell’apparecchio Description de l’appareil Vista d’insieme Vue d’ensemble 1. Griglie di appoggio per RECIPIENTI DI COTTURA 1. Grilles support de CASSEROLES 2. BRUCIATORI GAS 2. BRÛLEURS À GAZ 3. Manopole di comando dei BRUCIATORI GAS 3. Manettes de commande des BRÛLEURS GAZ 4.
- Page 10 Descrição do aparelho Beschrijving van het apparaat Vista de conjunto Algemeen aanzicht 1. Grades de suporte para RECIPIENTES DE COZEDURA 1. Roosters voor PANNEN 2. QUEIMADORES A GÁS 2. GASBRANDERS 3. Selectores de comando dos QUEIMADORES A GÁS 3. Knoppen voor het regelen van de GASBRANDERS 4.
- Page 11 Installazione il bidone in utilizzo, collocato in modo da non essere soggetto all’azione diretta di sorgenti di calore (forni, camini, stufe, ecc.) capaci di portarlo a temperature superiori ai 50°C. ! È importante conservare questo libretto per poterlo consultare in ogni momento.
- Page 12 ! Usare i ganci contenuti nella “confezione accessori” • la presa sia compatibile con la spina dell’apparecchio. in caso contrario sostituire la presa o la spina; non usare prolunghe e multiple. • Nel caso in cui il piano non sia installato su di un forno incasso, è ! Ad apparecchio installato, il cavo elettrico e la presa della corrente devono necessario inserire un pannello di legno come isolamento.
- Page 13 4. Al termine dell’operazione, sostituite la vecchia etichetta taratura con 6. Nel caso di manopole con regolazione discreta e visualizzazione a led quella corrispondente al nuovo gas d’utilizzo, reperibile presso i Nostri posizionare la manopola in posizione di minino poi togliere la manopola Centri Assistenza Tecnica.
- Page 14 (2) Solo per DCDR doppio comando A 15°C e 1013,25 mbar-gas secco Propano P.C.S. = 50.37 MJ/Kg Butano P.C.S. = 49.47 MJ/Kg Naturale P.C.S. = 37.78 MJ/m³ PKL 752 IX/HA PKL 741 D2/T/IX/HA PKL 752 T/IX/HA PKL 751 T/IX/HA PKLL 751 T/IX/HA PKL 752 T/EX/HA...
-
Page 15: Avvio E Utilizzo,15
Avvio e utilizzo Doppio comando: Ogni corona che compone il bruciatore ha una sua manopola di comando: la manopola individuata dal simbolo controlla la corona esterna; ! Su ciascuna manopola è indicata la posizione del bruciatore gas la manopola individuata dal simbolo controlla la corona interna. -
Page 16: Manutenzione E Cura,16
Sicurezza generale nulla (solo nei negozi con superficie di vendita superiore a 400 mq). Per ulteriori informazioni sulla corretta dismissione degli elettrodomestici i • Questo apparecchio riguarda un apparecchio da incasso di classe detentori potranno rivolgersi al servizio pubblico preposto o ai rivenditori. •... -
Page 17: Anomalie E Rimedi,17
Attenzione a non poggiare le griglie calde sul coperchio in vetro (se I recipienti sono instabili. presente) onde evitare che i gommini sul vetro si danneggino. Avete controllato se: • Il fondo del recipiente è perfettamente piano. • Il recipiente è centrato sul bruciatore o sulla piastra elettrica. •... - Page 18 Installation Fitting the appliance The following precautions must be taken when installing the hob: • Kitchen cabinets adjacent to the appliance and taller than the top of the ! Before operating your new appliance please read this instruction booklet hob must be at least 200 mm from the edge of the hob. carefully.
- Page 19 ! Once the appliance has been installed, the power supply cable and the • Where the hob is not installed over a built-in oven, a wooden panel must be installed as insulation. This must be placed at a minimum distance of electrical socket must be easily accessible.
- Page 20 2. Unscrew the burers with a 7 mm wrench spanner. The internal burner • Remove the knob and intervene on the adjustment screw located near has a nozzle, the external burner has two (of the same size). Replace the tap pin. the nozzle with models suited to the new type of gas (see table 1).
- Page 21 At 15°C and 1013,25 mbar - dry gas Propane P.C.S. = 50.37 MJ/Kg Butane P.C.S. = 49.47 MJ/Kg Natural P.C.S. = 37.78 MJ/m³ PKL 752 IX/HA PKL 741 D2/T/IX/HA PKL 752 T/IX/HA PKL 751 T/IX/HA PKLL 751 T/IX/HA PKL 752 T/EX/HA...
-
Page 22: Start-Up And Use,22
Start-up and use To activate any one of the two rings, press the corresponding knob and turn it anti-clockwise to the maximum power setting . ! The position of the corresponding gas burner is shown on every knob. In order to use the double-flame burner to its full potential, avoid simultaneously setting the inner ring to minimum power and the outer Gas cooker hobs are equipped with discrete power adjustment that allows ring to maximum power. -
Page 23: Maintenance And Care,23
Maintenance and care • The appliance must not be installed outdoors, even in covered areas. It is extremely dangerous to leave the appliance exposed to rain and storms. • Do not touch the appliance with bare feet or with wet or damp hands and Switching the appliance off feet. -
Page 24: Troubleshooting,24
! Never use aggressive detergents or coarse sponges because they can cause irreversible damage to the special protection treatment with formation of irremovable stains and halos. Gas tap maintenance Over time, the taps may become jammed or difficult to turn. If this happens, the tap must be replaced. - Page 25 Installation ou une aération plus efficace, en augmentant la puissance d’aspiration mécanique si déjà prédisposée. • (Pour la France et la Belgique) Les gaz de pétrole liquéfiés, plus ! Conservez ce mode d’emploi pour pouvoir le consulter à tout moment. lourds que l’air, se déposent et stagnent vers le bas.
- Page 26 ! L’installateur est responsable du bon raccordement électrique de l’appareil Devant et du respect des normes de sécurité. Avant de procéder au branchement, assurez-vous que : • la prise est bien munie d’une terre conforme à la loi; • la prise est bien apte à supporter la puissance maximale de l’appareil, indiquée sur la plaquette signalétique;...
- Page 27 Raccordement par tuyau flexible en acier inox, à paroi continue avec raccords filetés Le raccord d’entrée du gaz à l’appareil est fileté 1/2 gaz mâle cylindrique. La mise en œuvre de ces tuyaux doit être effectuée de façon à ce que, même au maximum de leur extension, ils ne dépassent pas 2000 mm de long.
- Page 28 PLAQUETTE SIGNALETIQUE Raccordements voir plaquette signalétique électriques Cet appareil est conforme aux Directives Communautaires suivantes : - 2006/95/CE du 12/12/06 (Basse Tension) et modifications successives - 2004/108/CE du 15/12/04 (Compatibilité Electromagnétique) et modifications successives - 93/68/CEE du 22/07/93 et modifications successives.
- Page 29 Caractéristiques des brûleurs et des injecteurs Tableau 1 (Pour la France et la Belgique) Gaz liquidés Gaz natural Brûleur Diamêtre Puissance Puissance By-pass Injecteur Débit * Injecteur Puissance Débit * Puissance Débit * thermique thermique 1/100 1/100 (g/h) 1/100 thermique (g/h) thermique (l/h)
- Page 30 A 15°C et 1013,25 mbar-gaz sec Propane P.C.S. = 50,37 MJ/kg Butane P.C.S. = 49,47 MJ/kg Naturel P.C.S. = 37,78 MJ/m³ Naturel P.C.S. = 32,49 MJ/m³ PKL 752 IX/HA PKL 741 D2/T/IX/HA PKL 752 T/IX/HA PKL 751 T/IX/HA PKLL 751 T/IX/HA PKL 752 T/EX/HA...
-
Page 31: Mise En Marche Et Utilisation,31
Mise en marche et utilisation la manette caractérisée par le symbole contrôle l’anneau extérieur; la manette caractérisée par le symbole contrôle l’anneau intérieur; ! La position du brûleur gaz correspondante est indiquée sur chaque manette. Pour allumer la couronne souhaitée, appuyer sur la manette correspondante en tournant dans le sens inverse des aiguilles d’une montre jusqu’à... -
Page 32: Nettoyage Et Entretien,32
Economies et respect de l’environnement les points indiqués dans le paragraphe relatif à leur “Positionnement” soient respectés. • Faites cuire vos aliments dans des casseroles ou des poêles à couvercle • Les instructions fournies ne sont applicables qu’aux pays dont et utilisez le moins d’eau possible. -
Page 33: Anomalies Et Remèdes,33
! Pas besoin de retirer les grilles pour nettoyer la surface du plan de cuisson. Le brûleur s’éteint quand il est réglé sur la position de minimum. Grâce à leur système de support, il suffit de soulever les grilles et de les garder Avez-vous contrôlé... -
Page 34: Instalación,34
Instalación botellas de GPL, vacías o parcialmente llenas, no deben ser instaladas o depositadas en ambientes o espacios a un nivel más bajo del suelo (sótanos, etc.) Es conveniente conservar en el ambiente sólo la botella que ! Es importante conservar este manual para poder consultarlo en todo se está... - Page 35 Adelante los contactos de 3 mm., dimensionado para esa carga y que responda a las normas vigentes (el conductor de tierra no debe ser interrumpido por el interruptor). El cable de alimentación eléctrica se debe colocar de modo tal que no alcance en ningún punto una temperatura que supere en 50°C la temperatura ambiente.
- Page 36 Control de la estanqueidad • Regulación de los mínimos ! Finalizada la instalación, controle la perfecta estanqueidad de todas las 1. Lleve la llave hasta la posición de mínimo; uniones utilizando una solución jabonosa pero nunca una llama. 2. Quite el mando y accione el tornillo de Adaptación a los distintos tipos de gas regulación situado en el interior o al costado Para adaptar la encimera a un tipo de gas diferente de aquel para el que fue...
- Page 37 (2) Sólo para DCDR doble comando A 15°C y 1013,25 mbar-gas seco Propano P.C.S. = 50.37 MJ/Kg Butano P.C.S. = 49,47 MJ/Kg Natural P.C.S. = 37.78 MJ/m³ PKL 752 IX/HA PKL 741 D2/T/IX/HA PKL 752 T/IX/HA PKL 751 T/IX/HA PKLL 751 T/IX/HA PKL 752 T/EX/HA...
-
Page 38: Puesta En Funcionamiento Y Uso,38
Puesta en funcionamiento y uso Doble mando: Cada corona que compone el quemador tiene su mando: el mando identificado con el símbolo controla la corona externa; ! En cada mando está indicada la posición del quemador a gas el mando identificado con el símbolo controla la corona interna. -
Page 39: Mantenimiento Y Cuidados,39
Seguridad general Ahorrar y respetar el medioambiente • Este aparato se refiere a un aparato empotrable de clase 3. • Cocine los alimentos en ollas o sartenes cerrados con tapas que ajusten • Para su correcto funcionamiento, los aparatos a gas necesitan un bien y usen la menor cantidad de agua posible. -
Page 40: Anomalías Y Soluciones,40
Tenga cuidado de no apoyar las rejillas calientes sobre la tapa de vidrio Los recipientes no permanecen estables. (si existe) para evitar que se dañen los tapones de goma del vidrio. Controle si: • El fondo del recipiente es perfectamente plano. •... -
Page 41: Plano
Instalação colocado de maneira a não ser sujeito à acção directa de fontes de calor (fornos, chaminés, esquentadores etc.) capazes de chegar a temperaturas superiores a 50°C. ! É importante guardar este folheto para poder consultá-lo a qualquer momento. No caso de venda, cessão ou mudança, assegure-se que o Encaixe mesmo permanece com o aparelho para informar o novo proprietário sobre Para instalar correctamente o plano de cozedura é... - Page 42 ! Utilize os ganchos fornecidos dentro da “embalagem dos acessórios”. • a tomada seja compatível com a ficha do aparelho. em caso contrário, substitua a tomada ou a ficha; não empregue extensões nem tomadas • Se o plano de cozedura não for instalado sobre um forno de encaixar, múltiplas.
- Page 43 3. Monte outra vez as partes, realizando estas operações na ordem contrária. 5. Depois de realizar a regulação, restabeleça os lacres situados nos ‘by- 4. No final da operação, troque a velha etiqueta de calibragem por outra pass’ com cera lacre ou materiais equivalentes. corresponda ao novo tipo de gás utilizado, que se encontram nos nossos 6.
- Page 44 (2) Apenas para DCDR de duplo comando A 15°C e 1013,25 mbars-gás seco Propano P.C.S. = 50,37 MJ/Kg. Butano P.C.S. = 49,47 MJ/Kg. Natural P.C.S. = 37,78 MJ/m³ PKL 752 IX/HA PKL 741 D2/T/IX/HA PKL 752 T/IX/HA PKL 751 T/IX/HA PKLL 751 T/IX/HA PKL 752 T/EX/HA...
-
Page 45: Início E Utilização,45
Início e utilização Duplo comando: Cada coroa que compõe o queimador tem um botão de comando: o botão indicado pelo símbolo controla a coroa externa; ! Em cada selector está indicada a posição do queimador de gás o botão indicado pelo símbolo controla a coroa interna. -
Page 46: Manutenção E Cuidados,46
Segurança geral Os consumidores devem contactar as autoridades locais ou os pontos de venda para solicitar informação referente ao local apropriado onde devem • Este aparelho refere-se a um aparelho de encaixar de classe 3 depositar os electrodomésticos velhos. • Para os aparelhos a gás funcionarem correctamente é necessário uma troca de ar regular do ambiente. -
Page 47: Anomalias E Soluções,47
! Para limpar a superfície do plano não é necessário remover as grelhas. O queimador em posição de mínimo não permanece aceso. Graças ao sistema de suporte, basta levantar as grelhas e segurá-las ou Foi controlado se: rodá-las até as apoiar num suporte posterior. •... - Page 48 Installation • Die Flüssiggase, die schwerer als Luft sind, stauen sich im unteren Raumbereich. Räume, in denen Gasflaschen mit GPL-Flüssiggas gelagert werden, müssen demnach in Bodenhöhe mit geeigneten ! Bewahren Sie diese Bedienungsanleitung bitte sorgfältig auf, damit Sie sie Abzugsöffnungen ins Freie ausgestattet werden, damit das Gas im jederzeit zu Rate ziehen können.
- Page 49 Haken-Befestigungsschema über einem Einbaubackofen installiert, müssen der Elektroanschluss der Kochmulde sowie der des Backofens getrennt voneinander vorgenommen werden. Dadurch wird eine ausreichende elektrische Sicherheit gewährleistet und das Herausziehen des Backofens erleichtert. Anschluss des Versorgungskabels an das Stromnetz Versehen Sie das Netzkabel mit einem Normstecker für die auf dem Position der Haken für Position der Haken für Typenschild angegebene Belastung (siehe nebenstehende Tabelle).
- Page 50 Austausch der Düsen des Brenner mit Dreifachkrone Anschluss mittels eines starren Anschlussrohres (Kupfer oder Stahl) ! Der Anschluss an die Gasleitung muss so durchgeführt werden, dass das 1. Die Kochfeldroste abnehmen und die Brenner aus ihren Sitzen Gerät keinerlei Zugspannungen ausgesetzt wird. herausnehmen.
- Page 51 TYPENSCHILD Elektrischer siehe Typenschild Anschluss Dieses Gerät entspricht den folgenden EG-Richtlinien: - 2006/95/EG vom 12/12/06 (Niederspannung) und nachfolgenden Änderungen - 2004/108/EG vom 15/12/04 (elektromagnetische Verträglichkeit) und nachfolgenden Änderungen - 93/68/EWG vom 22.07.93 und nachfolgenden Änderungen. - 2009/142/EG vom 30.11.09 und nachfolgenden Änderungen.
- Page 52 Heizwert = 50,37 MJ/kg Butan oberer Heizwert = 49,47 MJ/kg Erdgas oberer Heizwert = 37,78 MJ/m³ Erdgas oberer Heizwert = 32,49 MJ/m³ PKL 752 IX/HA PKL 741 D2/T/IX/HA PKL 752 T/IX/HA PKL 751 T/IX/HA PKLL 751 T/IX/HA PKL 752 T/EX/HA...
- Page 53 Inbetriebsetzung und Gebrauch Da der Brenner mit einer Sicherheitsvorrichtung ausgestattet ist, muss der Reglerknopf für ca. 2-3 Sekunden gedrückt werden, bis die Sicherheitsvorrichtung, dank derer die Flamme automatisch gezündet wird ! Auf jedem Reglerknopf ist gekennzeichnet, welcher Gasflamme er entspricht. und eingeschaltet bleibt, heiß...
- Page 54 Vorsichtsmaßregeln und Hinweise • Gemäß der Europäischen Richtlinie 2012/19/EU über Elektro- und Elektronik-Altgeräte (WEEE) dürfen Elektrohaushalts-Altgeräte nicht über den herkömmlichen Haushaltsmüllkreislauf entsorgt werden. ! Das Gerät wurde entsprechend den strengsten internationalen Altgeräte müssen separat gesammelt werden, um die Wiederverwertung Sicherheitsvorschriften entworfen und gebaut. Nachstehende Hinweise und das Recycling der beinhalteten Materialien zu optimieren und die werden aus Sicherheitsgründen geliefert und sollten aufmerksam gelesen Einflüsse auf die Umwelt und die Gesundheit zu reduzieren.
- Page 55 • Bei Modellen mit elektrischen Zündsteckern und Sicherheitsvorrichtung Bei den mit Sicherheitsvorrichtungen versehenen Modellen erlischt muss das Steckerende sorgfältig gereinigt werden, um eine korrekte die Flamme. Funktion sicherzustellen. Prüfen Sie diese Bauteile häufig und reinigen Sie Bitte kontrollieren Sie, ob: sie ggf.
- Page 56 Het installeren hebben voor het afvoeren van eventueel ontsnapt gas. Lege of halfvolle LPG-flessen mogen dus niet worden geïnstalleerd of bewaard in vertrekken die lager liggen dan de vloer (kelders, enz.). Het is beter alleen ! Bewaar dit boekje zorgvuldig voor eventuele verdere raadpleging. Wanneer de in gebruik zijnde fles in het vertrek te bewaren, zodanig geplaatst dat u het product weggeeft, verkoopt, of wanneer u verhuist, dient u dit boekje hij niet in rechtstreeks contact staat met warmtebronnen (oven, open...
- Page 57 Voor mag niet worden onderbroken door de schakelaar). De voedingskabel moet zodanig worden geplaatst dat hij nergens een temperatuur bereikt van 50°C hoger dan de kamertemperatuur. ! De installateur is verantwoordelijk voor een correcte elektrische aansluiting en het in acht nemen van de veiligheidsnormen. Voor het aansluiten moet u controleren dat: •...
- Page 58 Aansluiting met een roestvrije stalen flexibele buis aan een onafgebroken wand voorzien van aanhechtingen met schroefdraad. Het verbindingsstuk waardoor het gas toegang krijgt tot het fornuis is voorzien van schroefdraad: 1/2 gas cilindrische schroefbout. De in werking stelling van deze buizen moet zodanig worden bewerkstelligd dat hun lengte in uitgerolde toestand niet meer dan 2000 mm is.
- Page 59 TYPEPLAATJE Elektrische zie typeplaatje aansluitingen Dit apparaat voldoet aan de volgende EU Richtlijnen: - 2006/95/EG van 12/12/06 (Laagspanning) en daaropvolgende wijzigingen - 2004/108/EG van 15/12/04 (Elektromagnetische Compatibiliteit) en daaropvolgende wijzigingen - 93/68/EG van 22/07/93 en daaropvolgende wijzigingen. - 2009/142/EG van 30/11/09 (Gas) en daaropvolgende wijzigingen.
- Page 60 Propane P.C.S. = 50,37 MJ/kg Butane P.C.S. = 49,47 MJ/kg Naturele G20 P.C.S. = 37,78 MJ/m³ Naturele G25 P.C.S. = 32,49 MJ/m³ PKL 752 IX/HA PKL 741 D2/T/IX/HA PKL 752 T/IX/HA PKL 751 T/IX/HA PKLL 751 T/IX/HA PKL 752 T/EX/HA...
- Page 61 Starten en gebruik Dubbele bediening: Iedere vlamkroon van de brander heeft zijn eigen bedieningsknop: de knop met het symbool bedient de buitenste vlamkroon; ! Op iedere knop staat aangegeven waar de gasbrander zich precies bevindt. de knop met het symbool bedient de binnenste vlamkroon.
- Page 62 Algemene veiligheidsmaatregelen Energiebesparing en milieubehoud • Dit is een inbouwapparaat van klasse 3. • Bereid uw etenswaren in afgesloten potten of pannen met goed passende • Gasfornuizen hebben voor een goede werking behoefte aan een deksels en gebruik zo weinig mogelijk water. Koken zonder deksel zal het regelmatige luchtverversing.
- Page 63 Zorg ervoor de warme roosters nooit op het glazen deksel te leggen De pannen zijn wankel. (indien aanwezig) om te voorkomen dat de rubberen elementen van Heeft u gecontroleerd of: het glas worden beschadigd. • De bodem van de pan helemaal plat is. •...
- Page 64 195140975.01 02/2016 - XEROX FABRIANO Indesit Company S.p.A. Viale Aristide Merloni,47 60044 Fabriano (AN) www.hotpoint.eu...
Need help?
Do you have a question about the PKL 741 D2/T/IX/HA and is the answer not in the manual?
Questions and answers