Table of Contents
Advertisement
Available languages
Available languages
Quick Links
PKL 641 D2/IX/HA
PKL 642 D2/IX/HA
PKL 642 D2/IX/HAR
PKL 751 D2/IX/HA
Italiano
Istruzioni per l'uso
PIANO
Sommario
Istruzioni per l'uso,1
Avvertenze,3
Assistenza,7
Descrizione dell'apparecchio,9
Installazione,11
English
Operating Instructions
HOB
Contents
Operating Instructions,1
Warnings,3
Assistance,7
Description of the appliance,9
Installation,18
Start-up and use,22
Precautions and tips,22
Maintenance and care,23
Troubleshooting,24
Mode d'emploi
TABLE DE CUISSON
Sommaire
Mode d'emploi,1
Avertissements,4
Assistance,7
Description de l'appareil,9
Installation,25
Mise en marche et utilisation,30
Español
Manual de instrucciones
ENCIMERA
Sumario
Manual de instrucciones,1
Advertencias,4
Asistencia,7
Descripción del aparato,9
Portuges
Instruções para a utilização
Índice
Instruções para a utilização,1
Advertências,5
Assistência,8
Descrição do aparelho,10
Instalação,40
Français
Advertisement
Table of Contents

Related Manuals for Hotpoint Ariston PKL 641 D2/IX/HA


Summary of Contents for Hotpoint Ariston PKL 641 D2/IX/HA
-
Page 1: Table Of Contents
PKL 641 D2/IX/HA PKL 642 D2/IX/HA PKL 642 D2/IX/HAR PKL 751 D2/IX/HA Français Mode d’emploi TABLE DE CUISSON Sommaire Mode d’emploi,1 Avertissements,4 Assistance,7 Description de l’appareil,9 Installation,25 Mise en marche et utilisation,30 Précautions et conseils,31 Nettoyage et entretien,31 Anomalies et remèdes,32 Italiano Español... - Page 2 Deutsch Bedienungsanleitung KOCHMULDE Inhaltsverzeichnis Bedienungsanleitung,2 Hinweise,5 Kundendienst,8 Beschreibung Ihres Gerätes,10 Installation,47 Inbetriebsetzung und Gebrauch,51 Vorsichtsmaßregeln und Hinweise,52 Reinigung und Pflege,52 Störungen und Abhilfe,53 Nederlands Gebruiksaanwijzing KOOKPLAAT Inhoud Gebruiksaanwijzing,2 Belangrijk,6 Service,8 Beschrijving van het apparaat,10 Het installeren,54 Starten en gebruik,59 Voorzorgsmaatregelen en advies,60 Onderhoud en verzorging,60 Storingen en oplossingen,61 Українська...
- Page 3 Avvertenze Warnings ATTENZIONE: Questo apparecchio e le sue parti WARNING: The appliance and its accessible parts accessibili diventano molto caldi durante l’uso. become hot during use. Care should be taken to Bisogna fare attenzione ed evitare di toccare gli avoid touching heating elements. Children less than 8 elementi riscaldanti.
- Page 4 ATTENTION : l’utilisation de protections de table inappropriées peut causer des incendies. Avertissements ATTENTION : Cet appareil ainsi que ses parties Advertencias accessibles deviennent très chauds pendant leur fonctionnement. Il faut faire attention à ne pas toucher ATENCIÓN: Este aparato y sus partes accesibles se les éléments chauffants.
- Page 5 Advertências Hinweise ATENÇÃO: Este aparelho e as suas partes ZUR BEACHTUNG: Bei Gebrauch wird dieses acessíveis aquecem muito durante a utilização. Gerät und alle zugänglichen Teile sehr heiß. É preciso ter atenção e evitar tocar os elementos Es ist darauf zu achten, dass die Heizelemente que aquecem.
- Page 6 Belangrijk Запобіжні заходи PAS OP: Dit apparaat en zijn bereikbare onderdelen УВАГА! Під час роботи цей прилад, а також worden tijdens gebruik zeer heet. Zorg ervoor de його доступні частини нагріваються до високих verwarmende elementen niet aan te raken. Zorg температур.
- Page 7 Assistenza Assistance Comunicare: Communicating: • il tipo di anomalia • type of trouble • il modello della macchina (Mod.) • appliance model (Mod.) • il numero di serie (S/N) • serial number (S/N) Queste ultime informazioni si trovano sulla targhetta caratteristiche posta This information is found on the data plate located on the appliance and/or sull’apparecchio.
- Page 8 Assistência Comunique: • o tipo de falha • o modelo da máquina (Mod.) • o número de série (S/N) Estas últimas informações encontram-se na placa de identificação situada no aparelho e/ou na embalagem. Kundendienst Geben Sie bitte Folgendes an: • die Fehlerart •...
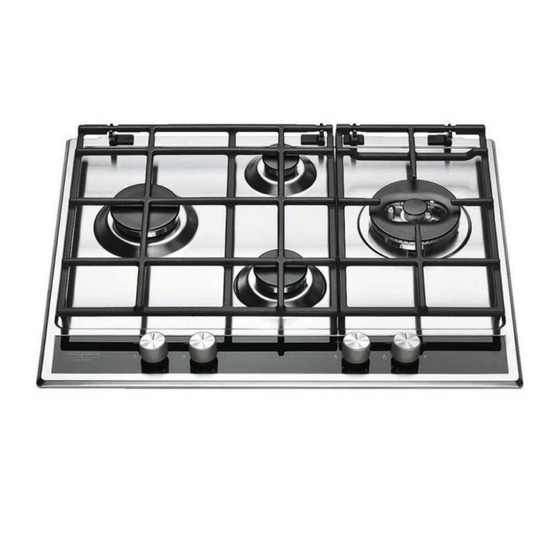
- Page 9 Descrizione dell’apparecchio Description de l’appareil Vista d’insieme Vue d’ensemble 1. Griglie di appoggio per RECIPIENTI DI COTTURA 1. Grilles support de CASSEROLES 2. BRUCIATORI GAS 2. BRÛLEURS À GAZ 3. Manopole di comando dei BRUCIATORI GAS 3. Manettes de commande des BRÛLEURS GAZ 4.
- Page 10 Descrição do aparelho Beschrijving van het apparaat Vista de conjunto Algemeen aanzicht 1. Grades de suporte para RECIPIENTES DE COZEDURA 1. Roosters voor PANNEN 2. QUEIMADORES A GÁS 2. GASBRANDERS 3. Selectores de comando dos QUEIMADORES A GÁS 3. Knoppen voor het regelen van de GASBRANDERS 4.
- Page 11 Installazione il bidone in utilizzo, collocato in modo da non essere soggetto all’azione diretta di sorgenti di calore (forni, camini, stufe, ecc.) capaci di portarlo a temperature superiori ai 50°C. ! È importante conservare questo libretto per poterlo consultare in ogni momento.
- Page 12 ! Usare i ganci contenuti nella “confezione accessori” • la tensione di alimentazione sia compresa nei valori nella targhetta caratteristiche; • Nel caso in cui il piano non sia installato su di un forno incasso, è • la presa sia compatibile con la spina dell’apparecchio. in caso contrario necessario inserire un pannello di legno come isolamento.
- Page 13 ! Nel caso dei gas liquidi, la vite di regolazione dovrà essere avvitata a fondo. 3. Rimontare le parti eseguendo all’inverso le operazioni. 4. Al termine dell’operazione, sostituite la vecchia etichetta taratura con ! Al termine dell’operazione sostituire la vecchia etichetta di taratura con quella corrispondente al nuovo gas d’utilizzo, reperibile presso i Nostri Centri Assistenza Tecnica.
- Page 14 Massima (mbar) (1) Solo per DCDR monocomando A 15°C e 1013,25 mbar-gas secco Propano P.C.S. = 50.37 MJ/Kg Butano P.C.S. = 49.47 MJ/Kg Naturale P.C.S. = 37.78 MJ/m³ PKL 641 D2/IX/HA PKL 751 D2/IX/HA PKL 642 D2/IX/HA PKL 642 D2/IX/HAR...
-
Page 15: Avvio E Utilizzo,15
Avvio e utilizzo Mono Comando: Le corone che compongono il bruciatore hanno una manopola di comando. Per accendere entrambe le corone contemporaneamente premere e ruotare la ! Su ciascuna manopola è indicata la posizione del bruciatore gas corrispondente. manopola in senso antiorario in corrispondenza del simbolo (max) - (min). I piani cottura gas sono dotati di regolazione discreta della potenza, che Per passare alla sola corona interna premere e ruotare la manopola in senso consentirà... -
Page 16: Precauzioni E Consigli,16
Precauzioni e consigli di recupero e riciclaggio dei materiali che li compongono ed impedire potenziali danni per la salute e l’ambiente. Il simbolo del cestino barrato è riportato su tutti i prodotti per ricordare gli obblighi di raccolta separata. ! L’apparecchio è stato progettato e costruito in conformità alle norme Quando si acquista una nuova apparecchiatura equivalente si può... -
Page 17: Anomalie E Rimedi,17
! Per evitare danni all’accensione elettrica, non utilizzarla quando i bruciatori non sono nella loro sede. ! Per pulire la superficie del piano non è necessario rimuovere la griglie. Grazie al sistema di supporto è sufficiente sollevare le griglie e sostenerle o ruotarle fino a poggiarle ad un supporto posteriore. - Page 18 Installation Fitting the appliance The following precautions must be taken when installing the hob: • Kitchen cabinets adjacent to the appliance and taller than the top of the ! Before operating your new appliance please read this instruction booklet hob must be at least 200 mm from the edge of the hob. carefully.
- Page 19 ! Once the appliance has been installed, the power supply cable and the • Where the hob is not installed over a built-in oven, a wooden panel must be installed as insulation. This must be placed at a minimum distance of electrical socket must be easily accessible.
- Page 20 ! Should the gas pressure used be different (or vary slightly) from the 2. Unscrew the burers with a 7 mm wrench spanner. The internal burner has a nozzle, the external burner has two (of the same size). Replace recommended pressure, a suitable pressure regulator must be fitted to the the nozzle with models suited to the new type of gas (see table 1).
- Page 21 (1) For single-control DRDA (DCDR) burner only At 15°C and 1013,25 mbar - dry gas Propane P.C.S. = 50.37 MJ/Kg Butane P.C.S. = 49.47 MJ/Kg Natural P.C.S. = 37.78 MJ/m³ PKL 641 D2/IX/HA PKL 751 D2/IX/HA PKL 642 D2/IX/HA PKL 642 D2/IX/HAR...
- Page 22 Start-up and use To turn on the inner ring only, position the knob on the symbol (max ) - (min) then press and turn the knob clockwise. To switch modes, it is necessary to switch off the burner. ! The position of the corresponding gas burner is shown on every knob. To switch off the burner, press and turn the knob clockwise until it stops (when Gas cooker hobs are equipped with discrete power adjustment that allows it reaches the “●”...
- Page 23 General safety Consumers should contact their local authority or retailer for information concerning the correct disposal of their old appliance. • This is a class 3 built-in appliance. • Gas appliances require regular air exchange to maintain efficient Respecting and conserving the environment operation.
- Page 24 Gas tap maintenance Over time, the taps may become jammed or difficult to turn. If this happens, the tap must be replaced. ! This procedure must be performed by a qualified technician authorised by the manufacturer. Troubleshooting It may happen that the appliance does not function properly or at all. Before calling the service centre for assistance, check if anything can be done.
- Page 25 Installation ou une aération plus efficace, en augmentant la puissance d’aspiration mécanique si déjà prédisposée. • (Pour la France et la Belgique) Les gaz de pétrole liquéfiés, plus ! Conservez ce mode d’emploi pour pouvoir le consulter à tout moment. lourds que l’air, se déposent et stagnent vers le bas.
- Page 26 ! L’installateur est responsable du bon raccordement électrique de l’appareil Devant et du respect des normes de sécurité. Avant de procéder au branchement, assurez-vous que : • la prise est bien munie d’une terre conforme à la loi; • la prise est bien apte à supporter la puissance maximale de l’appareil, indiquée sur la plaquette signalétique;...
- Page 27 Raccordement par tuyau flexible en acier inox, à paroi continue avec Réglage raccords filetés DCDR total Le raccord d’entrée du gaz à l’appareil est fileté 1/2 gaz mâle cylindrique. La mise en œuvre de ces tuyaux doit être effectuée de façon à ce que, même au maximum de leur extension, ils ne dépassent pas 2000 mm de long.
- Page 28 (DCDR 94x2 extérieur 2 injecteurs) Pressions Nominale (mbar) d'alimentation Minimum (mbar) Maximum (mbar) Pour la Luxembourg Gaz natural PKL 641 D2/IX/HA Brûleur Diamêtre Puissance thermique Injecteur Débit * PKL 642 D2/IX/HA (mm) kW (p.c.s.*) 1/100 (l/h) (mm) PKL 642 D2/IX/HAR Nominale Réduit...
- Page 29 Caractéristiques des brûleurs et des injecteurs (uniquement pour modèles 75 cm) Tableau 1 (Pour la France et la Belgique) Gaz liquidés Gaz natural Brûleur Diamêtre Puissance Puissance By-pass Injecteur Débit * Injecteur Puissance Débit * Puissance Débit * thermique thermique 1/100 1/100 (g/h)
- Page 30 Mise en marche et utilisation Mono Commande : Les couronnes qui composent le brûleur ont une manette de commande. Pour allumer les deux anneaux en même temps, appuyer sur la manette en ! La position du brûleur gaz correspondante est indiquée sur chaque manette. tournant dans le sens inverse des aiguilles d’une montre jusqu’au symbole Les tables de cuisson sont équipées de réglage de puissance “...
-
Page 31: Précautions Et Conseils,31
Précautions et conseils • La Directive Européenne 2012/19/EU sur les Déchets des Equipements Electriques et Electroniques (DEEE), exige que les appareils ménagers usagés ne soient pas jetés dans le flux normal des déchets municipaux. ! Cet appareil a été conçu et fabriqué conformément aux normes Les appareils usagés doivent être collectés séparément afin d’optimiser le internationales de sécurité. -
Page 32: Anomalies Et Remèdes,32
• Sur les modèles équipés de bougies d’allumage électriques et de dispositif Les casseroles sont instables. de sécurité, veillez à nettoyer soigneusement l’extrémité de la bougie Avez-vous contrôlé si : pour garantir son bon fonctionnement. Vérifiez régulièrement l’état de • le fond de la casserole est parfaitement plat ces éléments et nettoyezles à... -
Page 33: Instalación,33
Instalación o depositadas en ambientes o espacios a un nivel más bajo del suelo (sótanos, etc.) Es conveniente conservar en el ambiente sólo la botella que se está utilizando, colocada de modo que no quede expuesta a la acción ! Es importante conservar este manual para poder consultarlo en todo directa de fuentes de calor (hornos, chimeneas, estufas, etc.) capaces de momento. - Page 34 Adelante los contactos de 3 mm., dimensionado para esa carga y que responda a las normas vigentes (el conductor de tierra no debe ser interrumpido por el interruptor). El cable de alimentación eléctrica se debe colocar de modo tal que no alcance en ningún punto una temperatura que supere en 50°C la temperatura ambiente.
- Page 35 Control de la estanqueidad 4. En los aparatos provistos del dispositivo de seguridad (termopar), si dicho ! Finalizada la instalación, controle la perfecta estanqueidad de todas las dispositivo no funcionara con los quemadores al mínimo, aumente la uniones utilizando una solución jabonosa pero nunca una llama. capacidad de los mínimos utilizando para ello el tornillo de regulación.
- Page 36 Màximo (mbar) (1) Sólo para DCDR monomando A 15°C y 1013,25 mbar-gas seco Propano P.C.S. = 50.37 MJ/Kg Butano P.C.S. = 49,47 MJ/Kg Natural P.C.S. = 37.78 MJ/m³ PKL 641 D2/IX/HA PKL 751 D2/IX/HA PKL 642 D2/IX/HA PKL 642 D2/IX/HAR...
-
Page 37: Puesta En Funcionamiento Y Uso,37
Puesta en funcionamiento y uso Mono Mando: Las coronas que componen el quemador poseen un mando. Para encender ambas coronas simultáneamente presione y gire el mando ! En cada mando está indicada la posición del quemador a gas correspondiente. en sentido antihorario hasta el símbolo (máx) - (mín) . -
Page 38: Precauciones Y Consejos,38
Precauciones y consejos en la salud humana y el medioambiente. El símbolo del cubo de basura tachado se marca sobre todos los productos para recordar al consumidor la obligación de separarlos para la recogida selectiva. ! El aparato ha sido proyectado y fabricado en conformidad con las normas El consumidor debe contactar con la autoridad local o con el vendedor para internacionales de seguridad. -
Page 39: Anomalías Y Soluciones,39
! Para evitar daños al dispositivo de encendido eléctrico, no lo utilice si los quemadores están fuera de su alojamiento. ! Para limpiar la superficie de la encimera no es necesario extraer las rejillas. Gracias al sistema de soporte, basta levantar las rejillas y sostenerlas o girarlas hasta apoyarlas en un soporte posterior. -
Page 40: Plano
Instalação etc.). É oportuno deixar na cozinha apenas o cilindro sendo utilizado, colocado de maneira a não ser sujeito à acção directa de fontes de calor (fornos, chaminés, esquentadores etc.) capazes de chegar a temperaturas ! É importante guardar este folheto para poder consultá-lo a qualquer superiores a 50°C. - Page 41 ! Utilize os ganchos fornecidos dentro da “embalagem dos acessórios”. • a tensão de alimentação seja entre os valores da placa de identificação; • a tomada seja compatível com a ficha do aparelho. Em caso contrário, • Se o plano de cozedura não for instalado sobre um forno de encaixar, substitua a tomada ou a ficha;...
- Page 42 2. Desparafusar os bicos utilizando uma chave a tubo de 7mm, e substituí- • Para a regulação do mínimo da coroa interna, rode o botão no sentido los com aqueles apropriados para o novo tipo de gás (ver tabela 1 dos ponteiros do relógio até...
- Page 43 Màxima (mbar) (1) Apenas para DCDR monocomando A 15°C e 1013,25 mbars-gás seco Propano P.C.S. = 50,37 MJ/Kg. Butano P.C.S. = 49,47 MJ/Kg. Natural P.C.S. = 37,78 MJ/m³ PKL 641 D2/IX/HA PKL 751 D2/IX/HA PKL 642 D2/IX/HA PKL 642 D2/IX/HAR...
-
Page 44: Início E Utilização,44
Início e utilização Monocomando: As coroas que compõem o queimador têm um botão de comando. Para acender ambas as coroas simultaneamente, pressione e rode o botão ! Em cada selector está indicada a posição do queimador de gás no sentido dos ponteiros do relógio até ao símbolo (máx) - (mín). correspondente. -
Page 45: Precauções E Conselhos,45
Precauções e conselhos desactualizados devem ser recolhidos separadamente para optimizar a taxa de recuperação e reciclagem dos materiais que os compõem e impedir potenciais danos para a saúde humana e para o ambiente. O símbolo ! Este aparelho foi projectado e fabricado em conformidade com as normas constituído por um contentor de lixo barrado com uma cruz deve ser colocado internacionais de segurança. -
Page 46: Anomalias E Soluções,46
e, se necessário, limpe-as com um pano húmido. Quaisquer restos de Os recipientes são instáveis. alimentos devem ser retirados com um palito ou uma agulha. Foi controlado se: • O fundo do recipiente é perfeitamente plano. ! Para evitar danificar o isqueiro elétrico, não o utilize quando os •... - Page 47 Installation • Die Flüssiggase, die schwerer als Luft sind, stauen sich im unteren Raumbereich. Räume, in denen Gasflaschen mit GPL-Flüssiggas gelagert werden, müssen demnach in Bodenhöhe mit geeigneten ! Bewahren Sie diese Bedienungsanleitung bitte sorgfältig auf, damit Sie sie Abzugsöffnungen ins Freie ausgestattet werden, damit das Gas im jederzeit zu Rate ziehen können.
- Page 48 Haken-Befestigungsschema über einem Einbaubackofen installiert, müssen der Elektroanschluss der Kochmulde sowie der des Backofens getrennt voneinander vorgenommen werden. Dadurch wird eine ausreichende elektrische Sicherheit gewährleistet und das Herausziehen des Backofens erleichtert. Anschluss des Versorgungskabels an das Stromnetz Versehen Sie das Netzkabel mit einem Normstecker für die auf dem Position der Haken für Position der Haken für Typenschild angegebene Belastung (siehe nebenstehende Tabelle).
- Page 49 Anschluss mittels eines starren Anschlussrohres (Kupfer oder Stahl) • Minimumeinstellung ! Der Anschluss an die Gasleitung muss so durchgeführt werden, dass das 1. Drehen Sie den Brenner auf Minimum; Gerät keinerlei Zugspannungen ausgesetzt wird. 2. Ziehen Sie den Reglerknopf ab und verstellen Sie dann die innen oder Auf der Zuleitung zum Gerät befindet sich ein orientierbares,“L”-förmiges seitlich der Gashahnstange befindliche Einstellschraube, bis eine kleine, Anschlussstück, dessen Dichtheit durch einen Dichtring gewährleistet wird.
- Page 50 Bie 15°C und 1013,25 mbar-Trockengas Propangas oberer Heizwert = 50,37 MJ/kg Butan oberer Heizwert = 49,47 MJ/kg Erdgas oberer Heizwert = 37,78 MJ/m³ Erdgas oberer Heizwert = 32,49 MJ/m³ PKL 641 D2/IX/HA PKL 751 D2/IX/HA PKL 642 D2/IX/HA PKL 642 D2/IX/HAR...
- Page 51 Inbetriebsetzung und Gebrauch Sicherheitsvorrichtung, dank derer die Flamme automatisch gezündet wird und eingeschaltet bleibt, heiß wird. ! Auf jedem Reglerknopf ist gekennzeichnet, welcher Gasflamme er entspricht. Einzelner Reglerknopf: Gas-Kochmulden sind mit einer Stufenregelung ausgestattet, mit der die Die Flammenkränze, aus denen der Brenner gebildet ist, verfügen über einen Flamme präzise auf 5 Stufen eingestellt werden kann.
- Page 52 • Das Gerät ist nicht zur Verwendung durch Personen (einschließlich Die veränderliche Stabilität eines Topfs Kinder) mit eingeschränkten körperlichen, geistigen oder ist meist vom Topf selbst abhängig (bzw. Wahrnehmungsfähigkeiten oder aber ohne ausreichende Erfahrung und davon, wie er während des Gebrauchs Produktkenntnis geeignet, sofern sie nicht durch eine für ihre Sicherheit aufgestellt wird).
- Page 53 Kochfeldteile reinigen Bei den mit Sicherheitsvorrichtungen versehenen Modellen erlischt die Flamme. • Reinigen Bauteile aus Emaille und Glas nur mit einem weichen Lappen Bitte kontrollieren Sie, ob: oder Schwamm. • der Reglerknopf auch bis zum Anschlag durchgedrückt wurde; • Gitter, Brennerdeckel und Gasbrenner können zur Reinigung ausgebaut •...
- Page 54 Het installeren hebben voor het afvoeren van eventueel ontsnapt gas. Lege of halfvolle LPG-flessen mogen dus niet worden geïnstalleerd of bewaard in vertrekken die lager liggen dan de vloer (kelders, enz.). Het is beter alleen ! Bewaar dit boekje zorgvuldig voor eventuele verdere raadpleging. Wanneer de in gebruik zijnde fles in het vertrek te bewaren, zodanig geplaatst dat u het product weggeeft, verkoopt, of wanneer u verhuist, dient u dit boekje hij niet in rechtstreeks contact staat met warmtebronnen (oven, open...
- Page 55 Voor elektrische vermogen en voldoend aan de geldende normen (de aarding mag niet worden onderbroken door de schakelaar). De voedingskabel moet zodanig worden geplaatst dat hij nergens een temperatuur bereikt van 50°C hoger dan de kamertemperatuur. ! De installateur is verantwoordelijk voor een correcte elektrische aansluiting en het in acht nemen van de veiligheidsnormen.
- Page 56 ! In het geval van een DCDR brander met enkelvoudige bediening dient de Aansluiting met een roestvrije stalen flexibele buis aan een onafgebroken wand voorzien van aanhechtingen met schroefdraad. afregeling te worden uitgevoerd op de 2 schroeven die zich naast het staafje Het verbindingsstuk waardoor het gas toegang krijgt tot het fornuis is voorzien van de kraan bevinden (zie afbeelding).
- Page 57 (1) Alleen voor DCDR met enkelvoudige bediening A 15°C et 1013,25 mbar-gaz sec Propane P.C.S. = 50,37 MJ/kg Butane P.C.S. = 49,47 MJ/kg Naturele G20 P.C.S. = 37,78 MJ/m³ Naturele G25 P.C.S. = 32,49 MJ/m³ PKL 641 D2/IX/HA PKL 642 D2/IX/HA PKL 642 D2/IX/HAR...
- Page 58 Kenmerken van de branders en de straalpijpjes (alleen voor de modellen van 75 cm) Table 1 (Voor Belgie) Vloeibaar gas Natuurlijk gas Doorsnee Termisch Termisch By-pass Straal. Bereik* Straal. Termisch Bereik* Termisch Bereik* Gaspit vermogen vermogen 1/100 1/100 (g/h) 1/100 vermogen (l/h) vermogen...
- Page 59 Starten en gebruik Enkele Bediening: Iedere vlamkroon van de brander heeft zijn eigen bedieningsknop. Om beide kronen tegelijkertijd aan te steken drukt u de knop in en draait u ! Op iedere knop staat aangegeven waar de gasbrander zich precies bevindt. hem tegen de klok in, tot aan het symbool (max) - (min).
- Page 60 Voorzorgsmaatregelen en advies herinnert u aan uw verplichting, dat wanneer u het apparaat vernietigt, het apparaat apart moet worden ingezameld. Consumenten moeten contact opnemen met de locale autoriteiten voor Dit apparaat is ontworpen en vervaardigd volgens de geldende internationale informatie over de juiste wijze van vernietiging van hun oude apparaat. veiligheidsvoorschriften.
- Page 61 ! Om het oppervlak van de kookplaat te reinigen dient u eerst de roosters te verwijderen. Dankzij het ondersteuningssysteem is het voldoende de roosters op te tillen en vast te houden of ze te draaien totdat ze op de achterzijde kunnen rusten. Zorg ervoor de warme roosters nooit op het glazen deksel te leggen (indien aanwezig) om te voorkomen dat de rubberen elementen van het glas worden beschadigd.
- Page 62 Встановлення балони зрідженого газу, як частково, так і повністю наповнені, не слід установлювати або зберігати в приміщеннях, що знаходяться нижче за рівень землі (підвал, тощо). Рекомендовано тримати в приміщенні ! Перш ніж користуватися Вашим новим приладом, будь ласка, уважно тільки той балон, яким Ви безпосередньо користуєтеся, так щоб не ознайомтеся...
- Page 63 Спереду встановлюється між приладом и мережею. Вимикач має відповідати вказаному заряду й діючим нормам улаштування електричних установок (вимикач не має від’єднувати провід заземлення). Кабель живлення не має контактувати з поверхнями, температура яких вище за 50°C. ! Фахівець, що встановлює прилад, має забезпечити правильне електричне...
- Page 64 4. На деяких приладах встановлений захисний пристрій (термопара). Перевірка щільності з’єднання ! По завершенні процесу встановлення перевірте фітинги патрубку на Якщо прилад не працює, коли конфорка встановлена на позначці витоки за допомогою мильного розчину. Ніколи не користуйтеся вогнем. слабкого вогню, збільшить відповідне налаштування слабкого вогню за...
- Page 65 П 15°C 1013,25 а – а П а P.C.S. = 50,37 МД / Б а P.C.S. = 49,47 МД / П а P.C.S. = 37,78 МД / ³ PKL 641 D2/IX/HA PKL 751 D2/IX/HA PKL 642 D2/IX/HA PKL 642 D2/IX/HAR...
- Page 66 Підключення й використання Щоб одночасно ввімкнути обидва кільця, поверніть ручку до положення з позначкою (максимум) - (мінімум) потім натисніть і поверніть ручку ! Розміщення відповідної газової конфорки позначене на кожній ручці. проти годинникової стрілки. Газові варильні поверхні оснащені дискретною системою регулювання Щоб...
- Page 67 Запобіжні заходи та поради • Європейська Директива 2012/19/EU з утилізаціїелектричного та електронного обладнання (WEEE)вимагає, щоб старі електропобутові прилади викидалиразом із звичайним міським сміттям. Старі ! Ця плита була розроблена і виготовлена відповідно доміжнародних приладимають бути зібрані окремо для оптимізації їх утилізаціїта стандартів...
- Page 68 195141388.00 01/2016 - XEROX FABRIANO необхідності чистьте їх вологою ганчіркою. Пригорілі рештки страв Полум’я згасає на моделях із захисним пристроєм. необхідно видаляти зубочисткою або голкою. Перевірити й переконатися: • Що, натиснувши ручку, Ви не відпускаєте її, коли запалюєте конфорку. ! Щоб уникнути пошкодження електричного запалювального •...
Need help?
Do you have a question about the PKL 641 D2/IX/HA and is the answer not in the manual?
Questions and answers