Hotpoint Ariston 7HKRC 640 B RU/HA Operating Instructions Manual
Hide thumbs
Also See for 7HKRC 640 B RU/HA:
- Operating instructions manual (28 pages) ,
- Operating instructions manual (28 pages)
Table of Contents
Advertisement
Quick Links
RS
B
nglish,1
C 4
C 4
C 4
, 14
Positioning
Electrical connection
escription o t e appliance, -
Control panel
Extendable cooking zones
tart-up an use, -
Switching on the hob
Switching on the cooking zones
Switching off the cooking zones
Power function
Heating elements
Programming the cooking duration
Timer
Control panel lock
Switching off the hob
“Demo” mode
Practical advice on using the appliance
Safety devices
Practical cooking advice
recautions an tips,
General safety
Disposal
Care an
aintenance, 2
Switching the appliance off
Cleaning the appliance
Disassembling the hob
ec nical escription o t e
HOB
B
o els,
Advertisement
Table of Contents

Subscribe to Our Youtube Channel
Related Manuals for Hotpoint Ariston 7HKRC 640 B RU/HA


Summary of Contents for Hotpoint Ariston 7HKRC 640 B RU/HA
- Page 1 Positioning Electrical connection , 14 nglish,1 escription o t e appliance, - Control panel Extendable cooking zones tart-up an use, - Switching on the hob Switching on the cooking zones Switching off the cooking zones Power function Heating elements Programming the cooking duration Timer Control panel lock Switching off the hob...
-
Page 2: Installation
Installation Before operating your new appliance please read this instruction booklet carefully. It contains important information concerning the safe operation, installation and maintenance of the appliance. min. 20 mm Please keep these operating instructions for future reference. Pass them on to any new owners of the appliance. -
Page 3: Electrical Connection
i ing Single-phase connection on a perfectly level The appliance must be installed The hob is equipped with a pre-connected electricity supporting surface. supply cable, which is designed for single-phase Any deformities caused by improper fixing could connection. Connect the wires in accordance with affect the features and operation of the hob. - Page 4 connection required and position the connection Connecting the electricit suppl ca le to the supports as shown in the following table and mains diagrams. If the appliance is being connected directly to the 4. Position the wires in accordance with the electricity mains an omnipolar switch must be information given in the following table and diagrams installed with a minimum opening of 3 mm between...
-
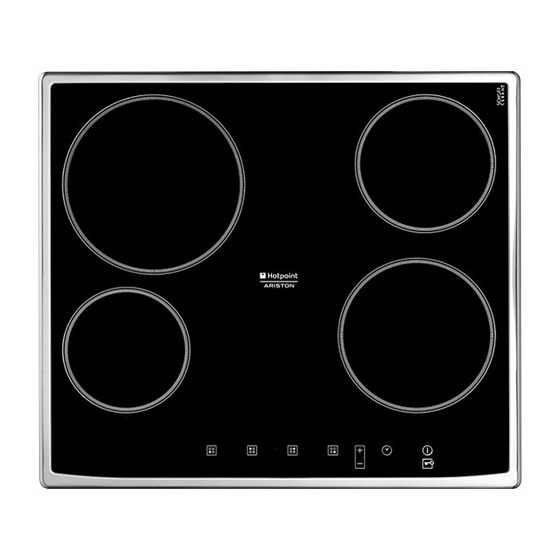
Page 5: Description Of The Appliance
Description of the appliance Control panel The control panel described in this manual is only a representative example: it may not exactly match the panel on your appliance. TIMER* indicator light INCREASE PROGRAMME TIMER* POWER button display COOKING ZONE PROGRAMMED* indicator light POWER and COOKING ZONE... - Page 6 Extendable coo ing ones Certain models are fitted with extendable cooking zones. A list of controls is given below (these controls are only present in models with the extendable cooking zone option). Circular extenda le hotplate DOUBLE HOTPLATE ON indicator light DOUBLE HOTPLATE ON button...
-
Page 7: Start-Up And Use
Start-up and use itc ing o t e cooking zones The glue applied on the gaskets leaves traces of grease on the glass. Before using the appliance, we recommend you remove these with a special non- To switch off a cooking zone, select it using the abrasive cleaning product. -
Page 8: Control Panel Lock
itc ing o t e ob To display the time remaining for the other programmed hotplates, press the button Press the button to switch the appliance off. repeatedly. The times remaining for each hotplate If the control panel lock has been activated, the will be shown in a clockwise order, beginning with controls will continue to be locked even after the hob the front left hotplate. - Page 9 O erheating protection • Make sure that the base of the cookware is always clean and dry, in order to fully utilise and If the electronic elements overheat, the hob switches extend the life of both the cooking zones and the cookware.
- Page 10 Practical coo ing advice ª Pressure cooking Frying Pressure cooker • Grilling Boiling • ¶ Crêpes Cooking on a high flame and browning (roasts, steaks, escalopes, fish fillets, fried eggs) ¶ § Fast thickening (liquid juices) Boiling water (pasta, rice, vegetables) Milk §...
-
Page 11: Precautions And Tips
Precautions and tips This appliance has been designed and • Always make sure that pan handles are turned manufactured in compliance with international safety towards the centre of the hob in order to avoid standards. The following warnings are provided for accidental burns. -
Page 12: Care And Maintenance
Care and maintenance Switching the appliance off Stainless steel frame (only in models with outer frame) Disconnect your appliance from the electricity supply before carrying out any work on it. Stainless steel can be marked by hard water which has been left on the surface for a long time, or by cleaning products containing phosphorus. -
Page 13: Technical Description Of The Models
This table provides a model-by-model list of the energy absorption values, type of heating elements and diameters of each cooking zone. Hobs 7HKRC 640 B RU/HA 7HKRC 641 D X RU/HA 7HKRC 640 X RU/HA Cooking zone Power (W) - Page 14 ÂÀÐÎ×ÍÀß ÏÀÍÅËÜ Ñîäåðæàíèå Ìîíòàæ, 15-17 Ðóññêèé, 14 Îïèñàíèå èçäåëèÿ, 18-19 Âêëþ÷åíèå è ýêñïëóàòàöèÿ, 20-23 7HKRC 640 B RU/HA 7HKRC 640 X RU/HA 7HKRC 641 D X RU/HA Ïðåäîñòîðîæíîñòè è ðåêîìåíäàöèè, 24 Òåõíè÷åñêîå îáñëóæèâàíèå è óõîä, 25 Òåõíè÷åñêîå îïèñàíèå ìîäåëåè, 26...
- Page 15 Ìîíòàæ min. 20 mm Ящиком min. 40 mm Ðàñïîëîæåíèå ñì. min. 20 mm Ïðåäîñòîðîæíîñòè è ðåêîìåíäàöèè Вентилированная духовка min. 40 mm Âñòðîåííûé ìîíòàæ ñì. ñõåìû) Âåíòèëÿöèÿ Äëÿ îáåñïå÷åíèÿ íàäëåæàùåé âåíòèëÿöèè è âî èçáåæàíèå ïåðåãðåâà ïðèëåãàþùèõ ïîâåðõíîñòåè âàðî÷íàÿ ïàíåëü äîëæíà áûòü óñòàíîâëåíà: •...
-
Page 16: Ýëåêòðè÷Åñêîå Ïîäêëþ÷Åíèå
Êëåììíàÿ êîëîäêà ÏÅÐÅÂÅÐÍÓÒÀß ÂÀÐÎ×ÍÀß ÏÀÍÅËÜ • Êðåïëåíèå Ìîíîôàçíîå ñîåäèíåíèå íà èäåàëüíî çäåëèå äîëæíî áûòü óñòàíîâëåíî ðîâíîè ïîâåðõíîñòè. Âîçìîæíûå äåôîðìàöèè, âûçâàííûå íåïðàâèëüíûì êðåïëåíèåì, ìîãóò ïðèâåñòè ê èçìåíåíèÿì õàðàêòåðèñòèê è ýêñïëóàòàöèîííûõ êà÷åñòâ âàðî÷íîè ïàíåëè. Äëèíà ðåãóëÿöèîííîãî âèíòà êðåïåæíûõ êðþêîâ Òèïîâîå Ïîäñîåäèíåíèå íàïðÿæåíèå è Ýëåêòðè÷åñêèé... - Page 17 È Ïîäñîåäèíåíèå ñåòåâîãî êàáåëÿ èçäåëèÿ ê ñåòè ýëåêòðîïèòàíèÿ ñì. èçîáðàæåíèå êëåììíîè êîëîäêè). Òè ïîâ î å íàï ðÿæ åíè å è Ýëåêòð îïè òàíè å Çàæ è ìíàÿ êî ðîáêà ÷àñ òî òà ñå òè 400 3-N ~ Ò ðå õô àçíû é 400 50/60 Ã...
-
Page 18: Îïèñàíèå Èçäåëèÿ
Îïèñàíèå èçäåëèÿ Ïàíåëü óïðàâëåíèÿ ÓÂÅËÈ×ÅÍÈÅ ÌÎÙÍÎÑÒÈ ÒÀÈÌÅÐÀ ÏÐÎÃÐÀÌÌÈÐÎÂÀÍÈß* ñì. Âêëþ÷åíèå è ñì. Âêëþ÷åíèå è ýêñïëóàòàöèÿ ýêñïëóàòàöèÿ ÓÌÅÍÜØÅÍÈÅ ÌÎÙÍÎÑÒÈ È ÇÀÏÐÎÃÐÀÌÌÈÐÎÂÀÍÍÛÅ ÂÀÐÎ×ÍÛÅ ÇÎÍÛ* ñì. Âêëþ÷åíèå è ýêñïëóàòàöèÿ ñì. Âêëþ÷åíèå è ýêñïëóàòàöèÿ È ÂÛÁÐÀÍÍÀß ÂÀÐÎ×ÍÀß ÇÎÍÀ ÁËÎÊÈÐÎÂÊÀ ÓÏÐÀÂËÅÍÈÈ ñì. Âêëþ÷åíèå è ýêñïëóàòàöèÿ ÂÛÁÎÐ... - Page 19 Ðàñøèðÿþùèåñÿ âàðî÷íûå çîíû Êðóãëàÿ ðàñøèðÿþùàÿñÿ âàðî÷íàÿ çîíà ÂÊËÞ×ÅÍÈÅ ÄÂÎÈÍÎÈ ÂÀÐÎ×ÍÎÈ ÇÎÍÛ ñì. Âêëþ÷åíèå è ýêñïëóàòàöèÿ È ÄÂÎÈÍÀß ÂÀÐÎ×ÍÀß ÇÎÍÀ ÂÊËÞ×ÅÍÀ...
-
Page 20: Âêëþ÷Åíèå È Ýêñïëóàòàöèÿ
Âêëþ÷åíèå è ýêñïëóàòàöèÿ Íàãðåâàòåëüíûå ýëåìåíòû Âêëþ÷åíèå âàðî÷íîé ïàíåëè Âêëþ÷åíèå âàðî÷íûõ çîí Ïðîãðàììèðîâàíèå ïðîäîëæèòåëüíîñòè ïðèãîòîâëåíèÿ Âûêëþ÷åíèå âàðî÷íûõ çîí Ôóíêöèÿ power Ð... - Page 21 Áëîêèðîâêà óïðàâëåíèé Âèçóàëèçàöèÿ â ñëó÷àå ïðîãðàììèðîâàíèÿ íåñêîëüêèõ âàðî÷íûõ çîí È Âûêëþ÷åíèå âàðî÷íîé ïàíåëè Èçìåíåíèå ïðîãðàììèðîâàíèÿ Ðåæèì «demo» È ÈÈ Òàéìåð...
- Page 22 Ïðàêòè÷åñêèå ñîâåòû ïî ýêñïëóàòàöèè èçäåëèÿ Ïåðåãðåâ È È Ïðåäîõðàíèòåëüíûé âûêëþ÷àòåëü È Óðîâåíü ìîùíîñòè Ìàêñ. êîë-âî ÷àñîâ ôóíêöèîíèðîâàíèÿ Çàùèòíûå óñòðîéñòâà Ñåíñîð íàëè÷èÿ ïîñóäû Çâóêîâàÿ ñèãíàëèçàöèÿ Èíäèêàòîðû îñòàòî÷íîãî òåïëà...
- Page 23 Ïðàêòè÷åñêèå ñîâåòû ïî ïðèãîòîâëåíèþ áëþä ª Ïðèãîòîâëåíèå ïîä Ôðèòþð äàâëåíèåì Ñêîðîâàðêà • Áèôøòåêñû Âàðêà • Áëèíû Ïðèãîòîâëåíèå íà ñðåäíåì îãíå, ¶ îáæàðèâàíèå (Æàðêîå, áèôøòåêñû, ýñêàëîïû, ðûáíîå ôèëå, ÿè÷íèöà) ¶ § Áûñòðîå çàãóñòåíè (Æèäêèå ñîóñû) Êèïÿ÷åíèå âîäû (äëÿ âàðêè ìàêàðîí, ðèñà, îâîùåé) Êèïÿ÷åíèå...
-
Page 24: Ïðåäîñòîðîæíîñòè È Ðåêîìåíäàöèè
Ïðåäîñòîðîæíîñòè è ðåêîìåíäàöèè È Îáùèå ïðàâèëà áåçîïàñíîñòè È Óòèëèçàöèÿ È ñì. Âêëþ÷åíèå è ýêñïëóàòàöèÿ... - Page 25 Òåõíè÷åñêîå îáñëóæèâàíè è óõîä Îòêëþ÷åíèå ýëåêòðîïèòàíèÿ Ñòðóêòóðà èç íåðæàâåþùåè ñòàëè ×èñòêà èçäåëèÿ Ïîðÿäîê äåìîíòàæà âàðî÷íîé ïàíåëè...
- Page 26 Òåõíè÷åñêîå îïèñàíèå ìîäåëåé Ìîäåëè âàðî÷íûõ 7HKRC 640 B RU/HA 7HKRC 641 D X RU/HA ïàíåëåé 7HKRC 640 X RU/HA Âàðî÷íûå çîíû Ìîùíîñòü (Âò) Äèàìåòð (ìì) Ìîùíîñòü (Âò) Äèàìåòð (ìì) Çàäíÿÿ ëåâàÿ H 2300 HD 2200/1000 210/140 Çàäíÿÿ ïðàâàÿ H 1400 H 1400 Ïåðåäíÿÿ...
- Page 28 10/2009 - 195079704.00 XEROX ABRIANO...
Need help?
Do you have a question about the 7HKRC 640 B RU/HA and is the answer not in the manual?
Questions and answers