Table of Contents
Advertisement
Quick Links
Advertisement
Table of Contents

Related Manuals for Hotpoint Ariston PH 640 MST


Summary of Contents for Hotpoint Ariston PH 640 MST
- Page 1 Варочные поверхности Hotpoint-Ariston PH 640 MST (OS): Инструкция пользователя...
-
Page 2: Table Of Contents
Operating Instructions Contents Installation, 2-5 Positioning Electrical connection Gas connection , 12 English,1 ✁ ✂ ✂ ✄ ☎ ✆ Data plate Burner and nozzle specifications Description of the appliance, 6 Overall view Start-up and use, 7-8 Practical advice on using the burners Practical advice on using the electric hotplates Precautions and tips, 9 General safety... -
Page 3: Installation
Installation ! Before operating your new appliance please read this also be equipped with vents to allow gas to escape in the instruction booklet carefully. It contains important information event of a leak. As a result LPG cylinders, whether for safe use, installation and care of the appliance. partially or completely full, must not be installed or stored in rooms or storage areas that are below ground level ! Please keep these operating instructions for future... -
Page 4: Electrical Connection
Front Connecting the supply cable to the mains Install a standardised plug corresponding to the load indicated on the data plate. The appliance must be directly connected to the mains using an omnipolar circuit-breaker with a minimum contact opening of 3 mm installed between the appliance and the mains. The circuit-breaker must be suitable for the charge indicated and must comply with current electrical regulations (the earthing wire must not be interrupted by the circuit-breaker). -
Page 5: Data Plate
appliance supply ramp and this is fitted with a seal in 3. Having adjusted the flame to the required low setting, order to prevent leaks. The seal must always be replaced while the burner is alight, quickly change the position of after rotating the pipe fitting (seal provided with the knob from minimum to maximum and vice versa appliance). -
Page 6: Burner And Nozzle Specifications
Burner and nozzle specifications ❚ ❛ ❜ ❧ ✁ ✂ ✄ ☎ ✆ ✄ ✝ ✞ ❛ ✟ ✥ ❛ ✠ ✆ ✡ ❛ ❧ ✞ ❛ ✟ ❇ ✕ ✓ ✍ ✦ ✓ ❉ ✌ ✎ ☞ ✦ ✣ ✦ ✓ ✪... -
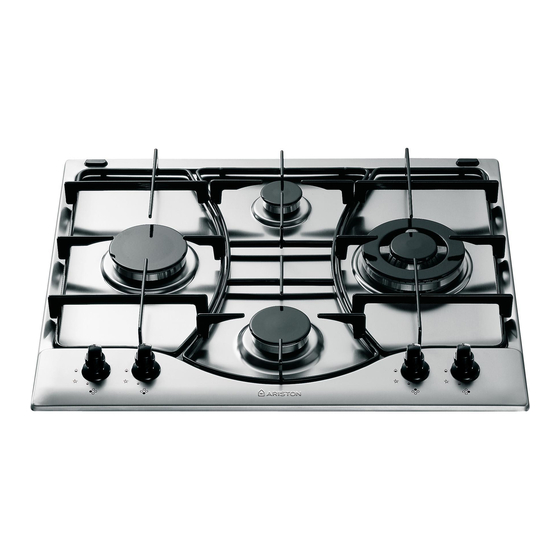
Page 7: Description Of The Appliance
Description of the appliance Overall view ✩ ❊ ✩ ✫ ✬ ✧ ✭ ✫ ✮ ✯ ✬ ✰ ❊ ✣ ✬ ✩ ✱ ✢ ✣ ✤ ✥ ✦ ✧ ★ ✩ ✧ ✤ ❀ ✿ ❁ ❁ ✔ ✗ ✖ ❂ ✗ ✳ ✪ ✜ ✔ ✗ ✫... -
Page 8: Start-Up And Use
Start-up and use ! The position of the corresponding gas burner or Electric hotplates* electric hotplate* is shown on every knob. The corresponding knob may be turned clockwise or Gas burners anti-clockwise and set to six different positions: Each burner can be adjusted to one of the following settings using the corresponding control knob: ❙... -
Page 9: Practical Advice On Using The Electric Hotplates
Practical advice on using the electric hotplates To avoid heat loss and damage to the hotplates, use pans with a flat base, whose diameter is no less than that of the hotplate itself. ❙ ✁ ✁ ✂ ✄ ☎ ❙ ✁ ✁ ✂ ✄ ☎ ✵... -
Page 10: Precautions And Tips
Precautions and tips ! This appliance has been designed and • Do not use unstable or deformed pans. manufactured in compliance with international safety • The appliance should not be operated by people standards. The following warnings are provided for (including children) with reduced physical, safety reasons and must be read carefully. -
Page 11: Maintenance And Care
Maintenance and care Gas tap maintenance Switching the appliance off Over time, the taps may become jammed or difficult to Disconnect your appliance from the electricity supply turn. If this happens, the tap must be replaced. before carrying out any work on it. ! This procedure must be performed by a qualified Cleaning the appliance technician authorised by the manufacturer. -
Page 12: Troubleshooting
Troubleshooting It may happen that the appliance does not function properly or at all. Before calling the service centre for assistance, check if anything can be done. First, check to see that there are no interruptions in the gas and electrical supplies, and, in particular, that the gas valves for the mains are open. - Page 13 7HPH 631 MS IX RU/HA 7HPH 631 MS RU/HA...
- Page 14 555 mm...
- Page 18 ✁ ✂ ✄ ☎ ✆ ✂ ✝ ✂ ✞ ✟ ✝ ✠ ✂ ✡ ☛ ☞ ✌ ✍ ✍ ✎ ✍ ✏ ♥ ♦ ♣ r s t ❣ ★ ✩ ✪ ✫ ✬ ✭ ✮ ✯ ✸ ✰ ✫ ✱ ✭ ✲ ✰ ✫ ✳ ✭ ✴ q ✳...
- Page 19 ✁ ✁ ✂ ✄ ☎ ✆ ✝ ✞ ✝ ✟ ✁ ✠ ✡ ☛...
- Page 21 ✁ ✂ ✄ ☎ ✆ ✁ ✝ ✞ ✟ ✁ ✟ ✠ ✝ ✡ ☛ ☞ ☎ ✌ ✍ ✄ ☎ ✁ ☎ ☛ ✂ ✟ ✎ ❑ ▲ ✕ ✜ ✛ ✙ ▼ ◆ ✿ ✕ ✣ ✔ ✿ ✙ ❖ ✗ € ✙ ✛ ✕ ✘ ✕ ✗ ✘ ✙ ▼ ✕ ✖ ✚ ✕ ✗ ✏...
- Page 23 ✁ ✂ ✄ ☎ ✆ ✝ ✞ ✁ ✞ ✟ ✆ ✠ ✡ ☛ ☎ ✄ ☞ ✝ ☎ ✁ ✌ ✍ ✎ ✍ ✏ ✑ ✍ ✒ ✓ ✔ ✓ ✕ ✖ ✎ ✔ ✑ ✗ ✑ ✘ ✙ ✚ ✛ ✜ ✍ ✢ ✑ ✎ ✣ ✍ ✤ ✢ ✗ ✥ ✍ ✙ ✓ ✕ ✦ ✕ ✧ ✖ ✙ ★ ✩ ✪ ✗ ✛ ✔ ✢ ✗ ✚ ✫ ✬...
- Page 25 06/2010 - 195061733.02 XEROX FABRIANO...
- Page 26 Наборы кастрюль и Духовые шкафы Сковородки Встраиваемые холодильники Кастрюли сковородок Вытяжки Посудомойки встраиваемые Встраиваемые морозильные Встраиваемые стиральные Чайники камеры машины Термометры кухонные Встраиваемые микроволновые печи...
Need help?
Do you have a question about the PH 640 MST and is the answer not in the manual?
Questions and answers