
Related Manuals for Godex ZX400+ Series


Summary of Contents for Godex ZX400+ Series
- Page 2 ....................1 ..............................1 ........................2 .........................5 ..........................5 .........................9 ..................11 ....................12 ......................17 ..........................17 ........................19 ..............................24 ............................26 ..........................28 ....................33 ...............................35 ..............................39 ..................41 ......................41 ........................43 ........................50 ............................50 ..........................51 ........................51 ........................54 ........................57 ........................60 ......................62 ................64 ..................64 ...........................65 .........................66 ......................67 ..................68 ..........................69 ............................70 ............................71...
- Page 3 ................72 ....75 ─ ..81 ─...
- Page 4 ● ● ● ●...
-
Page 5: Safety Instructions
SAFETY INSTRUCTIONS Please read the following instructions carefully. ⚫ Keep the equipment away from humidity. ⚫ Before you connect the equipment to the power outlet, please check the voltage of the power source. ⚫ Make sure the printer is off before plugging the power connector into the power jack. - Page 6 。...
- Page 7 TOP COVER LCD PANEL OPERATOR PANEL POWER BUTTON VIEWING WINDOW FEED BUTTON FRONT COVER AUTO-CALIBRATION BUTTON BT/Wi-Fi PORT (OPTIONAL) ETHERNET PORT RS232 PORT PARALLEL PORT (OPTIONAL) USB PORT USB HOST POWER JACK EXTERNAL LABEL INSERT...
- Page 8 TOP COVER VIEWING WINDOW POWER BUTTON FEED BUTTON FRONT COVER AUTO-CALIBRATION BUTTON BT/Wi-Fi PORT (OPTIONAL) PARALLEL PORT (OPTIONAL) USB PORT USB HOST POWER JACK EXTERNAL LABEL INSERT...
- Page 9 PAPER GUIDE RIBBON REWIND HUB RIBBON SUPPLY HUB HANDLE OF PAPER GUIDE PRINT MECHANISM PLATEN ROLLER LABEL ROLL GUIDE RELEASE LEVER FOR PRINT HEAD RELEASE LEVER FOR PRINT HEAD ADJUSTABLE SENSOR PAPER GUIDE...
- Page 10 : :...
- Page 11 Now fold the label roll guide up Place the label roll on the label supply hub, pushing it right up to the printer housing. (Do not apply too much pressure to avoid damaging the label stock.)
- Page 12 Load the label roll into the printer as shown in the illustration. Pass it through the printer as indicated by the red arrows. Pass the label stock through the adjustable Sensor and up to the tear-off plate.
- Page 13 2. Return the print head release lever to its original position. 1. The labels pass between the wall of the printer housing and the adjustable paper guide. Then close the printer cover.
- Page 14 Place the printer on a flat surface and open the printer cover Place a new ribbon on the ribbon supply hub. The illustration as below shows you how to install the ribbon. Ink side out...
-
Page 16: Barcode Printer
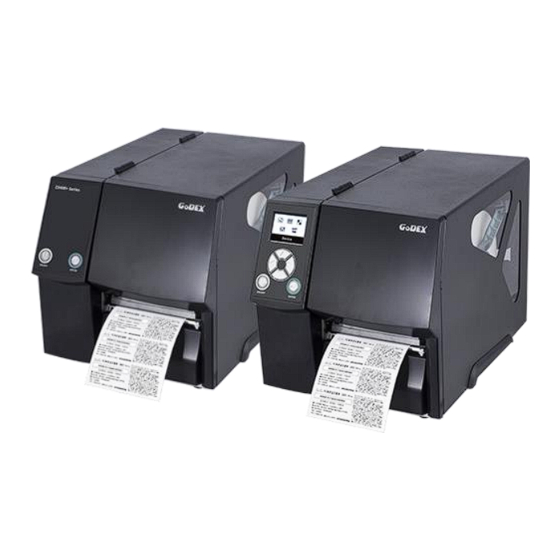
BARCODE PRINTER (Ports may vary per model。) - Page 22 LCD PANEL OPERATOR PANEL OPERATOR PANEL FEED BUTTON POWER BUTTON...
- Page 23 FEED BUTTON POWER BUTTON...
- Page 24 Power on Enter Main page...
- Page 25 Select Enter Select Enter...
- Page 26 Select Apply...
-
Page 27: Navigation Icon
NAVIGATION ICON Back to the Setting page Back to the Main page... - Page 28 EXIT from Setting Mode Back to the Ready status...
- Page 29 Select Device Enter LAN Setting Select a designated function...
-
Page 30: Setting Page
Select to enable DHCP Press FEED once to exit Press FEED again to save and return to previous SETTING PAGE... - Page 31 Select Device Enter LCD Password Select button to Enable Password function...
- Page 32 Select button again to setup the password Press FEED button once to exit Press FEED button again to save and return to previous SETTING PAGE...
-
Page 34: Error Icon
ERROR ICON ERROR DESCRIPTION... - Page 35 繁體中文 简体中文 日本語 усский...
- Page 38 Model & Version USB ID setting Serial port setting MAC address of Ethernet port IP protocol setting IP address of Ethernet Gateway setting port Netmask setting Card Status Network Status Number of DRAM installed Image buffer size Number of forms Number of graphics Number of fonts Number of Asian fonts...
-
Page 39: Calibration Button
CALIBRATION BUTTON Press the button 1or 2seconds. Press the button 1or 2seconds. - Page 40 LCD TOUCH PANEL OPERATION TOUCH PANEL OPERATOR PANEL FEED BUTTON POWER BUTTON...
- Page 42 FEED BUTTON (Status Indictor) POWER BUTTON (Power Indictor)
- Page 44 : ⚫ ⚫ ⚫ ⚫ ⚫ ⚫ ⚫ ⚫ ⚫ ⚫...
- Page 56 CONNECTION CABLE OF GUILLOTINE CUTTER COVER Remove the screw (as circle indicated).
- Page 57 2. Remove the cover panel by pushing to right-hand side. 3. Stick the hub onto the circled area. 4. Direct the cutter’s cable through the platen bracket of the printer. 5. Engage the catchs of the cutter module firmly into the printer.
- Page 58 7. Put the cable into the hub. Close printer cover.
- Page 59 CONNECTION CABLE OF ROTARY CUTTER COVER 1. Remove the screw (as circle indicated).
- Page 60 2. Remove the cover panel by pushing right-hand side. 3. Stick the hub onto the circled area. 4. Direct the cutter’s cable through the platen bracket of the printer. 5. Engage the catchs of the cutter module firmly into the printer.
- Page 61 6. Plug the cutter’s cable into the printer in the direction of the arrow. 7. Put the cable into the hub. Close printer cover.
- Page 62 CONNECT CABLE OF LABEL DISPENSER SCREWS PAPER SENSOR 1. Remove the screw (as circle indicated).
- Page 63 2. Remove the cover panel by pushing to right-hand side. 3. Stick the hub onto the circled area. 4. Direct the label dispenser’s cable through the platen bracket of the printer. 5. Engage the catchs of the label dispenser module firmly into the printer.
- Page 64 7. Put the cable into the hub. 8. Close printer cover.
- Page 65 Step1. Remove the screw on the left side cover. Step2.Disassemble the left side cover. Step3.Install the WiFi Module.
- Page 66 Step4.Connect the cable. Step5.Install the left side cover. Step6. Lock the left cover screws.
- Page 67 Step1. Remove the screw on the left side cover. Step2. Disassemble the left side cover. Step3. Install the Bluetooth Module.
- Page 68 Step4. Connect the cable. Step5. Install the left side cover. Step6. Lock the left cover screws.
- Page 69 1. Open the printer cover. 2. Using a screwdriver or a coin, loosen the screw to take out the TPH module. 3. Turn the print head counterclockwise to a top right position 4. Turn the print head counterclockwise to a top right position...
- Page 70 1. Open the printer cover. 2. Using a screwdriver or a coin to loosen the screw 3. Turn the print head counterclockwise to a top right position If no improvement is visible, turn the screws(A) clockwise or counterclockwise as far as possible and be sure to align with the indicator board and indicator line.
- Page 73 1. Open the printer cover. 2. Using a screwdriver or a coin to loosen the screwcoin to loosen the screw When using a variety of label stock and ribbons, the ink may not be evenly distributed. If there is no printed image on one side of the paper, or the ribbon wrinkles, the print head pressure must be readjusted using the TPH spring boxes.
- Page 74 To keep track of the change in print quality, you should adjust the screws by half a turn at a time. Print a test page. If there is no improvement in the print result, turn the screw by another half turn. Do not turn the adjustment screw more than two full turns(360〫).
- Page 75 Switch off the printer before removing the CUTTER. (Remove or install cutter refer to ‘’accessories’’ in Section 5) Unscrew the screw at the bottom of cutter. Remove the cutter cover. Clean and remove jammed paper. Reinstall CUTTER back onto printer.
- Page 78 、 、 、 、 、 、...
- Page 80 ─ * Quick setting only supports GoLabel 1.15K and Arm 7 (FW1.100) Or Arm 9 (FW2.00A) or higher version...
- Page 86 ─...
Need help?
Do you have a question about the ZX400+ Series and is the answer not in the manual?
Questions and answers