Advertisement
Quick Links
Before assembly
•
We recommend that time is taken to read the
instructions before starting assembly, then follow the
easy step by step guide.
The instruction sheet is only a guide to the assembly.
Certain items may not be shown to scale.
•
Check all components prior to assembly
•
This product should be assembled by no
less than Two people.
•
Never attempt to erect the assembly in
high winds.
•
Drill components where indicated.
x 2
Drill
Biocidal Products
Regulation EU 528/2012
Wolmanit
®
CX treated wood is a treated article that incorporates biocidal
products: copper hydroxide carbonate/II/ and boric acid. They protect wood
against fungal decay /rot/ and insect attack. Keep away from food, drink and
animal feeding stuffs. Avoid breathing dust when cutting treated wood.
Recommended tools for assembly
•
Cross head screw driver
•
Drill with 3mm diameter drill bit
•
Tape measure
•
Step ladder
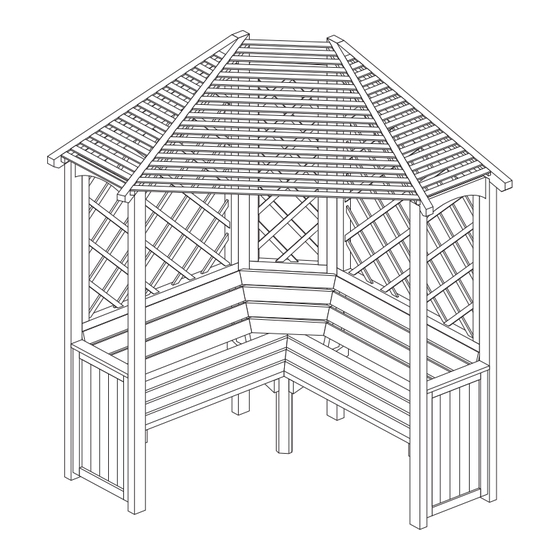
No.
Components
1
Uprights
2
Left-hand seat
3
Right-hand seat
4
Back rest
5
Lattice
6
Back legs
7
Corner back rest slat (350mm)
8
Corner back rest slat (380mm)
9
Corner back rest slat (410mm)
10
Corner back rest slat (435mm)
11
Centre seat support
12
Corner lattice
13
Outer rafters
14
Left-hand inner rafter
15
Right-hand inner rafter
16
Left-hand roof section
17
Right-hand Roof section
18
Top centre roof section
19
Bottom centre roof section
No.
Fixing kit
20
100mm screws
21
70mm screws
22
60mm screws
23
50mm screws
24
40mm screws
Balmoral Arbour
Assembly Instructions
Qty.
2
1
1
2
2
2
13
1
1
1
16
1
1
1
2
14
1
1
1
1
1
1
Qty.
8
4
40
4
20
1
5
6
2
11
English SS162B
18
17
19
12
10
9
8
7
3
15
4
Advertisement

Related Manuals for Rowlinson Garden Products Balmoral Arbour SS162B


Summary of Contents for Rowlinson Garden Products Balmoral Arbour SS162B
- Page 1 Balmoral Arbour English SS162B Assembly Instructions Before assembly • We recommend that time is taken to read the instructions before starting assembly, then follow the easy step by step guide. The instruction sheet is only a guide to the assembly. Certain items may not be shown to scale.
- Page 2 1. Seats to uprights Drill pilot holes in the seat slat bearers as shown. Lay the upright on the ground and position the top of the seat bearer 420mm from the bottom of the upright. Secure the seat the legs of the upright using 4 x 60mm screws. Screw through the drilled holes in the seat bearers into the upright legs. Note: Drill Drill pilot holes in the seat bearers...
- Page 3 4. Securing the back legs On a back leg measure and mark the seat height to the same height as on the upright panels (420mm). To the narrow edge of the post secure the seat using 2 x 60mm screws, screw through the drilled holes in the seat bearer into the post. Secure the seat back to the post through the drilled holes in the seat back bearers using 2 x 60mm screws and then attach the lattice using 3 x 60mm screws.
- Page 4 Green Lane components shown and are only correct at time of Wardle Nr. Nantwich printing. We reserve the right to change the Cheshire specification of our products without prior notice. CW5 6BN www.rowgar.co.uk 2015 © Rowlinson Garden Products Ltd...
Need help?
Do you have a question about the Balmoral Arbour SS162B and is the answer not in the manual?
Questions and answers