Table of Contents
Advertisement
Quick Links
IMPORTANT SAFETY INFORMATION
Adult assembly is required. Checks and main-
tenance needs to be carried out on the main
parts (fixings etc.) at regular intervals. If these
checks are not carried out the product could
become unsafe.
Before assembly
•
We recommend that time is taken to read the
instructions before starting assembly, then
follow the easy step by step guide.
The instruction sheet is only a guide to
the assembly. Certain items may not be
shown to scale.
•
Check all components prior to assembly
•
This product should be assembled by no
less than two people.
•
Never attempt to erect the assembly in
high winds.
•
Drill components where indicated.
x 2
Drill
No.
Components
1
Floor panel
2
Angled back panel
3
Landing support back panel
4
Small side panel
5
Large side panel
6
Large front window panel
7
Small front window panel
8
door header panel
9
Apex panel
10
Landing floor
11
Landing support block
(35x29x100mm)
12
Fence top rail
13
Ladder
14
Ladder attachment piece
(500x45x32mm)
15
Fence railing
16
Purlin
(35x29x1815mm)
17
Small front roof panel
(980x1220mm)
18
Small Rear roof panel
(980x811mm)
19
Large front roof panel
(1900x1220mm)
20
Large rear roof panel
(1900x811mm)
21
Felt battens
(1015x29x29mm)
22
Batten blocks
(29x29x140mm)
23
Roofing felt roll
(10m)
24
Short shaped baregeboard
25
Long shaped bargeboard
26
Short plane baregeboard
27
Long plane bargeboard
28
Door
29
Long side/rear coverstrip
(12x40x1700mm)
30
Short side coverstrips
(12x40x1235mm)
31
Front coverstrips
(12x40x830mm)
32
Window glazing
(478x398mm)
33
Horizontal beading
(10x10x479mm)
34
Vertical beading
(10x10x382mm)
35
Door hinge strip
(12x40x1220mm)
36
Door hinge
No.
Fixing Kit
37
Finial
38 Catch mounting block
(29x29x80mm)
39 Roller catch kit
40 Metal L-Brackets
41
Door handle
42 50mm screws
43 35mm screws
44 25mm screws
45 19mm black round head screws
46 10mm round head screws
47 30mm nails
48 20mm nails
49 10mm felt nails
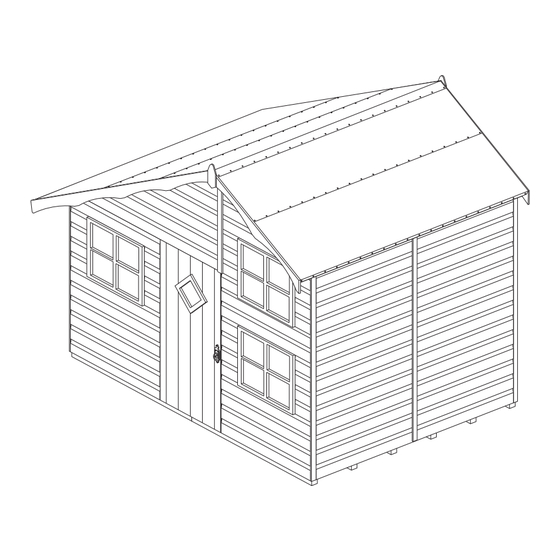
Playaway Swiss Cottage
Assembly Instructions
WARNING
Not suitable for children under 36 months
due to small parts and sharp points.
Qty.
2
1
1
2
2
Recommended tools for assembly
1
•
Cross head screw driver
1
•
Hammer
1
•
Sharp knife
2
•
Drill with 3mm diameter drill bit
1
•
Spirit level
1
•
Tape measure
1
•
Silicon sealant
1
•
Step ladder
1
10
19
5
16
1
1
1
1
14
4
10
22
1
1
1
1
1
1
4
13
3
1
3
6
6
1
1
40
Qty.
2
36
1
33
1
2
1
72
32
34
85
26
4
4
86
10
36
139
20
18
17
21
8
4
30
31
7
1
35
12
38
39
41
28
11
English SS288C
37
27
25
9
2
3
15
5
6
23
26
24
29
Advertisement
Table of Contents

Related Manuals for Rowlinson Garden Products SS288C


Summary of Contents for Rowlinson Garden Products SS288C
- Page 1 Playaway Swiss Cottage English SS288C Assembly Instructions IMPORTANT SAFETY INFORMATION WARNING Adult assembly is required. Checks and main- Not suitable for children under 36 months tenance needs to be carried out on the main due to small parts and sharp points.
- Page 2 1. Laying the floor section Prepare a level area for the playhouse to sit. Attach three wooden or similar bearers of size 50 x 50 x 1810mm (not supplied in kit) to each floor section. To "VALIDATE" the guarantee, this item should be erected on 50mm x 50mm treated wooden or similar bearers (These are not supplied with the kit.) Ground contact must be avoided.
- Page 3 4. Securing the walls to the floor Ensure the walls are sitting square on the floor and secure them down using 16 x 50mm screws, screw through the panel framing into the floor. Side panel Back panel Drill Drill pilot holes for each screw in this 50mm section.
- Page 4 8. Roof Secure two felt battens to the lower edge of the two short roof panels using 12 x 30mm nails. Ensure the felt battens are flush to the edges of the panels. In the same way attach two felt battens to the lower edge of the two large roof panels. Flush to the front and rear edges of the large roof panel attach three bargeboard blocks using 2 x 30mm nails per block.
- Page 5 10. Roofing felt Cut the roll of roofing felt into four equal lengths. Place a length along the short side of the roof. At the front and along the lower edge of the roof leave an overhang of felt of at least 45mm. Fold down the felt along the lower edge and secure to the felt batten using 20 x10mm felt nails evenly spaced. Tension the felt up the roof and secure along the upper edge using 5 x 10mm felt nails.
- Page 6 If the building is to sit on soil or grass it MUST be erected on pressure treated wooden 50mm x 50mm or similar bearers (These are not supplied in the kit). Rowlinson Garden Products recommend using pressure treated bearers with all buildings on any type of base.
Need help?
Do you have a question about the SS288C and is the answer not in the manual?
Questions and answers