Table of Contents
Advertisement
Quick Links
Advertisement
Table of Contents

Related Manuals for PR Lighting XRLED 500 SPOT


Summary of Contents for PR Lighting XRLED 500 SPOT
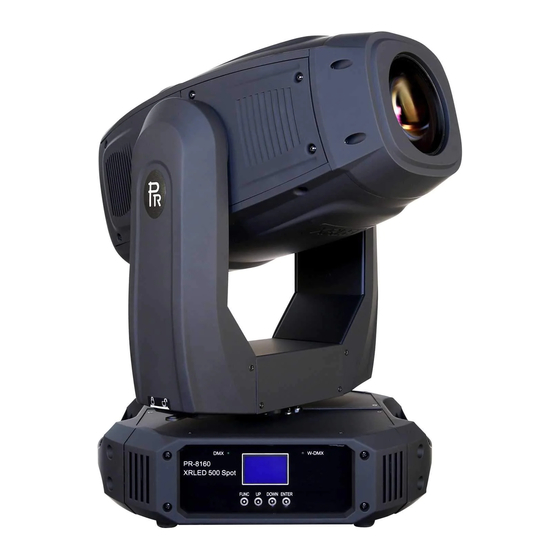
- Page 1 XRLED 500 SPOT PR-8160 This product manual contains important information about the safe installation and use of this projector. Please read and follow these instructions carefully and keep this manual in a safe place for future reference. PR LIGHTING LTD.
- Page 2 INDEX SAFE USAGE OF THE PROJECTOR INSTALLING THE PROJECTOR POWER SUPPLY – MAINS CONTROL CONNECTIONS DMX TERMINATOR SETUP OPTIONS-PROJECTOR CONFIGURATION TO SET THE DMX START ADDRESS STAND-ALONE MODE MASTER/SLAVE MODE OPERATION MENU REPLACING GOBOS DMX PROTOCOL INDICATION OF LED DIGITAL TUBE MAINTENANCE LUBRICATION KEEPING THE PROJECTOR CLEAN...
-
Page 3: Safe Usage Of The Projector
SAFE USAGE OF THE PROJECTOR When unpacking and before disposing of the carton check there is no transportation damage before using the projector. Should there be any damage caused by transportation, consult your dealer and do not use the apparatus. The projector is for indoor use only, IP20. -
Page 4: Install The Projector
INSTALL THE PROJECTOR Handle Safety cord Clamp Warning Please run the safety cord through a safety cord hole for safety. Safety cord hold Operation menu Take 2 clamps and the safety cord out from the package and mount 2 clamps on the underside of fixture with 2 retainers attached to each clamp. -
Page 5: Power Supply-Mains
POWER SUPPLY-MAINS Connect the power cord as follows: L (live) =brown E (earth) =yellow/green N (neutral) =blue Use the plug provided to connect the mains power to the projector paying attention to the voltage and frequency marked on the panel of the projector. -
Page 6: Dmx Terminator
DMX TERMINATOR In the Controller mode, at the last fixture in the chain, the DMX output has to be connected with a DMX terminator. This prevents electrical noise from disturbing and corrupting the DMX control signals. The DMX terminator is simply an XLR connector with a 120 (ohm) resistor connected across pins 2 and 3, which is then plugged into the output socket on the last projector in the chain. -
Page 7: To Set The Dmx Start Address
TO SET THE DMX START ADDRESS Each projector must be given a DMX start address so that the correct projector responds to the correct control signals. This DMX start address is the channel number from which the projector starts to “listen” to the digital control information being sent out from the controller. -
Page 8: Operation Menu
OPERATION MENU 1st LEVEL 2nd LEVEL 3rd LEVEL 4th LEVEL AddR (XXX:1~512) DMX Address Reset Are You Sure Standard 23 STD 23,Maximm Address:490 CNFG DMX mode Short 18 Config Settings (Default is:STD) Short 18,Maximm Address:495 Extended 31 Extended 31,Maximm Address:482 Pan Tilt Swap (Default is OFF)... - Page 9 Iris effect 2 Iris Effect 3 NO Gobo Gobo 1 to Gobo 7 Forward Rotation Fixed Gobo Wheel Reverse Rotation GWS1-GWS6 Manual Test Shake Effect 1-6 NO Gobo Gobo from 1 to 6 Forward rotation Rotating Gobo Wheel Reverse Rotation Shake Effect 1-6 STOP GOBO Rotation...
- Page 10 CH02 0-255 Dimmer CH03 0-255 CH04 0-255 Green CH05 0-255 Blue CH06 0-255 White CH07 0-255 Iris CH08 0-255 Fixed Gobo Wheel CH09 0-255 Rotating Gobo Wheel CH10 0-255 Gobo Rotation Direction CH11 0-255 Prism Settings CH12 0-255 Prism Rotation CH13 0-255 Focusing...
-
Page 11: Replacing Gobos
REPLACING GOBOS Rotating Gobo Wheel Fixed Gobo Wheel Disconnect the fixture from power. Carefully lift off the cover by undoing the 4 fast-fit screws. Before the replacement of fixed gobos, take leaf spring out using finger, push the gobos out carefully and insert new gobos. For rotating gobos: take rotating gobo wheel out by hand, push gobos out after pulling out leaf springs. - Page 12 Green 032-063 Blue 064-095 White 096-127 128-159 Yellow Cyan 160-191 192-223 All Lamps On Rainbow Effect(Speed From Slow to Fast) 224-255 Red from light to Dark (0-100%) 0-255 Red Fine Red in 16 Bit precision 0-255 Green Green from light to Dark (0-100%) 0-255 Green Fine Green in 16 Bit precision...
-
Page 13: Indication Of Led Digital Tube
Rotation speed from slow to fast 128-143 Reverse rotation from slow to fast 144-159 Gobo shake 1 from fast to slow 160-175 Gobo shake 2 from fast to slow 176-191 Gobo shake 3 from fast to slow 192-207 Gobo shake 4 from fast to slow 208-223 Gobo shake 5 from fast to slow 224-239... -
Page 14: Maintenance
MAINTENANCE If the projector does not function, check the fuses on the power socket of the projector, they should only be replaced by fuses of the same specification. Should these be damaged call a qualified technician before replacement. The projector has thermal protection device that will switch off the projector in case of overheating, should either of these operate, check that the fans are not blocked, and if they are dirty clean them before switching on the projector again. -
Page 15: Technical Data
TECHNICAL DATA VOLTAGES: 100V ~ 240V AC,50/60Hz POWER CONSUMPTION: 350W@220V LIGHT SOURCE: 280W LED, RGBW 4 in 1 COLOURS: RGBW(Red Green Blue White) Linearly Mixing with Macro With variable speed bi-directional rainbow effect Variable pulse and strobe effects COLOR TEMPERATURE: Linear adjustment from 2700K~10000K GOBOS: 1 ROTATING GOBO WHEEL:... - Page 16 BEAM ANGLE: 12°~36°linear adjustment HEAD MOVEMENT: Pan 540º, Tilt 270º with auto position correction Swap and Invert functions of Pan and Tilt CONTROL: DMX512, 3 pin, 5 pin interfaces 18channels in short mode, 23 channels in standard mode, and 31 channels in extended mode. Master/slave mode Stand-alone mode Self-test mode...
- Page 17 LIGHT OUTPUT: 17/20...
-
Page 18: Electrical Diagram
ELECTRICAL DIAGRAM 18/20... -
Page 19: Component Order Codes
COMPONENT ORDER CODES NAME PART NO. QUANTITY REMARK 400W POWER SUPPLY 192010153 230W POWER SUPPLY 192010156 RGBW LIGHT SOURCE 150020258 5A FUSE 270041045 5X20 5A、250V TILT BELT 290151378 HTD-684-3M 290151343 HTD-447-3M PAN BELT TAIL FAN 030060061 92X92X25 BASE FAN 030060080 60X60X20 PAN MOTOR 030040190... - Page 20 PR LIGHTING LTD. 1582 Xingye Avenue, Nancun Panyu Guangzhou, 511442 China TEL: +86-20-3995 2888 FAX: +86-20-3995 2330 P/N: 320020100 Version: 20131009 (Preliminary) 20/20...
Need help?
Do you have a question about the XRLED 500 SPOT and is the answer not in the manual?
Questions and answers