
Related Manuals for Ruijie RG-AP880-AR


Summary of Contents for Ruijie RG-AP880-AR
- Page 1 Ruijie RG-AP880-AR Access Point Hardware Installation and Reference Guide Document Version: V1.1 Date: 2022.09.08 Copyright © 2022 Ruijie Networks...
- Page 2 Due to product version upgrades or other reasons, the content of this document will be updated from time to time. Ruijie Networks reserves the right to modify the content of the document without any notice or prompt. This manual is for reference only. Ruijie Networks endeavors to ensure content accuracy and will not shoulder...
- Page 3 Preface Intended Audience This document is intended for: Network engineers Technical support and servicing engineers Network administrators Technical Support Ruijie Networks Website: https://www.ruijienetworks.com/ Technical Support Website: https://ruijienetworks.com/support Case Portal: https://caseportal.ruijienetworks.com Community: https://community.ruijienetworks.com ...
- Page 4 Note An alert that contains additional or supplementary information that if not understood or followed will not lead to serious consequences. Specification An alert that contains a description of product or version support. Note The manual offers configuration information (including model, port type and command line interface) for indicative purpose only.
-
Page 5: Product Introduction
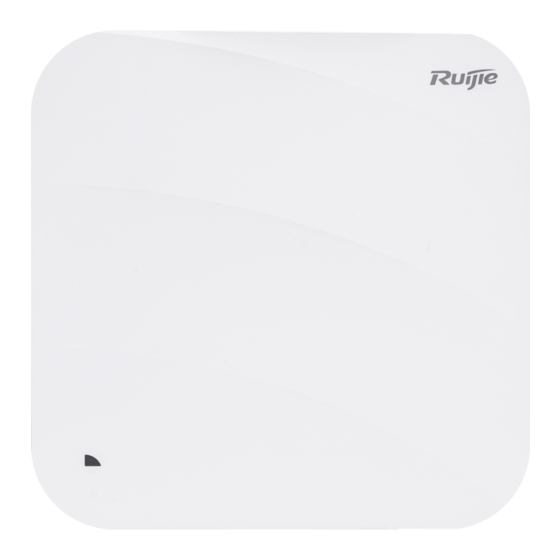
1.2 Product Appearance The RG-AP880-AR provides four RF ports, two Ethernet copper ports, one 5 Gbps SFP port, one RJ45 console port, one power socket for an external power adapter, one USB port, and one reset button. For the two Ethernet copper ports, LAN 1 port supports IEEE 802.3af/at/bt-compliant PoE and LAN 2/IoT port can be used to supply power to the IoT module (48... - Page 6 Ruijie RG-AP880-AR Wireless Access Point Hardware Installation Guide Product Introduction Figure 1-2 Top Table 1-1 LED on the Top Item Description Used to show the running status of the system Figure 1-3 Side Table 1-2 Button and Ports Item Description...
- Page 7 Ruijie RG-AP880-AR Wireless Access Point Hardware Installation Guide Product Introduction Item Description DC power port Connected to a 54 V DC power adapter to supply power to an AP LAN 1/PoE port Uplink service port for a wired Ethernet connection and data transmission, supporting IEEE 802.3af/at/bt-compliant PoE...
-
Page 8: Package Contents
Ruijie RG-AP880-AR Wireless Access Point Hardware Installation Guide Product Introduction 1.3 Package Contents Table 1-3 Package Contents Item Quantity Mounting bracket Wall anchor Phillips pan head screw 4.2 × 20 Warranty card and list of hazardous substances Installation Guide 1.4 Technical Specifications 1.4.1 Dimensions and Weight... - Page 9 Ruijie RG-AP880-AR Wireless Access Point Hardware Installation Guide Product Introduction 1.4.2 RF Specifications Table 1-5 RF Specifications RF Specifications RG-AP880-AR Four radios: Among the four RF ports, the fourth RF port can switch between 2.4 GHz and 5 GHz bands.
-
Page 10: Power Supply And Consumption
Ruijie RG-AP880-AR Wireless Access Point Hardware Installation Guide Product Introduction 1.4.3 Ports Table 1-6 Ports IPorts RG-AP880-AR Bluetooth Bluetooth 5.1 USB Port USB 3.0 Uplink: One 100/1000/2500/5000Base-T auto-sensing Ethernet port, supporting IEEE 802.3af/at/bt-compliant PoE One 5GE SFP combo port,compatible with 1/2.5GE SFP ports... -
Page 11: Led And Button
Ruijie RG-AP880-AR Wireless Access Point Hardware Installation Guide Product Introduction 1.4.5 Environment and Reliability Table 1-7 Standard Compliance RG-AP880-AR Environment Reliability Operating temperature: –10° C to +50° C (14° F to 122° F) Temperature Storage temperature: –40° C to +70° C (–40° F to +158° F) At a height between 3000 m (9842.52 ft.) and 5000 m (16404.20 ft.) above the sea... -
Page 12: Optical Module
Ruijie RG-AP880-AR Wireless Access Point Hardware Installation Guide Product Introduction Button Operation Result Reset Press the button Reboot the device. button for less than 2s. Press and hold the Restore the device to default settings. button for more than 3s. -
Page 13: Preparing For Installation
Ruijie RG-AP880-AR Wireless Access Point Hardware Installation Guide Preparing for Installation The 2.5 Gbps optical port of the AP does not support rate negotiation. If an O/E conversion module is used, ensure the same access rate for the AP, O/E conversion module, and port on the peer device. -
Page 14: Installation Environment Requirements
Ruijie RG-AP880-AR Wireless Access Point Hardware Installation Guide Preparing for Installation Confirm the preceding items before you cut off the power supply. Do not place the device in a damp/wet location. Do not let any liquid enter the chassis. -
Page 15: Cleanliness Requirements
Ruijie RG-AP880-AR Wireless Access Point Hardware Installation Guide Preparing for Installation 2.2.5 Cleanliness Requirements Dust poses a major threat to the running of the device. Indoor dust falling on the device may be adhered by static electricity, causing poor contact of metallic joints. Such electrostatic adherence may occur more easily when the relative humidity is low, not only affecting the service life of the device, but also causing communication faults. -
Page 16: Lightning Protection Requirements
Ruijie RG-AP880-AR Wireless Access Point Hardware Installation Guide Preparing for Installation 2.2.7 Lightning Protection Requirements The device can guard against lightning strikes. As an electric device, it may still be damaged by too strong lightning strikes. Take the following lightning protection measures: ... -
Page 17: Installing The Ap
Ruijie RG-AP880-AR Wireless Access Point Hardware Installation Guide Installing the AP 3 Installing the AP The RG-AP880-AR must be installed and secured indoors. Before installing the device, make sure that you have carefully read the requirements described in Chapter 2. - Page 18 Ruijie RG-AP880-AR Wireless Access Point Hardware Installation Guide Installing the AP The position of the indoor emergency power switch is found before installation, so that the power switch can be cut off in case of accidents. For ceiling-mounted or wall-mounted AP, the mounting bracket dimensions and mounting hole pattern should meet the requirements in Table 1-4 Dimensions and Weight.
-
Page 19: Ceiling Mounting
Ruijie RG-AP880-AR Wireless Access Point Hardware Installation Guide Installing the AP Fasten the device tightly. 3.4 Installing the AP You are advised to install the device where you can get the optimal coverage. In indoor areas, the signal coverage of a ceiling-mounted device is larger than that of a wall-mounted device. Please choose the ceiling-mounting method first. -
Page 20: Wall Mounting
Ruijie RG-AP880-AR Wireless Access Point Hardware Installation Guide Installing the AP Figure 3-3 Aligning the Square Feet with the Mounting Holes Install the Ethernet cable before mounting the AP on the bracket. DC power supply or PoE Install the Ethernet cables before mounting the AP on the bracket. - Page 21 Ruijie RG-AP880-AR Wireless Access Point Hardware Installation Guide Installing the AP Figure 3-5 Attaching the Mounting Bracket to the Wall Diameter: 6.5 mm 53 mm (0.26 in.) (2.09 in.) 53 mm (2.09 in.) Wall anchor Screw Align the square feet on the rear of the AP with the mounting holes on the bracket.
- Page 22 Ruijie logo pointed upwards. When mounting the AP on the wall, keep the Ruijie logo pointed upwards. The square feet should fit easily into the mounting holes. Do not forcibly push the AP into the holes.
-
Page 23: Installing Other Modules
Ruijie RG-AP880-AR Wireless Access Point Hardware Installation Guide Installing the AP Figure 3-8 Removing a Wall-mounted AP 3.5 Installing Other Modules 3.5.1 Securing the AP Loosen the screw on the mounting bracket and engage the security screw. Figure 3-9 Engaging the Security Screw Align the square feet on the rear of the AP over the mounting holes on the bracket, slide the AP in the opposite direction of the arrows on the mounting bracket until it clicks into place. - Page 24 Ruijie RG-AP880-AR Wireless Access Point Hardware Installation Guide Installing the AP Figure 3-10 Mounting the AP on the Bracket Install the Ethernet cables before mounting the AP on the bracket. Align the square feet on the rear of the AP with the mounting holes on the bracket.
-
Page 25: Connecting Cables
Ruijie RG-AP880-AR Wireless Access Point Hardware Installation Guide Installing the AP Insert the optical fiber. 3.6 Connecting Cables Connect twisted pairs with the LAN/PoE port on the AP. See 7.1 Connectors and Media for supported wiring of twisted pairs. By default, the baud rate is set to 9600, data bit to 8, stop bit to 1, with no parity check and no flow control on the console port of the AP. -
Page 26: Setting Up The Configuration Environment
Ruijie RG-AP880-AR Wireless Access Point Hardware Installation Guide Verifying the Operating Status 3.8.3 Checking the Power Supply Verify that the power cord is properly connected and compliant with safety requirements. Verify that the AP is operational after power-on. -
Page 27: Remote Maintenance
If the AP works in fit mode, you can use an AC to centrally manage and maintain the AP. 5.3 Hardware Maintenance If the hardware is faulty, please contact Ruijie technical support. 6 Troubleshooting 6.1 General Troubleshooting Procedure The device does not function properly. - Page 28 Ruijie RG-AP880-AR Wireless Access Point Hardware Installation Guide Appendix 6.2.3 LED Keeps Steady Red The LED keeps steady red for a long time, indicating that the Ethernet port is not connected. Verify the Ethernet connection. 6.2.4 LED Keeps Steady Green The device performs initialization after power-on.
- Page 29 Ruijie RG-AP880-AR Wireless Access Point Hardware Installation Guide Appendix Figure 7-1 1000BASE-T Twisted Pair Connections Straight-Through Cable Crossover Cable Switch Switch Switch Switch 1 TP0 + 1 TP0 + 1 TP0 + 1 TP0 + 2 TP0 - 2 TP0 -...
-
Page 30: Cabling Recommendations
Ruijie RG-AP880-AR Wireless Access Point Hardware Installation Guide Appendix Figure 7-3 100BASE-TX/10BASE-T Twisted Pair Connections Straight-Through Cable Crossover Cable Switch Switch Switch Switch 1 IRD + 1IRD + 1 IRD + 1 OTD + 2 IRD - 2IRD - 2 IRD -... - Page 31 Ruijie RG-AP880-AR Wireless Access Point Hardware Installation Guide Appendix Requirement for the Minimum Cable Bend Radius The bend radius of a fixed power cord, network cable, or flat cable should be over five times greater than their respective diameters. The bend radius of these cables that are often bent or plugged should be over seven times greater than their respective diameters.
- Page 32 Ruijie RG-AP880-AR Wireless Access Point Hardware Installation Guide Appendix Figure 7-5. 7-30...
- Page 33 Ruijie RG-AP880-AR Wireless Access Point Hardware Installation Guide Appendix Figure 7-5 Cutting off Excess Cable Tie When cables need to be bent, bind them first but do not tie cable ties within the bend. Otherwise, stress may be generated on the cables and cause the wires inside to break, as shown in Figure 7-6.
- Page 34 Ruijie RG-AP880-AR Wireless Access Point Hardware Installation Guide Appendix Figure 7-7. 7-32...
-
Page 35: Power Adapter Specifications
Ruijie RG-AP880-AR Wireless Access Point Hardware Installation Guide Appendix Figure 7-7 Fastening Cable Lugs Description: ① ③ Flat washer Spring washer ② ④ Flat washer Hard power cords should be fastened in the terminal connection area to prevent stress on terminal connection and cable. - Page 36 Ruijie RG-AP880-AR Wireless Access Point Hardware Installation Guide Appendix Figure 7-8 Power Adapter Dimensions 7-34...
Need help?
Do you have a question about the RG-AP880-AR and is the answer not in the manual?
Questions and answers