Tsun TITAN TSOL-MP3000 Quick Installation
Microinverter
Hide thumbs
Also See for TITAN TSOL-MP3000:
- Quick installation manual (2 pages) ,
- User manual (24 pages) ,
- Quick installation manual (2 pages)
Advertisement
Table of Contents
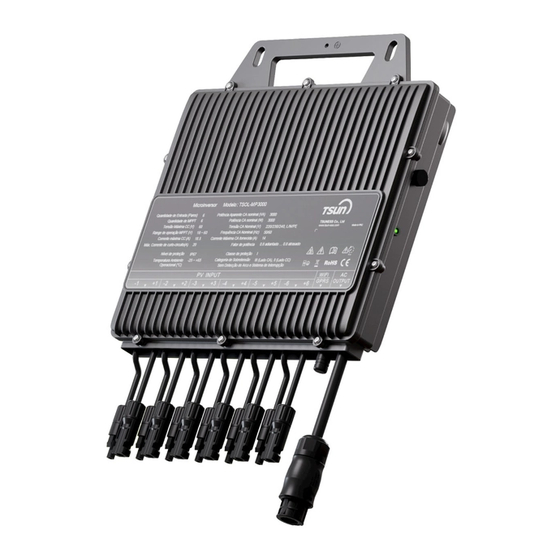
TITAN MICROINVERTER
Quick Installation
Check the Installation Environment and Position
When choosing the position of installation, comply with the following
conditions:
· To avoid unwanted power derating due to an increase in the
internal temperature of the inverter, do not expose it to direct
sunlight.
· To avoid overheating, always make sure the flow of air around the
inverter is not blocked.
· Do not install in places where gasses or flammable substances
may be present.
· Avoid electromagnetic interference that can compromise the
correct operation of electronic equipment.
· It's recommended to install microinverter on structures under-
neath the photovoltaic modules so that they work in the shade.
· Use a mobile phone to check the Wi-Fi signal strength at the
installation position. If the Wi-Fi signal is bad, try to install the
microinverter at another position or move the Wi-Fi router.
Installation Steps
DANGER
Only qualified personnel should install, troubleshoot, or replace TITAN
micro inverters or the cable and accessories.
·Before installation, check the unit to ensure absence of any transport
or handling damage, which could affect insulation integrity or safety
clearances.
·Unauthorized removal of necessary protections, improper use,
incorrect installation and operation may lead to serious safety and
shock hazards or equipment damage.
·Be aware that installation of this equipment includes risk of electric
shock.
Step 1. Fix the microinverter
DANGER
Do not install the equipment in adverse environment conditions such
as flammable, explosive, corrosive, extreme high or low temperature,
and humid.
WARNING
Choose installation location carefully and adhere to specified cooling
requirements. Micro-inverter should be installed in a suitable position
with good ventilation and no directly sunshine.
CAUTION
There are no screws and nuts in the package.
Choose an installation position. Using two pairs of screws and nuts
to fix the microinverter on the frame. Make sure that the label of
microinverter should be upside.
Microinverter can also be installed on the wall. Using the bracket
(optional) and fix it on the wall. Then using two pairs of screws and
nuts to fix the microinverter on the bracket. Make sure that the
label of microinverter should be outside.
Step 2. Connect the AC cable
DANGER
·Do not install the AC junction box without first removing AC power
from the system.
·To prevent electrical hazards, make sure the micro-inverter system is
disconnected from the home distribution network and the AC breaker
is open.
WARNING
·Ensure that all AC cables are correctly wired and that none of the
wires are pinched or damaged.
·Use AWG 12 ( 4 mm²) cable for AC end cable.
CAUTION
·The installation technician is responsible for selecting a kind of AC
cable and connecting the micro-inverter system into the home
distribution network correctly.
·The AC connecters may be provided by different suppliers. The port
definitions are subject to actual objects.
Take out the AC connector from the package. Get the AC cable
through the shell of AC connecter and connect the cable to the
right port.
The definition of the port is shown below:
L:
Live
N:
Neutral
PE: Ground
(Brown/Red)
(Blue/Black)
(Yellow-Green)
Advertisement
Table of Contents

Subscribe to Our Youtube Channel
Related Manuals for Tsun TITAN TSOL-MP3000


Summary of Contents for Tsun TITAN TSOL-MP3000
- Page 1 Step 1. Fix the microinverter Step 2. Connect the AC cable TITAN MICROINVERTER DANGER DANGER Quick Installation Do not install the equipment in adverse environment conditions such ·Do not install the AC junction box without first removing AC power as flammable, explosive, corrosive, extreme high or low temperature, from the system.
- Page 2 Follow the user guidance and complete all the operations in ·Use MC4 compatible DC connectors in the inverter side of DC the App. extension cable, or get the DC connectors form TSUN. ·Contact PV module manufacturers for the requirements of DC CAUTION TSUNESS Co,.
Need help?
Do you have a question about the TITAN TSOL-MP3000 and is the answer not in the manual?
Questions and answers