
Related Manuals for Secure C1727


Summary of Contents for Secure C1727
- Page 1 Simple controls solution guide PTD, C1727 and H3747 BGX701-366-R01 Copyright © 2020-2023, SIHPL. All rights reserved. E&OE.
-
Page 2: Table Of Contents
Contents Before you begin Know your PTD (Programmable Thermostat display) The Home Screen Symbols you may see on the PTD Know the buttons and their functions Menu navigation- General instructions Activating the display backlight Understanding the menus and their functions Change Zone menu 3.1.1 Adjusting the zone temperature... - Page 3 Installing the receiver (C1727/H3747) Installing the C1727 5.1.1 Label your wires 5.1.2 Drill the holes and secure the mounting plate 5.1.3 In case of surface wiring (optional) 5.1.4 Make connections Installing the H3747 5.2.1 In case of surface wiring (optional) 5.2.2...
-
Page 4: Before You Begin
To control the system locally using the mobile app, Bluetooth must be enabled in your phone settings. The app communicates with the receiver (either C1727 or H3747, which is pre-paired with a PTD) via Bluetooth. To control the system remotely using the mobile app the receiver must be fitted with a Wi-Fi adapter. -
Page 5: Know Your Ptd (Programmable Thermostat Display)
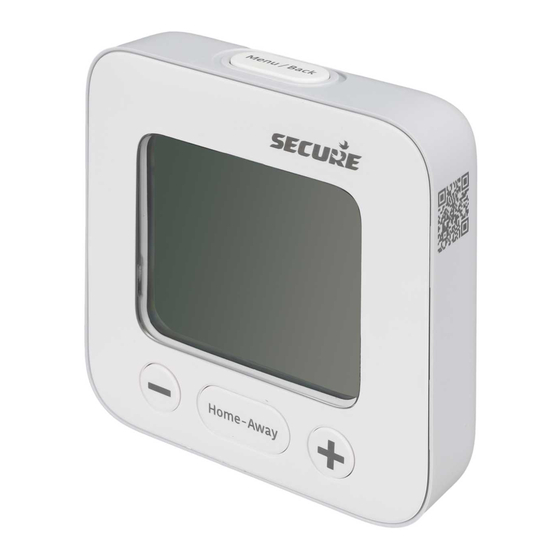
Know your PTD (Programmable Thermostat display) The Secure PTD is a battery operated, wireless thermostat which enables independent control of your heating and hot water. It can control up to 4 zones (3 heating + 1 hot water or 4 heating). Designed for comfort and convenience, it comes with an intuitive interface and powerful features such as single click Home-Away, Boost, Scheduling, Optimum start/stop and Service interval etc. -
Page 6: Symbols You May See On The Ptd
Symbols you may see on the PTD Indicates that your The PTD is connected by a radio signal boiler is On with the receiver. This icon indicates the communication signal strength Indicates that Hot Indicates a warning notification water is On Indicates that the button lock has been Indicates low battery activated to avoid unintentional setting... -
Page 7: Menu Navigation- General Instructions
Press button • To increase the target temperature, date and time • To navigate between different menus/menu items in the forward direction Long Press Fast forward the selection of temperature, dates and time in forward direction Press button • To decrease the target temperature, date and time •... -
Page 8: Activating The Display Backlight
As required, press the plus or minus buttons, until the required menu, selection, temperature, date or time appears. Activating the display backlight The PTD display backlit will illuminate for 4-5 seconds whenever any button is pressed. If no further buttons are pressed, it will automatically turn off in order to save battery life. To make the display backlit come on again, press any button on the PTD. -
Page 9: Adjusting The Zone Temperature
Change Zone menu The Change Zone menu lets you: • Switch between different zone views (if you have more than one) • Temporarily adjust the target temperature of a zone to suit your current needs. The temporary override will only last until the next scheduled set point is reached. -
Page 10: Applying Hold
Applying Hold To setup the Hold function, do the following: Press the top menu button and navigate to the Hold menu (If required press +/- until you reach the menu) Press + or – to select the Hold duration and then confirm. The following options are available. -
Page 11: Creating Schedules
3.4.1 Creating schedules To create a schedule, do the following: Press the top menu button and navigate to the Schedule menu (If required press +/- until you reach the menu) and then confirm. Press + or – until the required zone is displayed for which to create the schedule and then confirm. - Page 12 Press + or – until the required day is displayed for which to create the schedule and then confirm. Press + or – until the required period is displayed and then confirm. Press + or – until the required time is displayed and then confirm. Note: Depending on the pre-configured time format (24 or 12 hrs.), you may have to select the hour/minute/AM or PM.
- Page 13 Notes: • The minimum time interval that can be defined for a period is 10 minutes. • The last period of the day will cover the remaining time of the day till the start time of next day (first period). Press + or –...
- Page 14 Once a day is programmed, this information can be copied and applied to the remaining (or selected) days of the week. Select Yes to copy the schedule. Press +/- to select required or all remaining days for which you want to copy the schdeule and then confirm.
- Page 15 If required, you can continue copying the schedule for other days (Repeat day selection with +/- buttons as necessary) Note: After the copy cycle is completed, the Editing cycle is initiated. If required, you can continue editing the schedule. (Repeat day selection with +/- buttons as necessary) 15 of 40 BGX701-294-R03, PTD user manual...
-
Page 16: Overriding A Schedule
SERVICE DUE Indicates that the PTD service is due. This is a landlord setting for Housing associations or local authorities only, who should be contacted. Secure do not set or manage this feature. Note: If the system is not serviced in time, you may not be able to control your heating or only partial control will be available, depending on the settings configured by your installer. -
Page 17: Settings
LOW BATTERY Indicates that the battery of the main PTD is low and the unit needs to be replaced. LOW BATTERY- Z (X) Indicates that the battery of the zone PTD or THS is low. Notes: If the PTD battery is low, the unit will need replacing. - Page 18 optimised in the best possible way. Economy mode will remove all cycling and is recommended for Heat Pumps. Optimum The PTD analyses the Enable or disable Start temperature rise and fall pattern and determines how long it will take for your zone to heat up to the target temperature.
-
Page 19: Advance Settings
Sensor or Wired device) Add wired This option enables you to attach a wired The wired device is added to device device with a zone in the heating system. the system Advance settings To access the options grouped under this menu, you require the User or Owner PIN. By default, the PIN is set to 1854. -
Page 20: Adjusting The Date And Time Settings
boost settings can be modified. menu of the PTD. In the mobile app, tap the Settings icon on the top right to view this option. Adjusting the date and time settings The PTD should already have the correct time and date when you unbox it, but can be amended if required: Press the top menu button and navigate to the Settings menu (If required press +/- until you reach the menu) -
Page 21: Factory Reset
Next scroll to Reset system and choose Yes. The PTD will confirm the reset is done and ask you to power cycle the receiver (C1727/H3747). Switch the receiver off for 20 seconds and switch the power back on again. When all the lights appear on the receiver press and hold the Channel select button for 7 seconds to put the receiver in pairing mode. - Page 22 The thermostat and receiver are already paired out of the box and have default schedule as well. The C1727 uses the standard 6 pin wall plate and the H3747 the 9 pin one. Both have volt free contacts. The links to the full installation guides if required can be found at the beginning of this guide.
- Page 23 Installing the C1727 Note: All graphics are for illustration purposes only. 5.1.1 Label your wires 23 of 40 BGX701-294-R03, PTD user manual Public...
- Page 24 5.1.2 Drill the holes and secure the mounting plate 24 of 40 BGX701-294-R03, PTD user manual Public...
- Page 25 In case of surface wiring (optional) Break the surface wiring knockout provided on the receiver before proceeding further 5.1.4 Make connections In all the following cases for the C1727 • Terminal 1 is hot water off • Terminal 2 is the common •...
- Page 26 26 of 40 BGX701-294-R03, PTD user manual Public...
- Page 27 27 of 40 BGX701-294-R03, PTD user manual Public...
- Page 28 Installing the H3747 28 of 40 BGX701-294-R03, PTD user manual Public...
- Page 29 5.2.1 In case of surface wiring (optional) Break the surface wiring knockout provided on the receiver before proceeding further. 5.2.2 Label your wires 29 of 40 BGX701-294-R03, PTD user manual Public...
- Page 30 5.2.3 Making the connections The above diagram is for the common 3 zone system, to see more diagrams go online to get the full installation guide for the H3747. The PTD supplied with the H3747 is assigned to control heating for zone 1 terminal 1 by default.
- Page 31 Upgrading from Channel Plus The H3747 uses the same wall plate as the Channel plus range and only requires a simple wiring change in most cases. If you have existing regular thermostats you wish to use, make sure the switch live for these are in the appropriate terminals then choose “Add Wired Device”...
- Page 32 6.1.2 Communication established Installing the PTD The PTD should be placed approximately 1.5 meters above floor level, in ‘ free space’, away from draughts and sources of heat or electrical interference. 32 of 40 BGX701-294-R03, PTD user manual Public...
- Page 33 7.1.1 Mark out the mounting position 7.1.2 Fit the PTD 33 of 40 BGX701-294-R03, PTD user manual Public...
- Page 34 Inserting the Optional Wi-Fi card Power off the receiver and insert the Wi-Fi card. To do this simply remove the dummy cover on the front of the receiver and plug in the Wi-Fi card. Switch the reciever on and wait for the lights to appear Now open the mobile app and tap the three-lined menu...
- Page 35 Product technical specifications 7.3.1 Programmable Thermostat Display PTD 35 of 40 BGX701-294-R03, PTD user manual Public...
- Page 36 7.3.2 Receivers C127 and H3747 Appendices Controlling PTD using the mobile app (Multiple users) The app is optional and lets you control your system locally via Bluetooth or remotely if the Wi-Fi card is installed To connect to the system for the first time after setting up the PTD and receiver. Download the Simple Controls mobile app.
- Page 37 If using the mobile app, tap Settings at the top right, next tap Add new Device, then choose Wired devices and the relevant zone number. The C1727 can control up to 2 zones and the H3747 can control up to 4...
- Page 38 Q) I have invited a user to my system, but the invite is still pending A) The user needs to have the app installed on their smart phone to receive the invite. Once done, tap the three lined icon on the top left Next tap Manage users.
- Page 39 this can reduce signal range. Upgrading to WIFI removes this issue altogether as the system always chooses WIFI when possible Q) I have a padlock symbol on my PTD and cannot change any of the settings A) This indicates that the landlord setting has been enabled and the programs cannot be altered, contact the landlord for further information.
- Page 40 Secure Meters (UK) Ltd Secure House, Lulworth Close, Chandler's Ford, Eastleigh, SO53 3TL, United Kingdom t: +44 1962 840048 f: +44 1962 841046 UK Free Phone : 08081687224 UK Direct : +44 196 2826 225 BGX7 0 1 - 3 6 6...
Need help?
Do you have a question about the C1727 and is the answer not in the manual?
Questions and answers
How do I turn off the heating?
To turn off the heating on the Secure C1727, you can do one of the following:
1. Activate Summer Mode: This restricts heating in all zones to frost protection only, stopping all heating and timer schedules. Use the PTD or app to switch to Summer Mode.
2. Use Hold Mode: Set the hold temperature to a low value and select "Hold until cancel" to keep heating off. To cancel, go back to the hold menu and choose "cancel hold," or press the Channel 2 button to quickly cancel hold mode.
These methods stop regular heating schedules.
This answer is automatically generated
I have a padlock symbol on my display, the manual calls this a button lock to prevent accidental changing of the settings. How do i get rid of the padlock symbol in order to change settings
You cannot disable the button lock on the Secure C1727 yourself. The padlock symbol means the landlord setting is enabled, and only the landlord can change or remove it. Contact the landlord for further information.
This answer is automatically generated
If I leave the house for several hours or days, I would wish to turn off the cenral heating and hot water. I use a conventional boiler. I undestend that I could reduce the temperature of the central heating beyond ambient using the programmer, but I would not wish to continually produce or maitain hot water temperature. Hoew do I achieve this?
To turn off the hot water and central heating on the Secure C1727 programmer when leaving the house for several hours or days, you can use the Hold feature:
1. Press the Menu button located at the top.
2. Press the Home Away button to select the Hold option.
3. Use the Plus button to scroll through the hold time durations and select the desired duration (1 to 4 hours or "Hold until Cancel").
4. Press Home Away to confirm the hold duration.
5. Press the Back button to return to the main screen.
This will suspend all programs and hold the temperature you set. To release the hold, press the Menu button, select the Home Away option, press the same button again, and then press Back to return to the home screen.
This answer is automatically generated