Advertisement
Advertisement
Table of Contents

Summary of Contents for Secure Beanbag 600 Series
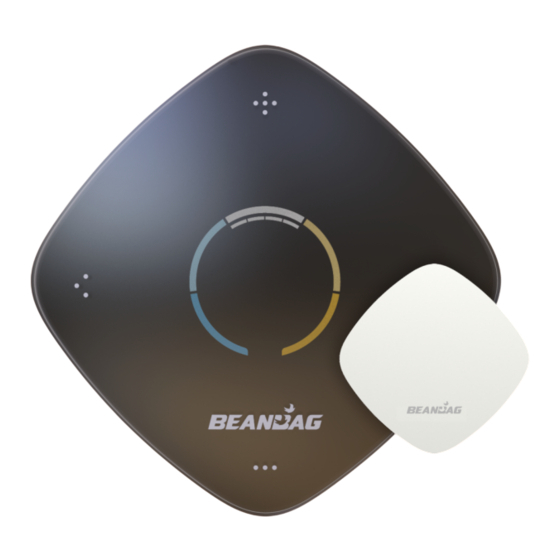
- Page 1 Beanbag Thermostat 600 series Quick installation guide Suitable for FCU systems...
-
Page 2: For Installation
Prerequisites For installation For commissioning Tools / things you may need: To commission your system, you need: Router with Flat head Philips head Drill machine internet screw driver screw driver Smartphone version 11.0 and above Wire stripper Plier Hammer Lollipop (version 5.0) and above Wall anchors Cable... - Page 3 Prerequisites For network configuration Router specifications Configure a dedicated SSID for Beanbag Cool on router / AP Ÿ Choose an SSID - minimum 5 characters Ÿ Choose a password - minimum 8 characters Ÿ Set the SSID broadcast to Disabled or Hide for enhanced security Ÿ...
-
Page 4: Technical Specifications
Technical specifications Mechanical Dimensions 105(H) x 105(W) x 35(D) Case material PC FR Weight 160.5 gms Mounting Snap-fit wall mount Power supply 90 -265 V, 50 – 60 Hz 230 V variant 21 -27 V, 50 – 60 Hz 24 V AC variant Output 3 Amp Max. -
Page 5: Installation
Installation Disconnect power before installation... - Page 6 In the box Thermostat Sensor Mounting plate M4 screws x3...
- Page 7 Beanbag Thermostat 600 series Note: These pin descriptors may vary with the variant. For the actual description, refer the mounting plate/ product package.
- Page 8 A1. Identify and label the wires The following chart describes the control function for each wire in the Thermostat. Identify, map, label and connect your wires accordingly. The labels are variant specific and may di er with thermostat variants. Line voltage 24 VAC Neutral 24 VAC Neutral 24 VAC...
-
Page 9: Connection Diagrams
Connection diagrams 230 V 230 V (2 way valve, key tag variant) (2 way valve) Key tag input 1 S1/ Hc S1/ Hc S2/ Ho S2/ Ho Key tag input 2... - Page 10 Connection diagrams 24 volt modulating valve 3 wire 24VL 24VN Isolation relay/transformer circuit...
- Page 11 Connection diagrams 24 volt modulating valve 4 wire 24VL 24VN Isolation relay/transformer circuit...
- Page 12 A2. Mark out the mounting position...
- Page 13 A3. Drill the holes and secure the mounting plate * The wall mounting plate is optional.
- Page 14 A4. Make connections Torque <0.4 Nm Note: These pin descriptors may vary with the variant. For the actual description, refer the mounting plate/ product package.
- Page 15 A6. Power On the thermostat and check the display AC and thermostat must be on the same supply source...
- Page 16 Demounting the thermostat Pull...
- Page 17 A5. Mount the thermostat Click...
- Page 18 Beanbag External Temperature Sensor 110 Note: Identify appropriate mounting location for the external temperature sensor...
- Page 19 Technical specifications Size (mm) 72(H) x 72(W) x 20(D) Battery Two AAA size batteries (included) Up to 5-year battery life Weight 58 grams approx Comms. type Comms. range Up to 10 meters from the Thermostat (Range can vary depending on your home's construction, wireless interference and other factors) Operating...
- Page 20 Mount and Power On...
- Page 21 3G/4G Commissioning...
- Page 22 Download the Beanbag Cool mobile application...
- Page 23 Commissioning Do’s and Don’ts Sign in to the app and follow the instructions to complete the commissioning process. However, please keep in mind the following, before/during the commissioning process: Before commissioning: 1. Ensure the device to be commissioned is on the same Wi-Fi network as that of the mobile. 2.
- Page 24 Display after commissioning: Mode 1 - Comfort Display and key functions Touch to change band setting from the current state towards Warm On / O button Mode Touch Comfort change mode Touch to change band setting from the current state towards Cool...
- Page 25 Display after commissioning: Mode 2 - Customise Display and key functions Touch to increase temperature On/ O button Ambient temperature Fan speed indicators Mode 25.6 Touch Touch to change fan Customise 24.0 Auto change mode speed Set temperature Touch to decrease temperature...
- Page 26 Display after commissioning: Mode 3 - Away Display and key functions On / O button Mode Touch 28.0 Away change mode...
- Page 27 Turn On/O the FCU locally O State On State Note: In the uncommissioned state, if the device is suitably connected and powered ON, the Beanbag Cool logo will come on and the power LED will be turned OFF.
- Page 28 Beanbag product variants Variants Description Beanbag thermostat 500, split/window AC, BT5000-000 230V AC, Wi-Fi, BLE Beanbag thermostat 600, FCU, 230V AC, wall mount, BT5100-000 Wi-Fi, BLE, On/O valve, with external BLE sensor Beanbag thermostat 600, FCU, 230V AC, wall mount, Wi-Fi, BLE, On/O valve, energy saver key tag BT5100-010 input, with BLE external sensor...
-
Page 29: Disposal Information
Disposal information Observe local safety norms while disposing of the product and accessories at the end of their life to ensure that they do not enter the household waste stream and pollute land or water. In addition, ensure that the materials used for wrapping, handling and packaging of commodities are disposed of responsibly. - Page 30 Notes...
- Page 31 Notes...
- Page 32 Australia sales_australia@securemeters.com Secure Meters Ltd sales_middleeast@securemeters.com Pratapnagar Industrial Area Udaipur 313 003 India, SE Asia, Africa India sales_india@securemeters.com p: + 91 294 2492300 f: +91 294 2492310 www.securemeters.com BGX7 0 1 - 1 7 5 BGX701-175-R03...


Need help?
Do you have a question about the Beanbag 600 Series and is the answer not in the manual?
Questions and answers