Table of Contents
Advertisement
Quick Links
Advertisement
Table of Contents

Related Manuals for Midea MI60T


Summary of Contents for Midea MI60T
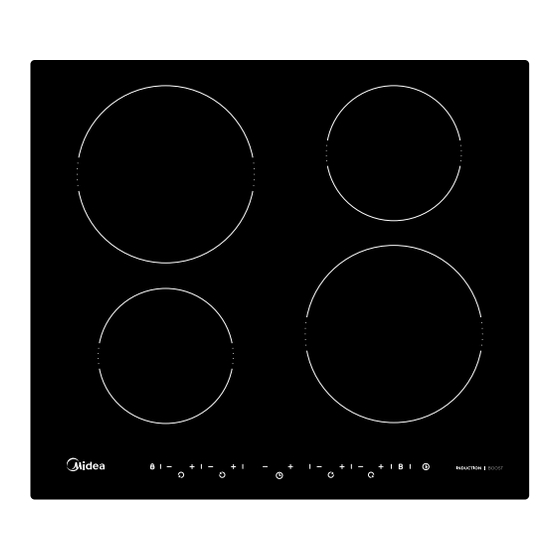
- Page 1 Midea Ceramic Hob Instruction MODEL : MI60T SAVE THESE INSTRUCTIONS CAREFULLY Read these instructions carefully before using your hob,and keep it carefully. If you follow the instructions, your hob will provide you with many years of good service.
-
Page 3: Table Of Contents
Content 1. Foreword ..................4 1.1 Safety Warnings ................. 4 1.2 Installation ................4 1.2.1 Electrical Shock Hazard ..........4 1.2.2 Cut Hazard ..............4 1.2.3 Important safety instructions .......... 4 1.3 Operation and maintenance ............5 1.3.1 Electrical Shock Hazard ..........5 1.3.2 Health Hazard .............. -
Page 4: Foreword
1. Foreword 1.1 Safety Warnings Your safety is important to us. Please read this information before using your cooktop. 1.2 Installation 1.2.1 Electrical Shock Hazard Disconnect the appliance from the mains electricity supply before carrying out any work or maintenance on it. ... -
Page 5: Operation And Maintenance
Failure to install the appliance correctly could invalidate any warranty or liability claims. This appliance can be used by children aged from 8 years and above and persons with reduced physical, sensory or mental capabilities or lack of experience and knowledge if they have been given supervision or instruction concerning use of the appliance in a safe way and understand the hazards involved. -
Page 6: Health Hazard
Switch the cooktop off at the wall before cleaning or maintenance. Failure to follow this advice may result in electrical shock or death. 1.3.2 Health Hazard This appliance complies with electromagnetic safety standards. However, persons with cardiac pacemakers or other electrical implants (such as insulin pumps) must consult with their doctor or implant manufacturer before using this appliance to make sure that their implants will not be... - Page 7 its electromagnetic field. Never use your appliance for warming or heating the room. After use, always turn off the cooking zones and the cooktop as described in this manual (i.e. by using the touch controls). Do not rely on the pan detection feature to turn off the cooking zones when you remove the pans.
-
Page 8: Product Introduction
Congratulations on the purchase of your new Induction Hob. We recommend that you spend some time to read this Instruction / Installation Manual in order to fully understand how to install correctly and operate it. For installation, please read the installation section. Read all the safety instructions carefully before use and keep this Instruction / Installation Manual for future reference. -
Page 9: Before Using Your New Induction Hob
iron pot magnetic circuit ceramic glass plate induction coil induced currents 2.4 Before using your New Induction Hob Read this guide, taking special note of the ‗Safety Warnings‘ section. Remove any protective film that may still be on your Induction hob. 2.5 Technical Specification Cooking Hob I60T... -
Page 10: Choosing The Right Cookware
3.2 Choosing the right Cookware Only use cookware with a base suitable for induction cooking. • Look for the induction symbol on the packaging or on the bottom of the pan. • You can check whether your cookware is suitable by carrying out a magnet test. Move a magnet towards the base of the pan. -
Page 11: How To Use
3.3 How to use 3.3.1 Start cooking Touch the ON/OFF control for three seconds. After power on, the buzzer beeps once, all displays show ―–‖ or ―– –‖, indicating that the induction hob has entered the state of standby mode. Place a suitable pan on the cooking zone that you wish to use. -
Page 12: Using The Boost Function
Beware of hot surfaces H will show which cooking zone is hot to touch. It will disappear when the surface has cooled down to a safe temperature. It can also be used as an energy saving function if you want to heat further pans, use the hotplate that is still hot. -
Page 13: Timer Control
To lock the controls Touch the lock control The timer indicator will show ― Lo ‖ To unlock the controls Touch and hold the lock control for a while. When the hob is in the lock mode, all the controls are disable except the ON/OFF you can always turn the induction hob off with the ON/OFF control in an emergency, but you shall unlock the hob first in the... - Page 14 b) Setting the timer to turn one or more cooking zones off Set one zone Touch the ―-‖ or ―+‖ of the corresponding cooking zone you want to set the timer for. Set the time by touching the or control of the timer Hint: Touch the ―-‖...
-
Page 15: Default Working Times
Once the countdown timer expires, the corresponding zone will switch off. Then it will show the new min. timer and the dot of corresponding zone will flash. The shown as right: (set to 30 minutes) 3.3.6 Default working times Auto shut down is a safety protection function for your induction hob. It shut down automatically if ever you forget to turn off your cooking. -
Page 16: For Stir-Frying
4. Turn the steak only once during cooking. The exact cooking time will depend on the thickness of the steak and how cooked you want it. Times may vary from about 2 – 8 minutes per side. Press the steak to gauge how cooked it is –... -
Page 17: Care And Cleaning
6. Care and Cleaning What? How? Important! Everyday soiling 1. Switch the power to the cooktop off. • When the power to the cooktop is on glass 2. Apply a cooktop cleaner while the switched off, there will be no ‗hot (fingerprints, glass is still warm (but not hot!) surface‘... -
Page 18: Hints And Tips
7. Hints and Tips Problem Possible causes What to do The induction hob No power. Make sure the induction hob is cannot be turned on. connected to the power supply and that it is switched on. Check whether there is a power outage in your home or area. -
Page 19: Failure Display And Inspection
8. Failure Display and Inspection The induction hob is equipped with a self diagnostic function. With this test the technician is able to check the function of several components without disassembling or dismounting the hob from the working surface. Trouble shooting 1) Failure code occur during customer using &... - Page 20 2) Specific Failure & Solution Failure Problem Solution A Solution B The LED does not No power supplied. Check to see if plug is come on when unit is secured tightly in outlet plugged in. and that outlet is working. The accessorial power Check the connection.
-
Page 21: Installation
9. Installation 9.1 Selection of installation equipment Cut out the work surface according to the sizes shown in the drawing. For the purpose of installation and use, a minimum of 5 cm space shall be preserved around the hole. Be sure the thickness of the work surface is at least 30mm. Please select heat-resistant and insulated work surface material (Wood and similar fibrous or hygroscopic material shall not be used as work surface material unless impregnated) to avoid the electrical shock and larger deformation caused by the heat radiation from the hotplate. - Page 22 A(mm) B(mm) C(mm) 50 min. 20 min. Air intake Air exit 5mm WARNING: Ensuring Adequate Ventilation Make sure the induction cooker hob is well ventilated and that air inlet and outlet are not blocked. In order to avoid accidental touch with the overheating bottom of the hob, or getting unexpectable electric shock during working, it is necessary to put a wooden insert, fixed by screws, at a minimum distance of 50mm from the bottom of the hob.
-
Page 23: Before Installing The Hob, Make Sure That
9.2 Before installing the hob, make sure that The work surface is square and level, and no structural members interfere with space requirements. The work surface is made of a heat-resistant and insulated material. If the hob is installed above an oven, the oven has a built-in cooling fan. ... -
Page 24: Cautions
TABLE BRACKET Under any circumstances, the brackets cannot touch with the inner surfaces of the worktop after installation (see picture) 9.6 Cautions 1. The induction hotplate must be installed by qualified personnel or technicians. We have professionals at your service. Please never conduct the operation by yourself. 2. -
Page 25: Connecting The Hob To The Mains Power Supply
9.7 Connecting the hob to the mains power supply This hob must be connected to the mains power supply only by a suitably qualified person. Before connecting the hob to the mains power supply, check that: 1. The domestic wiring system is suitable for the power drawn by the hob. 2. - Page 26 If the cable is damaged or to be replaced, the operation must be carried out the by after-sale agent with dedicated tools to avoid any accidents. If the appliance is being connected directly to the mains an omnipolar circuit-breaker must be installed with a minimum opening of 3mm between contacts.
- Page 27 This appliance is labeled in compliance with European directive 2012/19/EU for Waste Electrical and Electronic Equipment (WEEE). By ensuring that this appliance is disposed of correctly, you will help prevent any possible damage to the environment and to human health, which might otherwise be caused if it were disposed of in the wrong way.
Need help?
Do you have a question about the MI60T and is the answer not in the manual?
Questions and answers